Getting Started
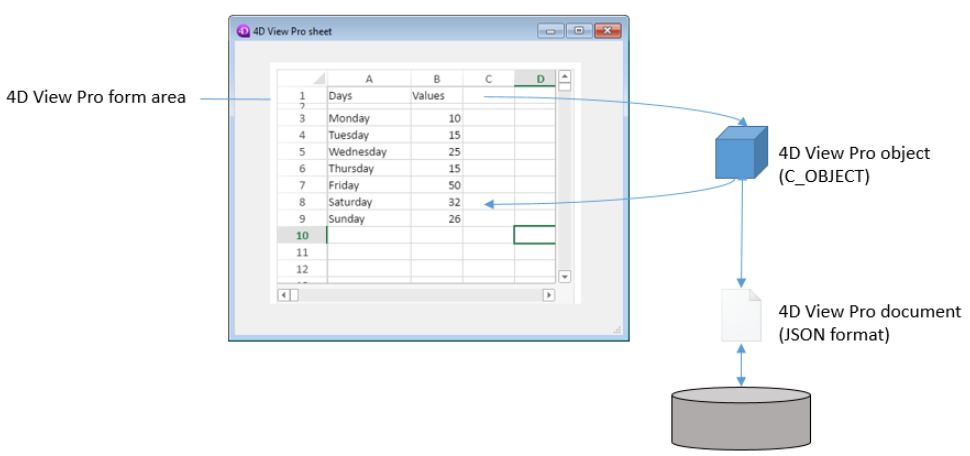
4D View Pro is a 4D component that includes a 4D form area and specific methods. It allows you to embed advanced spreadsheet features in your projects.
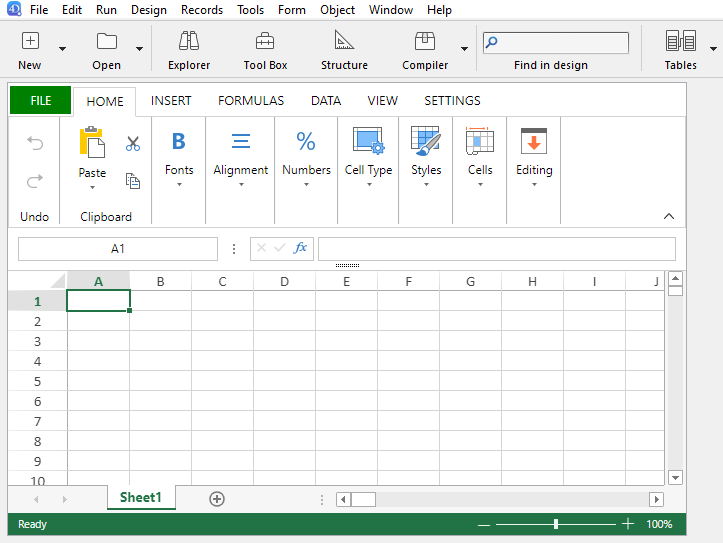
A spreadsheet is an application containing a grid of cells into which you can enter information, execute calculations, or display pictures. 4D View Pro is powered by the SpreadJS spreadsheet solution integrated in 4D.
Go to the Library table to know the SpreadJS version integrated in your 4D release.
Embedding 4D View Pro areas in your forms allows you to import and export spreadsheets documents using the 4D View Pro commands.
Installation and activation
4D View Pro features are directly included in 4D, making it easy to deploy and manage. No additional installation is required.
However, 4D View Pro requires a license. You need to activate this license in your application in order to use its features. When using this component without a license, the contents of an object that requires a 4D View Pro feature are not displayed at runtime, an error message is displayed instead:
Inserting a 4D View Pro area
4D View Pro documents are displayed and edited manually in a 4D form object named 4D View Pro. To select this object, click on the last tool in the object bar:
You can also select a preconfigured 4D View Pro area in the Object library.
4D View Pro areas can also be created and used offscreen.
You can configure the area using the Property List and 4D View Pro methods.
Selection, Input and Navigation Basics
Spreadsheets are composed of rows and columns. A number is associated with each row. A letter (or group of letters once the number of columns surpasses the number of letters in the alphabet) is associated with each column. The intersection of a row and a column makes a cell. Cells can be selected and their contents edited.
Selecting cells, columns and rows
-
To select a cell, simply click on it or use the direction arrows on the keyboard. Its content (or formula) is displayed within the cell.
-
To select several continuous cells, drag the mouse from one end of the selection to the other. You can also click on the two ends of the selection while holding down the Shift key.
-
To select all cells in the spreadsheet, click on the cell at the top left of the area:
-
To select a column, click on the corresponding letter (or set of letters).
-
To select a row, click on the corresponding number.
-
To select a group of cells that are not continuous, hold down the Ctrl key (Windows) or Command key (Mac) and click on each cell to be selected.
-
To deselect cells, simply click anywhere within the spreadsheet.
Entering data
Double-clicking on a cell allows passing into input mode in the relevant cell. If the cell is not empty, the insertion cursor is placed after the content of the cell.
Data can be entered directly once a cell is already selected, even if the insertion cursor is not visible. The input then replaces the content of the cell.
The Tab key validates the cell input and selects the cell to its right. Combining the Shift + Tab keys validates the cell input and selects the cell to its left.
The Carriage return key validates the cell input and selects the cell below it. Combining the Shift + Carriage return keys validates the cell input and selects the cell above it.
The direction keys (arrows) allow you to move a cell in the direction indicated by the arrow.
Using the Context Menu
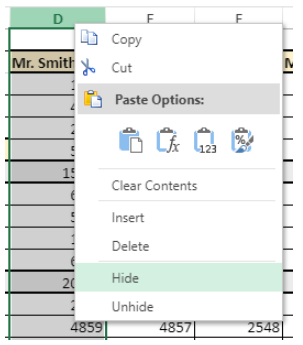
4D View Pro areas benefit from an automatic context menu that offers standard editing features such as copy and paste, but also basic spreadsheet features:
The Copy/Cut and Paste features of the context menu only work within the spreadsheet area, they do not have access to the system pasteboard. System shortcuts such as Ctrl+c/Ctrl+v works however and can be used to exchange data between the area and other applications.
Depending on the clicked area, the following options are also available:
- click on a column or row header: Insert, Delete, Hide, or Unhide the contents
- click on a cell or a cell range:
- Filter: allows hiding row through filters (see Filtering rows in the SpreadJS documentation).
- Sort: sorts the column contents.
- Insert Comment: allows user to enter a comment for an area. When a comment has been entered for an area, the top left cell of the area displays a small red triangle:
Using 4D View Pro methods
4D View Pro methods can be used in the 4D Code Editor, just like 4D language commands.
Since 4D View Pro is a built-in 4D component, you can access its list of methods from the Explorer, in the Component Methods section:
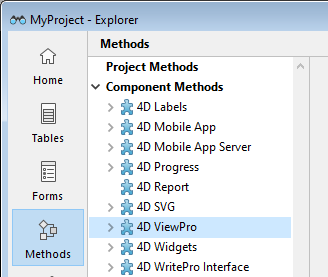
For a detailed list of component methods, see Method list.
Addressing a 4D View Pro area
A 4D View Pro area handles several objects and elements.
Most of 4D View Pro methods require a vpAreaName parameter, which is the 4D View Pro form area name (4D form object). This name is the object name property.
For example, if you want to set the total number of columns of an area named "myVpArea", you write:
VP SET COLUMN COUNT("myVpArea";5)
When loading a 4D View Pro object in a form area, 4D generates the On VP Ready form event once the whole area is loaded. You must execute any 4D View Pro code handling the area in this event, otherwise an error is returned.
Using range objects
Some 4D View Pro methods require a rangeObj parameter. In 4D View Pro, a range is an object that references an area in a spreadsheet. This area can be composed of one or several cells. Using 4D View Pro methods, you can create ranges and pass them to other methods to read from or write to specific locations in your document.
For example, to create a range object for the following cells:
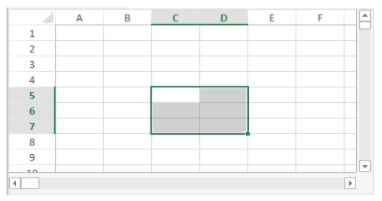
You can use the VP Cells method:
var $myRange : Object
$myRange:=VP Cells("ViewProArea";2;4;2;3) // C5 to D7
You can then pass $myRange to another 4D View Pro method to modify these cells (for example add a border to the set of cells with VP SET BORDER).
4D View Pro range objects are composed of several properties:
- area - The name of the 4D View Pro area
- ranges - A collection of range object(s). Available properties within each range object depend on the range object type. For example, a column range object will only include the .column and .sheet properties.
| Property | Type | Description | Available for | |
|---|---|---|---|---|
| area | text | 4D View Pro area form object name | always available | |
| ranges | collection | Collection of range(s) | always available | |
| [ ].name | text | Range name | name | |
| [ ].sheet | number | Sheet index (current sheet index by default) (counting begins at 0) | cell, cells, row, rows, column, columns, all, name | |
| [ ].row | number | Row index (counting begins at 0) | cell, cells, row, rows | |
| [ ].rowCount | number | Row count | cells, rows | |
| [ ].column | number | Column index (counting begins at 0) | cell, cells, column, columns | |
| [ ].columnCount | number | Column count | cells, columns |
Importing and exporting documents
4D View Pro supports the import and export of several document formats:
- .4vp
- .xlsx
- .txt and .csv
- .pdf (for export only)
For more details, check out the description of VP IMPORT DOCUMENT and VP EXPORT DOCUMENT.
