template.svg
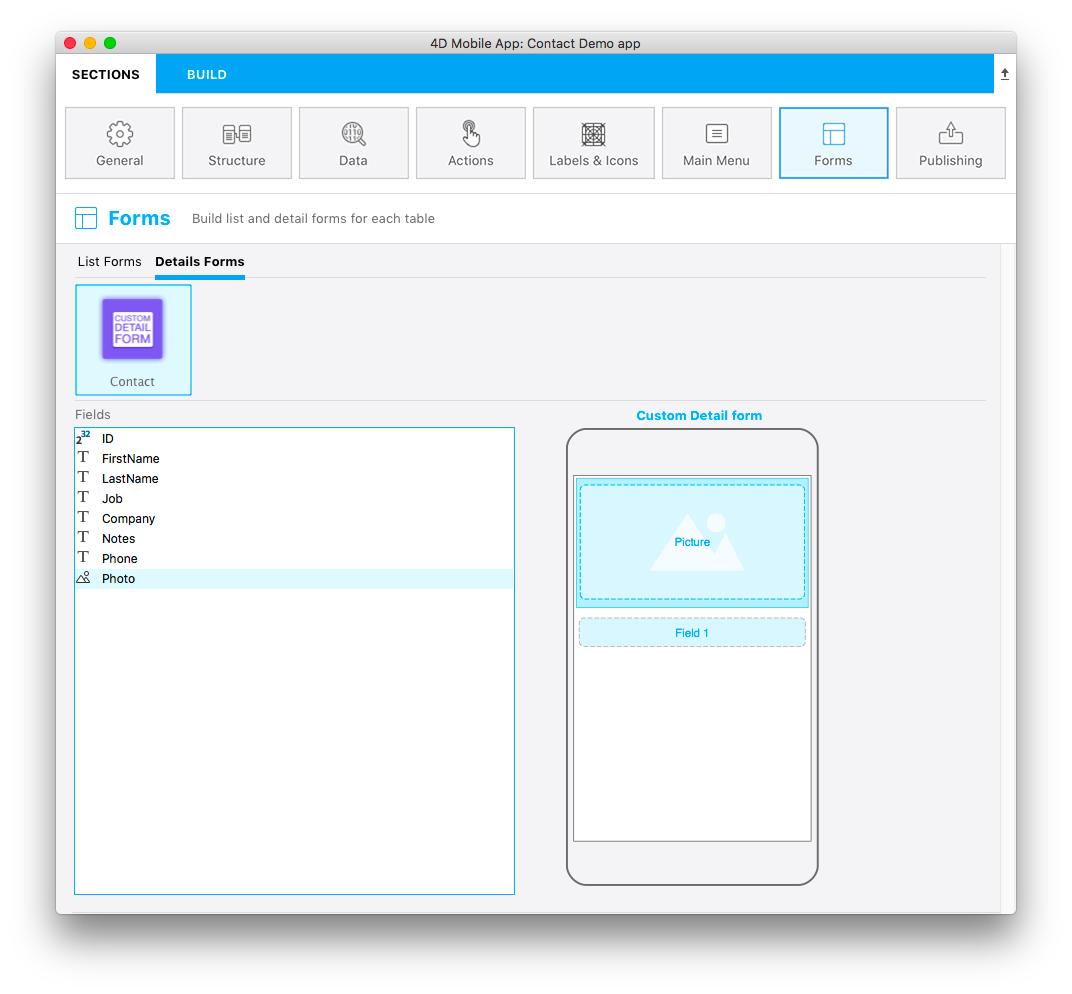
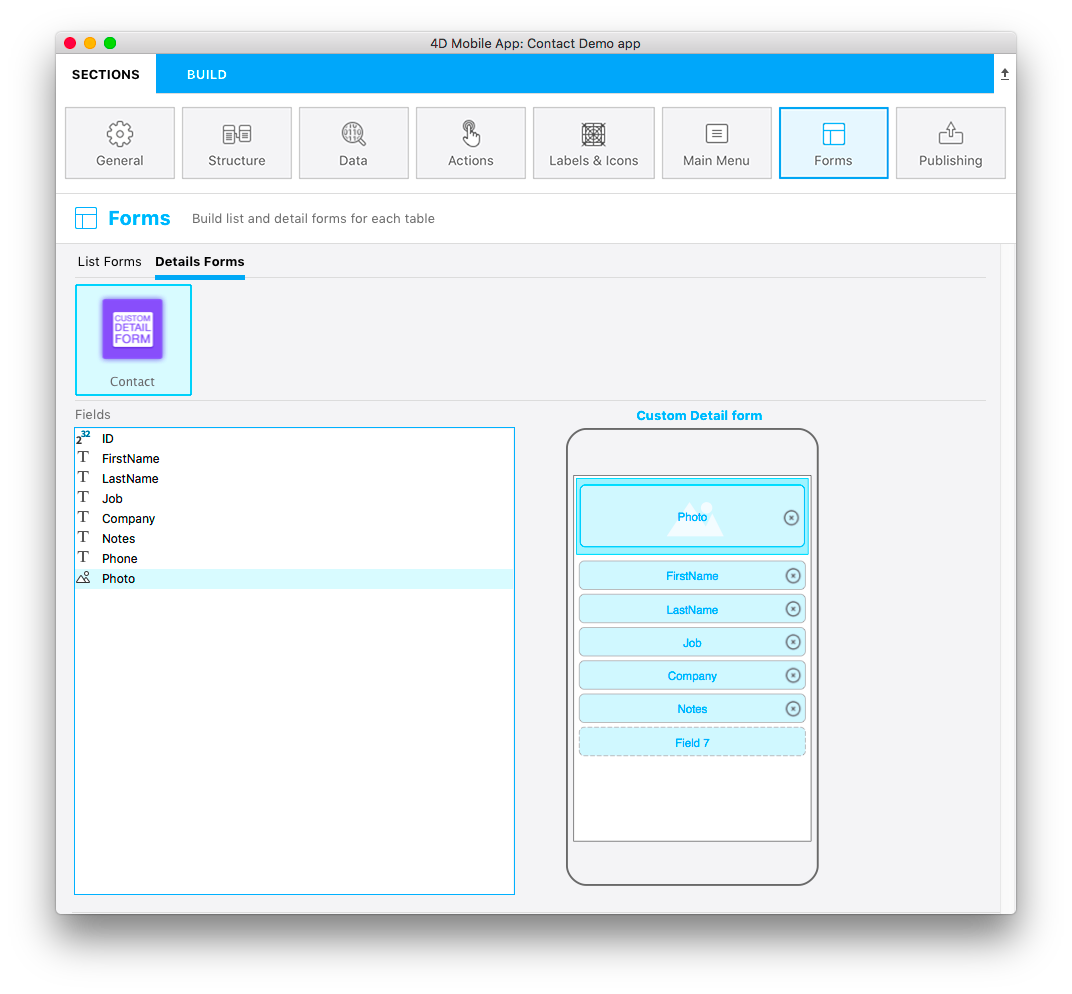
template.svgは,テンプレートのレイアウトを視覚的に表現するためのファイルです。 プロジェクターエディターでリストフォームのテンプレートにフィールドが追加できるように,ドラッグ&ドロップ用のエリアを定義しておきます。
図は完成したファイルのイメージです。

This template has dynamic field numbering, meaning that this template will allow you to add an image and you can put up to 8 fields depending on your needs. 「フォーム」セクションの詳細画面エディターでは,最後にドラッグ&ドロップしたフィールドの下に空白のフィールドが現れるようになっているので,フィールドをさらに追加することができます。

使い慣れたコードエディターでtemplate.svgファイルを開きます。
各部分の役割とカスタマイズできる箇所に注目しましょう。
タイトル要素(title)
<title>Custom Detail form</title>
テンプレートの名称です。
フィールドリスト(ios:values)
ios:values="f1,f2,f3,f4,f5,f6,f7,f8,f9"
f1,f2,f3,f4,f5,f6,f7,f8,f9 IDs: Refer to avaiblable fields to be displayed in your detail form. フィールドは,ドラッグ&ドロップで追加することができます。
エリアの位置とサイズ(position, height, width, type)
You can define position, height, and width for all of your fields like we did for the Custom list view tutorial.
繰り返されるフィールドのプロパティ
//1
<g id="f" visibility="hidden" ios:dy="35">

//2
<rect class="bg field" x="14" y="0" width="238" height="30"/>

//3
<textArea id="f.label" class="label" x="14" y="8" width="238">field[n]</textArea>

//4
<rect id="f" class="droppable field multivalued" x="14" y="0" width="238" height="30" stroke-dasharray="5,2" ios:type="0,1,2,4,8,9,11,25,35"/>

//5
<use id="f.cancel" x="224" y="1" xlink:href="#cancel" visibility="hidden"/>
</g>
- エリア全体の垂直位置です。(g要素のtransform属性)
- エリア背景の位置とサイズです。
- 入力エリアの位置とサイズです。(textArea要素)
- フィールドをドロップできるエリアの位置とサイズ,およびフィールドタイプです。(rect要素)
- 内容をクリアするためのキャンセルボタンです。
ピクチャフィールド
//1
<g transform="translate(0,60)">

//2
<rect class="bg field" x="15" y="0" width="236" height="65"/>

//3
<path class="picture" transform="translate(10 0) scale(6)"/>

//4
<textArea id="f1.label" class="label" x="15" y="25" width="236">$4DEVAL(:C991("picture"))</textArea>

//5
<rect id="f1" class="droppable field" x="15" y="0" width="236" height="65" stroke-dasharray="5,2" ios:type="3" ios:bind="fields[0]"/>

//6
<use id="f1.cancel" x="222" y="20" xlink:href="#cancel" visibility="hidden"/>
</g>
- エリア全体の垂直位置です。(g要素のtransform属性)
- エリア背景の位置とサイズです。
- ピクチャエリアに表示されるアイコン画像です。
- 入力エリアの位置とサイズです。(textArea要素)
- フィールドをドロップできるエリアの位置とサイズ,およびフィールドタイプです。
- 内容をクリアするためのキャンセルボタンです。
繰り返されるフィールド
//1
<g id="multivalued">

//2
<g transform="translate(0,140)">

//3
<rect class="bg field" x="14" y="0" width="238" height="30"/>

//4
<textArea id="f2.label" class="label" x="14" y="8" width="238">$4DEVAL(:C991("field[n]"))1</textArea>

//5
<rect id="f2" class="droppable field multivalued" x="14" y="0" width="238" height="30" stroke-dasharray="5,2" ios:type="0,1,2,4,8,9,11,25,35" ios:bind="fields[1]"/>

//6
<use id="f2.cancel" x="224" y="1" xlink:href="#cancel" visibility="hidden"/>
</g>
</g>
- 繰り返されるフィールドの動的ID
- エリア全体の垂直位置です。(g要素のtransform属性)
- エリア背景の位置とサイズです。
- 入力エリアの位置とサイズです。(textArea要素)
- フィールドをドロップできるエリアの位置とサイズ,およびフィールドタイプです。 (rect要素)
- 内容をクリアするためのキャンセルボタンです。
Now that you have an icon, a basic template description in the manifest.json file, and your svg file, let's move on to the fun part with Xcode!
注記
All types are available here.
TIP
To make field type definition easier, 4D for iOS allows you to include field types with positive values and also exclude field types with negative values. For example,
ios:type="-3,-4"will allow you to drag and drop every field exept images and dates.To include all types, just type
ios:type="all".