Android Layout
Now it's time to create your iOS detail form interface with Android Studio!
Este es el resultado que queremos lograr:
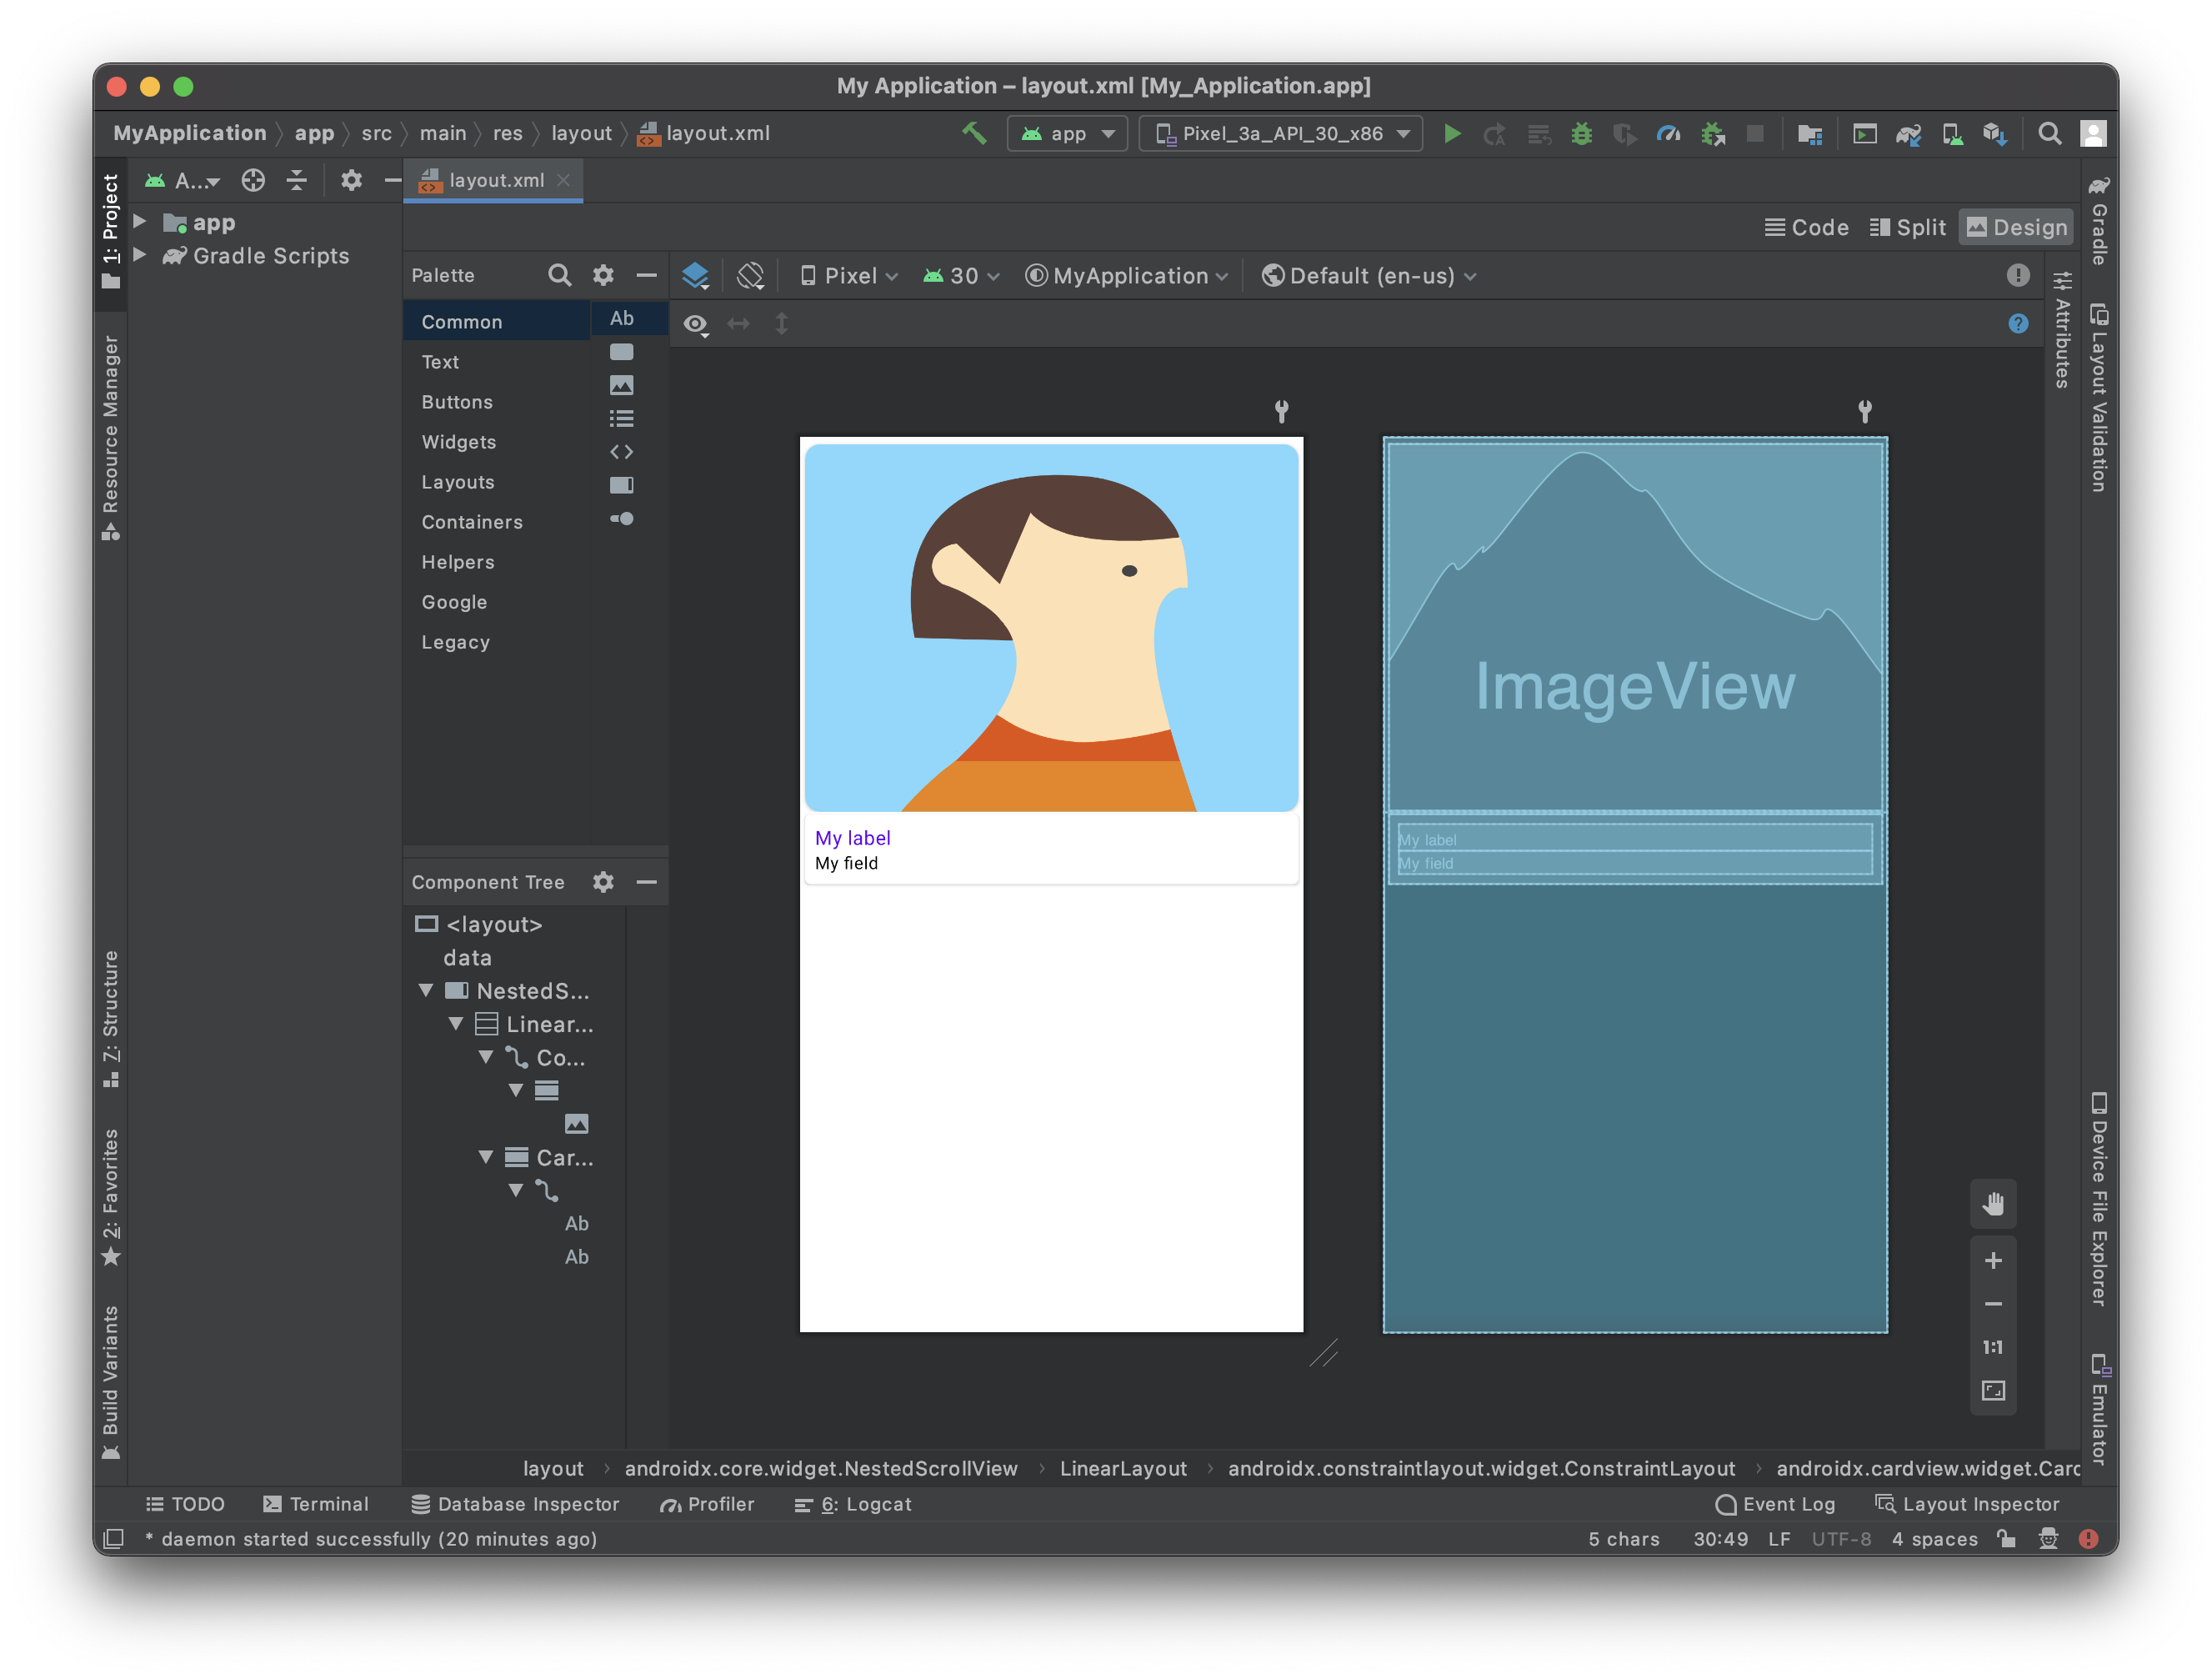
Para cada celda, vamos a añadir:
- Una foto de perfil en el encabezado
- Un campo a duplicar
Open the layout file with Android Studio
The best way to edit or create a tempalte is to :
Open Android Studio and create a new empty mobile project clicking on File > New > New Project...
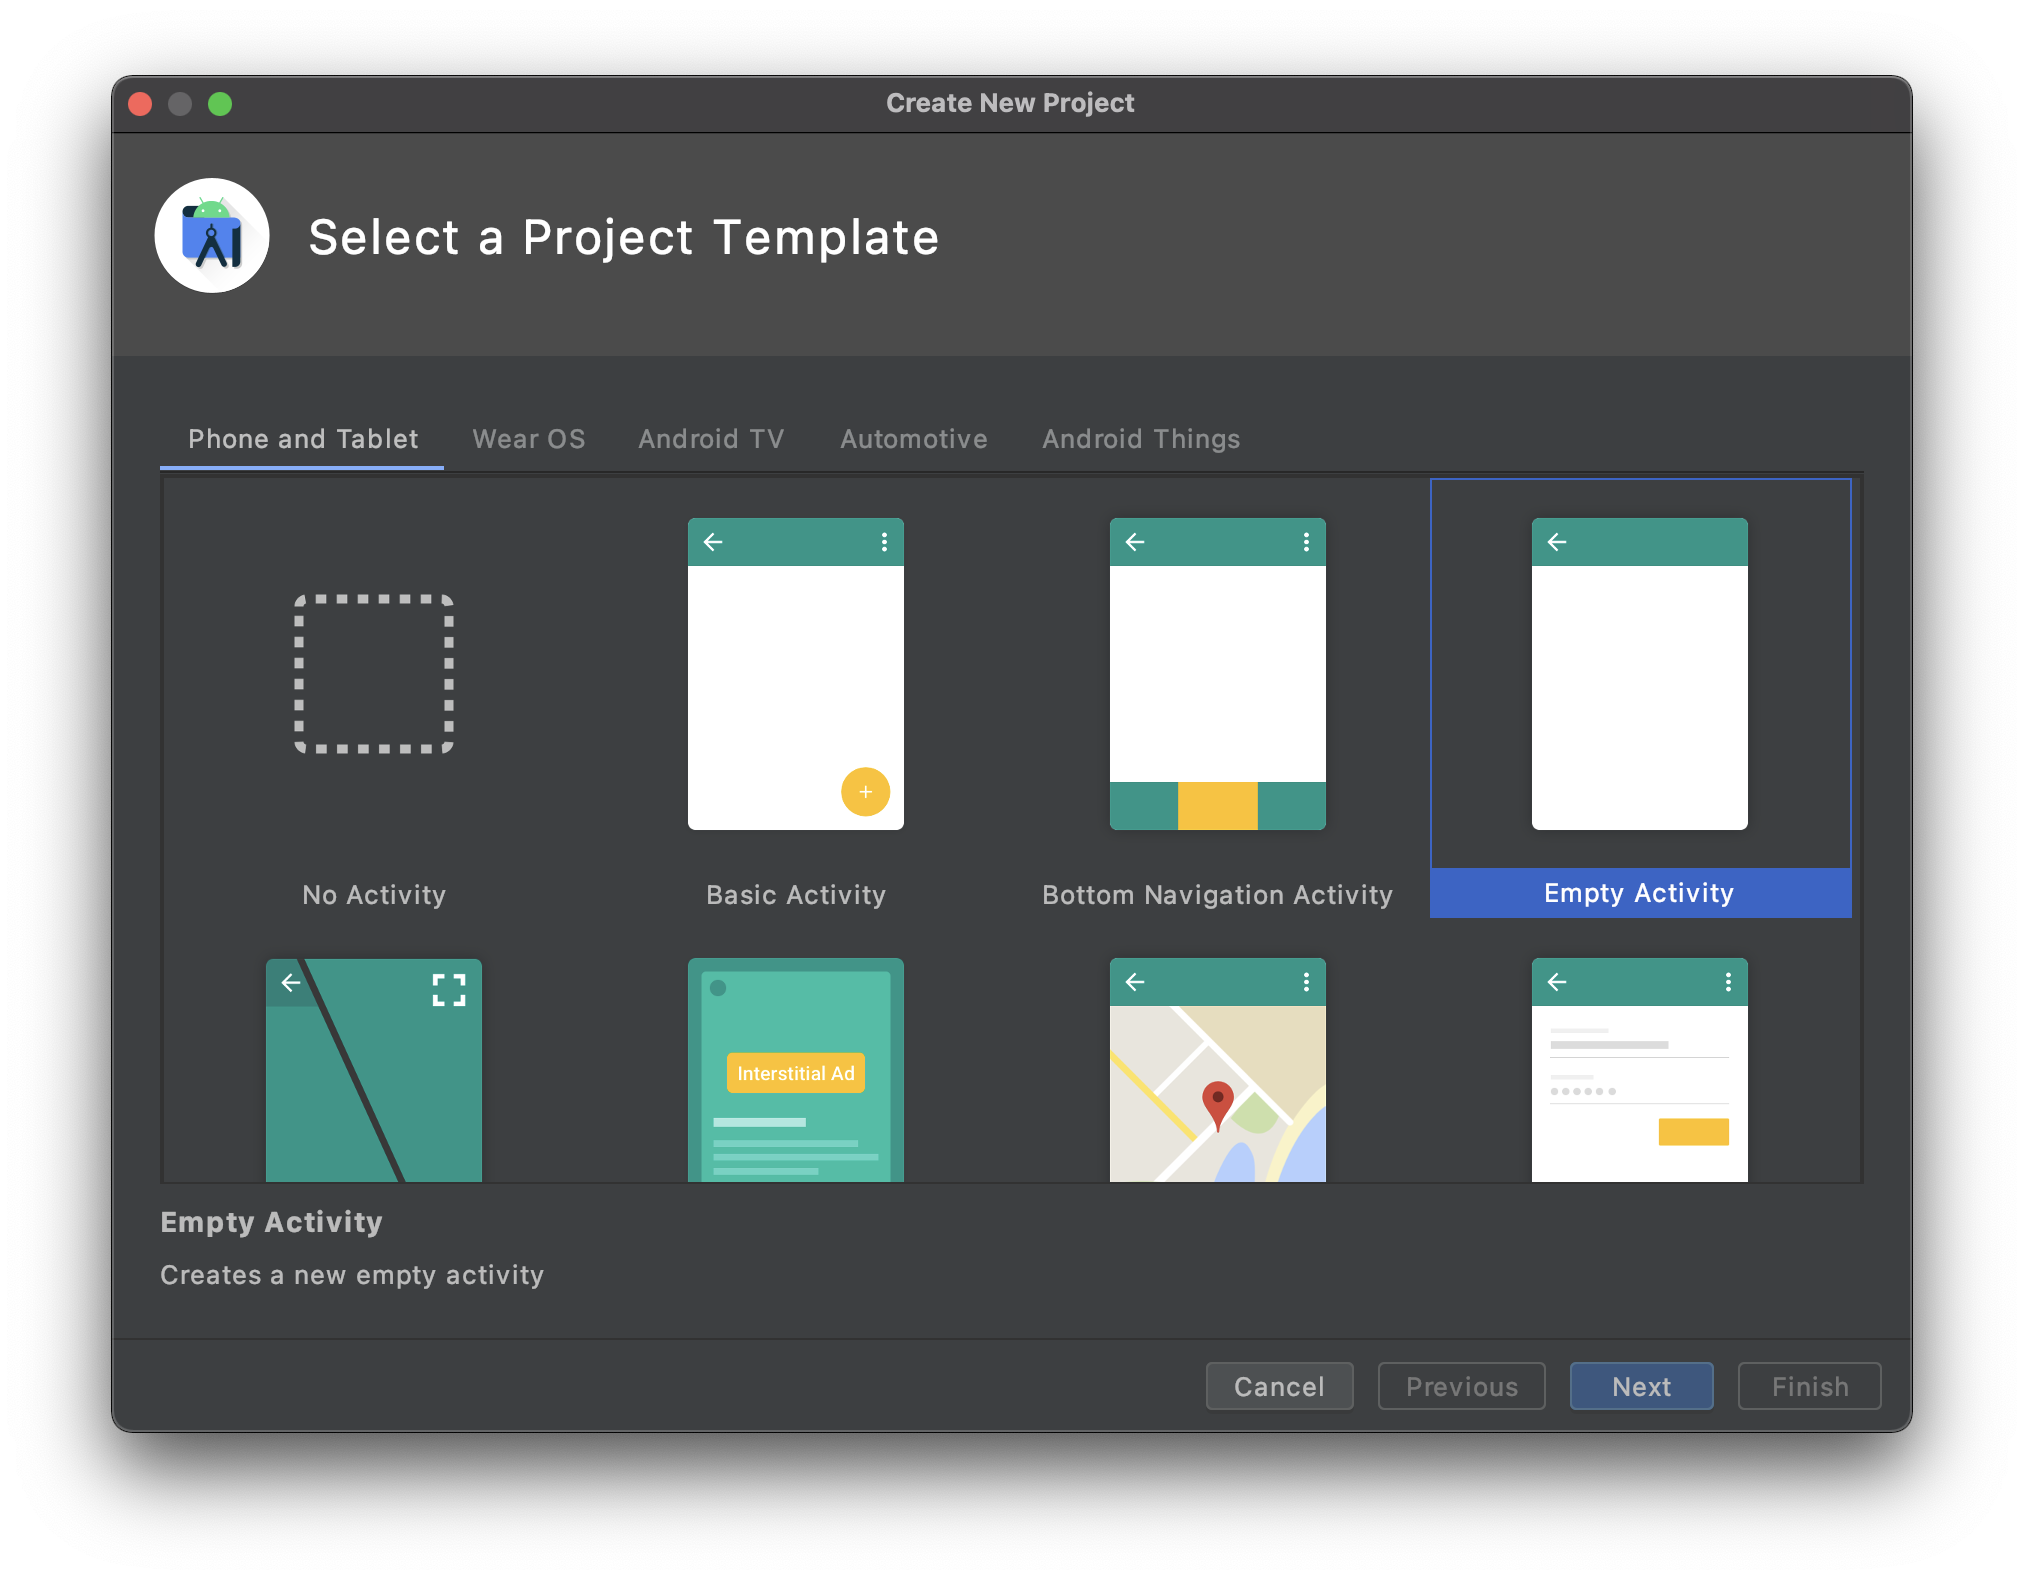
Select the Empty Activity template
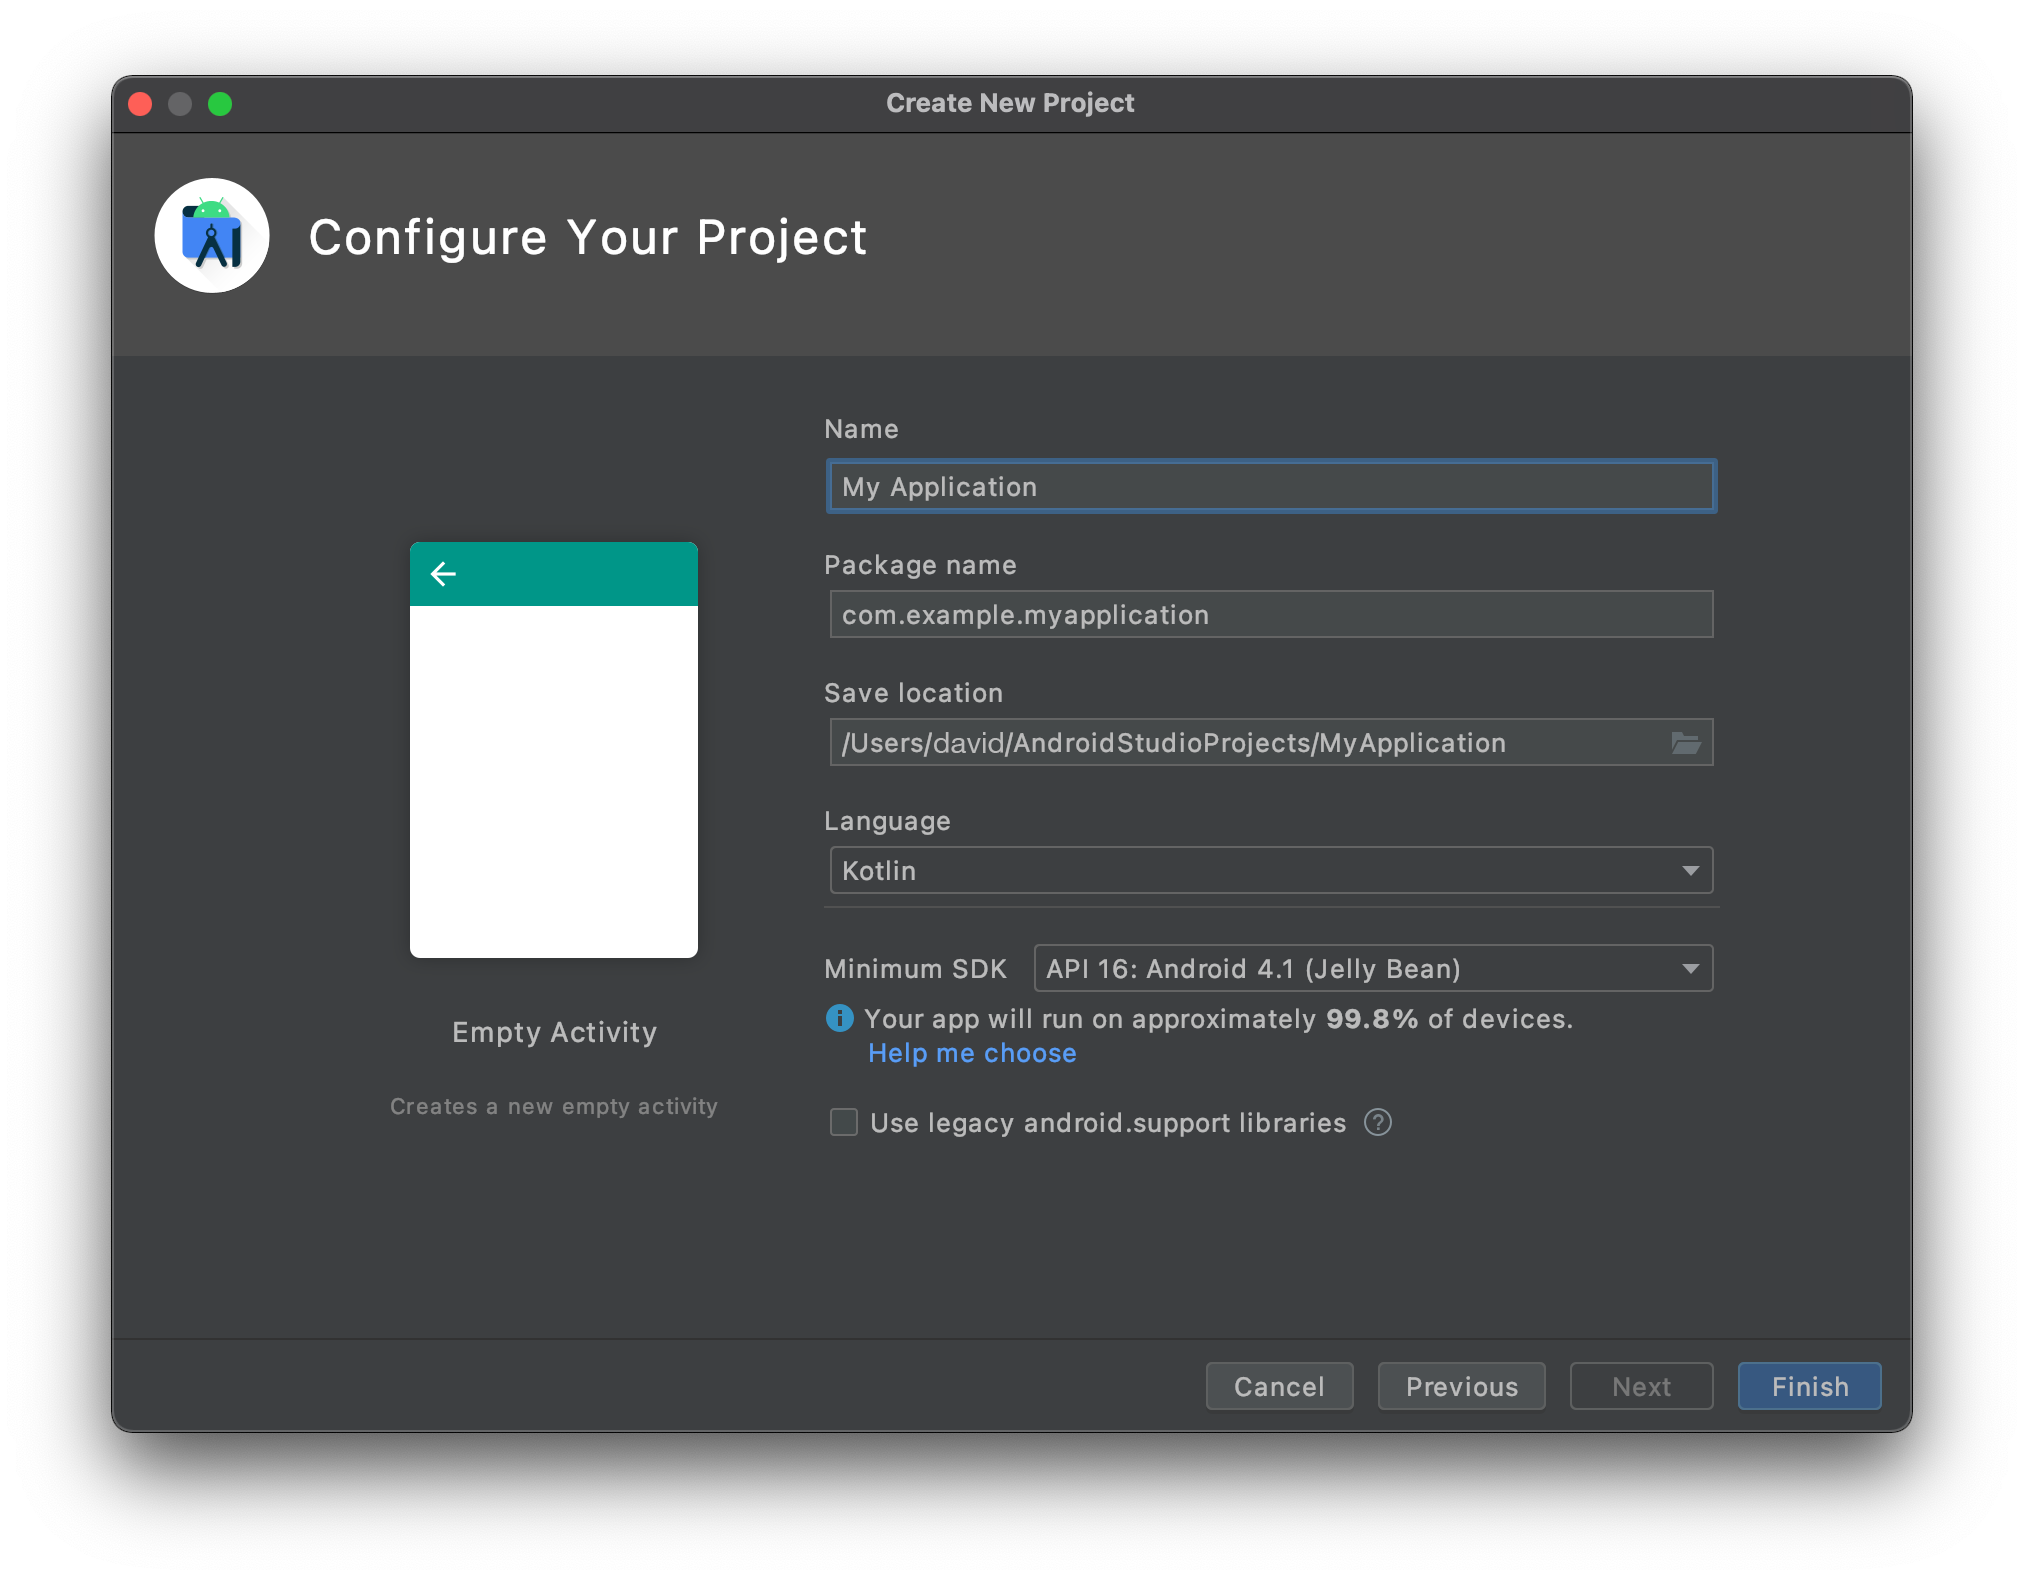
- Configure your project and click Finish
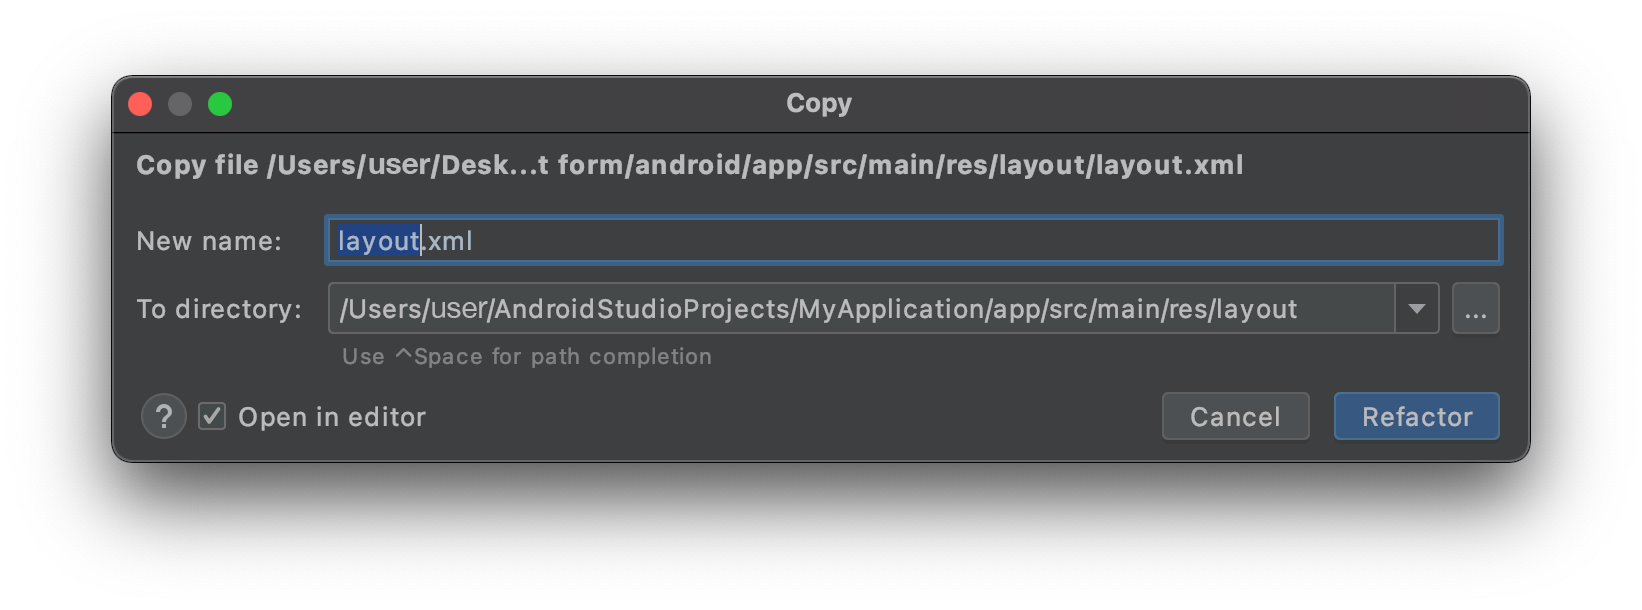
- Copy the layout.xml file in app > res > layout dropping it directly on the project layout folder
- You should have that at that point :
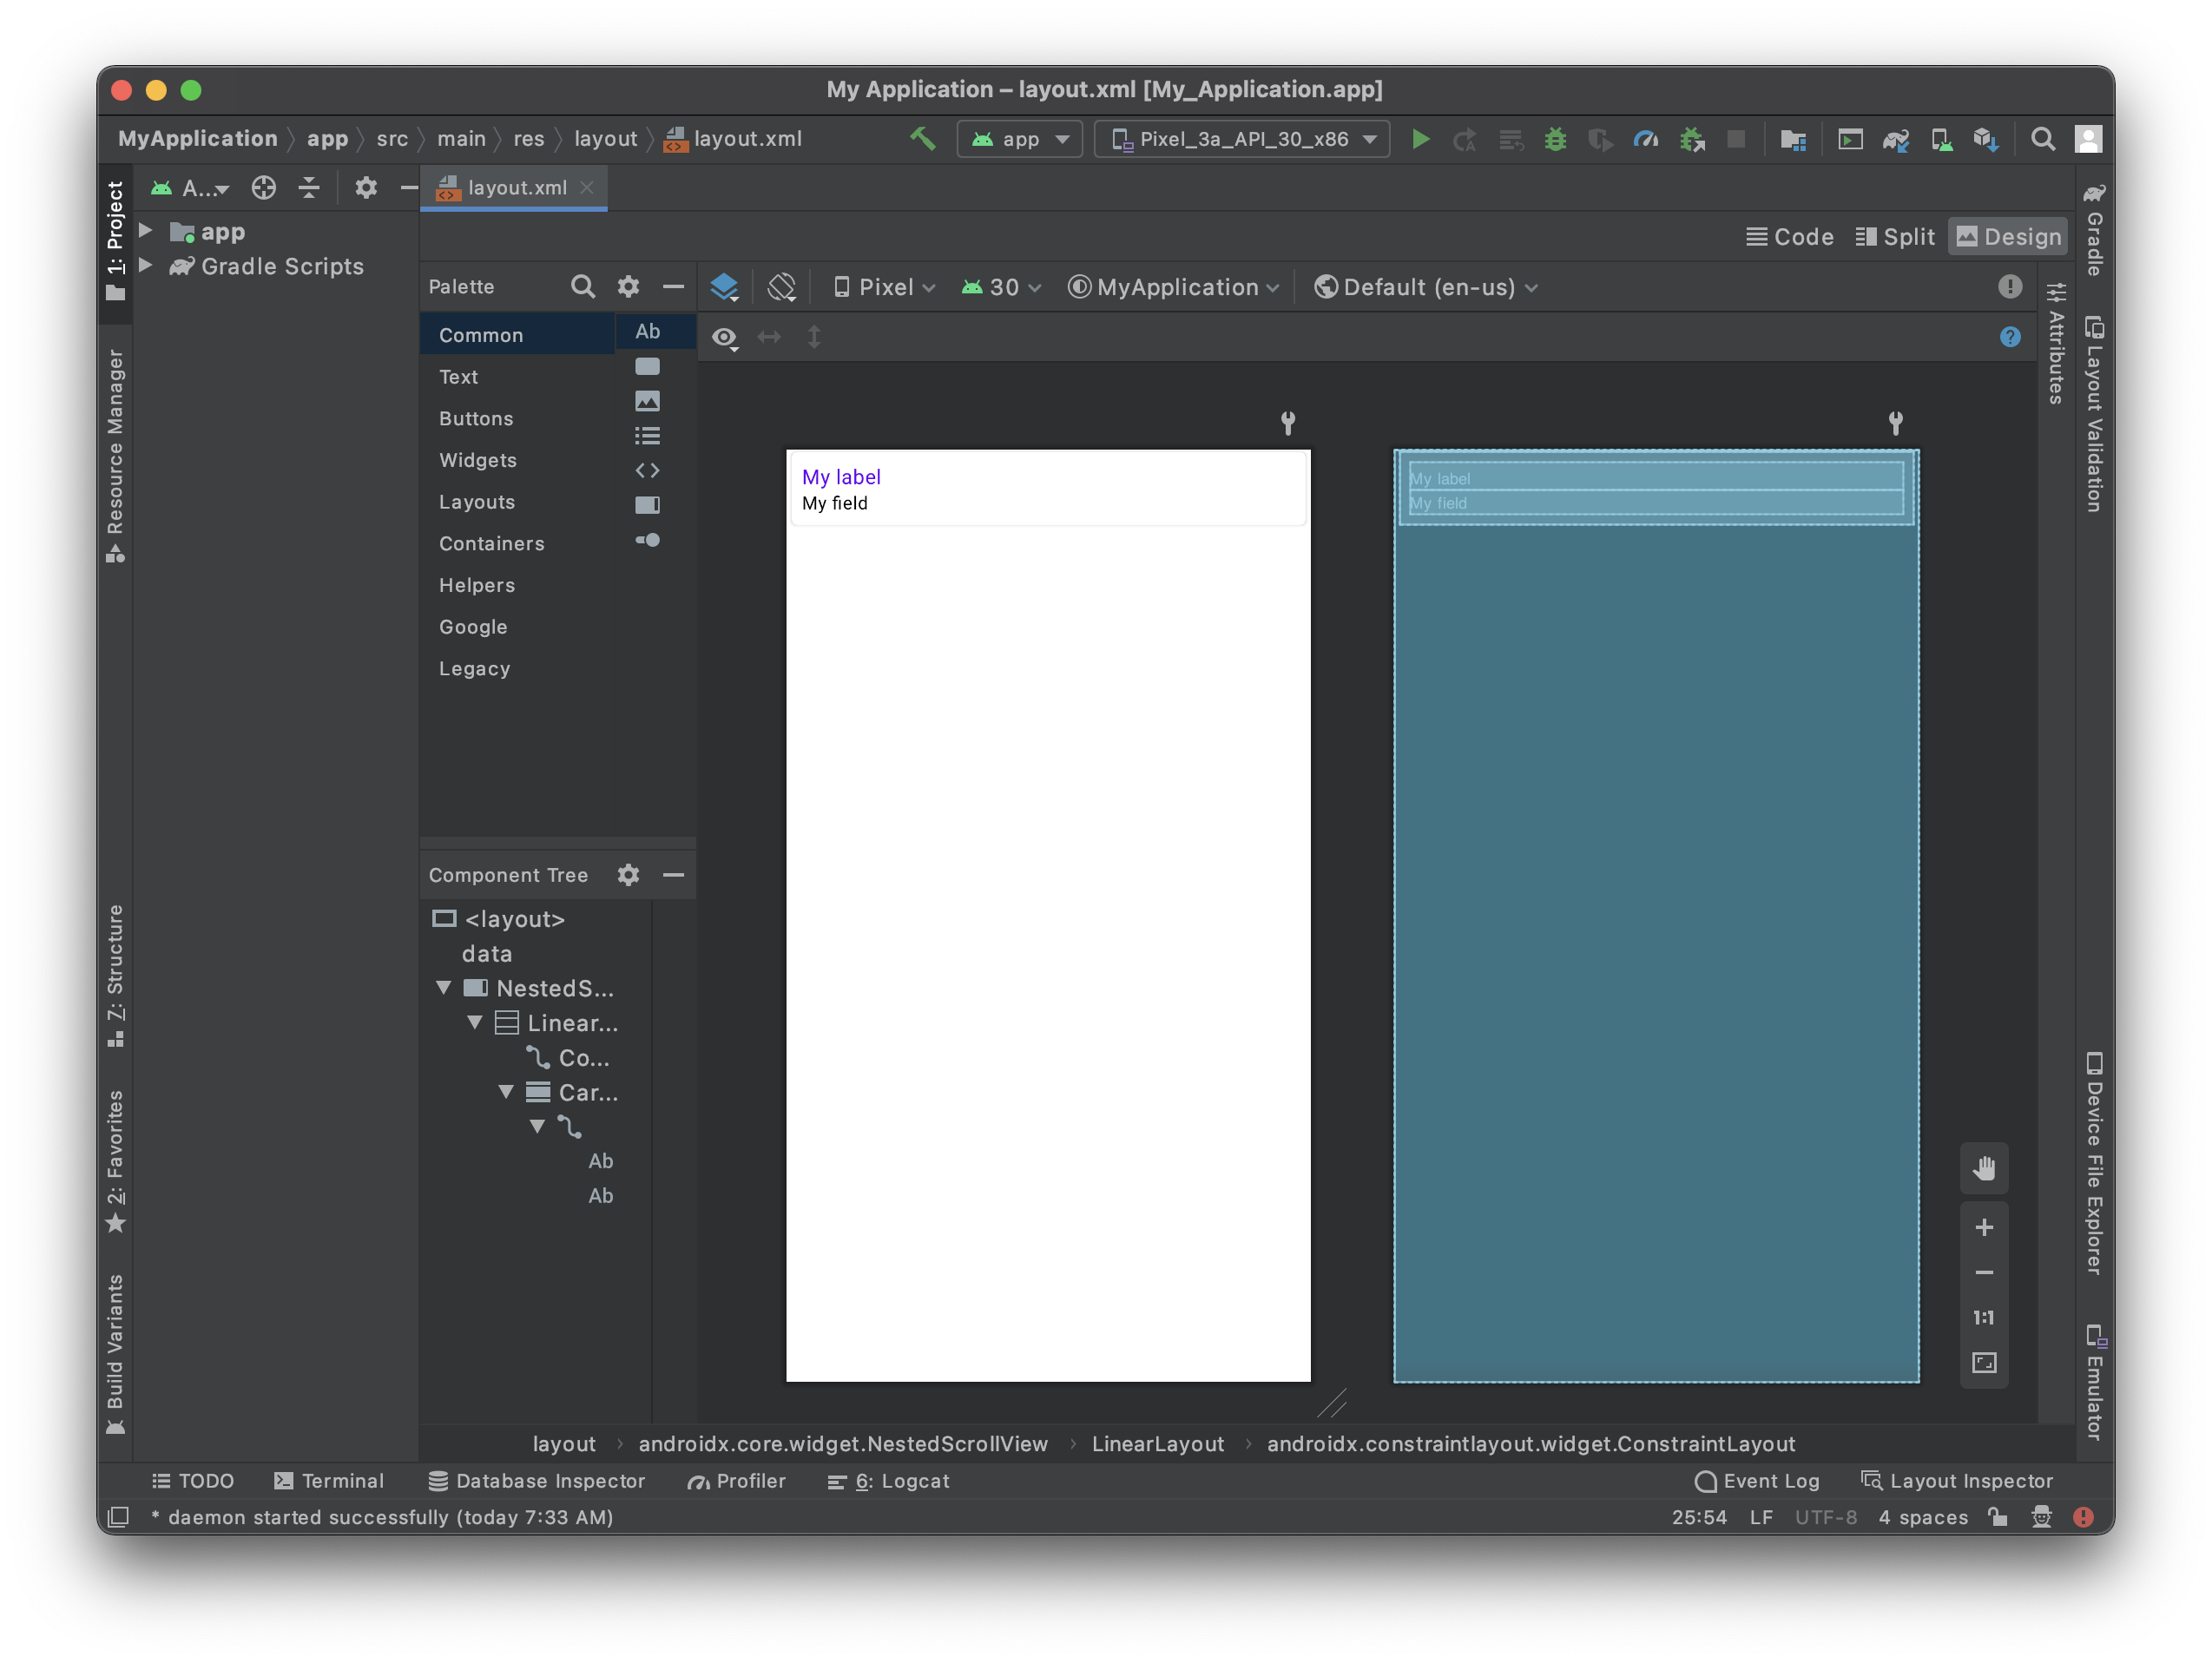
- Click on the top right Split option to visualize the template preview as well as the xml code.
Está bastante vacío, así que vamos a agregar algo de contenido.
What is available in this starter project
For the view to be scrollable, a scrollview is already included in the layout :
    <androidx.core.widget.NestedScrollView
        android:layout_width="match_parent"
        android:layout_height="match_parent"
        android:fillViewport="true">
The part that is going to be duplicated :
 <androidx.cardview.widget.CardView
                android:layout_width="match_parent"
                android:layout_height="wrap_content"
                android:layout_gravity="center"
                android:layout_marginHorizontal="4dp"
                android:layout_marginVertical="2dp"
                card_view:cardCornerRadius="4dp">

                <androidx.constraintlayout.widget.ConstraintLayout
                    android:layout_width="match_parent"
                    android:layout_height="wrap_content">

                    <TextView
                        android:id="@+id/__LABEL_ID__"
                        android:layout_width="0dp"
                        android:layout_height="wrap_content"
                        android:layout_marginStart="8dp"
                        android:layout_marginTop="8dp"
                        android:layout_marginEnd="8dp"
                        android:scrollbars="none"
                        android:text="__LABEL__"
                        android:textAppearance="@style/TextAppearance.MaterialComponents.Body1"
                        android:textColor="?colorPrimary"
                        app:layout_constraintBottom_toTopOf="@+id/__VALUE_ID__"
                        app:layout_constraintEnd_toEndOf="parent"
                        app:layout_constraintStart_toStartOf="parent"
                        app:layout_constraintTop_toTopOf="parent"
                        tools:text="My label" />

                    <!--IF_IS_IMAGE-->
                    <!-- IF THE DROPPED FIELD IS AN IMAGE -->
                    <ImageView
                        android:id="@+id/__VALUE_ID__"
                        android:layout_width="0dp"
                        android:layout_height="wrap_content"
                        android:layout_marginStart="8dp"
                        android:layout_marginTop="8dp"
                        android:layout_marginEnd="8dp"
                        android:layout_marginBottom="8dp"
                        android:contentDescription="Image"
                        app:imageUrl="__IMAGE__"
                        app:layout_constraintBottom_toBottomOf="parent"
                        app:layout_constraintEnd_toEndOf="parent"
                        app:layout_constraintStart_toStartOf="parent"
                        app:layout_constraintTop_toBottomOf="@+id/__LABEL_ID__" />
                    <!--END_IF_IS_IMAGE-->
                    <!--IF_IS_NOT_IMAGE-->
                    <!-- IF THE DROPPED FIELD IS NOT AN IMAGE, THEN IT WILL BE A TEXT VIEW -->

                    <TextView
                        android:id="@+id/__VALUE_ID__"
                        android:layout_width="0dp"
                        android:layout_height="wrap_content"
                        android:layout_marginStart="8dp"
                        android:layout_marginEnd="8dp"
                        android:layout_marginBottom="8dp"
                        android:scrollbars="none"
                        android:text="__TEXT__"
                        android:textAlignment="textStart"
                        android:textAllCaps="false"
                        android:textAppearance="@style/TextAppearance.MaterialComponents.Body2"
                        android:textColor="?colorOnSurface"
                        app:layout_constraintBottom_toBottomOf="parent"
                        app:layout_constraintEnd_toEndOf="parent"
                        app:layout_constraintStart_toStartOf="parent"
                        app:layout_constraintTop_toBottomOf="@+id/__LABEL_ID__"
                        tools:text="My field" />
                    <!--END_IF_IS_NOT_IMAGE-->

                </androidx.constraintlayout.widget.ConstraintLayout>

            </androidx.cardview.widget.CardView>
Añadir una "Image View"
In order to have a nice Image view display we are going to use agin a CardView container again as we want to add a nice corner radius to the ImageView to have a better design.
    <androidx.cardview.widget.CardView
                    android:id="@+id/cardview"
                    android:layout_width="match_parent"
                    android:layout_height="300dp"
                    android:layout_gravity="center"
                    android:layout_marginHorizontal="4dp"
                    android:layout_marginVertical="6dp"
                    card_view:cardCornerRadius="12dp"
                    app:layout_constraintEnd_toEndOf="parent"
                    app:layout_constraintStart_toStartOf="parent"
                    app:layout_constraintTop_toTopOf="parent">
                    <ImageView
                        android:id="@+id/__SPECIFIC_ID_1__"
                        android:layout_width="match_parent"
                        android:layout_height="match_parent"
                        android:contentDescription="Image"
                        android:scaleType="centerCrop"
                        app:imageUrl="__IMAGE_1__"
                        app:layout_constraintEnd_toEndOf="parent"
                        app:layout_constraintStart_toStartOf="parent"
                        app:layout_constraintTop_toTopOf="parent"
                        tools:background="@tools:sample/avatars"/>
                </androidx.cardview.widget.CardView>
As you can see the ImageView is embedded into the CardView. That allows to add corner radius to it.
The app:imageUrl="__IMAGE_1__" line will allow to bind image value that is situated in position 1 in the svg file that you previously defined.
The tools:background="@tools:sample/avatars" line simply there to display an ImageView placeholder.
Here is the full layout code at this stage :
<?xml version="1.0" encoding="utf-8"?>

<layout xmlns:android="http://schemas.android.com/apk/res/android"
    xmlns:app="http://schemas.android.com/apk/res-auto"
    xmlns:card_view="http://schemas.android.com/apk/res-auto"
    xmlns:tools="http://schemas.android.com/tools"
    tools:ignore="DuplicateIds,HardcodedText">

    <data>

        <!--ENTITY_VARIABLE-->
    </data>

    <!-- Generated with detail form template named "Visual Contact" -->

    <androidx.core.widget.NestedScrollView
        android:layout_width="match_parent"
        android:layout_height="match_parent"
        android:fillViewport="true">

        <LinearLayout
            android:layout_width="match_parent"
            android:layout_height="match_parent"
            android:orientation="vertical">

            <!-- START EDITING HERE -->

            <androidx.constraintlayout.widget.ConstraintLayout
                android:layout_width="match_parent"
                android:layout_height="wrap_content">

                <androidx.cardview.widget.CardView
                    android:id="@+id/cardview"
                    android:layout_width="match_parent"
                    android:layout_height="300dp"
                    android:layout_gravity="center"
                    android:layout_marginHorizontal="4dp"
                    android:layout_marginVertical="6dp"
                    card_view:cardCornerRadius="12dp"
                    app:layout_constraintEnd_toEndOf="parent"
                    app:layout_constraintStart_toStartOf="parent"
                    app:layout_constraintTop_toTopOf="parent">

                    <ImageView
                        android:id="@+id/__SPECIFIC_ID_1__"
                        android:layout_width="match_parent"
                        android:layout_height="match_parent"
                        android:contentDescription="Image"
                        android:scaleType="centerCrop"
                        app:imageUrl="__IMAGE_1__"
                        app:layout_constraintEnd_toEndOf="parent"
                        app:layout_constraintStart_toStartOf="parent"
                        app:layout_constraintTop_toTopOf="parent"
                        tools:background="@tools:sample/avatars"/>
                </androidx.cardview.widget.CardView>


            </androidx.constraintlayout.widget.ConstraintLayout>

            <!--
            THE FOLLOWING PART WILL BE DUPLICATED CARD VIEWS FOR EVERY FIELD
            YOU DROP AT THE BOTTOM OF THE TEMPLATE
            -->

            <!--FOR_EACH_FIELD-->
            <!-- EVERYTHING BELOW WILL BE DUPLICATED FOR EACH FIELD YOU DROP AT THE BOTTOM OF THE
                 TEMPLATE IN THE PROJECT EDITOR -->
            <androidx.cardview.widget.CardView
                android:layout_width="match_parent"
                android:layout_height="wrap_content"
                android:layout_gravity="center"
                android:layout_marginHorizontal="4dp"
                android:layout_marginVertical="2dp"
                card_view:cardCornerRadius="4dp">

                <androidx.constraintlayout.widget.ConstraintLayout
                    android:layout_width="match_parent"
                    android:layout_height="wrap_content">

                    <TextView
                        android:id="@+id/__LABEL_ID__"
                        android:layout_width="0dp"
                        android:layout_height="wrap_content"
                        android:layout_marginStart="8dp"
                        android:layout_marginTop="8dp"
                        android:layout_marginEnd="8dp"
                        android:scrollbars="none"
                        android:text="__LABEL__"
                        android:textAppearance="@style/TextAppearance.MaterialComponents.Body1"
                        android:textColor="?colorPrimary"
                        app:layout_constraintBottom_toTopOf="@+id/__VALUE_ID__"
                        app:layout_constraintEnd_toEndOf="parent"
                        app:layout_constraintStart_toStartOf="parent"
                        app:layout_constraintTop_toTopOf="parent"
                        tools:text="My label" />

                    <!--IF_IS_IMAGE-->
                    <!-- IF THE DROPPED FIELD IS AN IMAGE -->
                    <ImageView
                        android:id="@+id/__VALUE_ID__"
                        android:layout_width="0dp"
                        android:layout_height="wrap_content"
                        android:layout_marginStart="8dp"
                        android:layout_marginTop="8dp"
                        android:layout_marginEnd="8dp"
                        android:layout_marginBottom="8dp"
                        android:contentDescription="Image"
                        app:imageUrl="__IMAGE__"
                        app:layout_constraintBottom_toBottomOf="parent"
                        app:layout_constraintEnd_toEndOf="parent"
                        app:layout_constraintStart_toStartOf="parent"
                        app:layout_constraintTop_toBottomOf="@+id/__LABEL_ID__" />
                    <!--END_IF_IS_IMAGE-->
                    <!--IF_IS_NOT_IMAGE-->
                    <!-- IF THE DROPPED FIELD IS NOT AN IMAGE, THEN IT WILL BE A TEXT VIEW -->

                    <TextView
                        android:id="@+id/__VALUE_ID__"
                        android:layout_width="0dp"
                        android:layout_height="wrap_content"
                        android:layout_marginStart="8dp"
                        android:layout_marginEnd="8dp"
                        android:layout_marginBottom="8dp"
                        android:scrollbars="none"
                        android:text="__TEXT__"
                        android:textAlignment="textStart"
                        android:textAllCaps="false"
                        android:textAppearance="@style/TextAppearance.MaterialComponents.Body2"
                        android:textColor="?colorOnSurface"
                        app:layout_constraintBottom_toBottomOf="parent"
                        app:layout_constraintEnd_toEndOf="parent"
                        app:layout_constraintStart_toStartOf="parent"
                        app:layout_constraintTop_toBottomOf="@+id/__LABEL_ID__"
                        tools:text="My field" />
                    <!--END_IF_IS_NOT_IMAGE-->

                </androidx.constraintlayout.widget.ConstraintLayout>

            </androidx.cardview.widget.CardView>

            <!--END_FOR_EACH_FIELD-->

        </LinearLayout>

    </androidx.core.widget.NestedScrollView>

</layout>
How to get data into your detail form
Image View
In our detail form template we used app:imageUrl="__IMAGE_1__"
Here we suppose the ImageView is the first view in the svg, and its view ID is __SPECIFIC_ID_1__. If it would be the third view, it would be __IMAGE_3__ and its view ID would be __SPECIFIC_ID_3__.
¿Qué hacemos ahora?
En este tutorial, hemos cubierto los conceptos básicos para crear plantillas de formularios detallados. Ahora puede crear plantillas simples por su cuenta utilizando los recursos del Proyecto Starter. Haga clic en el botón Final Project abajo para descargar la carpeta que contiene la lista completa de modelos.