Custom Login Form
OBJECTIFS
Use a custom login form
Allow authenticated users to login by scanning a QRCode CONDITIONS PRÉALABLES CONDITIONS PRÉALABLES
A website with authenticated users
4D 18R6 minimum
Real iOS mobile device (simulator do not simulate camera)
This tutorial will allow you to quickly and easily integrate a custom login form.
Scenario: You already have a website with authenticated users and you want then to login into their app just by scanning a QRCode
NOTE
Selecting a custom login form from the Project editor is not implemented yet but let's see how to do that manually
ÉTAPE 1. Prise en main
In this tutorial, we're going to:
- Include a custom login form
- Add the ability for your app users to login just by scanning a QRCode
First download our Starter Project, which contains a database file and ready to use webpages in the Webfolder folder.
NOTE
This project already includes a Users table with a Login and a Password for each authenticated user.
ÉTAPE 2. Include and use a custom login form
To use a custom login form, the first thing you'll need to do is creating a YourDatabase.4dbase/Resources/Mobile/form/login folder.
Download the Sign in With QRCode login form and simply drop it in the login folder you've just created.
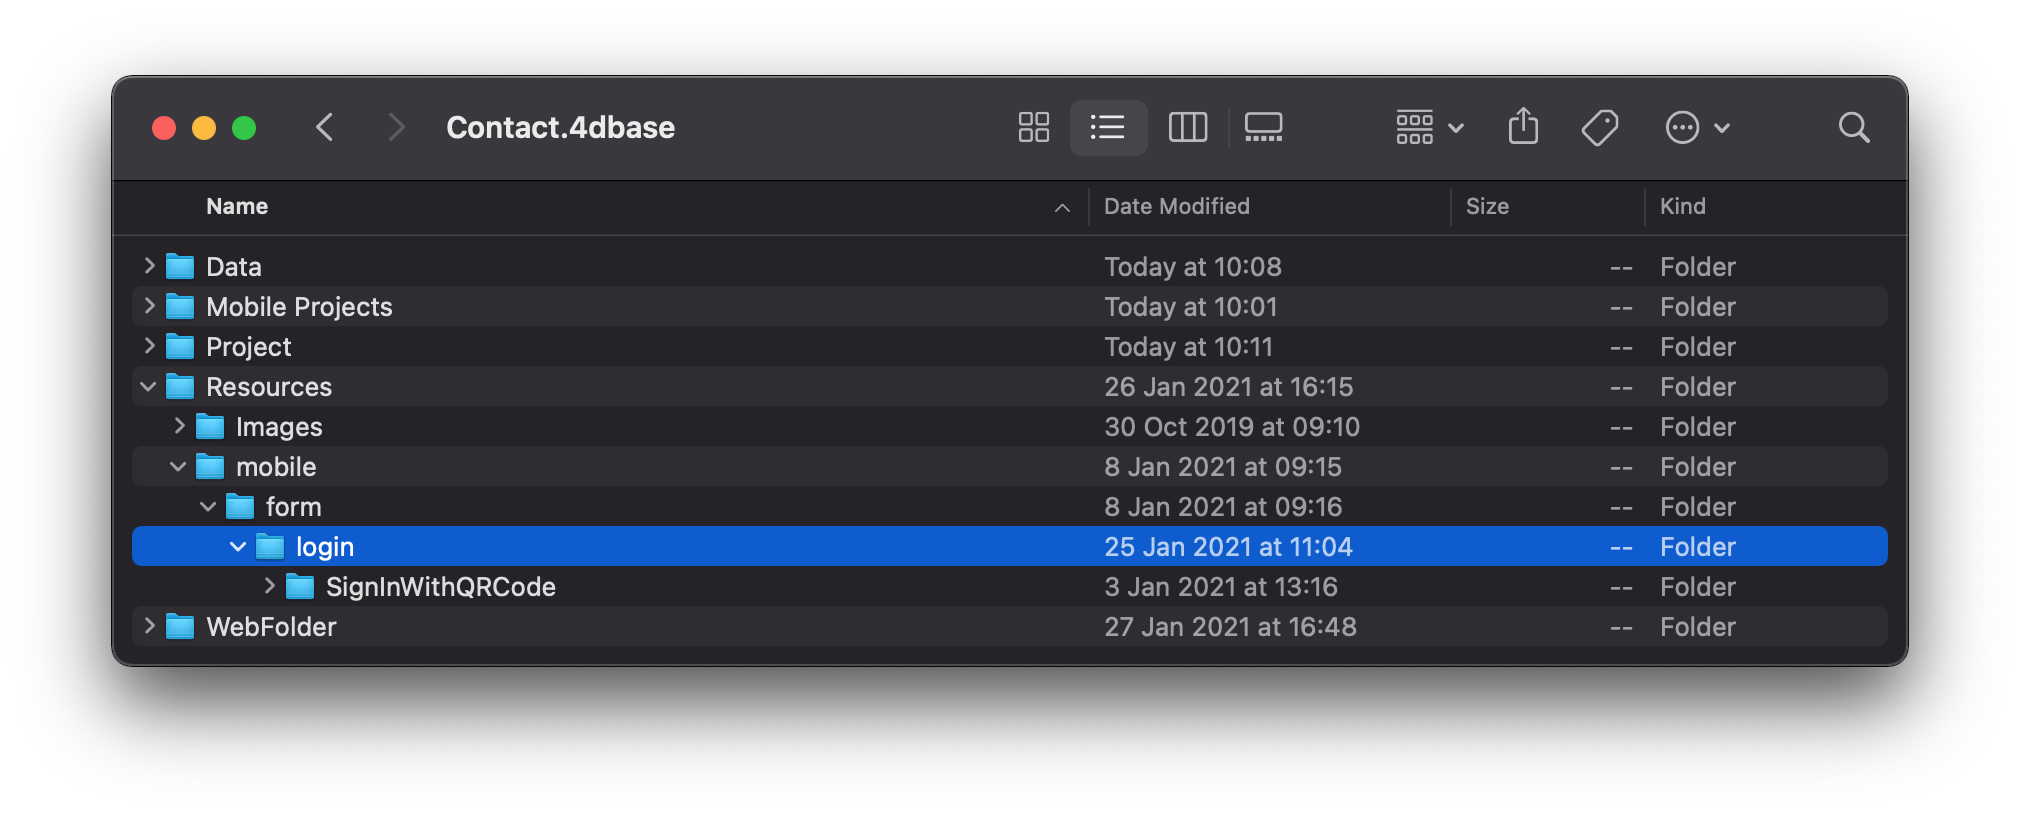
Then open the YourDatabase.4dbase/Mobile Projects/ContactQRCodeLogin/project.4dmobileapp file
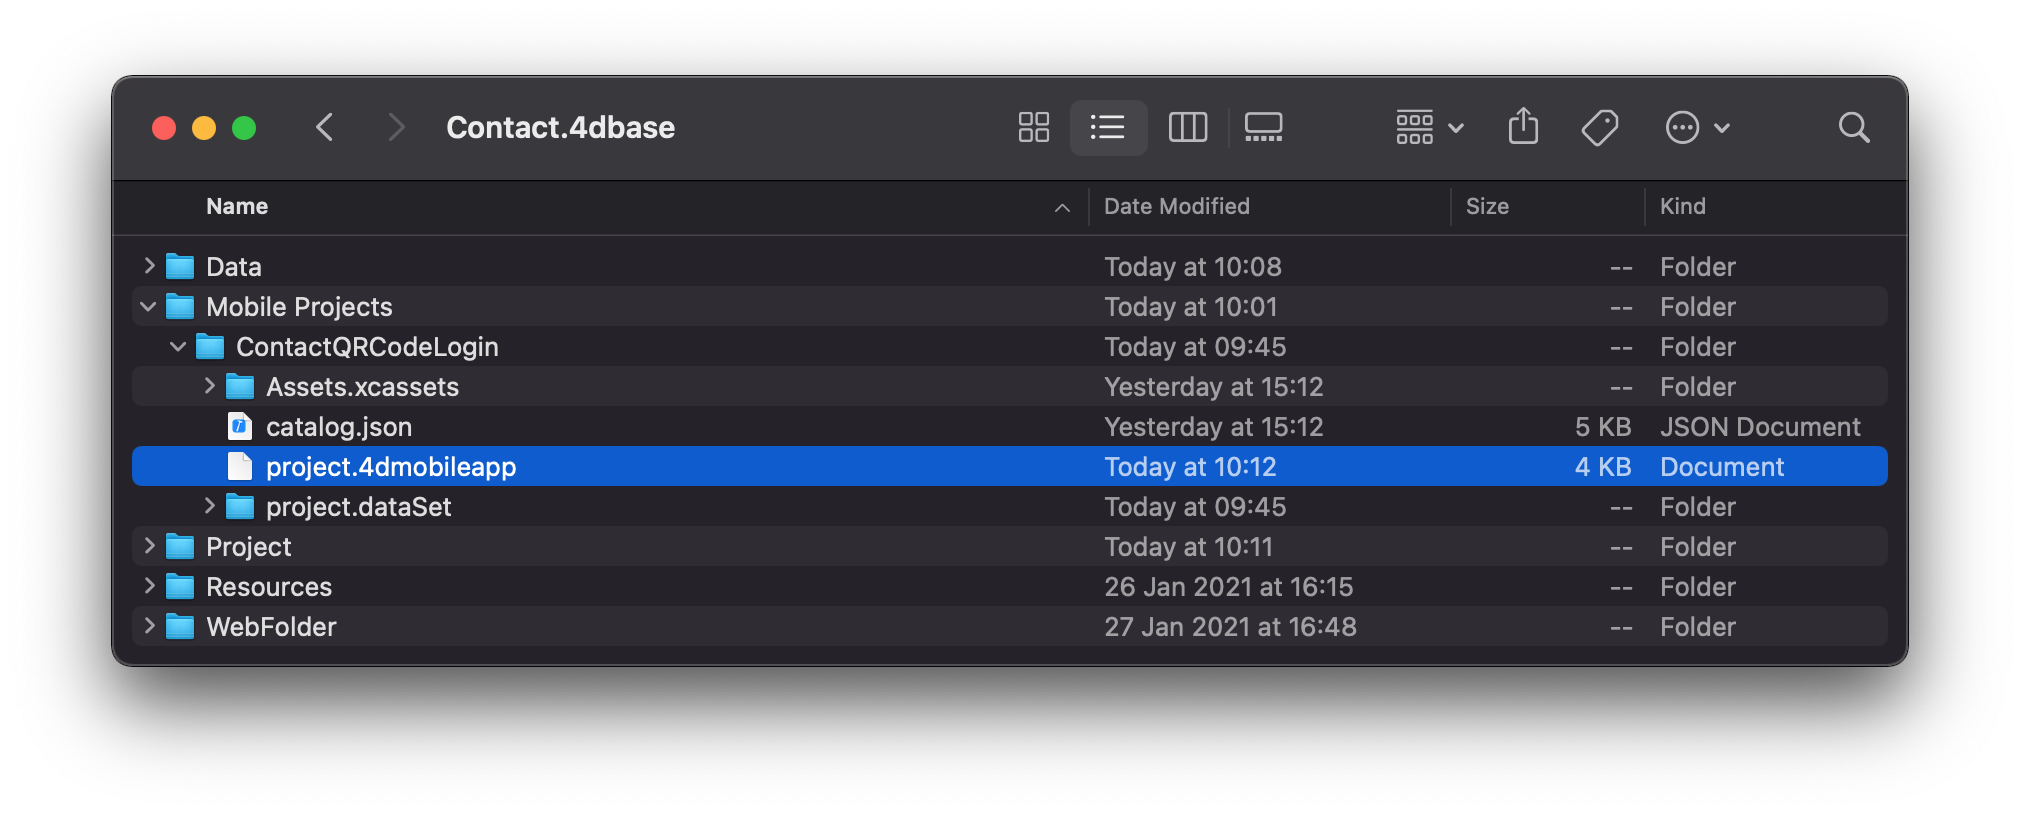
With your project closed, and add the following line : "login": "/SignInWithQRCode",
{
    "info": {
        "version": 5,
        "target": "iOS",
        "ideVersion": "1870",
        "ideBuildVersion": "261295",
        "componentBuild": ""
    },
    "login": "/SignInWithQRCode",
    ...
This will allow to initialize the custom template and use it during the build process.
You are done for the custom template intégration! So quite an easy process :)
ÉTAPE 3. On Mobile app Authentication database method
Open the QRCode mobile project and go right to the Publishing section.
From here check the Authentication feature and Create the database method clicking on the Create button.
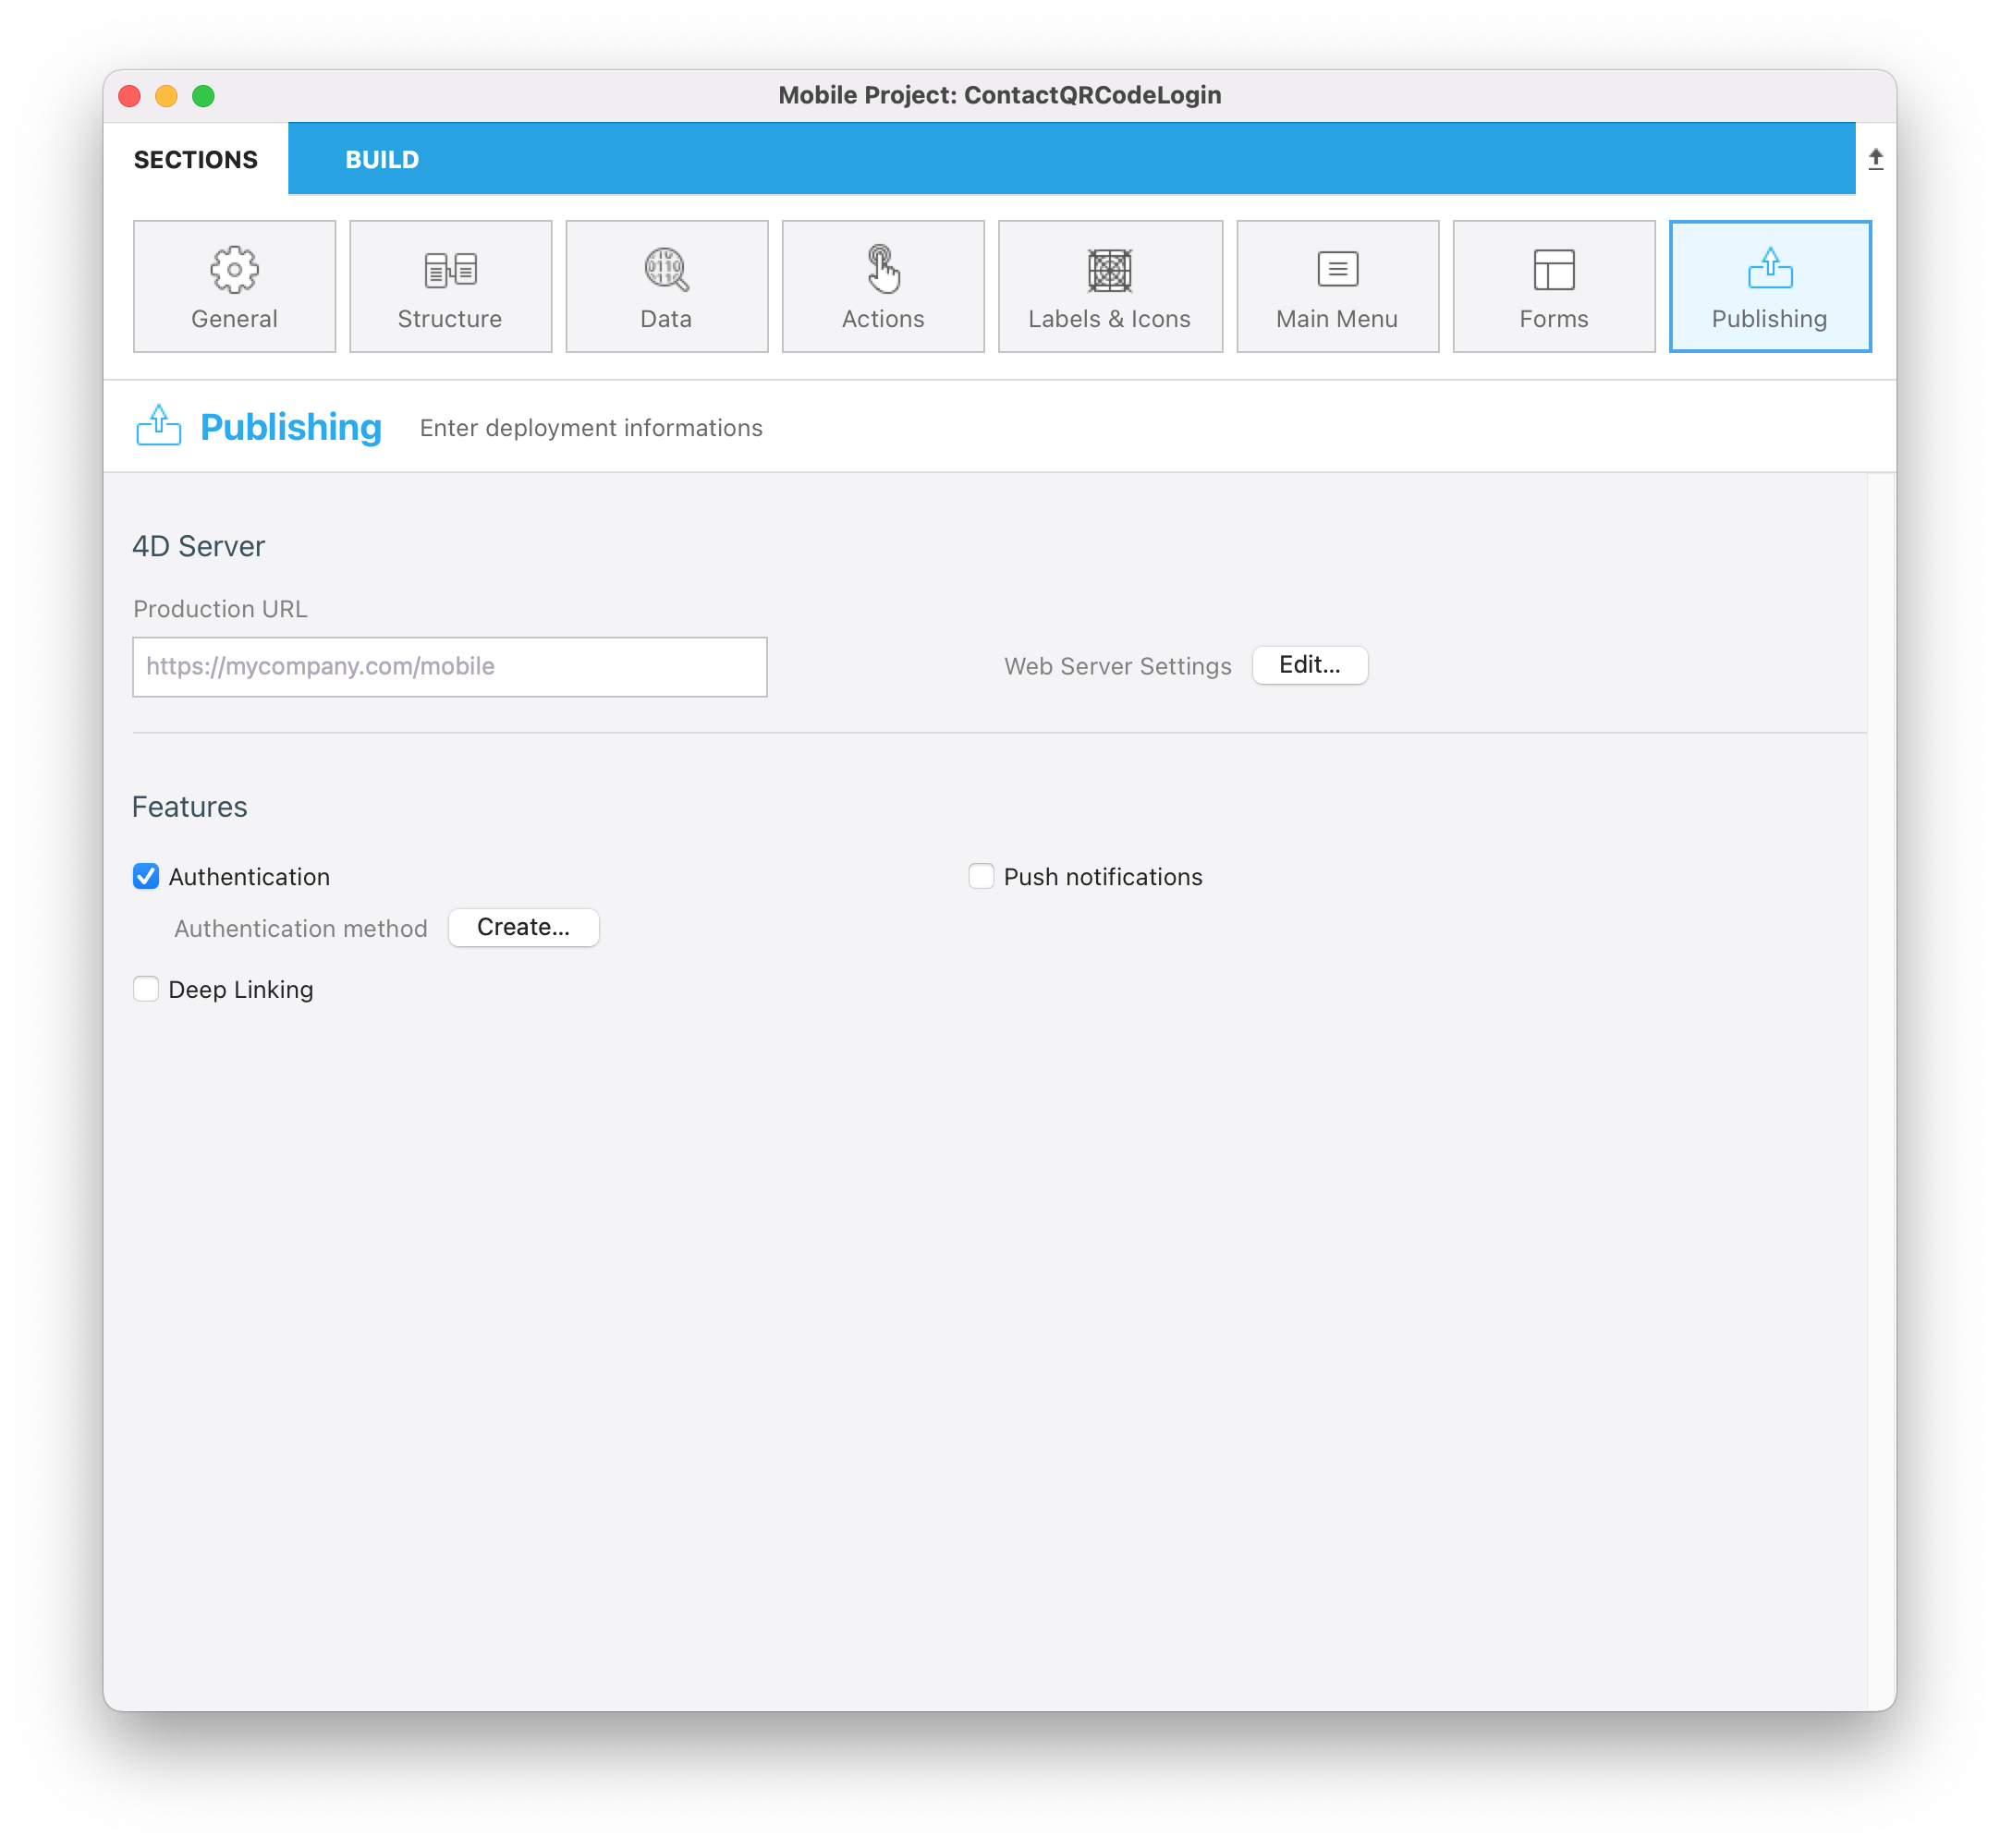
This is how it should look to authenticate users :
var $0 : Object
var $1 : Object

var $request; $response : Object

$request:=$1  // Informations provided by mobile application
$response:=New object  // Informations returned to mobile application

$entity:=ds.User.query("login = :1"; $request.email)
If ($entity.length>0)
    $password:=$entity.first().password  // Get the password from the table

    If (Verify password hash($password; $request.parameters.token))
        // Comparison with what you receive in the request

        $response.success:=True
    Else
        $response.success:=False
    End if
Else
    $response.success:=False
End if

// Optional message to display on mobile App.
If ($response.success)
    $response.statusText:="You are successfully authenticated"
Else
    $response.statusText:="Sorry, you are not authorized to use this application."
End if

$0:=$response
ÉTAPE 4. Project Methods
Authentication method
Here we get the variable from the form and check if those values exist in the User table :
//Retrieve all the variables of the form
C_TEXT($1)
ARRAY TEXT($arrNames; 0)
ARRAY TEXT($arrVals; 0)

// Get the login and pswd variable from the authentication web page
WEB GET VARIABLES($arrNames; $arrVals)
$VLOGIN:=Find in array($arrNames; "VLOGIN")
$VPASS:=Find in array($arrNames; "VPASS")

// Shared variable creation to access to it in the code
Use (Storage)
    Storage.session:=New shared object("login"; ""; "password"; "")
End use

// Search if the login / pswd exist and if the user can be authentified
$entity:=ds.User.query("login = :1 and password = :2"; $arrVals{$VLOGIN}; $arrVals{$VPASS})

// If the login / pswd exist the login / pswd are initialised in the share variable
If ($entity.length>0)
    Use (Storage.session)
        Storage.session.login:=$arrVals{$VLOGIN}
        Storage.session.password:=$arrVals{$VPASS}
        Storage.session.success:=True
    End use

    // Redirection to the web page
    WEB SEND HTTP REDIRECT("/createQRCode.html")

Else
    // Back to the home page
    Use (Storage.session)
        Storage.session.success:=False
    End use
    WEB SEND HTTP REDIRECT("/")
End if
GenerateQRCODE method
Here we generated a vqrCodeData that is a json that include the user email and the encrtypted password that are the data that are going to be emebeded in the QRCode.
// Use storage variable
$currentUserEmail:=Storage.session.login
$token:=Storage.session.password
$options:=New object("algorithm"; "bcrypt"; "cost"; 4)
$hash:=Generate password hash($token; $options)

// Process variable creation (json value with mail and encrypted pswd)
vqrCodeData:=JSON Stringify(New object("email"; $currentUserEmail; "token"; $hash))

// Redirection to the QRcode webpage
WEB SEND HTTP REDIRECT("/generatedQRCode.shtml")
ÉTAPE 5. Website
For this tutorial, three html pages are already available into the WebFolder folder:
- The authentication page (index.html)
- The QRcode generation page (createQRCode.html)
- The final page the user will scan from his mobile device (generatedQRCode.shtml)
Let's have a focus on those three pages :
index.html
Here, we just use a 4DACTION to post login and password to be used in the Authentication Project Method that we are going to see in step 4:
  <form class="box" ACTION="/4DACTION/Authentication" METHOD=post>
  <h1>1. Login</h1>
  <input type="text" id="login" placeholder="Username" name=VLOGIN >
  <input type="password" id="login" placeholder="Password" name=VPASS>
  <input type="submit" name="" value="Login">
  </form>
createQRCode.html
Here, we use call the GenerateQRCODE Project Method using a 4DACTION:
<h1>2. GENERATE YOUR QRCODE</h1>
    <div>
        <p>Create your QRCode to authenticate clicking <a href="/4DACTION/GenerateQRCODE">Here</a></p>
    </div>
generatedQRCode.shtml
In this last page, we use 4D tags to get the data value:
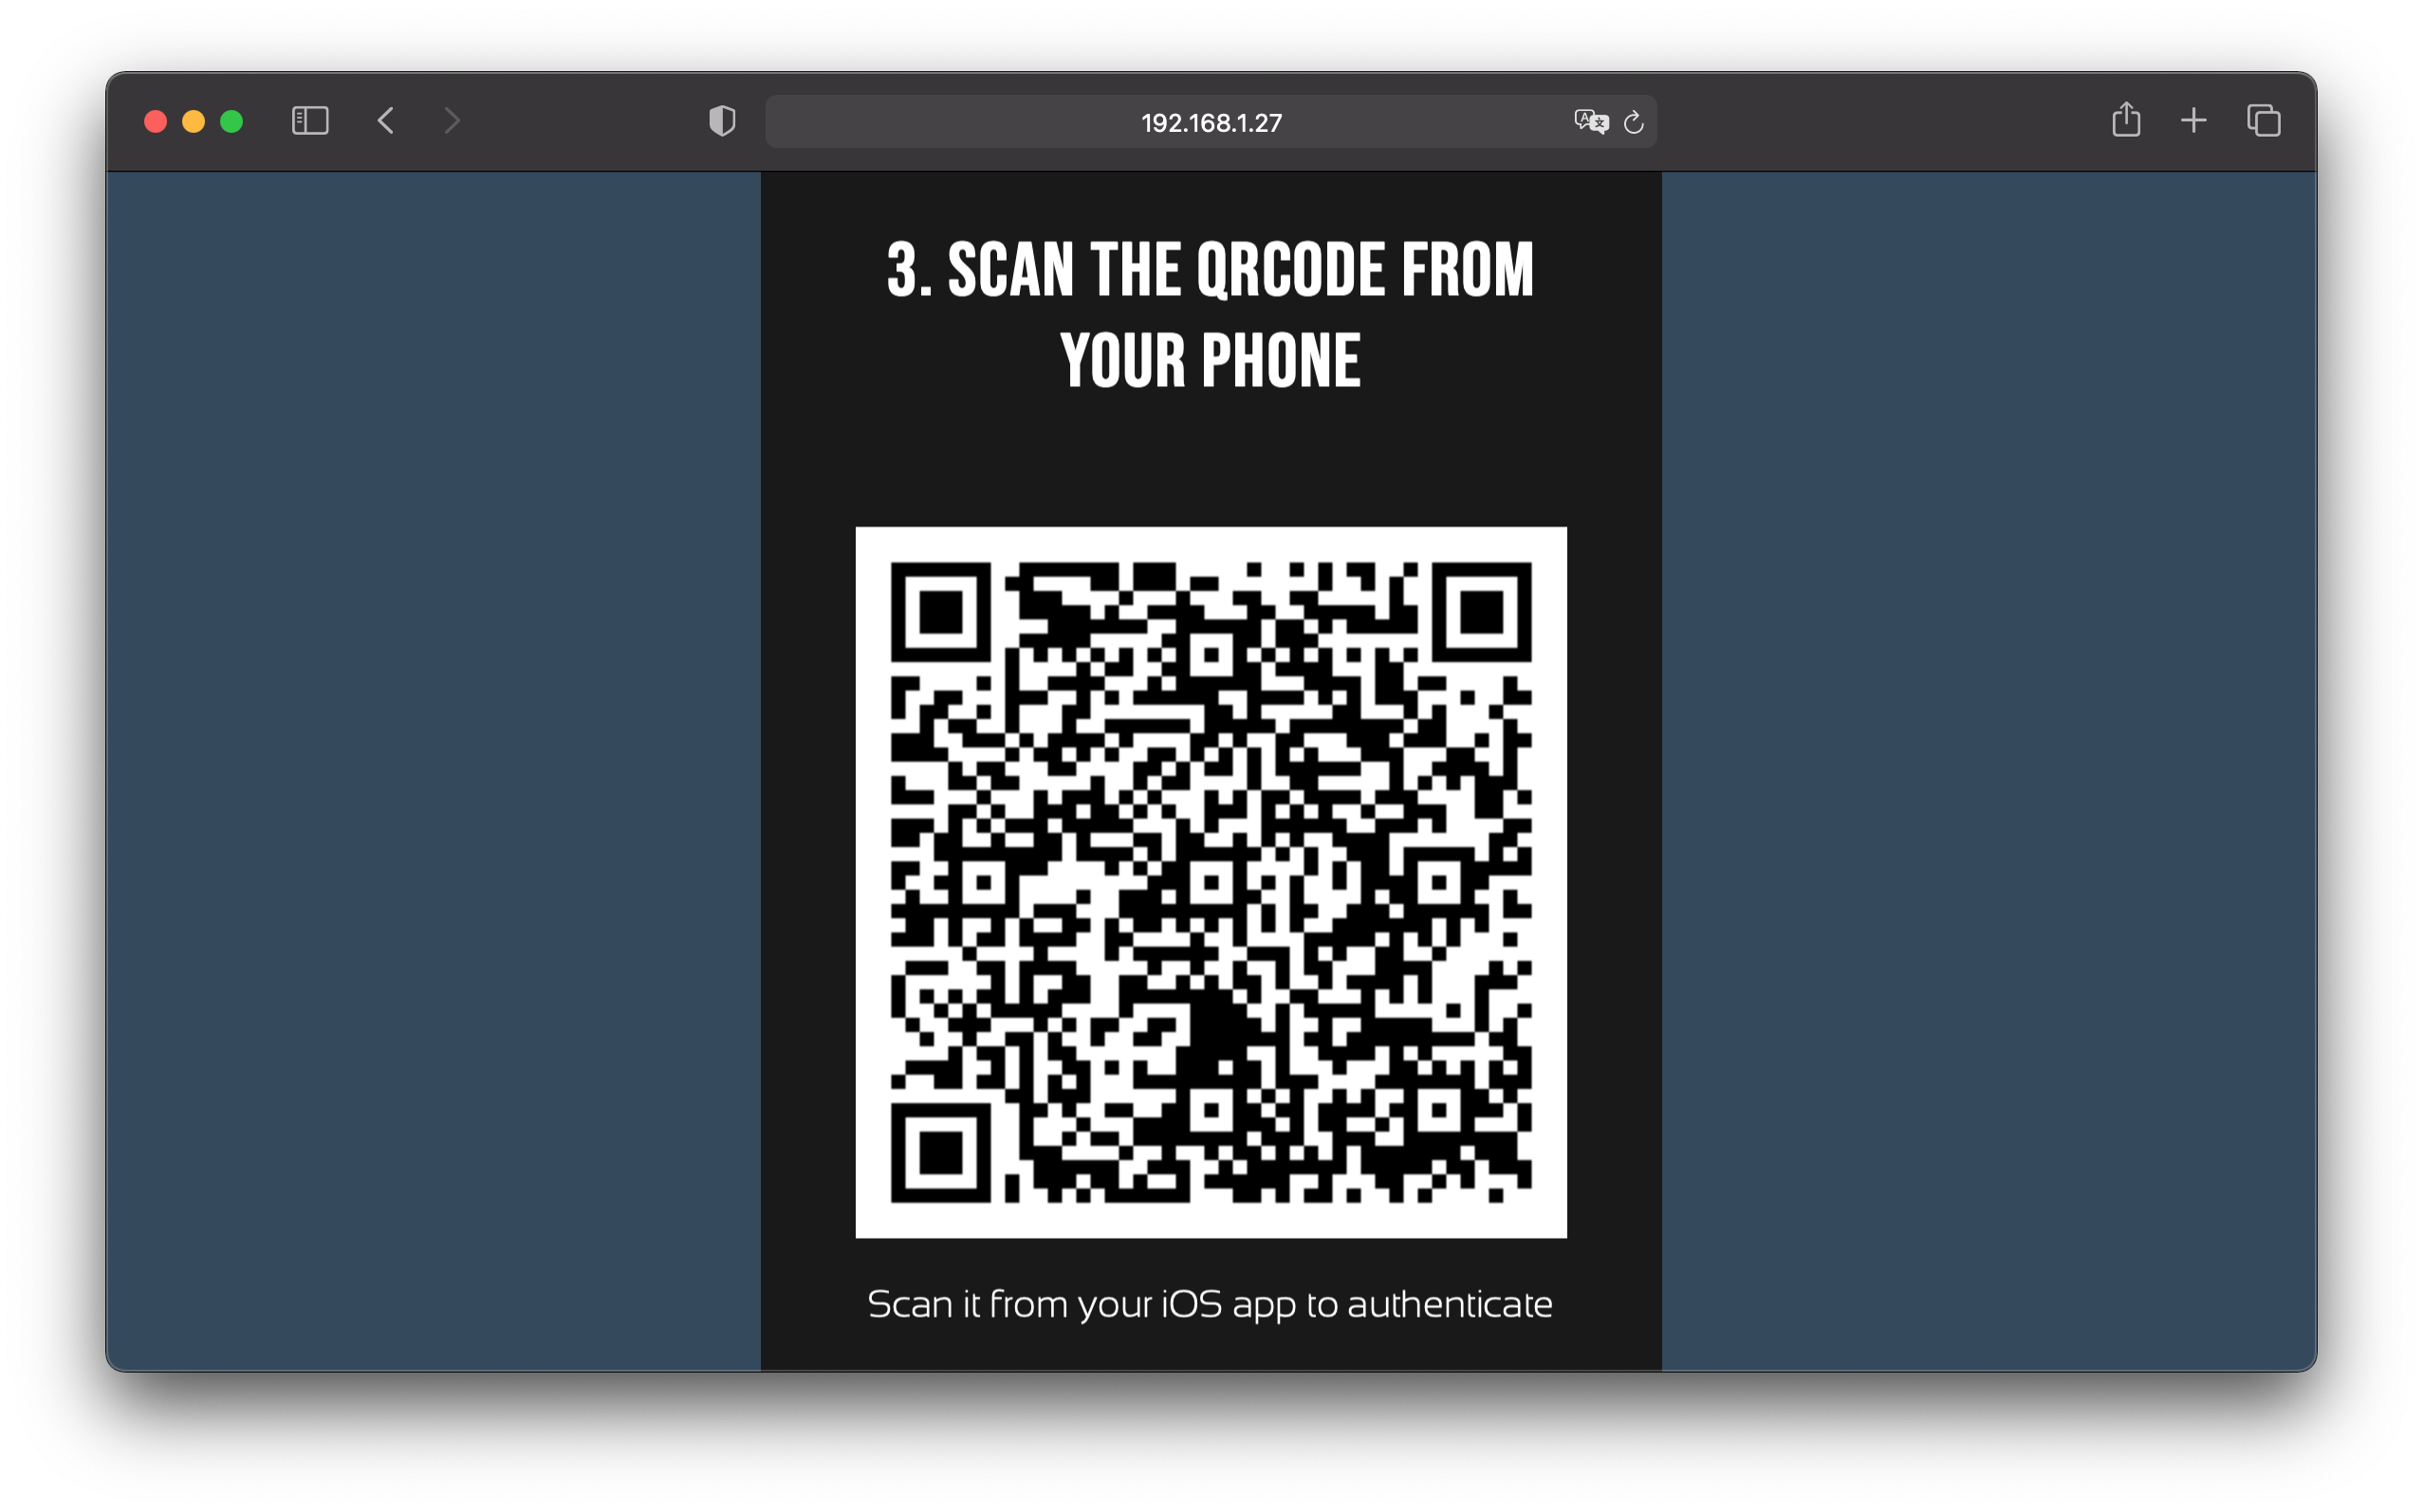
<h1>3. SCAN THE QRCODE FROM YOUR PHONE</h1>
<div id="canvas"></div>
<script type="text/javascript"></script>
ÉTAPE 6. Get the entire senario
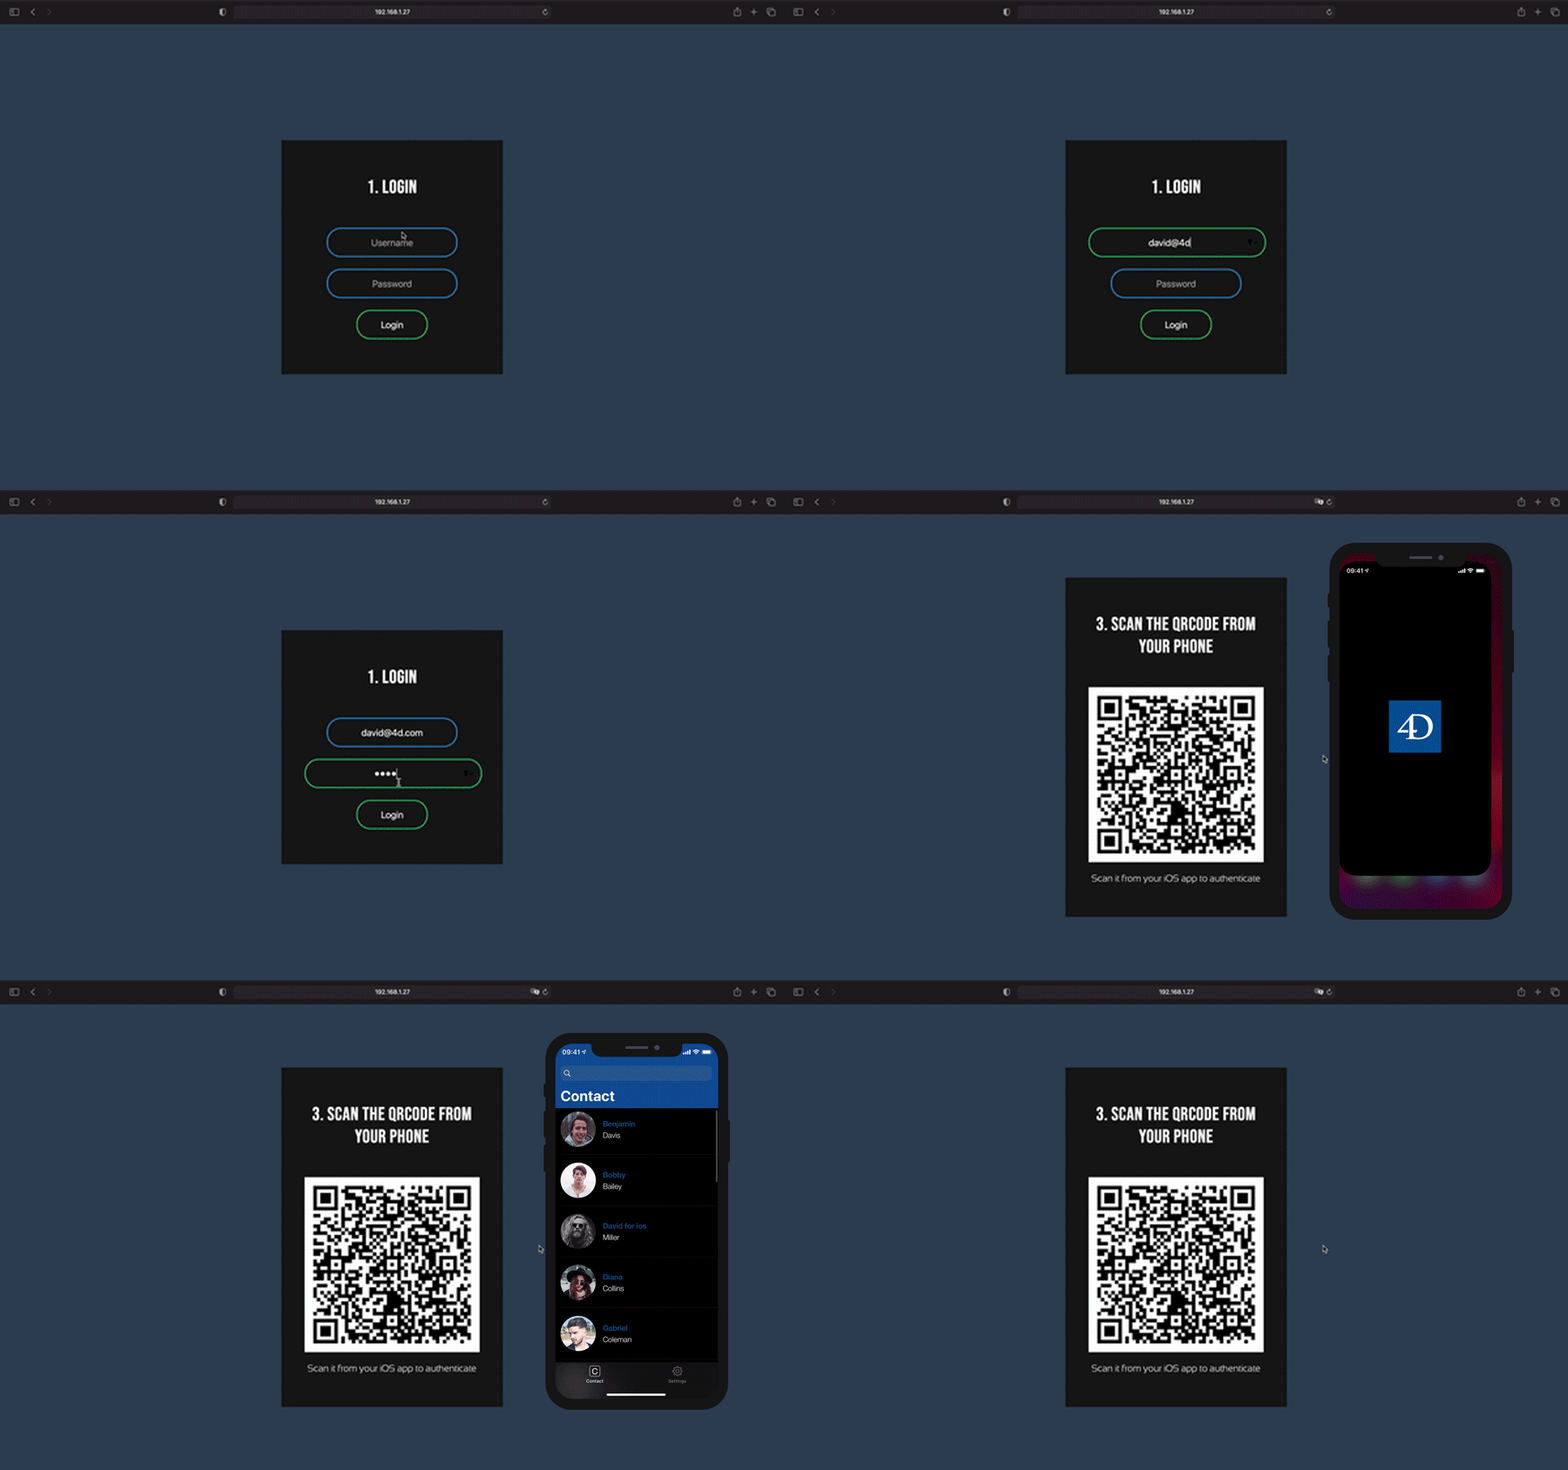
Login into your website home page
Enter david@4D.com in the Login field and TEST in the Password field in your website home page and click Login (Which is an existing record in the User table).

Generate the QRCode
Click on the HERE button to generate the QRCode.
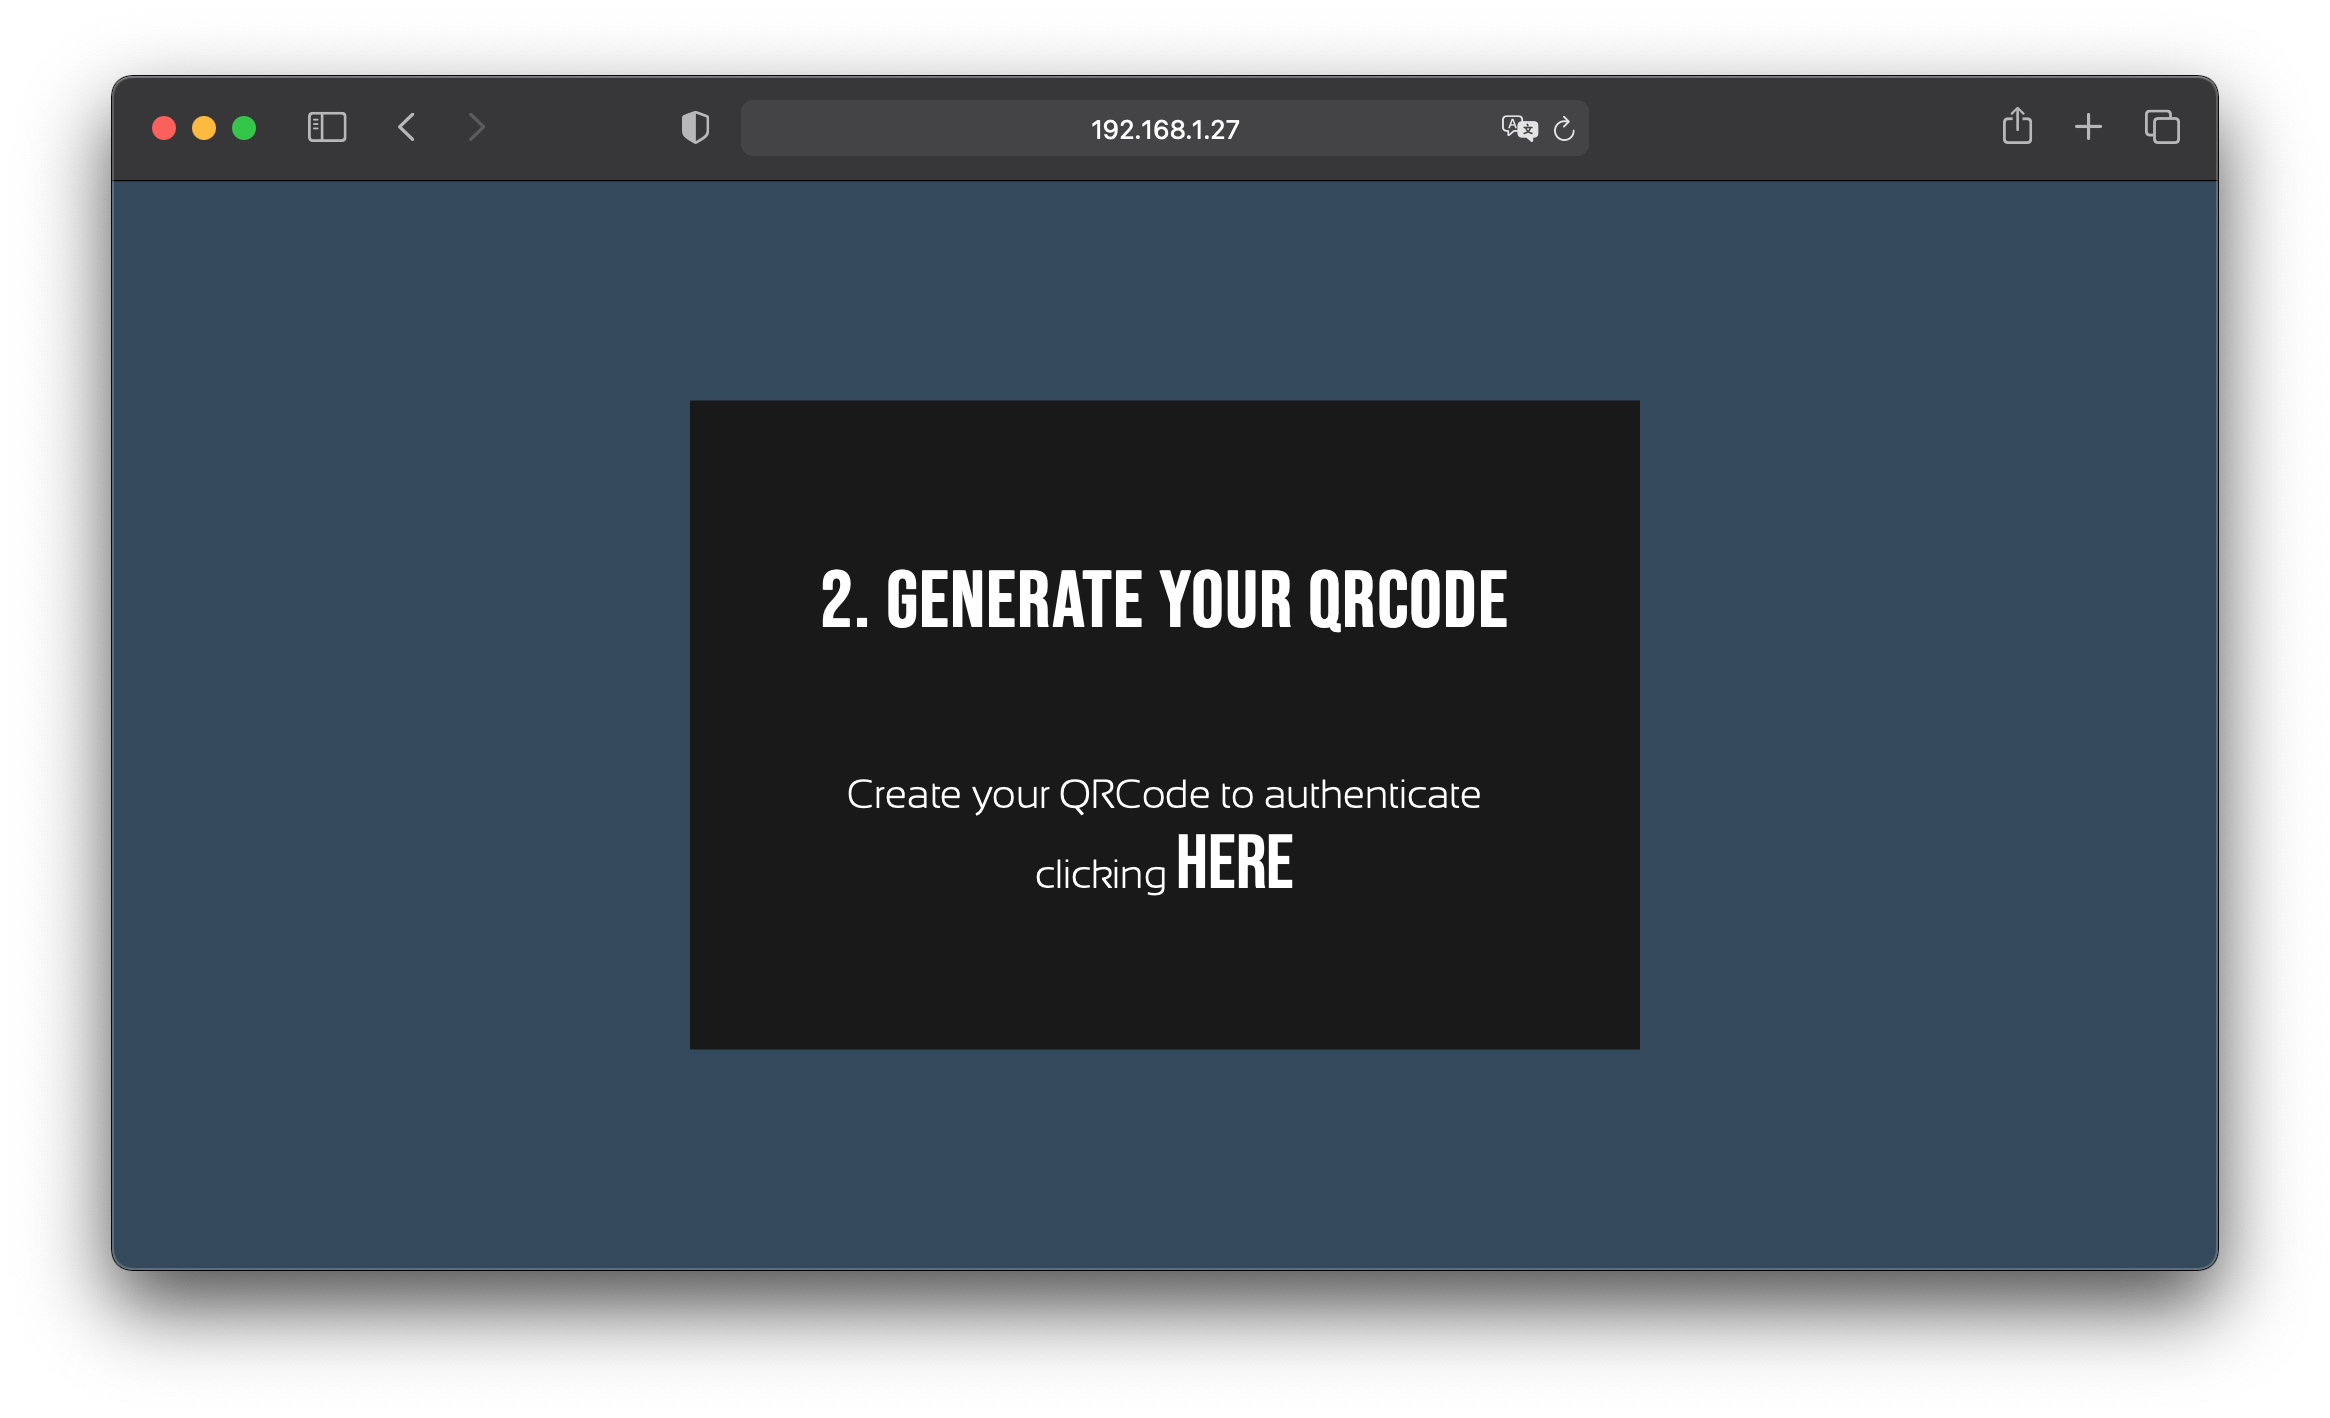
You will be redirected to the final QRCode page.
Build your app on a real device
Install your mobile app from the project editor on a real device.
Then the custom login form will appear to allow you scanning the generated QRCode and login into your mobile app.
Here is the final result :
ÉTAPE 7. Que faire ensuite ?
The step 2 covers how to include easily any custom login form in your mobile app. So you should now be able just followin this step, to create your own custom login form and use it on your own.
Reading next steps you are now able to include the Sign In With QRCode login and allow your authenticated users to scan a QRCode to login into their app.