Archive and export your Project
OBJECTIVES
- Archive and export your 4D for iOS project
- Generate .ipa and manifest files
PREREQUISITES
- Apple Enterprise Developer Program
- A secured web server
- 57 x 57 px icon
- 512 x 512 px icon
STEP 1. Xcode configuration
Following validation of your account by Apple, open Xcode and add your Apple Enterprise Developer account in Preferences > Accounts.
Xcode will automatically install required provisioning and certificates.
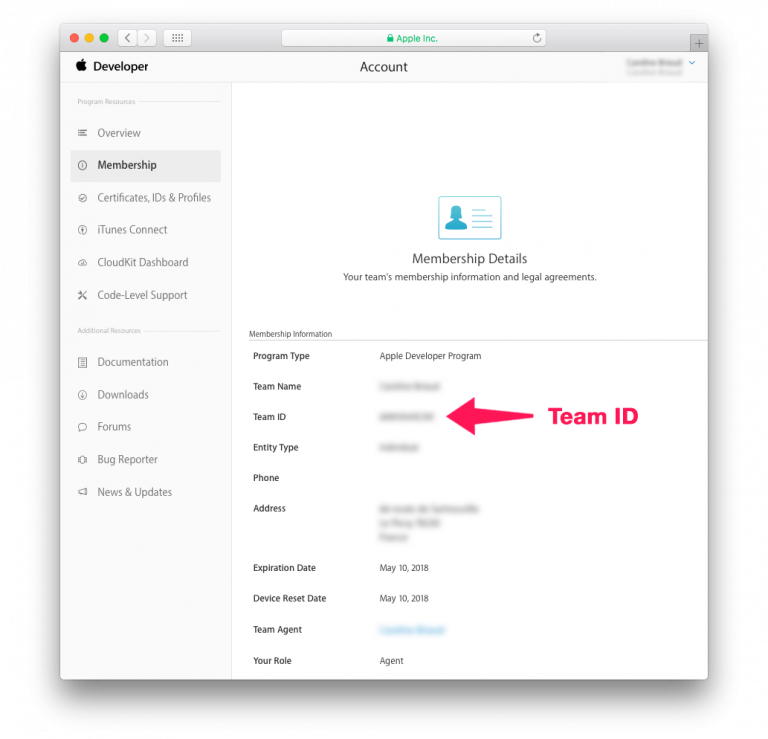
STEP 2. Get your Team ID
- Log into your Apple Developer Account. You can find your Team ID in Membership.
STEP 3. 4D for iOS configuration
Launch 4D for iOS
On the SECTIONS tab:
- General: Enter your Team ID.
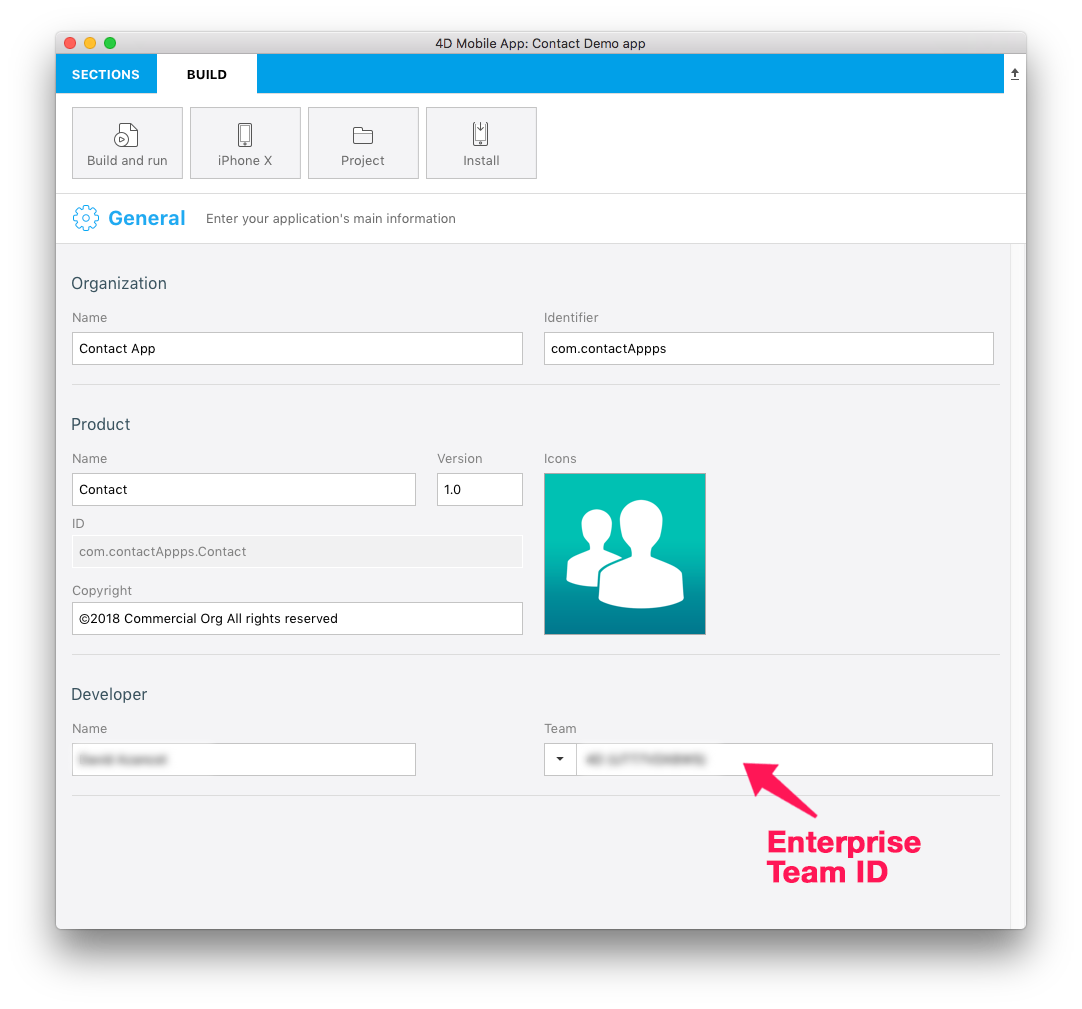
- Publishing: Enter your production URL (HTTPS is mandatory for deployment).
On the BUILD tab:
- Build and Run: Build your project.
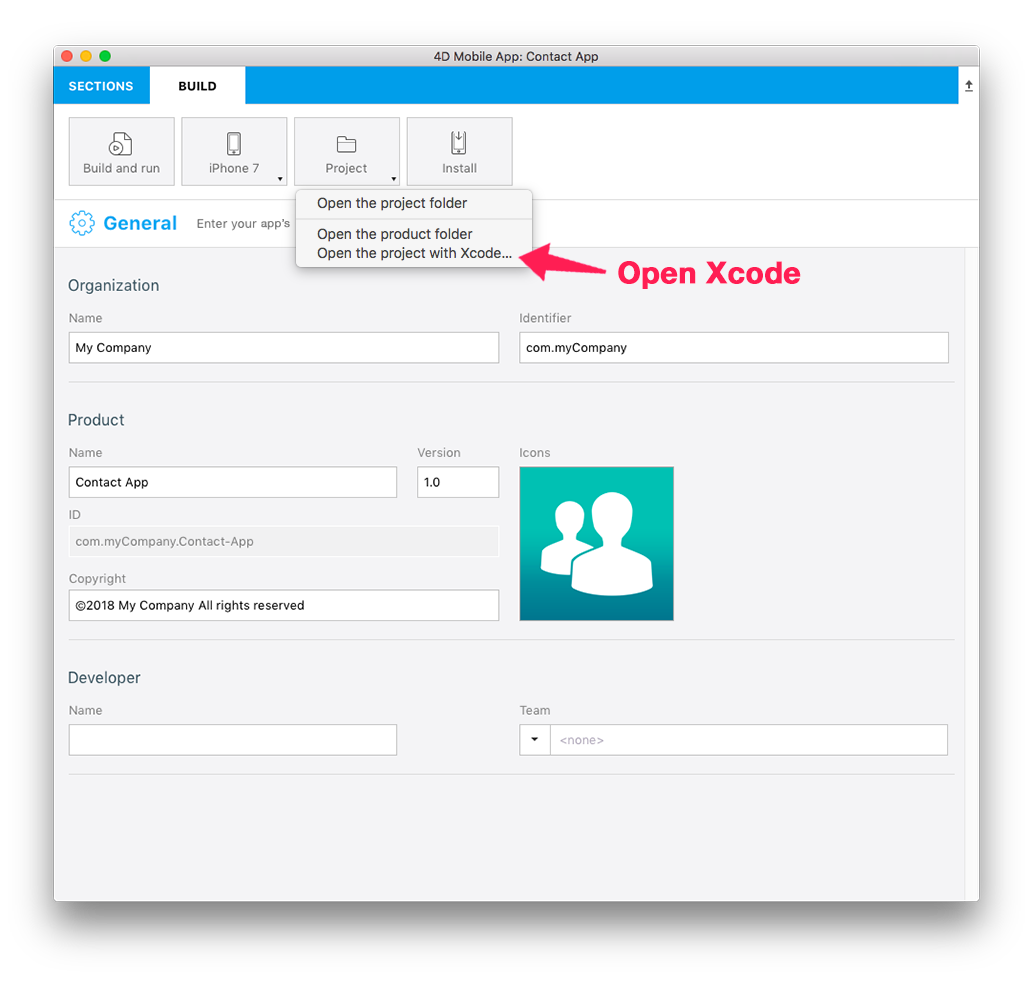
STEP 4. Open your project with Xcode
- From the 4D for iOS Project Editor's BUILD tab, click on Project > Open the project with Xcode
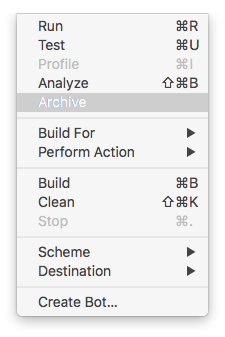
STEP 5. Archive your project from Xcode
- From Xcode, go to the simulator Menu and select Generic iOS Device
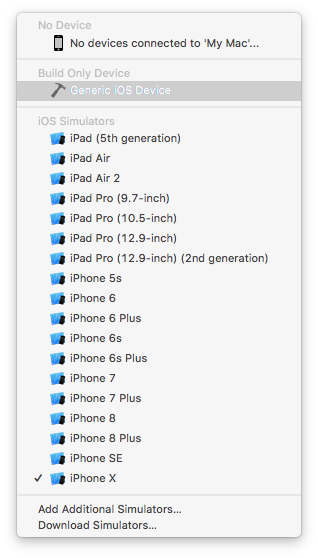
- Then from the menu, click on Product and select Archive
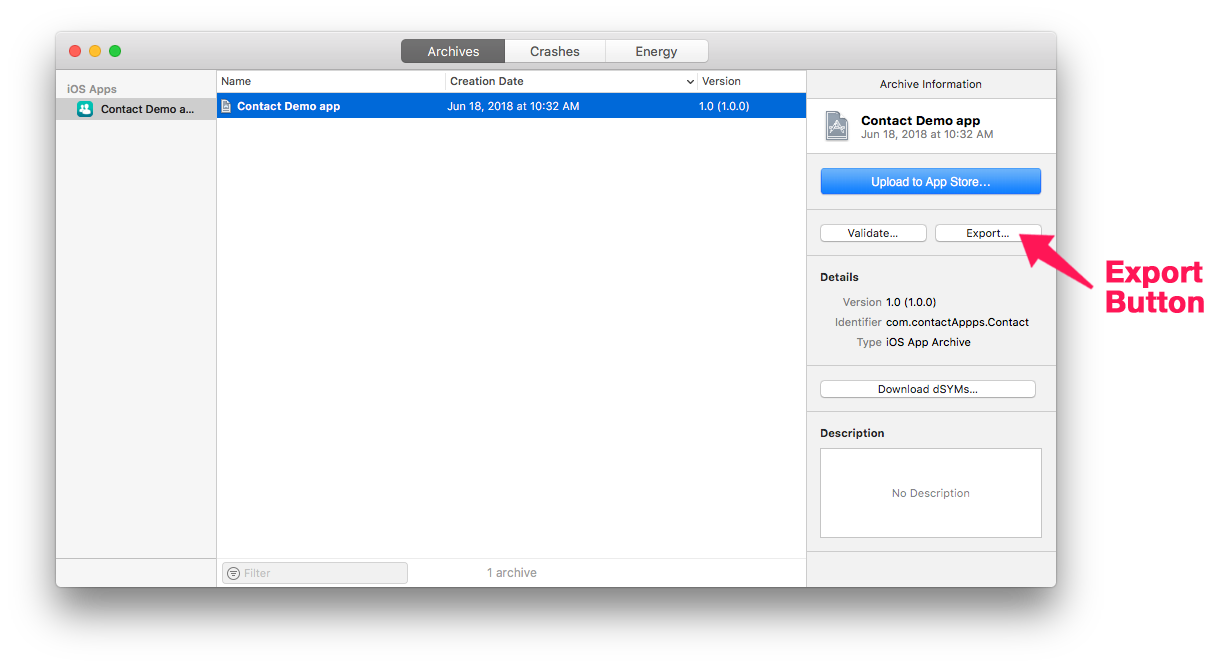
STEP 6. Export your project
At the end of the archive process, the Organizer window appears with the archive you just created
Click Export.
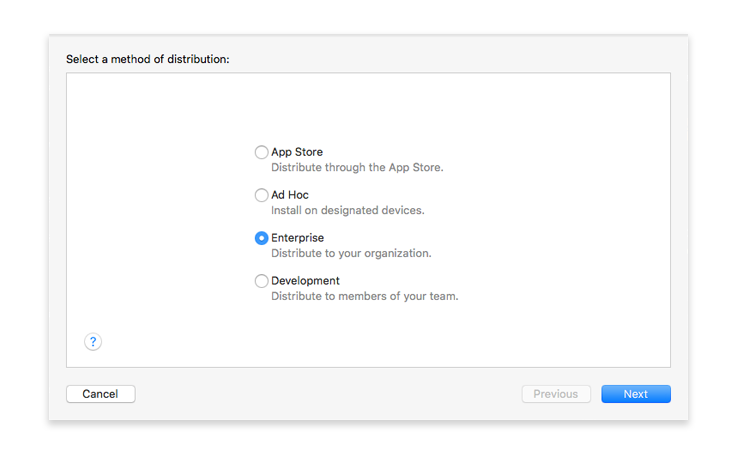
STEP 7. Select your distribution method
- Select Enterprise and click Next.
STEP 8. Select your Enterprise distribution options
- You can leave all option boxes checked.
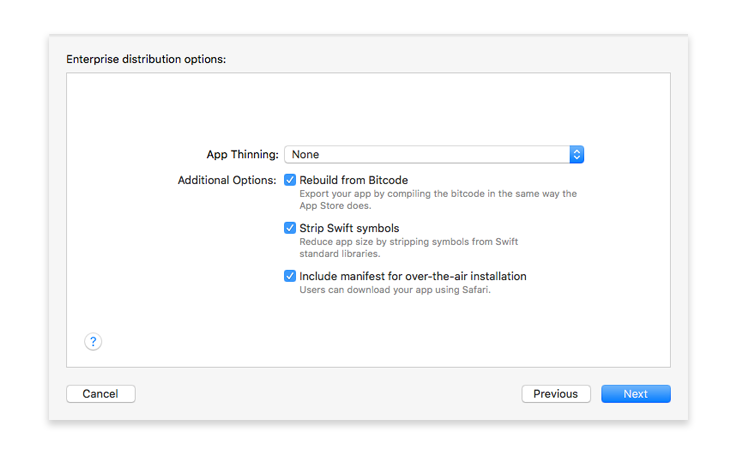
You can choose to let Xcode generate a manifest.plist file for you or generate it manually.
Click Next.
What is a manifest?
The manifest is an XML-based property list and should contain:
- URL : URL pointing to the .ipa file.
- display-image: URL pointing to a 57 x 57 px (72 x 72 px for iPad) PNG icon used during download and installation.
- full-size-image: URL pointing to a 512 x 512 px PNG image representing the iTunes app.
- bundle-identifier: Your app identifier string. You can get it from your app's .plist file.
- bundle-version: Your app's current bundle version string. You can get it from your app's .plist file.
- title: Your app's name.
Here is an example of a manifest.plist file :
<?xml version="1.0" encoding="UTF-8"?>
<!DOCTYPE plist PUBLIC "-//Apple//DTD PLIST 1.0//EN" "http://www.apple.com/DTDs/PropertyList-1.0.dtd">
<plist version="1.0">
<dict>
    <key>items</key>
    <array>
        <dict>
            <key>assets</key>
            <array>
                <dict>
                    <key>kind</key>
                    <string>software-package</string>
                    <key>url</key>
                    <string>https://...Contact.ipa</string>
                </dict>
                <dict>
                    <key>kind</key>
                    <string>display-image</string>
                    <key>url</key>
                    <string>https://...Contact_icon_57.png</string>
                </dict>
                <dict>
                    <key>kind</key>
                    <string>full-size-image</string>
                    <key>url</key>
                    <string>https://...Contact_icon_512.png</string>
                </dict>
            </array>
            <key>metadata</key>
            <dict>
                <key>bundle-identifier</key>
                <string>com.contactApp.ContactDemoapp</string>
                <key>bundle-version</key>
                <string>1.0</string>
                <key>kind</key>
                <string>software</string>
                <key>title</key>
                <string>Contact Demo app</string>
            </dict>
        </dict>
    </array>
</dict>
</plist>
STEP 9. Distribution manifest information
- We recommand letting Xcode do the job of entering your app URL as well as the icons URLs. You will, of course, have the option to change those URLs later.
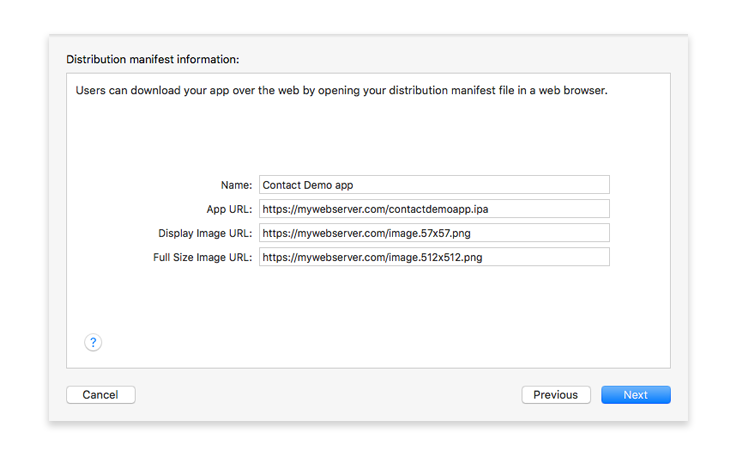
- Click Next.
STEP 10. Re-sign your application
- Let Xcode manage the Automatically manage signing option.
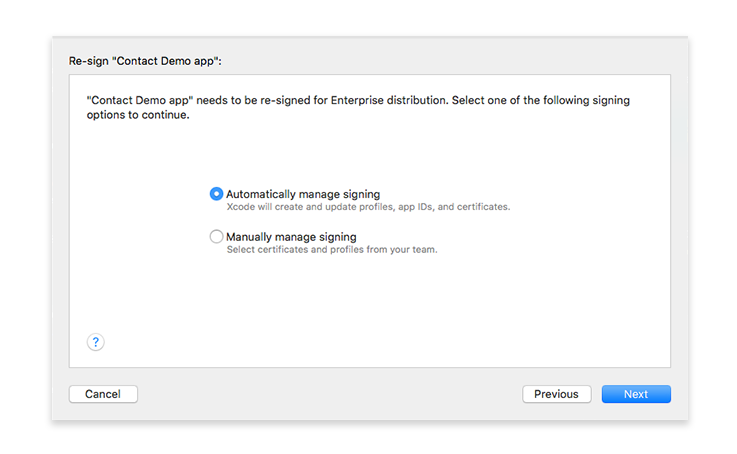
- Click Next.
STEP 11. Review your app.ipa content
- Here you can verify that your application identifier is correct as well as your Team ID.
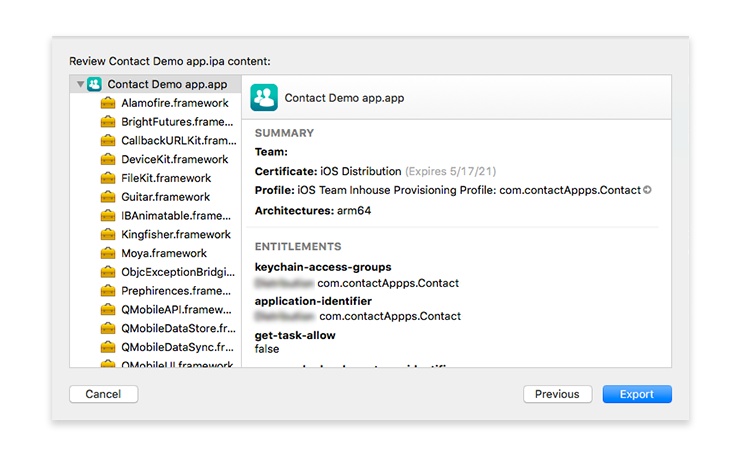
- Click on Export and select where to save your app folder on your computer.