Publishing
This page gives you access to your app's publishing settings and special mobile features:
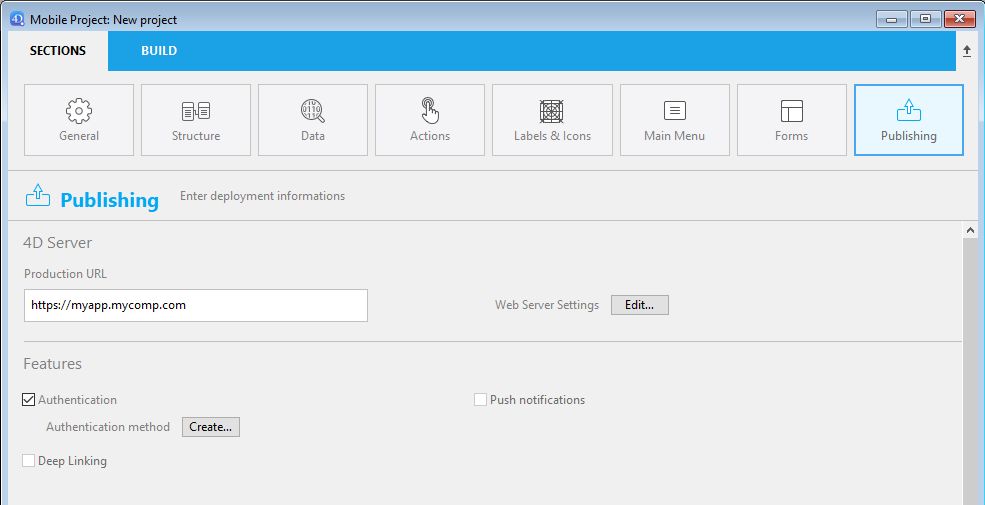
Production URL
URL of the Web Server on which mobile apps will connect to read and write data, in production context. You can enter any valid address, i.e.:
https://my.wesbsite.com
http://my.website.com:9200
www.website.com/mobile
During the development phase, you can leave this area empty and set the Data source to Current data file.
:::consejo
The user will be able to change the server url from the mobile device.
:::
Web Server Settings
The Edit... button opens the Web page of the 4D settings dialog box. Use this page to define the following settings to embed in the mobile app:
- Enable HTTP option and HTTP port.
- Enable HTTPS option and HTTPS port.
:::nota
If both HTTP and HTTPS are enabled, HTTP is used.
:::
Activating the HTTPS port requires that you installed a valid TLS certificate. You can create test certificates with 4D.
These settings are taken into account only if the production URL is defined. Otherwise, the local IP address is used.
:::nota
The Simulator always works locally (127.0.0.1 or localhost).
:::
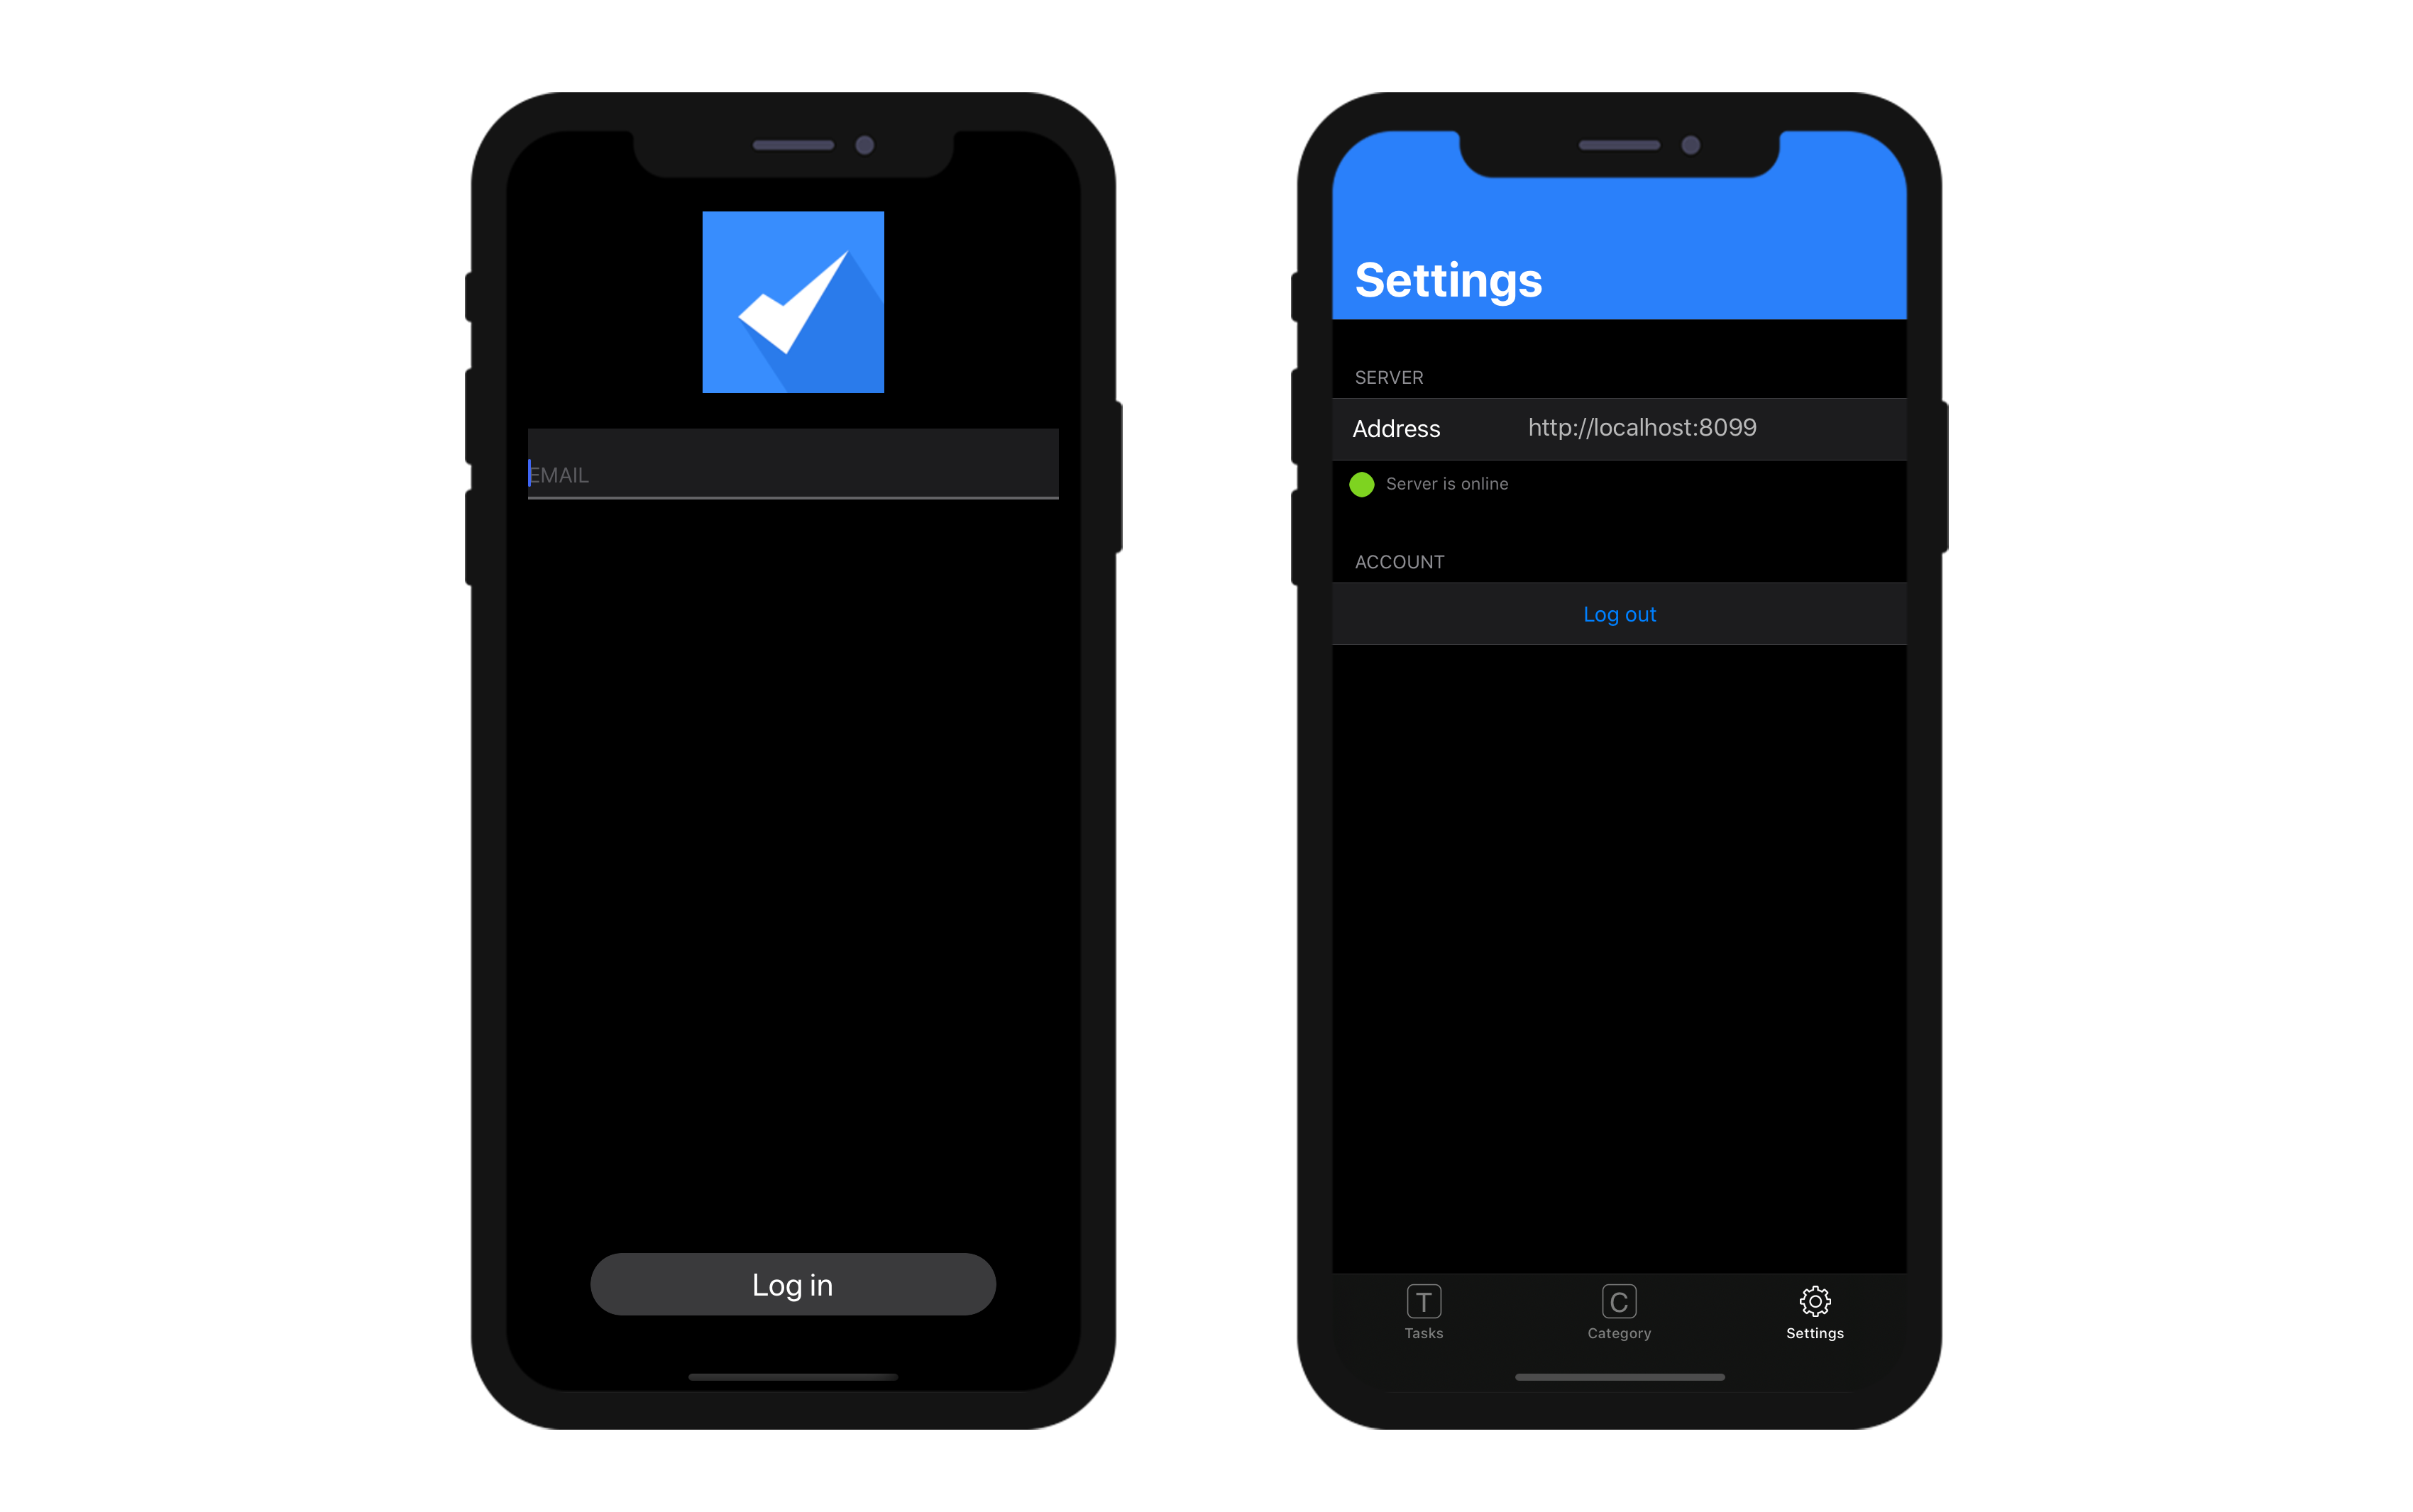
How it looks on a device
Settings screen
A Settings screen is available from the tab bar. You can also find it from the More tab if necessary (i.e., your app has more than four tables).
The Settings screen allows you to:
- Consult your remote URL and its current state
- Log out (if connected as an Authorized User)
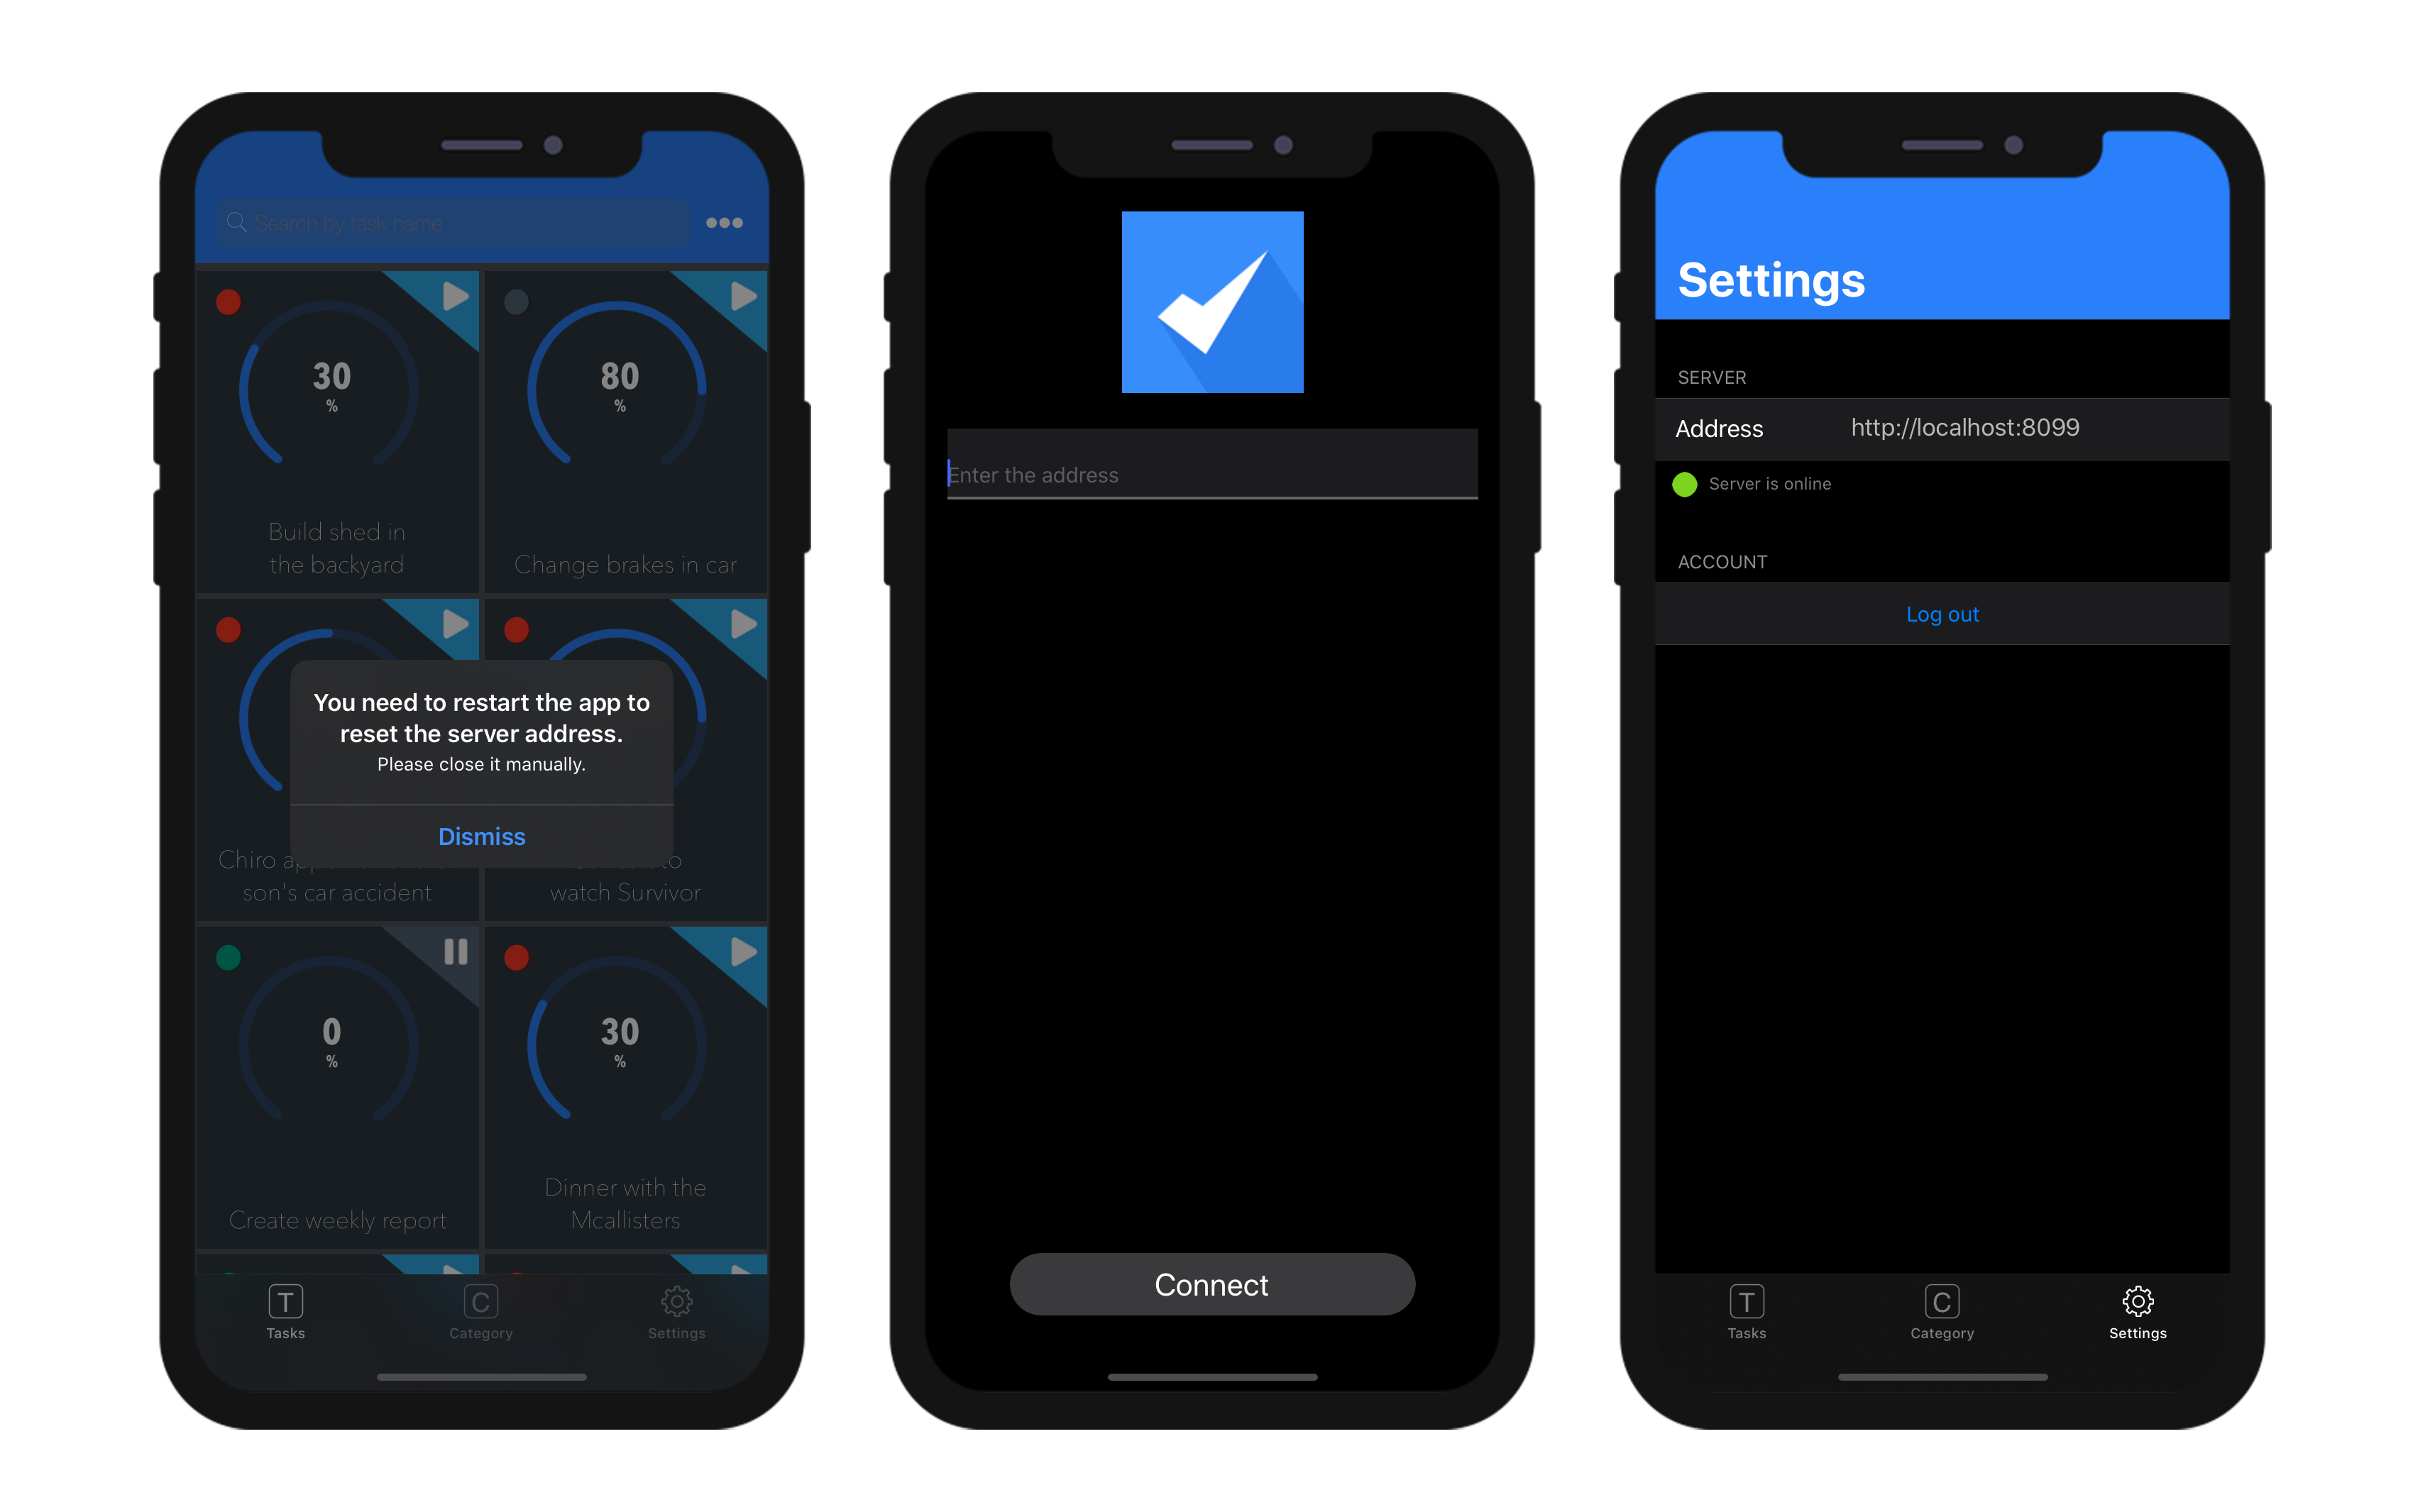
Modify remote url
You can easily update your remote url from iPhone Settings :
- Open your iPhone Settings
- Select the app you want the remote url to be updated
- Switch on the "Reset server address" option
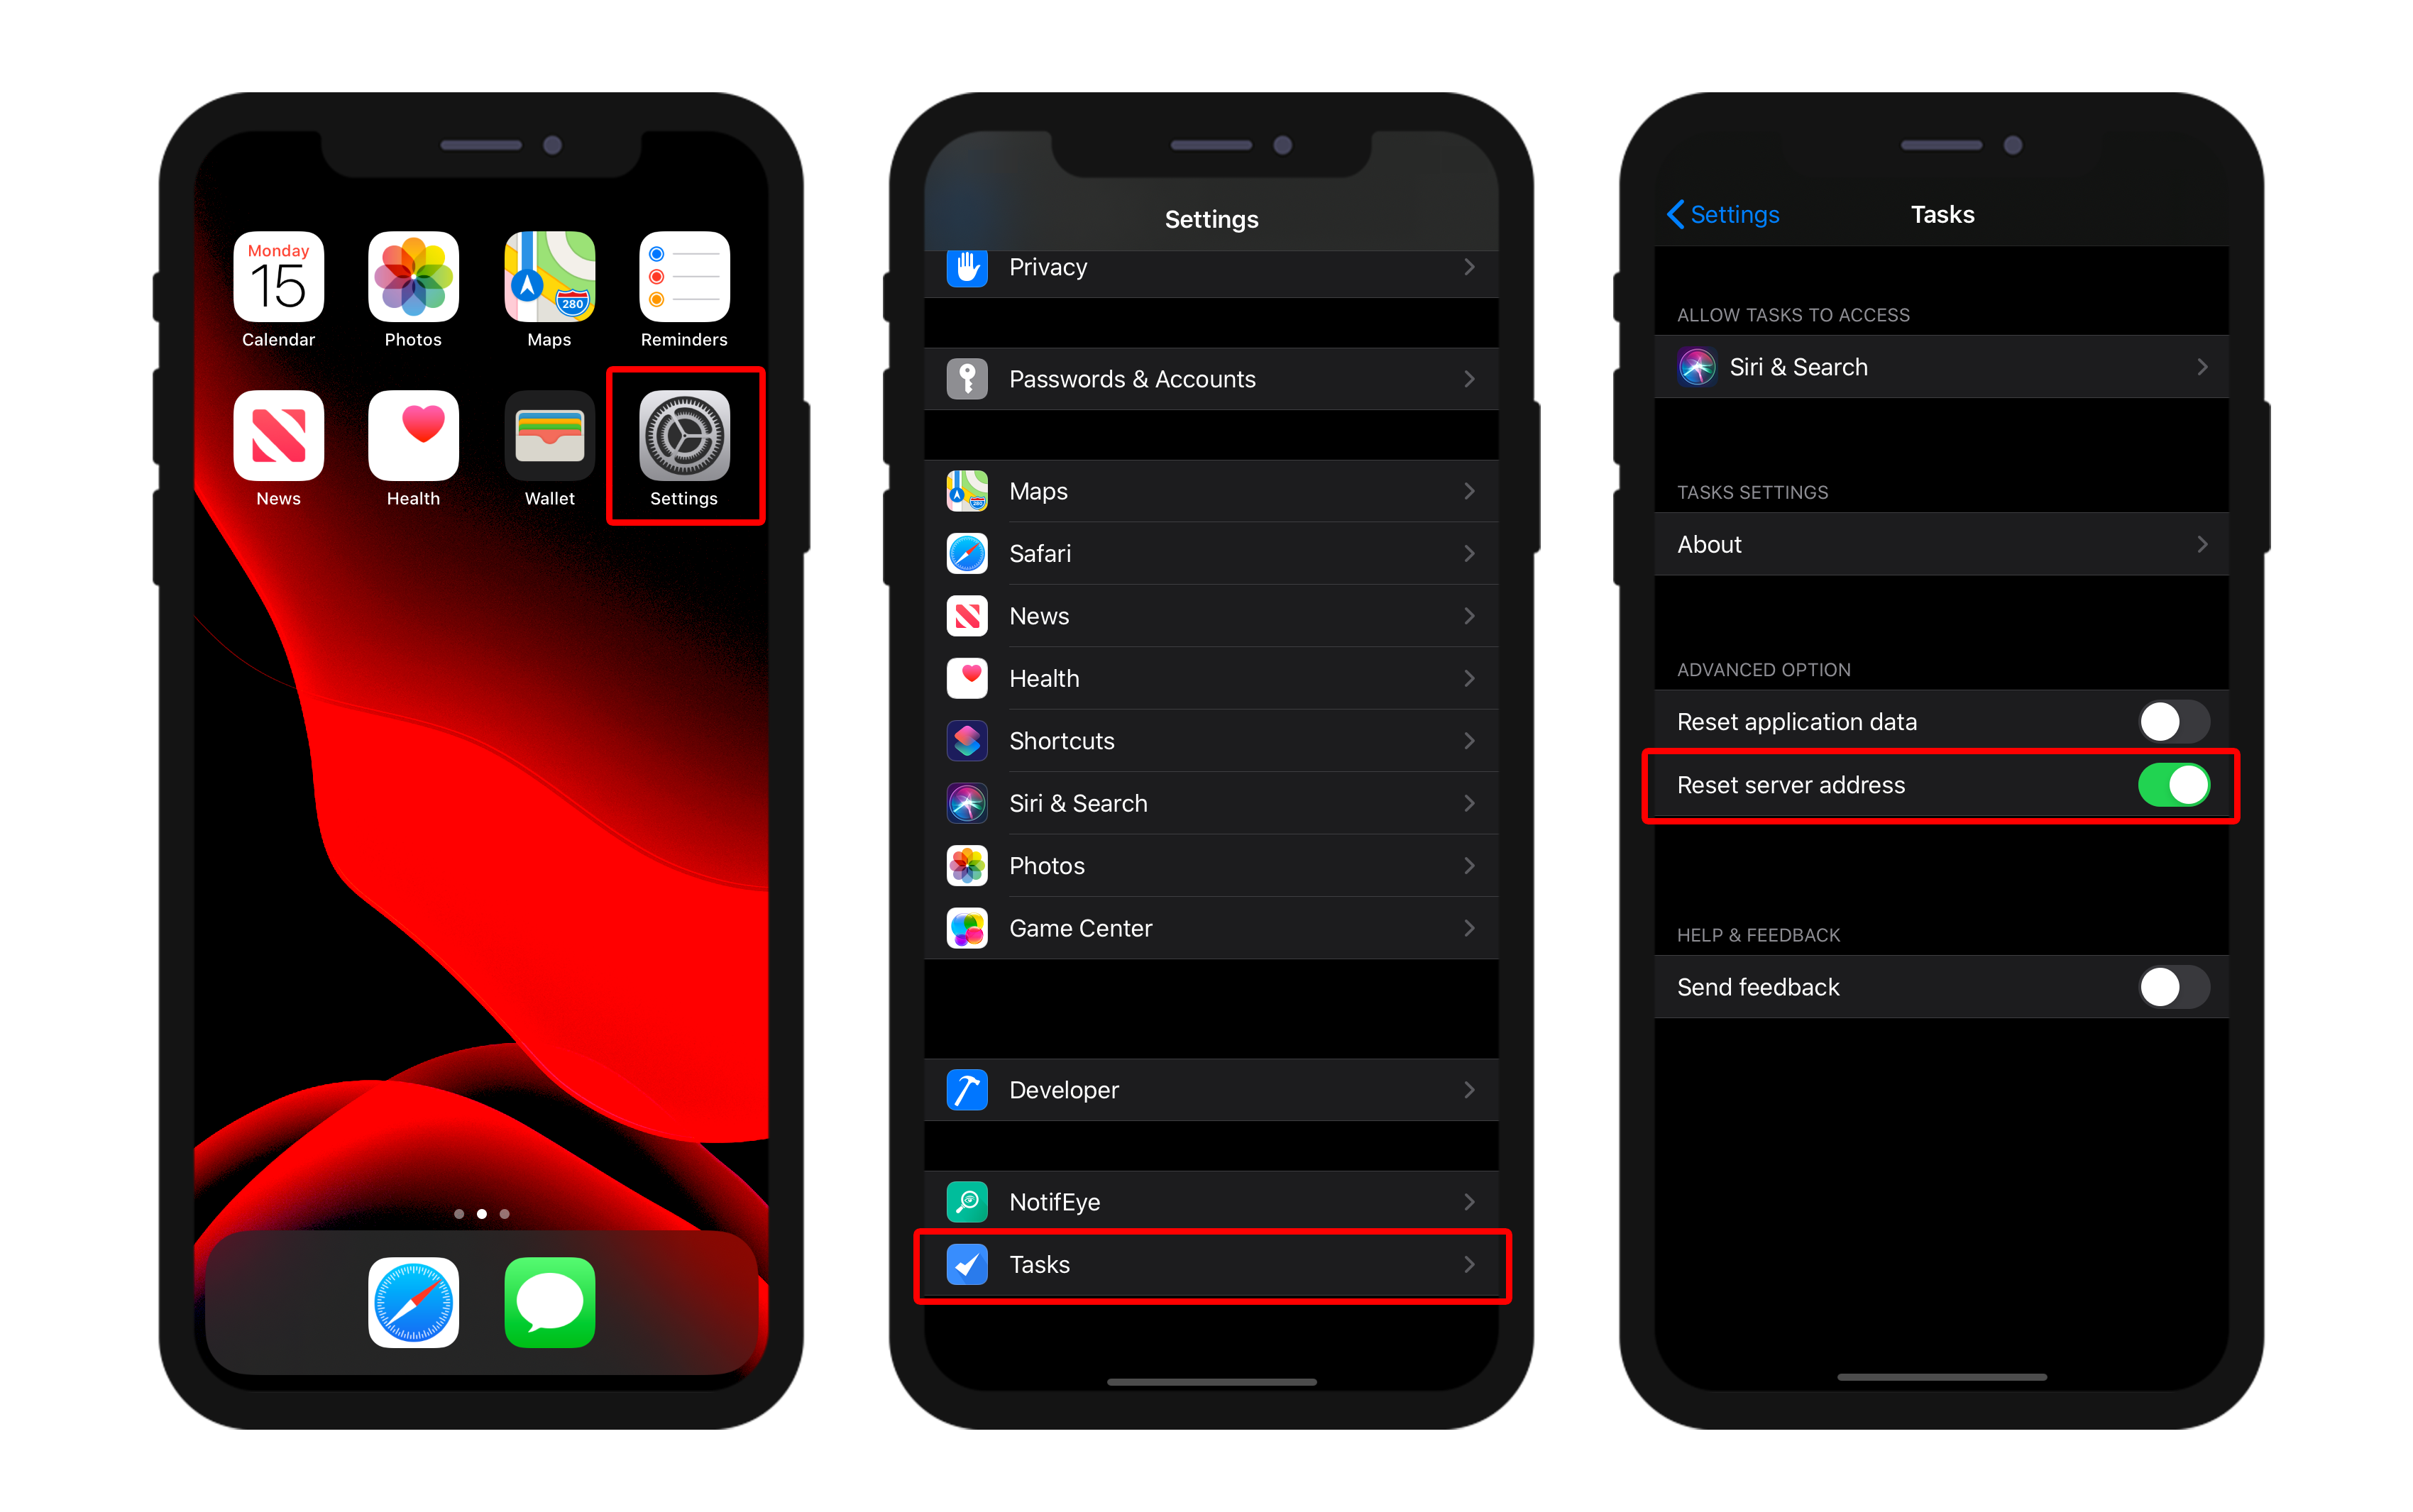
- Then restart your app to reset the server address
- And finally define the new remote url
Authentication
A mobile application can require that the user be authenticated or not.
- When authentication is not enabled, mobile users navigate in the application in Guest mode.
- Once authentication is enabled, mobile users are asked to login before connecting to the application.
In any cases, when a mobile user connects to the server, a user session is created.
Authentication option
To enable authentication, check the Authentication option:

When this option is selected, a Login form will be displayed to the user at startup. A Default login form is automatically selected in the Login Form menu (see below).
Authentication method
The Create.../Edit... button opens the On Mobile App Authentication database method in the 4D method editor. A default template code is provided, allowing all users to log as guests:
#DECLARE($request : Object)->$response : Object

/*
        $request = Informations provided by mobile application
        $response = Informations returned to mobile application
*/

$response:=New object

// Check user email
If ($request.email=Null)
    // No email means Guest mode - Allow connection
    $response.success:=True
Else
    // Authenticated mode - Allow or not the connection according to email or other device property
    $response.success:=True
End if

// Optional message to display on mobile App.
If ($response.success)
    $response.statusText:="You are successfully authenticated"
Else
    $response.statusText:="Sorry, you are not authorized to use this application."
End if
This method handles all incoming requests from the mobile apps and accepts or denies the connection. See the On Mobile App Authentication database method page for a full description of the method.
The most common and comfortable way to authenticate mobile users is to rely on email authentication. For a detailed example of email-based double authentication, please refer to this tutorial.
Login Form
The Login Form menu proposes all login forms available in the project, so that you can select the form to use. Default is a basic login form provided by the mobile editor. Its uses the user email as identifier.
You can also create or download custom login forms. Once installed, custom login forms are listed in the Login Form pop up. You can either create or download custom login forms. Custom login forms can be downloaded from the Login form Github gallery.
A custom login form is associated to a manifest.json file and (optionally) Swift or Kotlin source code. The custom login form files must be stored into a subfolder at the following location:
myProject/Resources/Mobile/Form/Login/
The manifest.json file contains the following attributes:
| Propiedad | Type | Descripción |
|---|---|---|
| "name" | texto | login form name |
| "type" | texto | set to "login" |
| Optional "capabilities" | object | to add information or options according to needs |
| "target" | text or collection | platform(s) supported by your login form |
Push notifications
This feature is documented in the Push notifications section.
Deep Linking
This feature is documented in the Deep linking section.