Começando
This "Getting started" section is geared at first-time users who want an overall overview on how to go from zero to a 4D website that handles data from the database. Vamos começar!
Exemplo Hello World
Vamos começar fazendo com que o servidor Web envie "Hello World" para o navegador. The most simple way to do this is to create a project, start the web server and write a small code that returns a text in the On Web Connection database method.
Iniciar o servidor Web
Para iniciar o servidor web 4D:
- Inicie sua aplicação 4D e crie um projeto 4D novo e vazio.
- In the Run menu, select Start Web Server.
É tudo! The web server is started (you can see that the menu item has become Stop Web Server). Está agora pronto para processar pedidos. Para o verificar, vamos apresentar a página inicial padrão.
Exibição da página inicial padrão
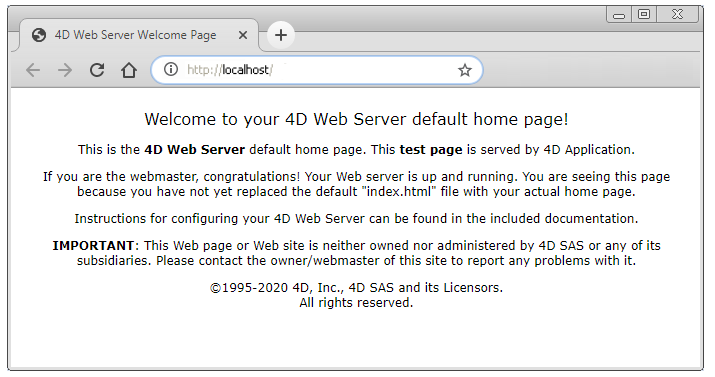
The 4D web server creates automatically a default index.html page in the default WebFolder root folder, created at the same level as the Project folder.
- Inicie um navegador da Web e conecte-se ao endereço IP do servidor da Web (a porta http padrão do servidor Web 4D é 80). If the web server and the browser are on the same machine, you can select Test Web Server in the Run menu.
É apresentada a página inicial predefinida:
Exibindo Hello World
-
Open the Explorer, display the Database Methods list and double-click on
On Web Connection. -
Digite o seguinte código:
Case of
 : ($1="/hello")
  WEB SEND TEXT("Hello World!")
 Else
  // Erro 404 por exemplo
End case
The On Web Connection database method is called for incoming requests and receives the target URL in the $1 parameter. Este código muito simples apenas envia o texto para o navegador.
- No seu browser, introduza o seguinte URL:
http://localhost/hello
O servidor Web processa o pedido e devolve-o:

Obter dados da base de dados
Agora vamos ver como é simples obter dados do banco de dados. Primeiro, vamos criar uma tabela e preenchê-la com alguns dados.
Create a basic database with, for example, a single table containing some records:


Exibição de dados em uma página
The most simple solution to display data is to call a template page containing tags.
- Usando qualquer editor de texto, crie um arquivo com as seguintes linhas:
<html>
<body>
<!--#4DCODE ALL RECORDS([Friends])-->
<!--#4DLOOP [Friends]-->
<!--#4DTEXT [Friends]lastName--> <!--#4DTEXT [Friends]firstName--><br/>
<!--#4DENDLOOP-->
</body>
</html>
- Name the file "friends.shtml" and save it in the WebFolder of your project.
- No seu browser, introduza o seguinte URL:
http://localhost/friends.shtml
.shtml pages are automatically processed by the web server. A sua página preenchida com dados é devolvida:

Pedido REST
If we not only want to display data, but to use it, we can use ORDA and the REST server. Thanks to the ORDA concept, the Friends table is automatically mapped to a dataclass and is available through REST.
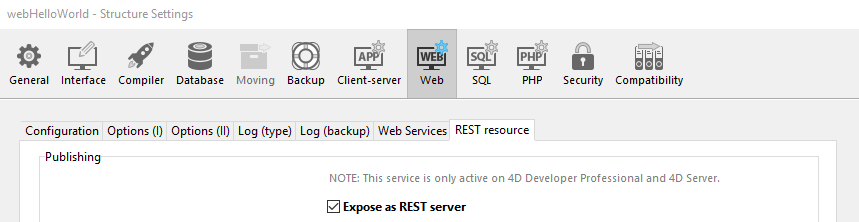
- We will use the REST server to access data: go the "Settings" dialog box, select the "Web/Rest resource" page, and check the Expose as REST server option.
- No seu browser, introduza o seguinte URL:
http://localhost/rest/$catalog
O servidor Web devolve os resultados em JSON:
{
 "__UNIQID": "3F1B6ACFFE12B64493629AD76011922D",
 "dataClasses": [
  {
   "name": "Friends",
   "uri": "/rest/$catalog/Friends",
   "dataURI": "/rest/Friends"
  }
 ]
}
You get the catalog, i.e. the list of exposed dataclasses and attributes in the datastore.
Você também pode obter qualquer dado.
- Introduzir o seguinte URL:
http://localhost/rest/Friends
The server returns the entities, i.e. the data, from the Friends dataclass:
{
 "__DATACLASS": "Friends",
 "__entityModel": "Friends",
 "__GlobalStamp": 0,
 "__COUNT": 4,
 "__FIRST": 0,
 "__ENTITIES": [
  {
   "__KEY": "1",
   "__TIMESTAMP": "2020-10-27T14:29:01.914Z",
   "__STAMP": 1,
   "ID": 1,
   "lastName": "Smith",
   "firstName": "John"
  },
  {
   "__KEY": "2",
   "__TIMESTAMP": "2020-10-27T14:29:16.035Z",
   "__STAMP": 1,
   "ID": 2,
   "lastName": "Brown",
   "firstName": "Danny"
  },
  {
   "__KEY": "3",
   "__TIMESTAMP": "2020-10-27T14:29:43.945Z",
   "__STAMP": 1,
   "ID": 3,
   "lastName": "Purple",
   "firstName": "Mark"
  },
  {
   "__KEY": "4",
   "__TIMESTAMP": "2020-10-27T14:34:58.457Z",
   "__STAMP": 1,
   "ID": 4,
   "lastName": "Dupont",
   "firstName": "Jenny"
  }
 ],
 "__SENT": 4
}
This very simple example shows how the web server interacts transparently with the REST server to return any requested data, provided it is exposed. In your web interfaces, you can easily bind the javascript or html code with returned data. See the built-in Web Data Explorer to have an example of sophisticated web interface bound to dataclasses.
Início de sessão e sessão
In the above sections, we get free access to the application from web requests. However, in the world of web applications, data access security is the first priority. When connecting to the 4D web server, users must be authentified and their navigation controlled.
Criação de uma tabela de usuários
The most simple and secured way to log a user on the 4D web server is based upon the following scenario:
- Users are stored in a dedicated, unexposed table (named WebUsers for example)
- The WebUsers table could be encrypted and stores the user login and a hash of their password.
- Criar uma tabela com alguns campos, por exemplo:

- Escreva e execute o seguinte código para criar um usuário:
var $webUser : cs.WebUsersEntity

$webUser:=ds.WebUsers.new()
$webUser.firstName:="John"
$webUser.lastName:="Doe"
// a senha seria inserida pelo usuário
$webUser.password:=Generate password hash("123")
$webUser.userId:="john@4d.com"
$webUser.save()
Autenticação de usuários
Para ser seguro de ponta a ponta, deve toda a conexão seja estabelecida via https.
-
Abra o Explorador e crie um método projeto chamado "login".
-
Escreva o seguinte código:
var $indexUserId; $indexPassword : Integer
var $userId; $password : Text
var $user; $info : Object
ARRAY TEXT($anames; 0)
ARRAY TEXT($avalues; 0)

// get values sent in the header of the request
WEB GET VARIABLES($anames; $avalues)

// look for header login fields
$indexUserId:=Find in array($anames; "userId")
$userId:=$avalues{$indexUserId}
$indexPassword:=Find in array($anames; "password")
$password:=$avalues{$indexPassword}

//look for a user with the entered name in the users table
$user:=ds.WebUsers.query("userId = :1"; $userId).first()

If ($user#Null) //a user was found
  //check the password
    If (Verify password hash($password; $user.password))
      //password ok, fill the session
        $info:=New object()
        $info.userName:=$user.firstName+" "+$user.lastName
        Session.setPrivileges($info)
         //You can use the user session to store any information
        WEB SEND TEXT("Welcome "+Session.userName)
    Else
        WEB SEND TEXT("Wrong user name or password.")
    End if
Else
    WEB SEND TEXT("Wrong user name or password.")
End if
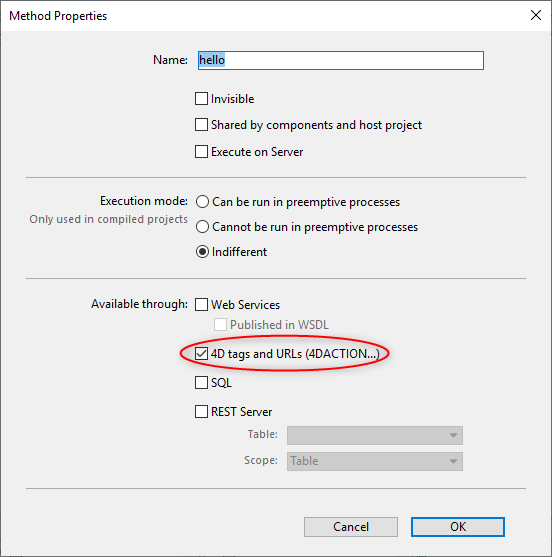
- Display the method properties by clicking on the [i] button in the code editor, check the
4D tags and URLs (4DACTION...)option and click OK.
- No seu browser, introduza o seguinte URL:
http://localhost/4DACTION/login/?userID=john@4d.com&password=123
Using such URLs is not recommended, it is only presented here to keep the example simple. A more realistic login request must be handled through a web form and a POST request. See this page for an example of form POST.
Em seguida, será registado para a sessão:

As credenciais incorretas serão rejeitadas:

Once a user is logged, you can handle the associated session using the WEB Get Current Session ID method. Ver a página Sessões de usuário.