Creating a webform
Creating a webform#
In 4D Web Studio, everything starts with a webform. A webform is a container that holds all the other components (buttons, grids, style boxes, etc.) of your application.
To create a webform:
- from the homepage, click Webform and enter a name for the new webform
- from the Webform Editor, click the New + tab > Webform
Webform Editor Interface#
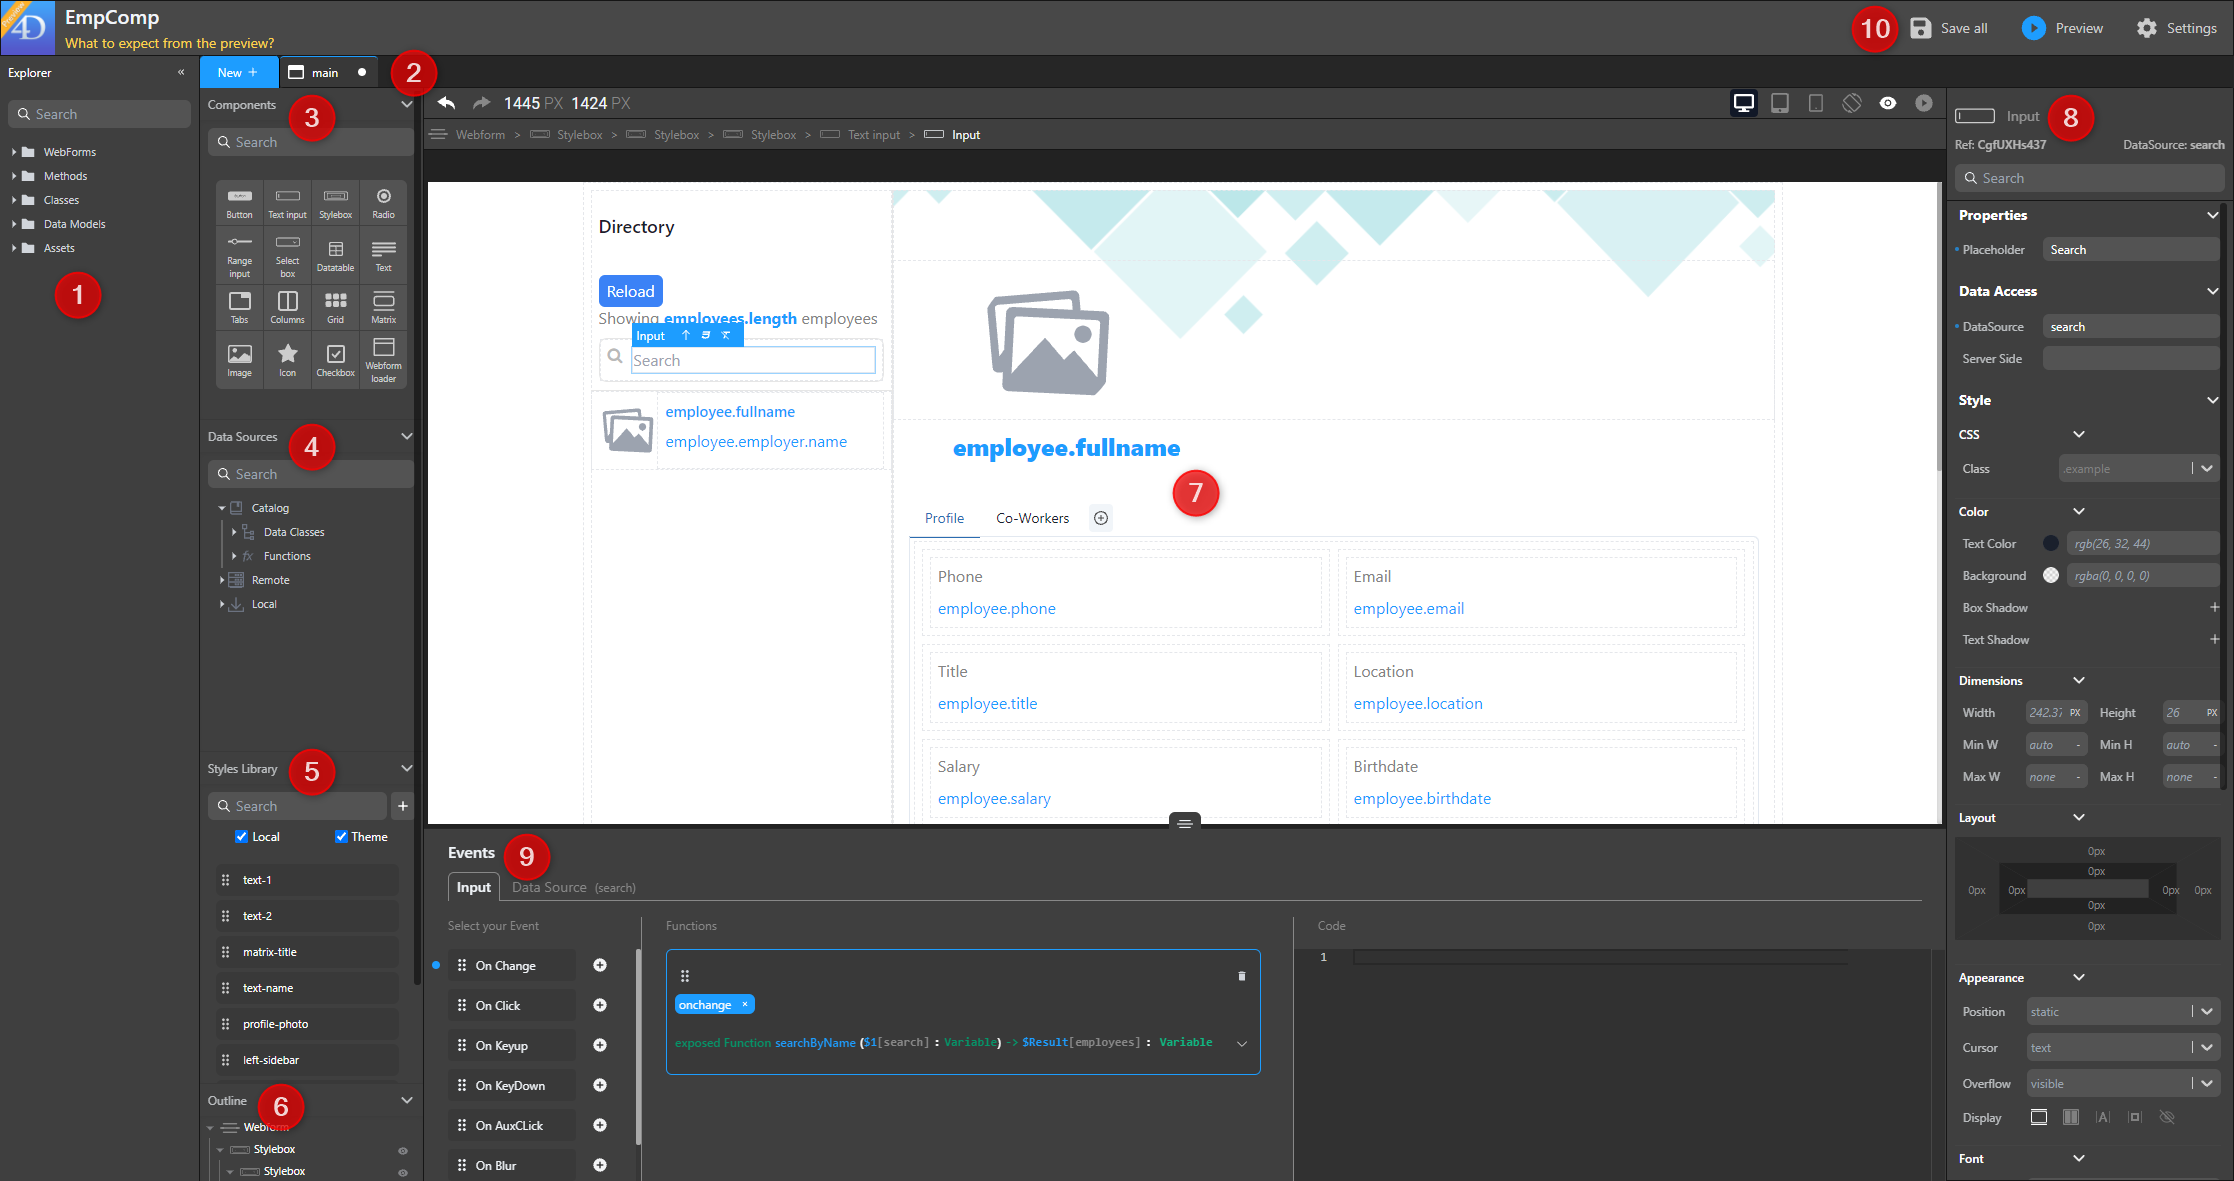
The Webform Editor provides several tools to customize the interface and contents of your application:

- Explorer: Displays your project's webforms, methods and classes.
- Tabs: They let you keep track of your currently opened elements, such as your forms and methods.
- Components: The building blocks of your application.
- Data Sources: Create and explore your datasources.
- Styles Library: Holds predefined and customized styles for your components.
- Outline: Presents the structure of your webform and allows you to navigate between the different elements.
- Canvas: This is where you combine your components, styles and datasources. You can drag and drop components onto your canvas, then drag and drop CSS classes and datasources onto these components, and preview or render your webforms.
- Properties panel: Allows for advanced style customization. Also allows binding datasources to components.
- Contextual configuration panel: Link events and methods to your components, edit CSS styles, etc.
- Header: Save and preview your work, access the Data Explorer as well as additional settings.
Uploading images#
With the Image component, you can upload an image to the studio and display it in your application. That image is available to all the webforms in your project and is stored in the Explorer panel > Assets > Images.