One to Many - Custom button
As we have seen with all previous tutorials, the 4D mobile editor give you the freedom to create lots of custom things.
As for custom templates or custom formatters, you can create custom Relation Buttons.
To that end, nothing more simple! You just have to drop your custom button in your custom template.
Let's get started by downloading the Starter project that includes:
- a database with its mobile project
- a standard Relation button
Include the button
The first step is including the button.xib button into your custom template so that 4D for iOS can use it.
To use the button, you just need to drop it in the YourDatabase.4dbase/Resources/Mobile/form/detail/BlackVisual Contact folder.

The first step is done!
Modify the button
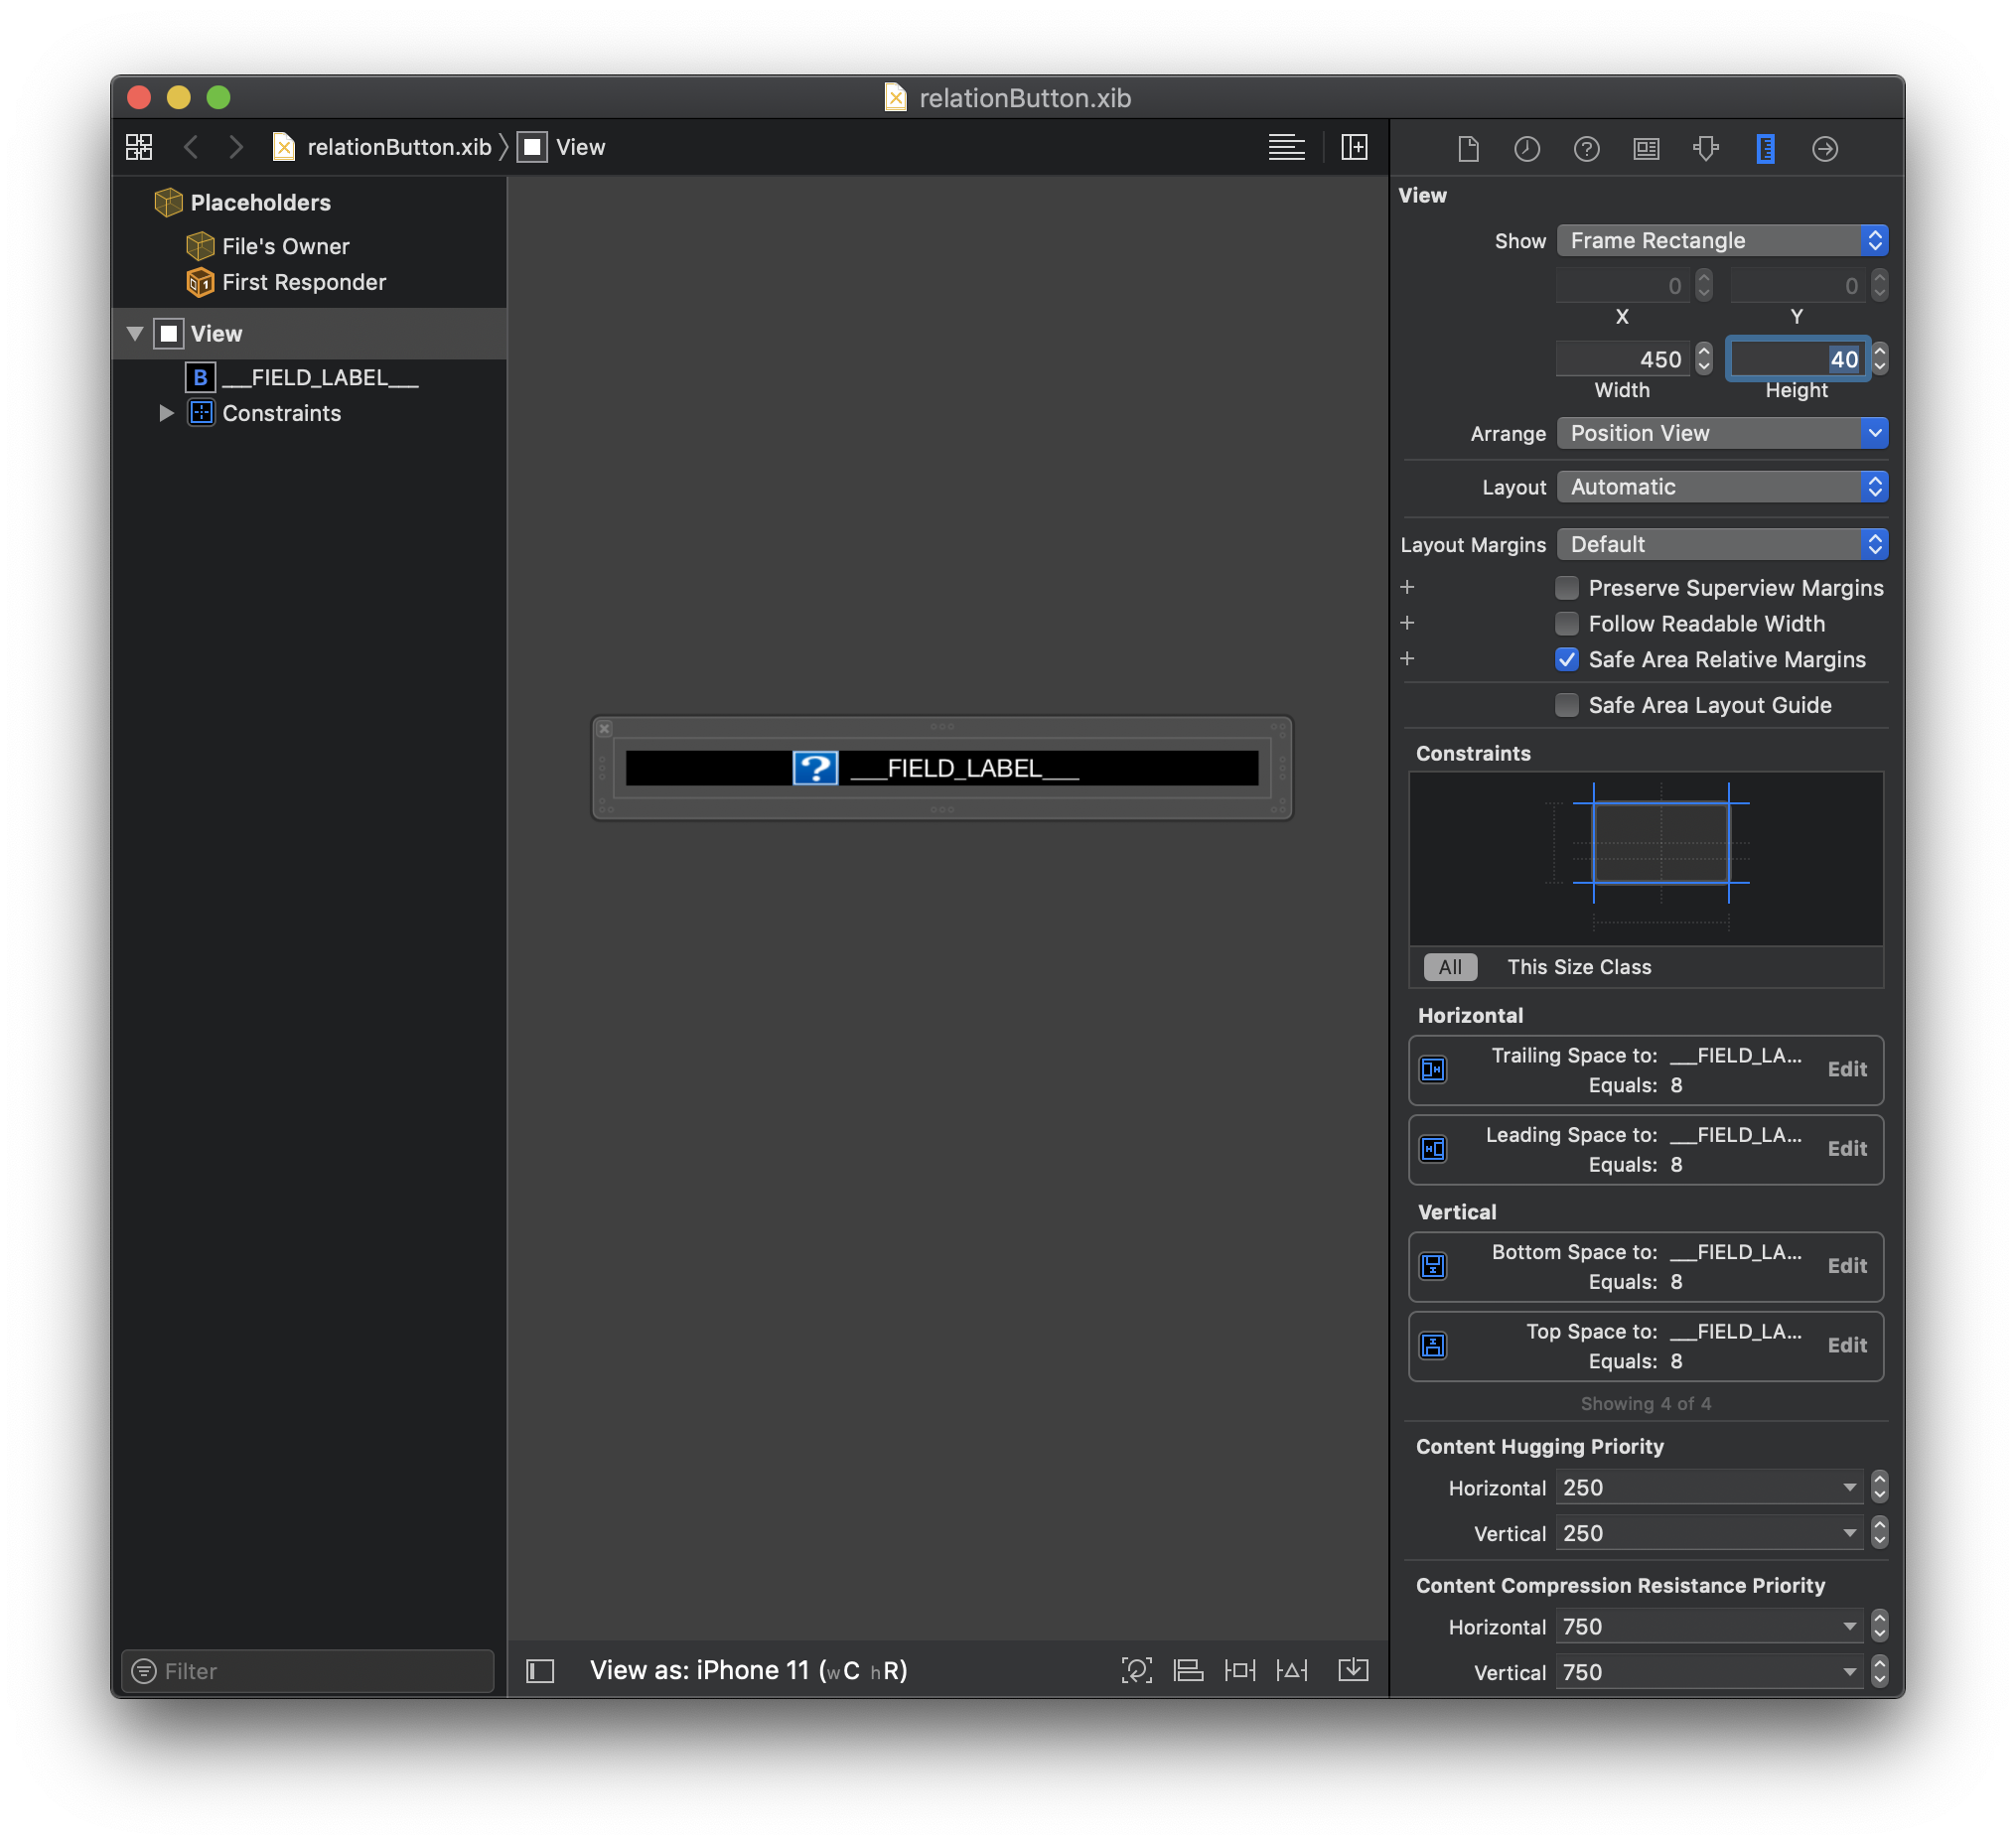
Open the .xib file with Xcode.
It should look like this:
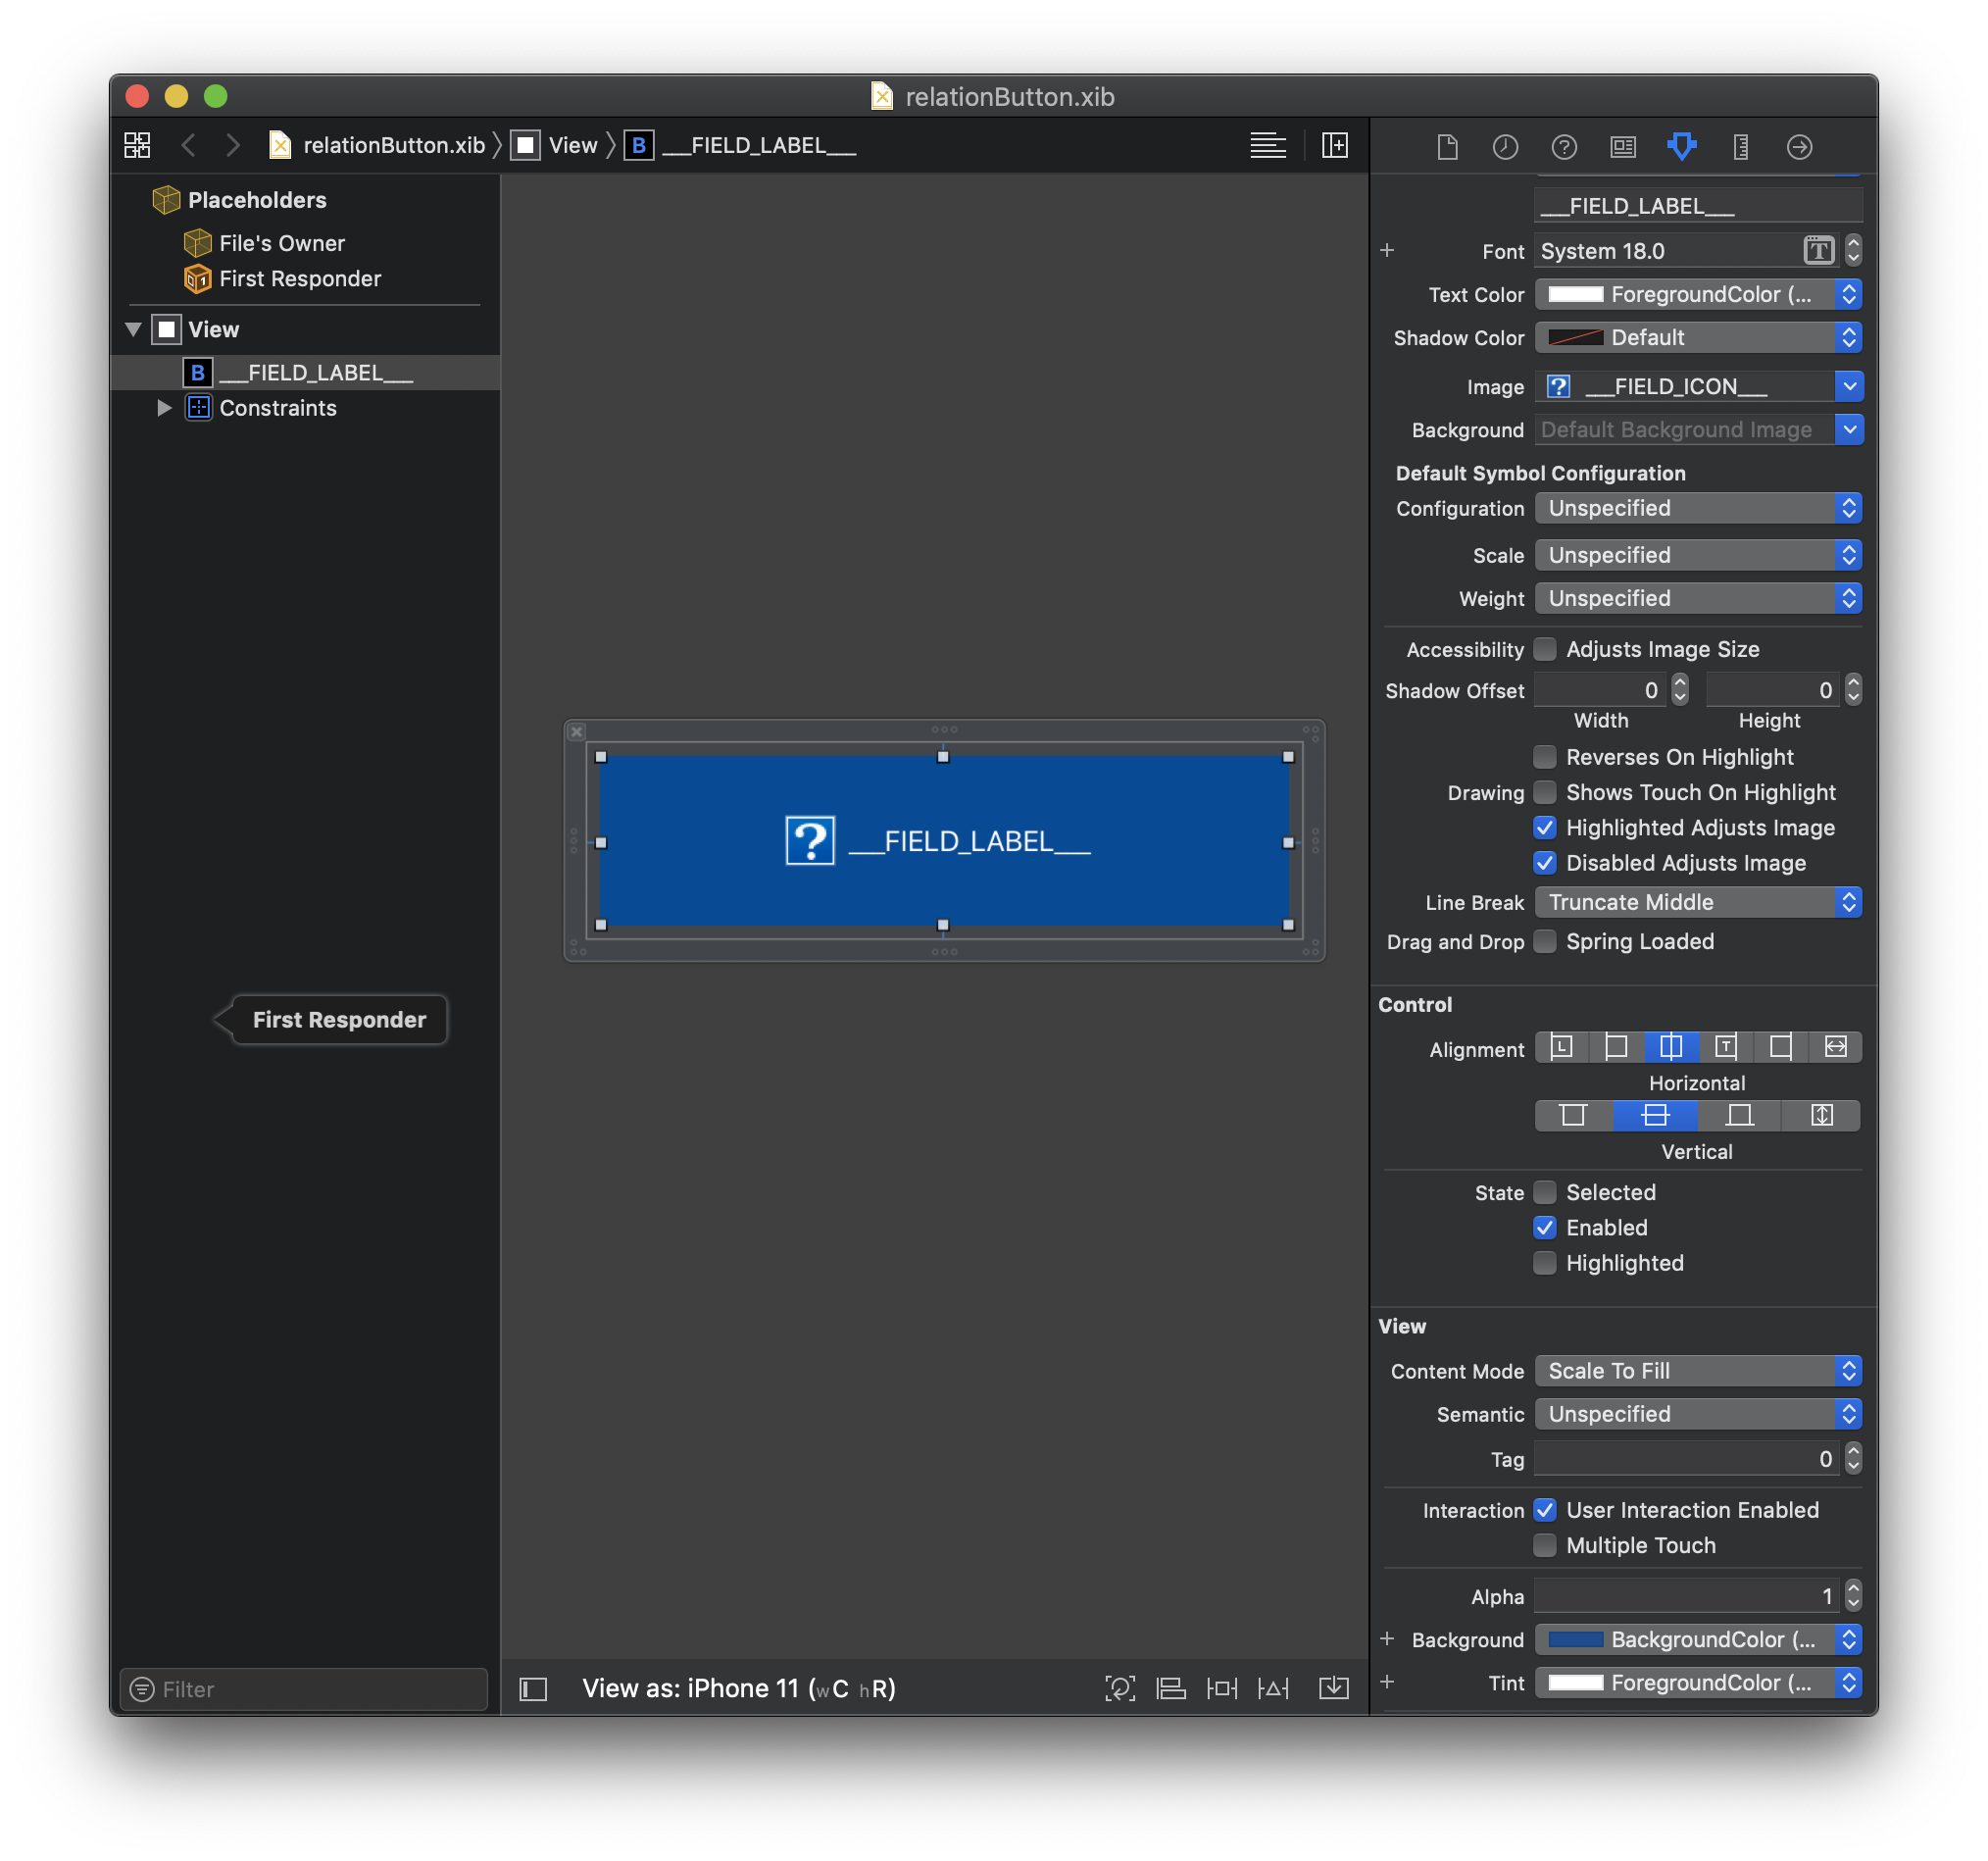
And from the attribute inspector, you can change for example:
- colors and fonts
- the button style
- the button size...
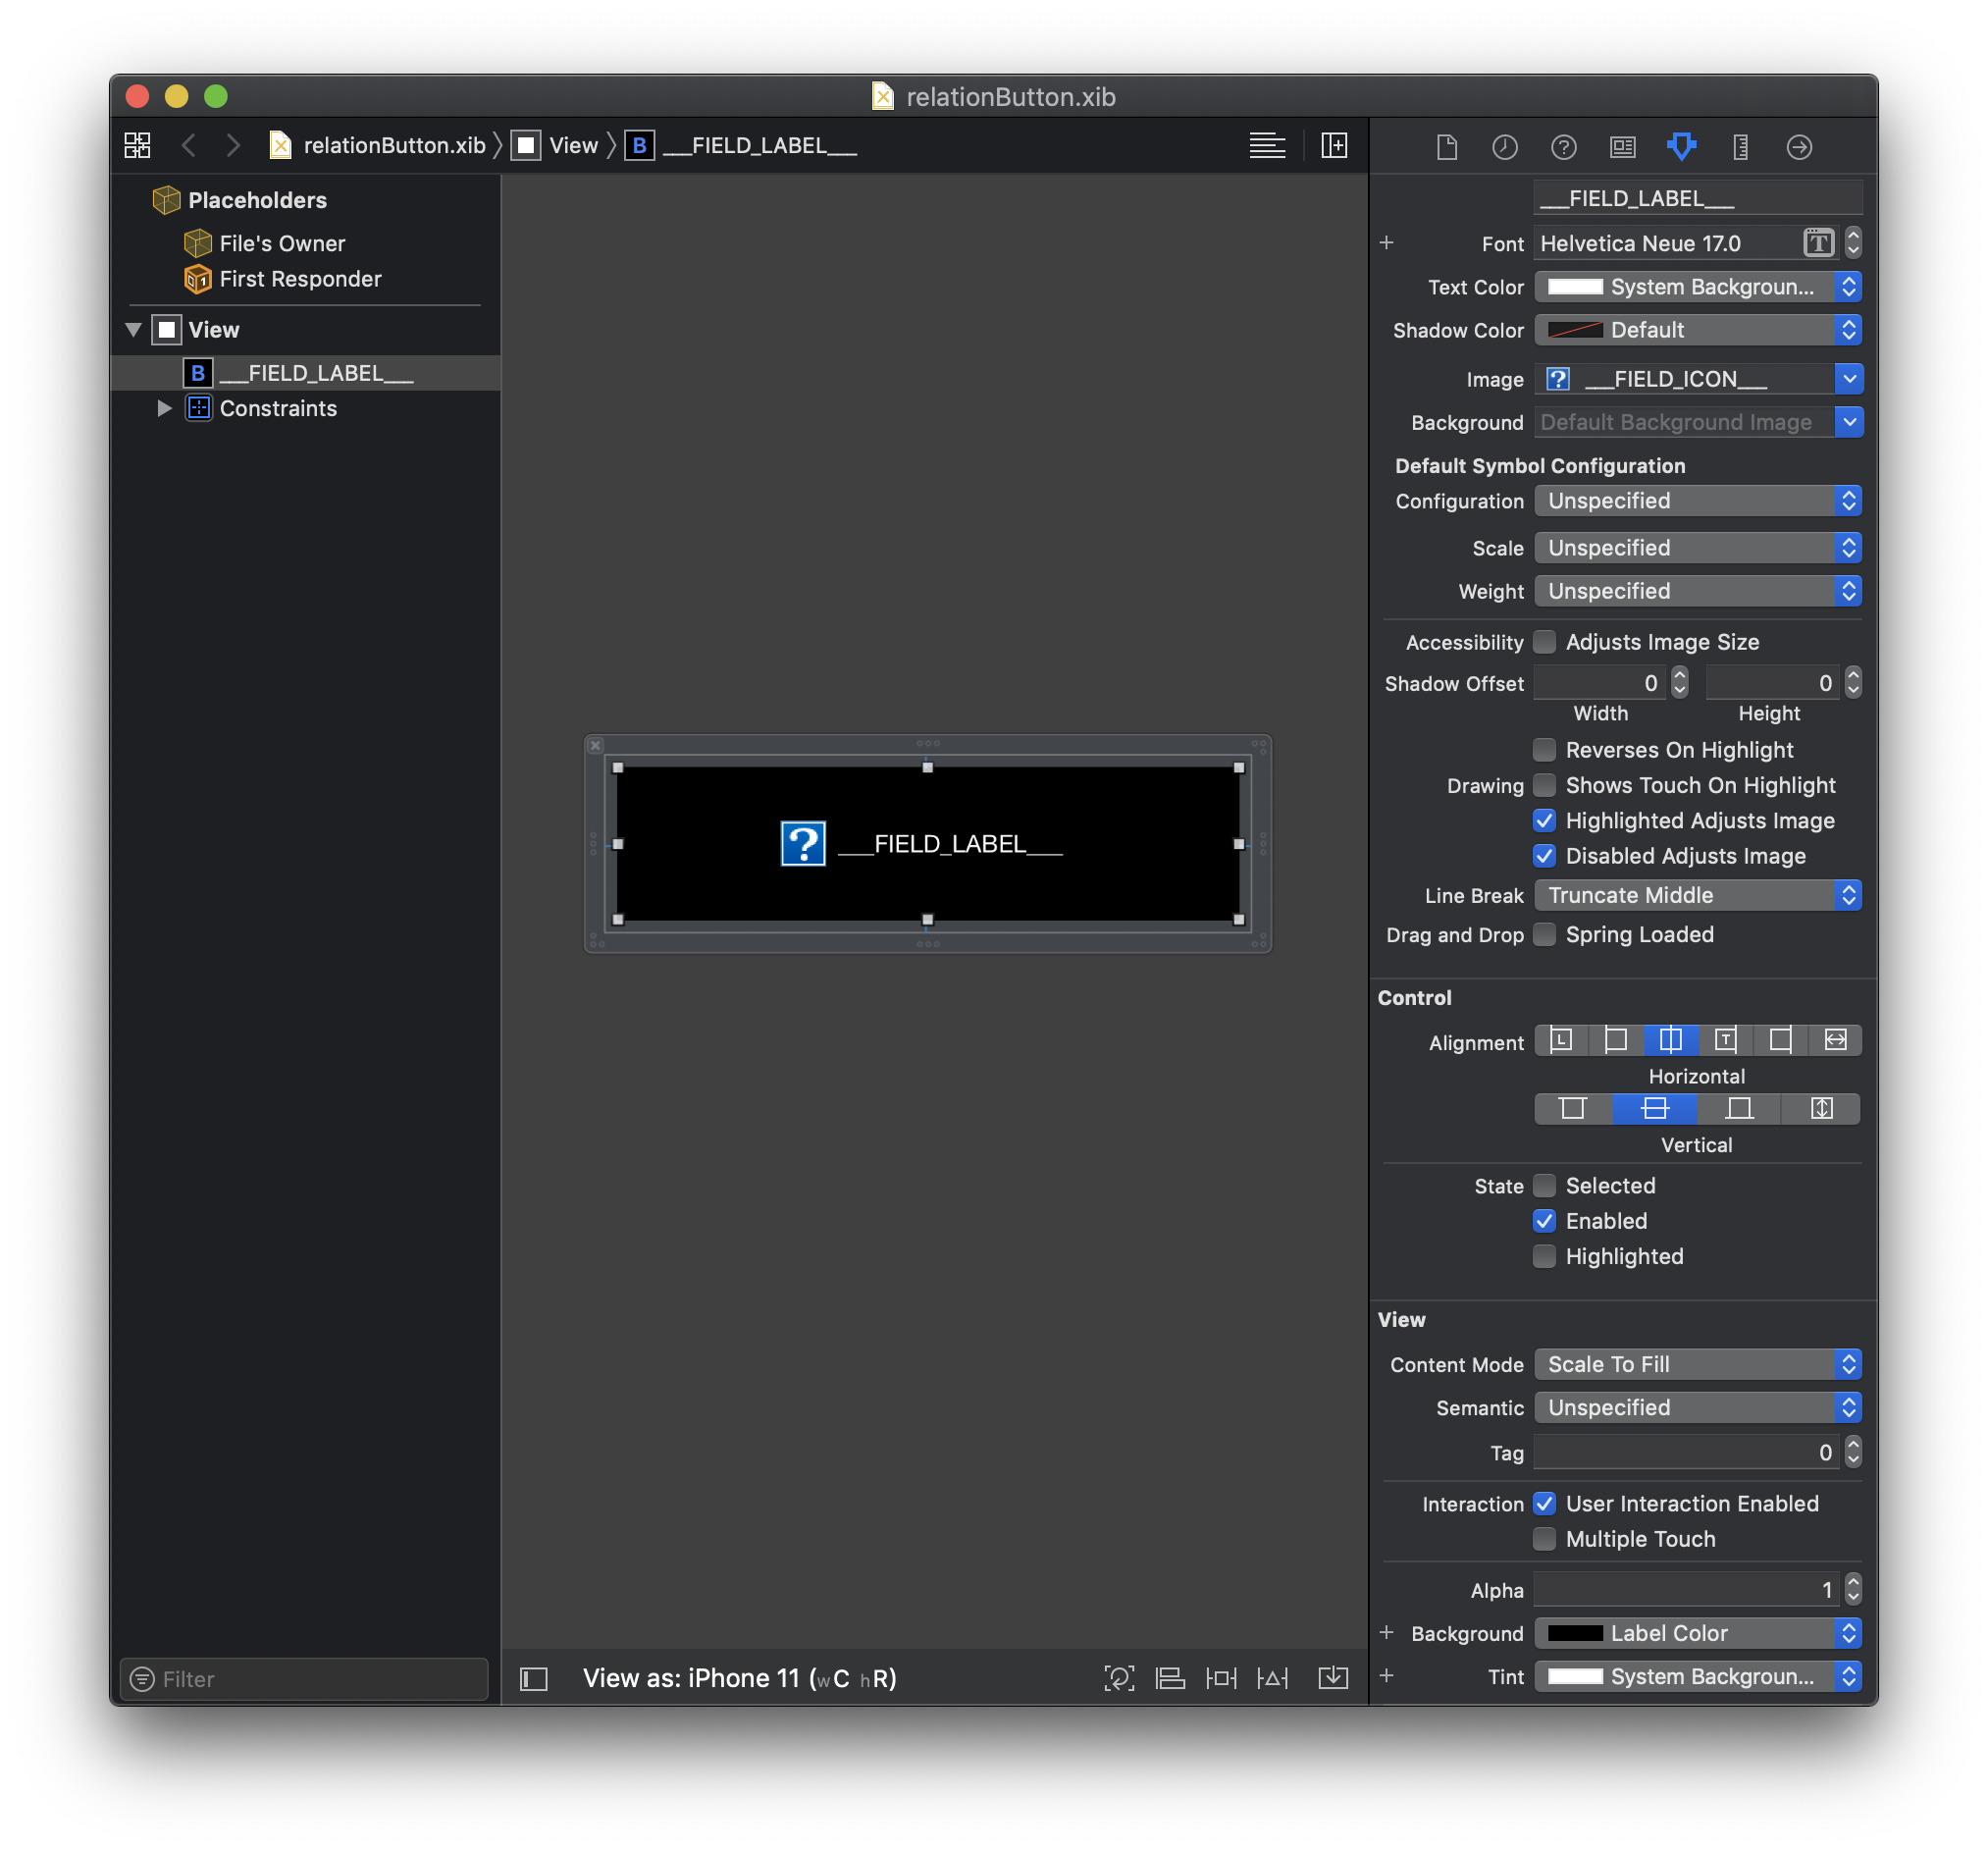
Let's change the button color and the button label font!
Custom colors and fonts
Select the button and change the color and font from the attribute inspector.
For the background, let's select the Label Color to have the best contrast in Light and Dark mode.
For the font color let's put a System background color with a helvetica Neue Medium font.
Finally, don't forget to select the System background color Tint to apply this color to the button icon.
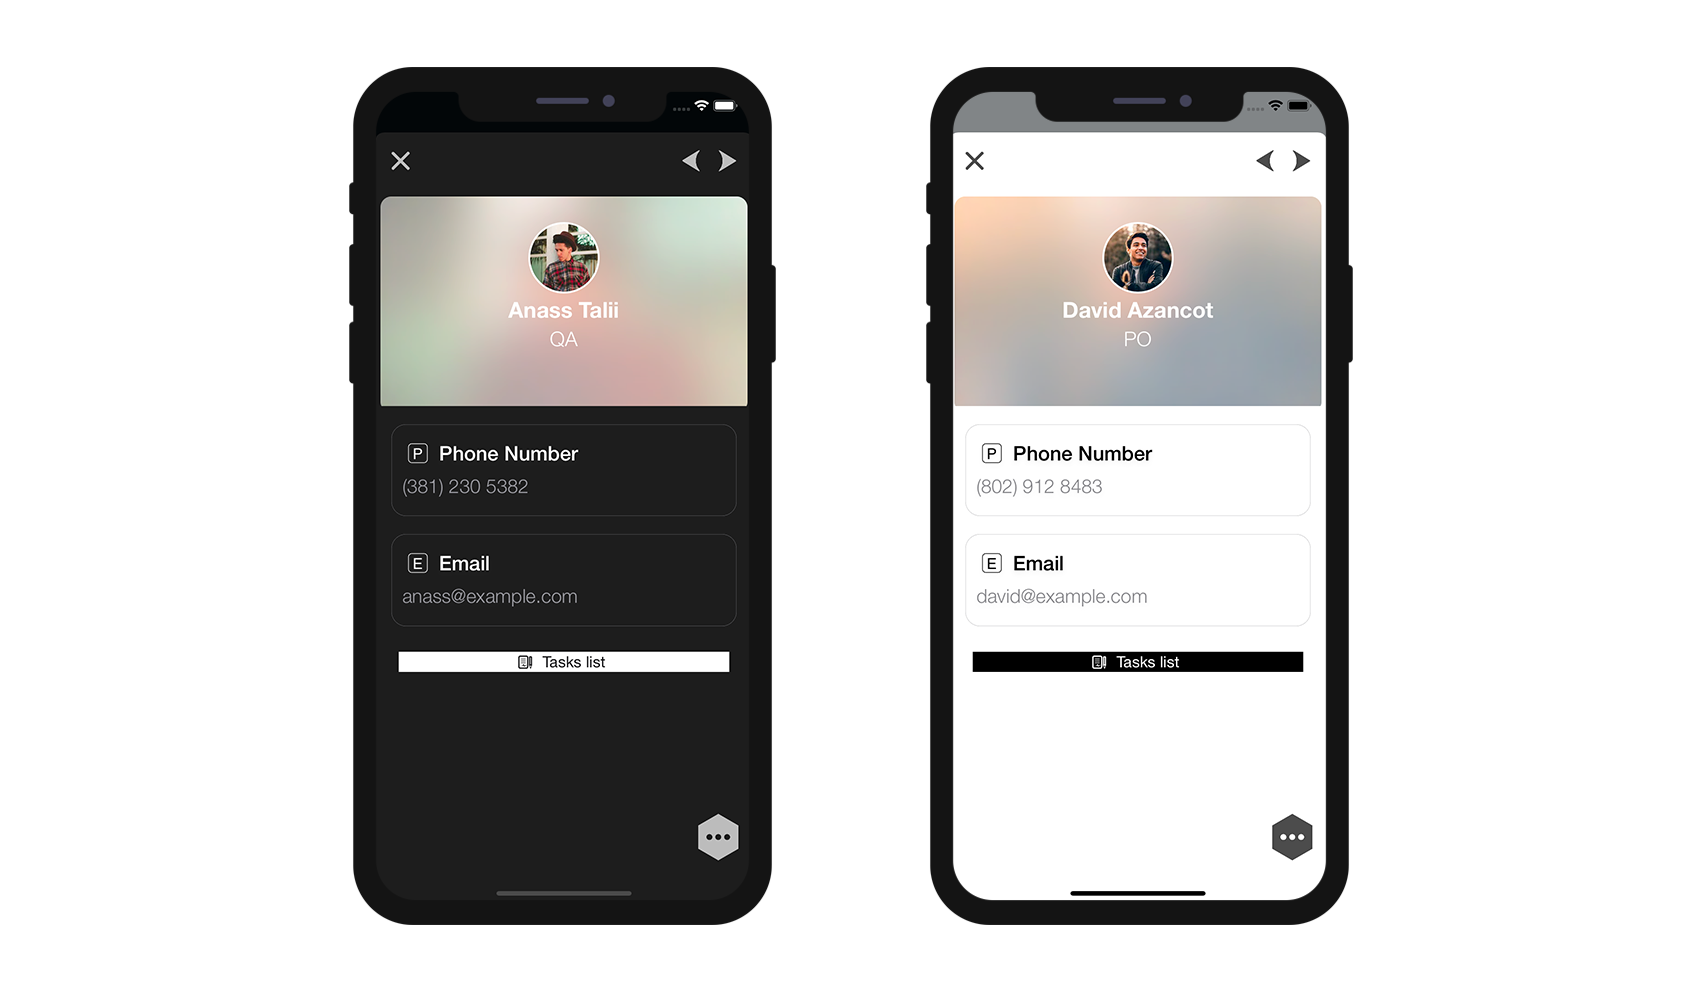
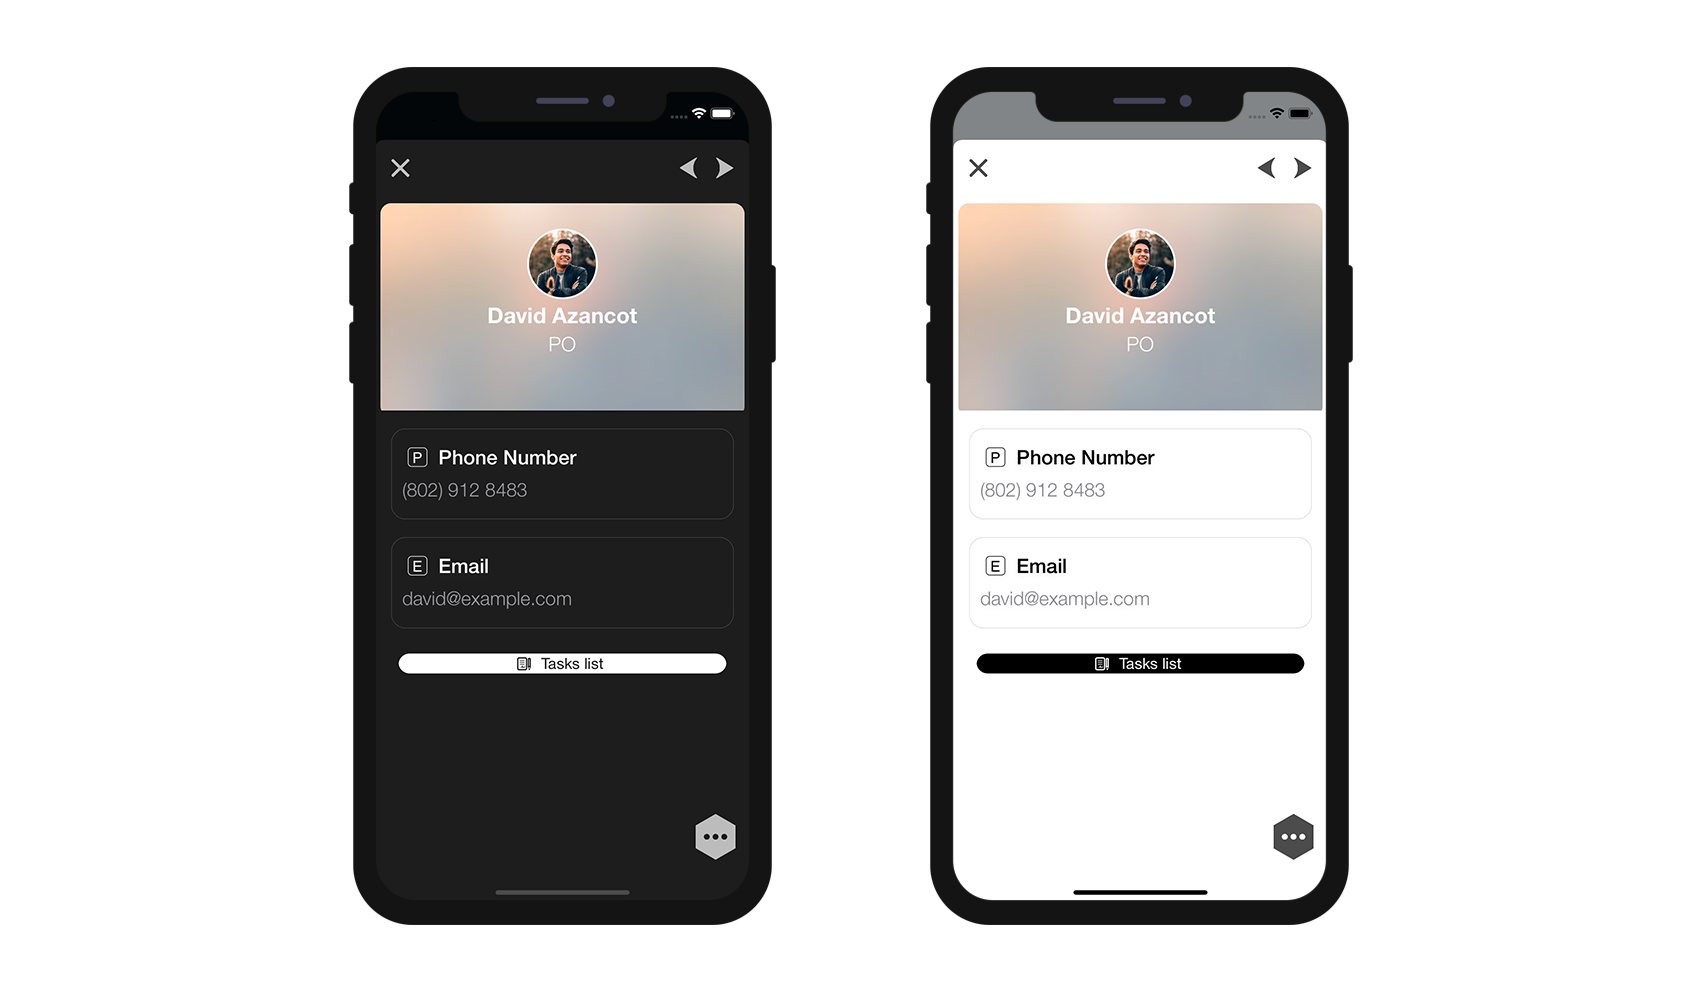
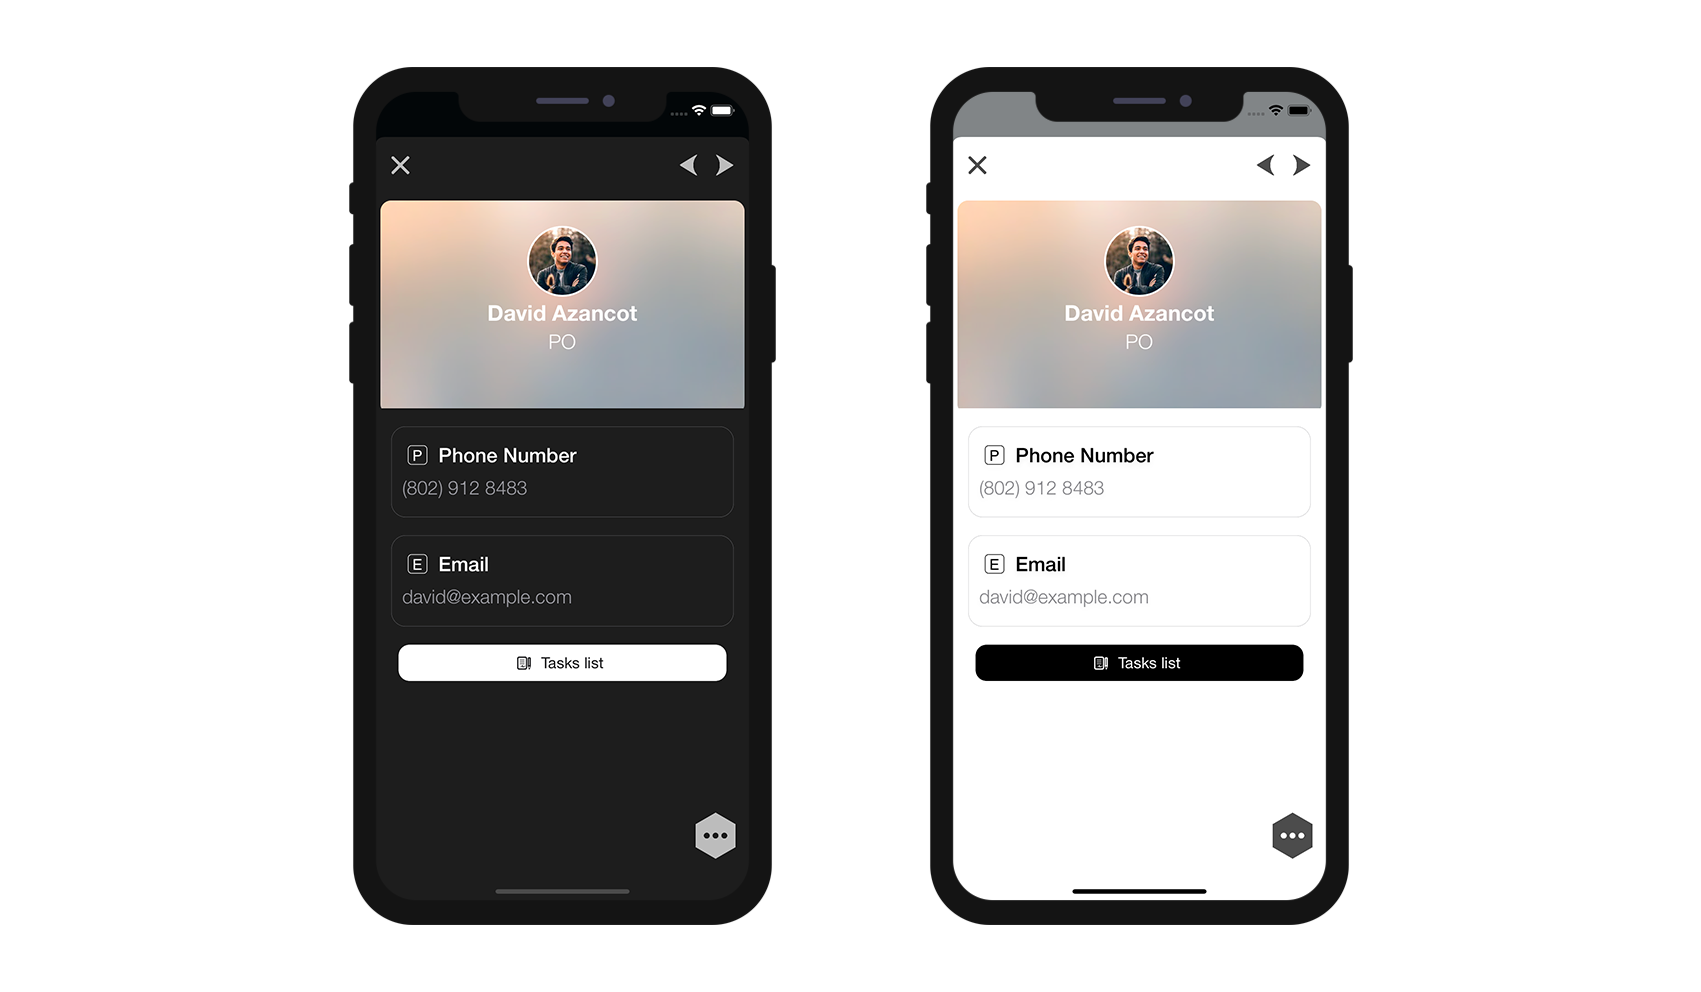
You should get this result in your Simulator in Dark and in Light mode:
Button round corners
Let's add some round corners to the relationButton!
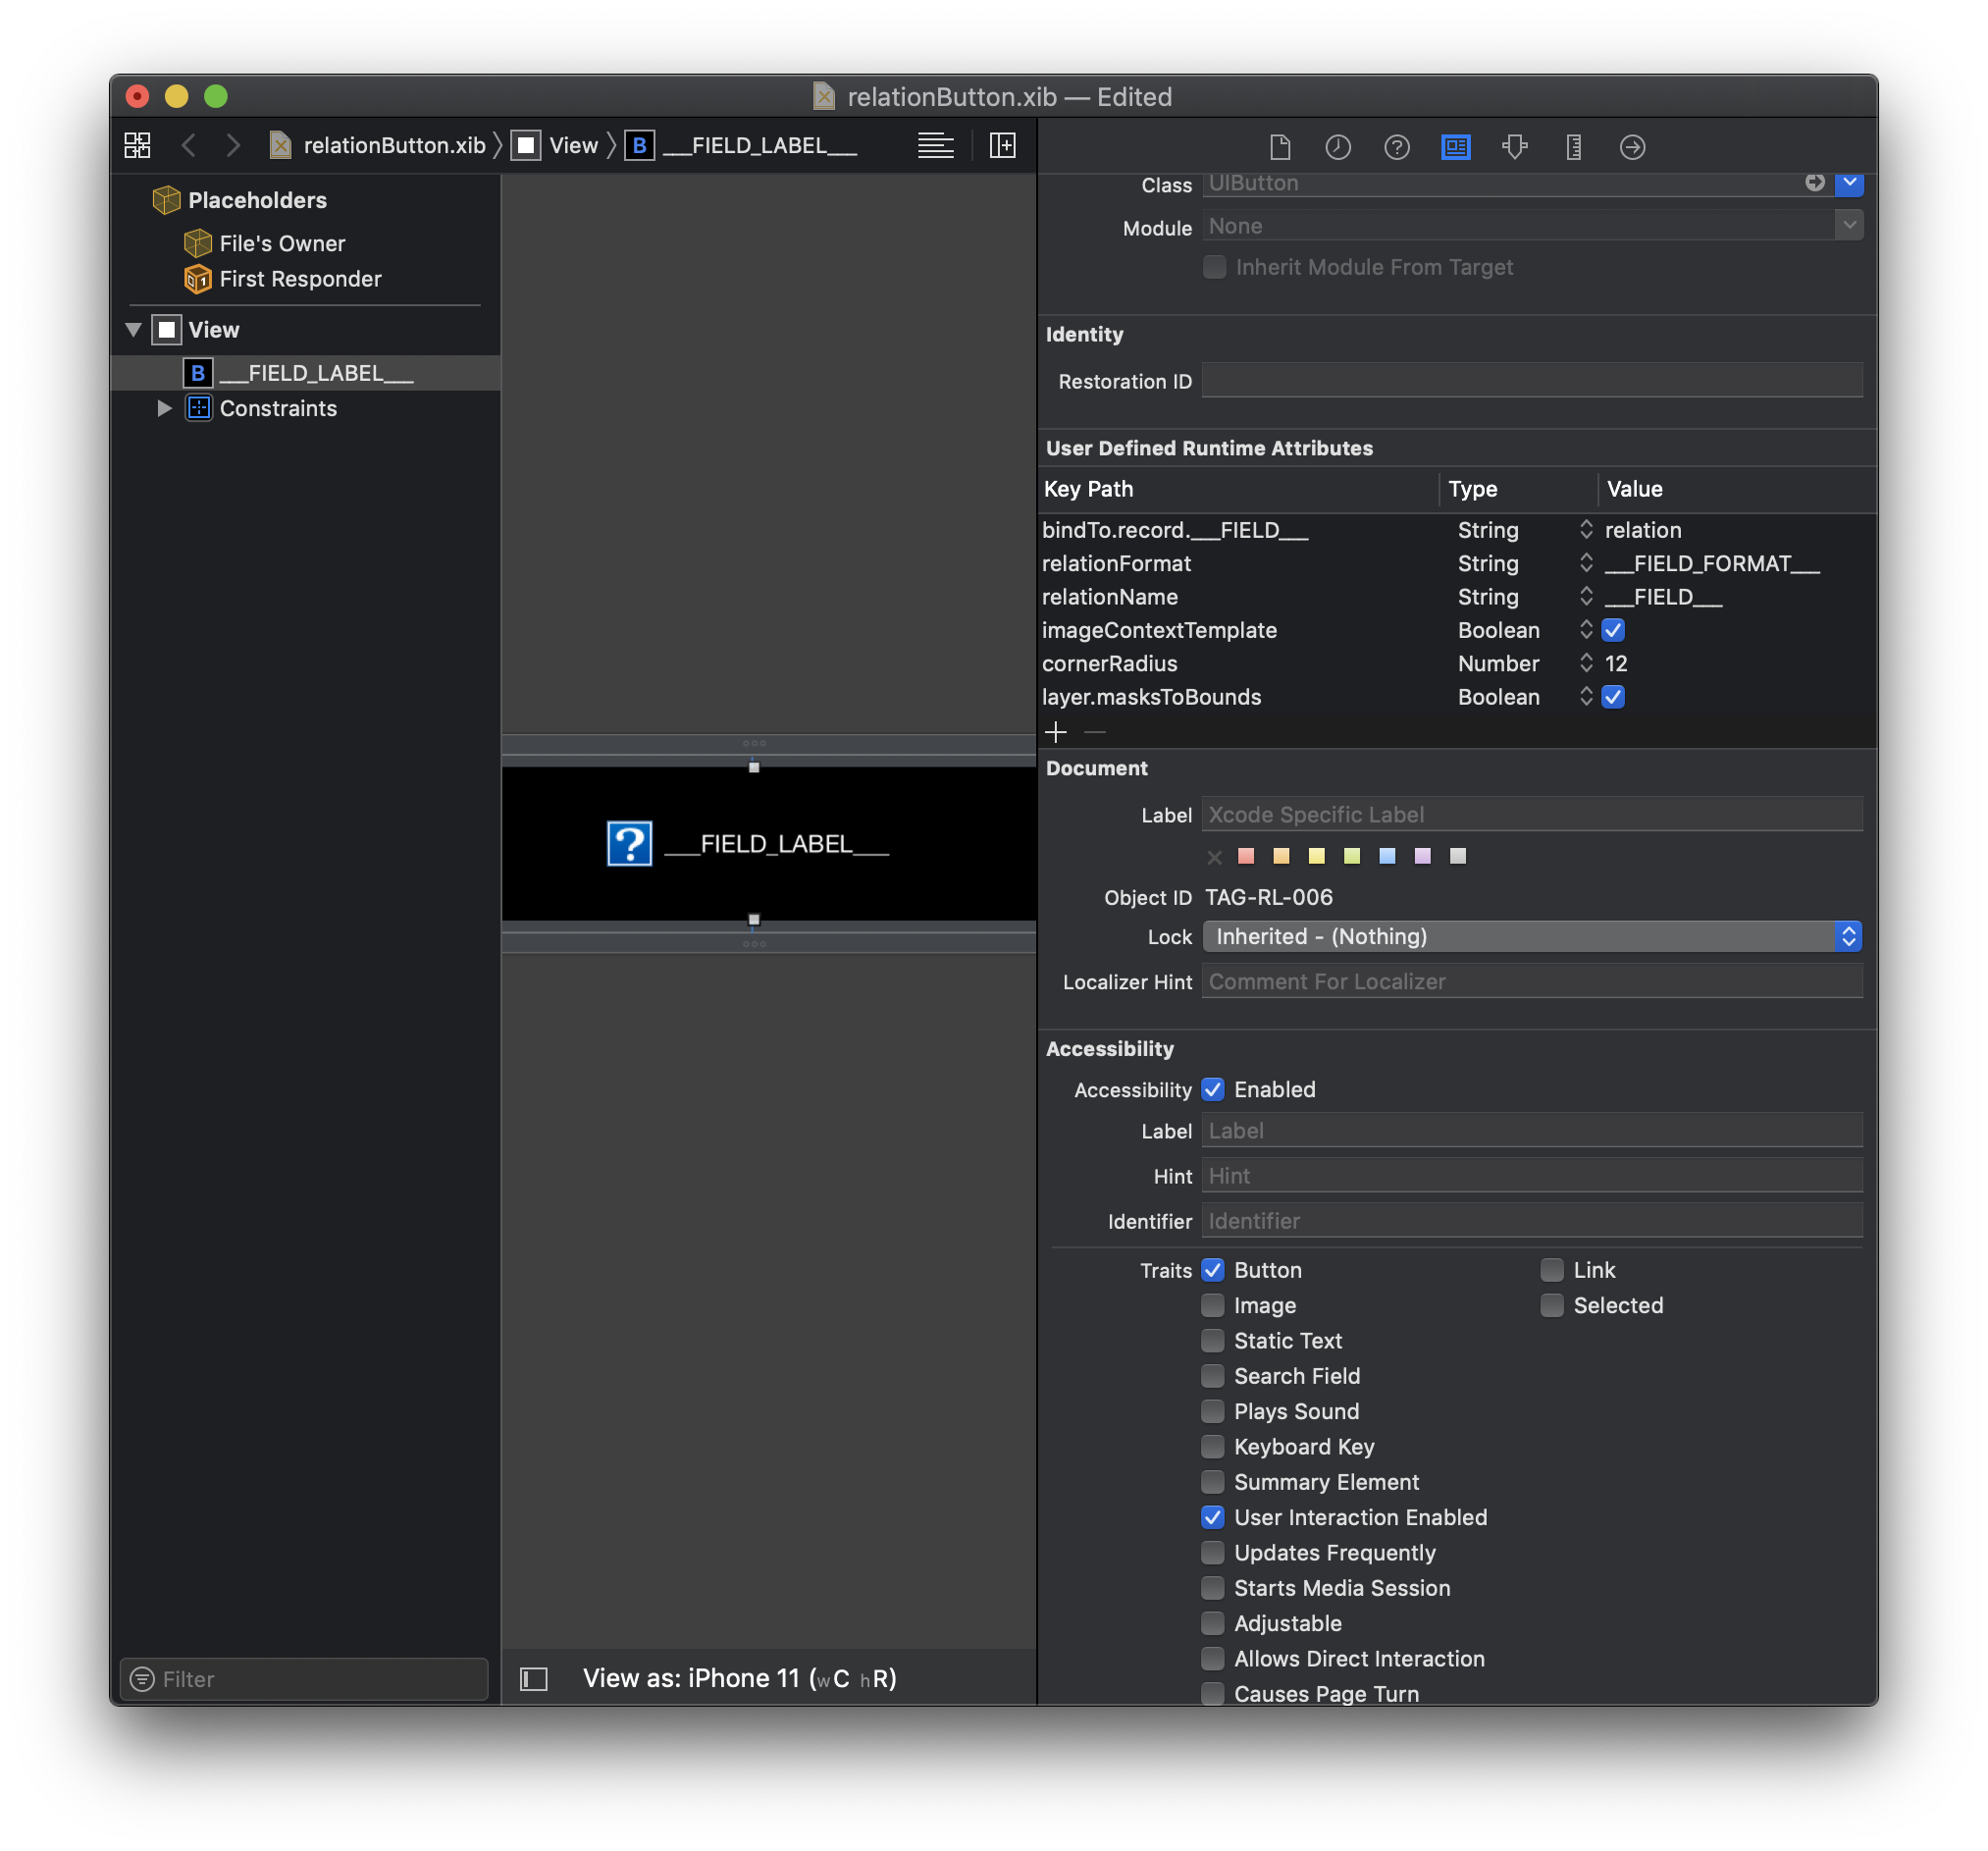
To do so, open the Identity Inspector.
Select your Button and add the two following lines in the User Defined Runtime Attributes:
Key Path:
cornerRadiusType:
NumberValue:
12
and
Key Path:
layer.masksToBoundsType:
BooleanValue: Check the box
You can now build your project from the project editor!
The result should look like this:
Size and constraints
Keep in mind that if you add constraints into your button, you will also have to modifiy the xib xml file to add some TAGS as for custom Detail form templates. This allows the button to be well duplicated when several relations are available in the same detail view.
How convenient, since we plan on adding a few constraints!
Add constraints
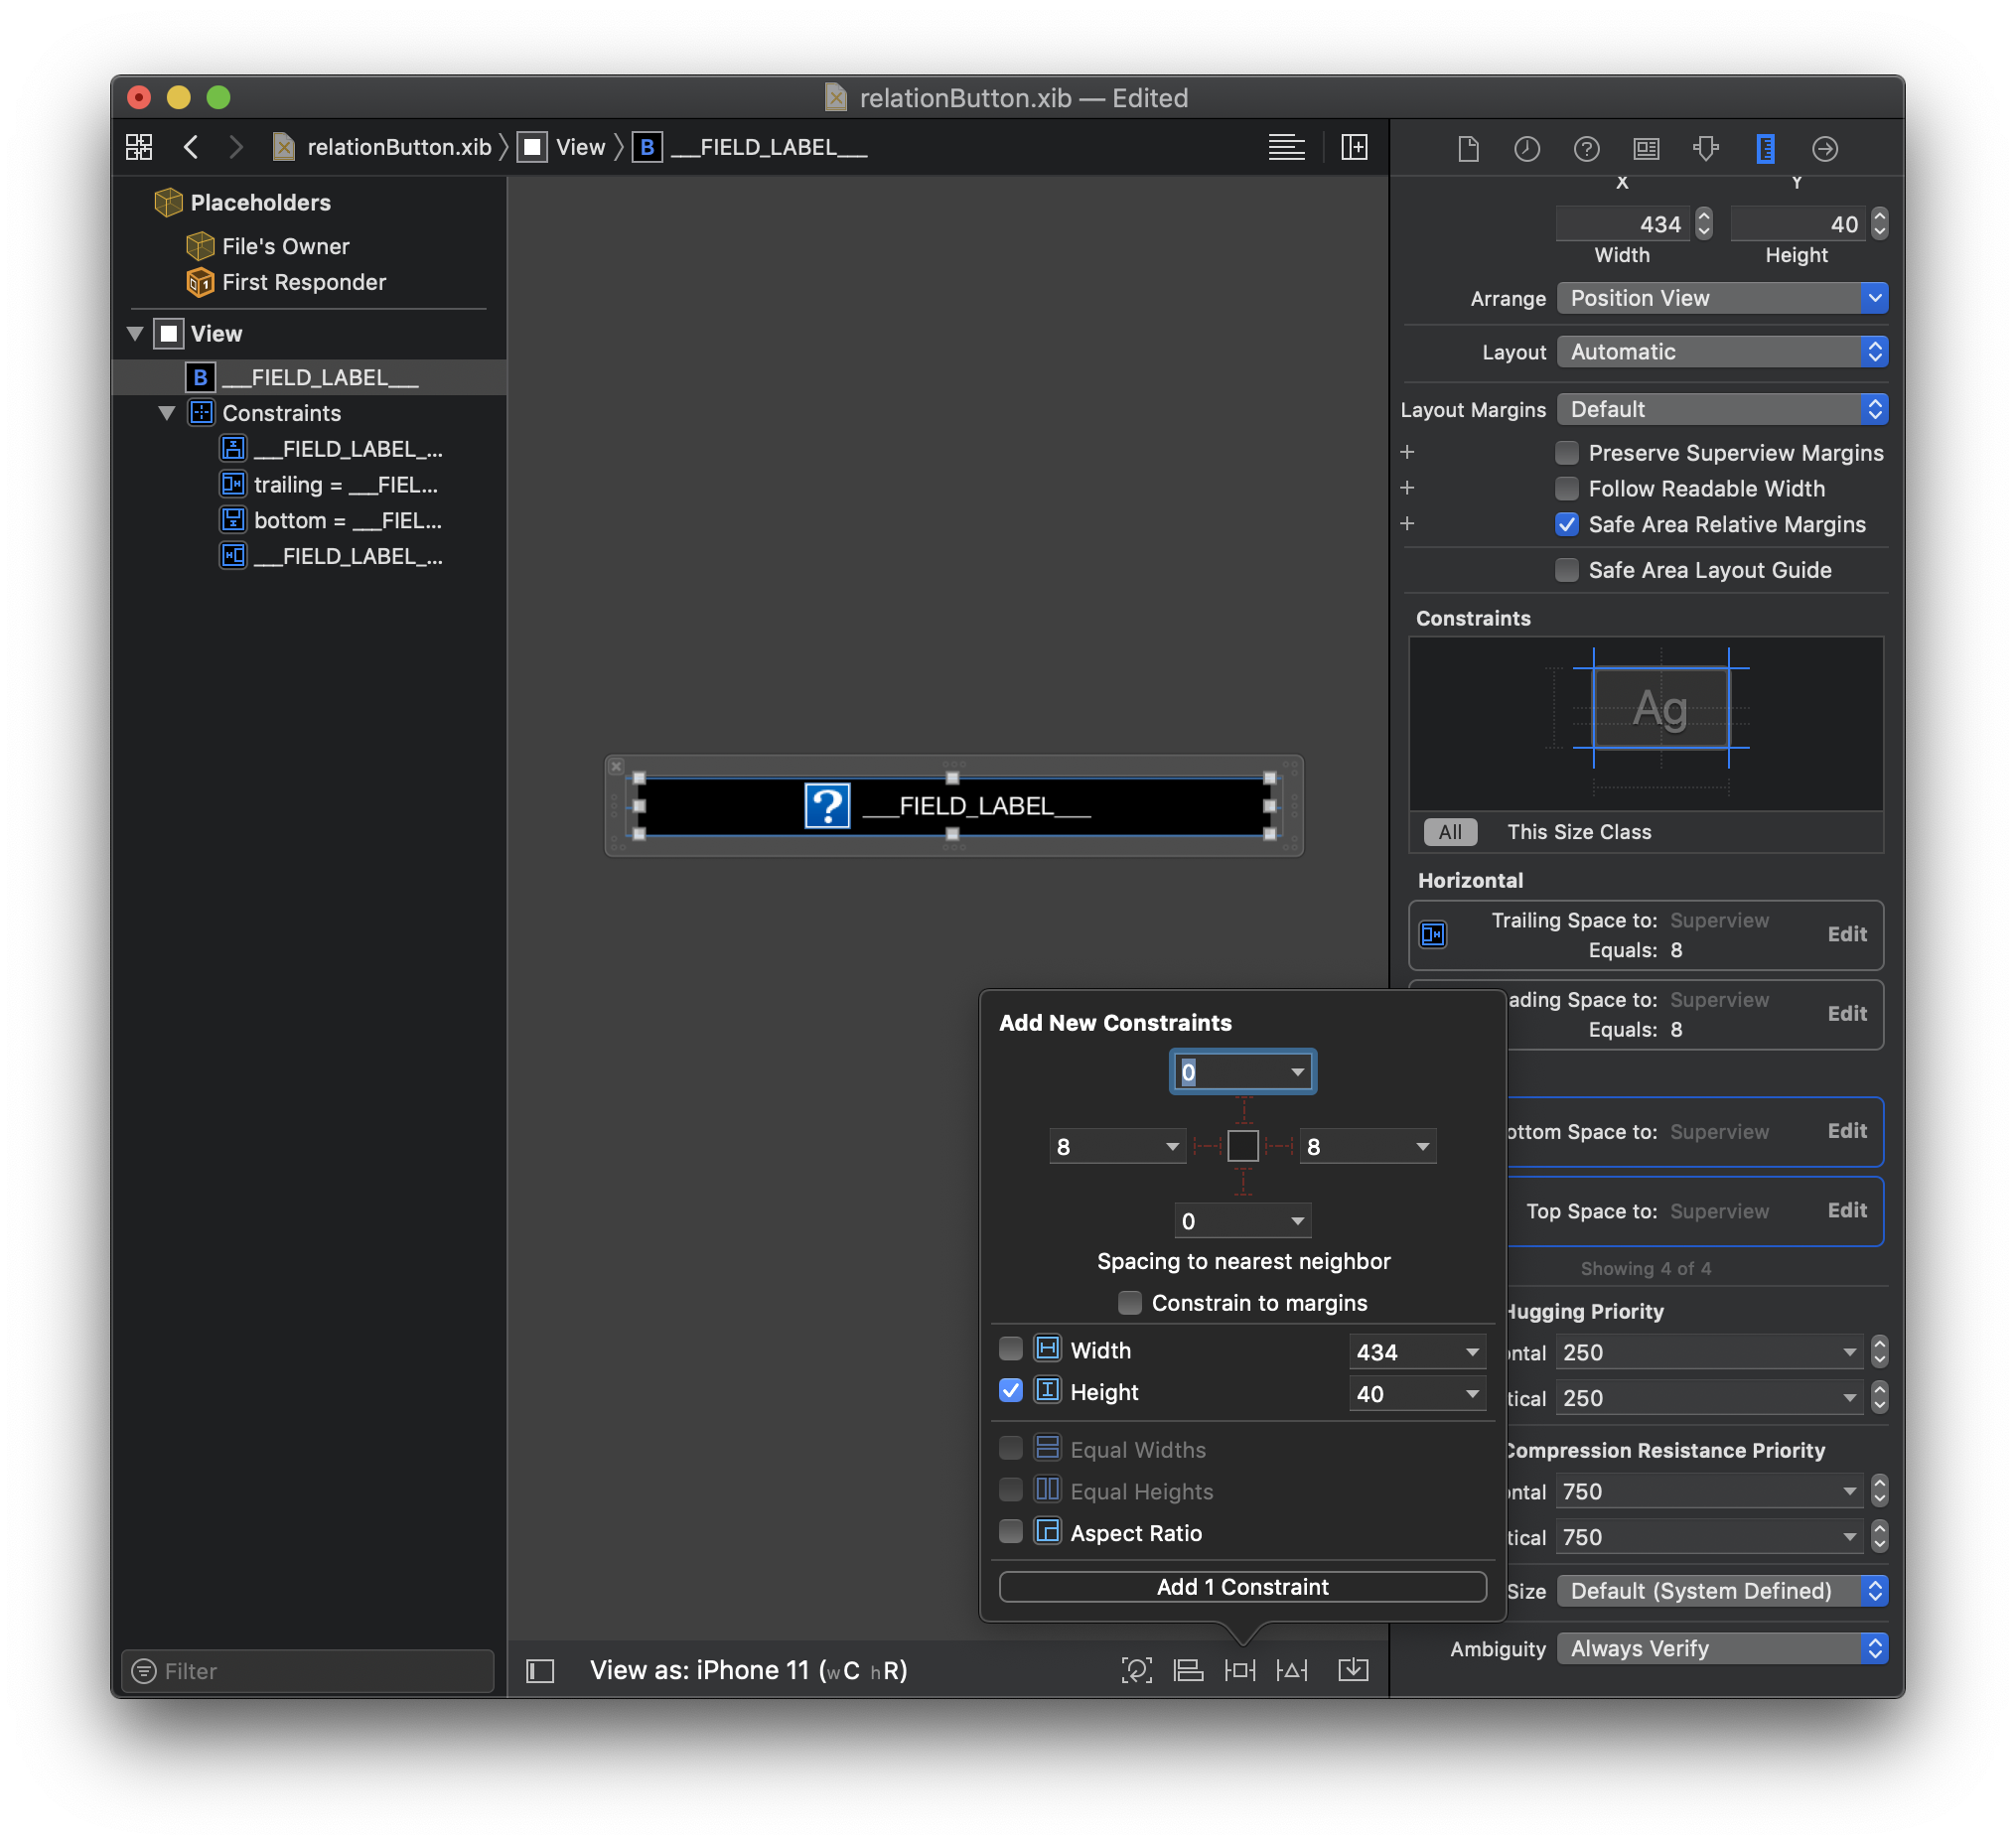
For this tutorial, we are just going to add a button height because we want it to look bigger on the screen.
Step 1. First select the view and change the height from 123 to 40
Step 2. Double click on the Top Space Constraint and change it from 8 to 0
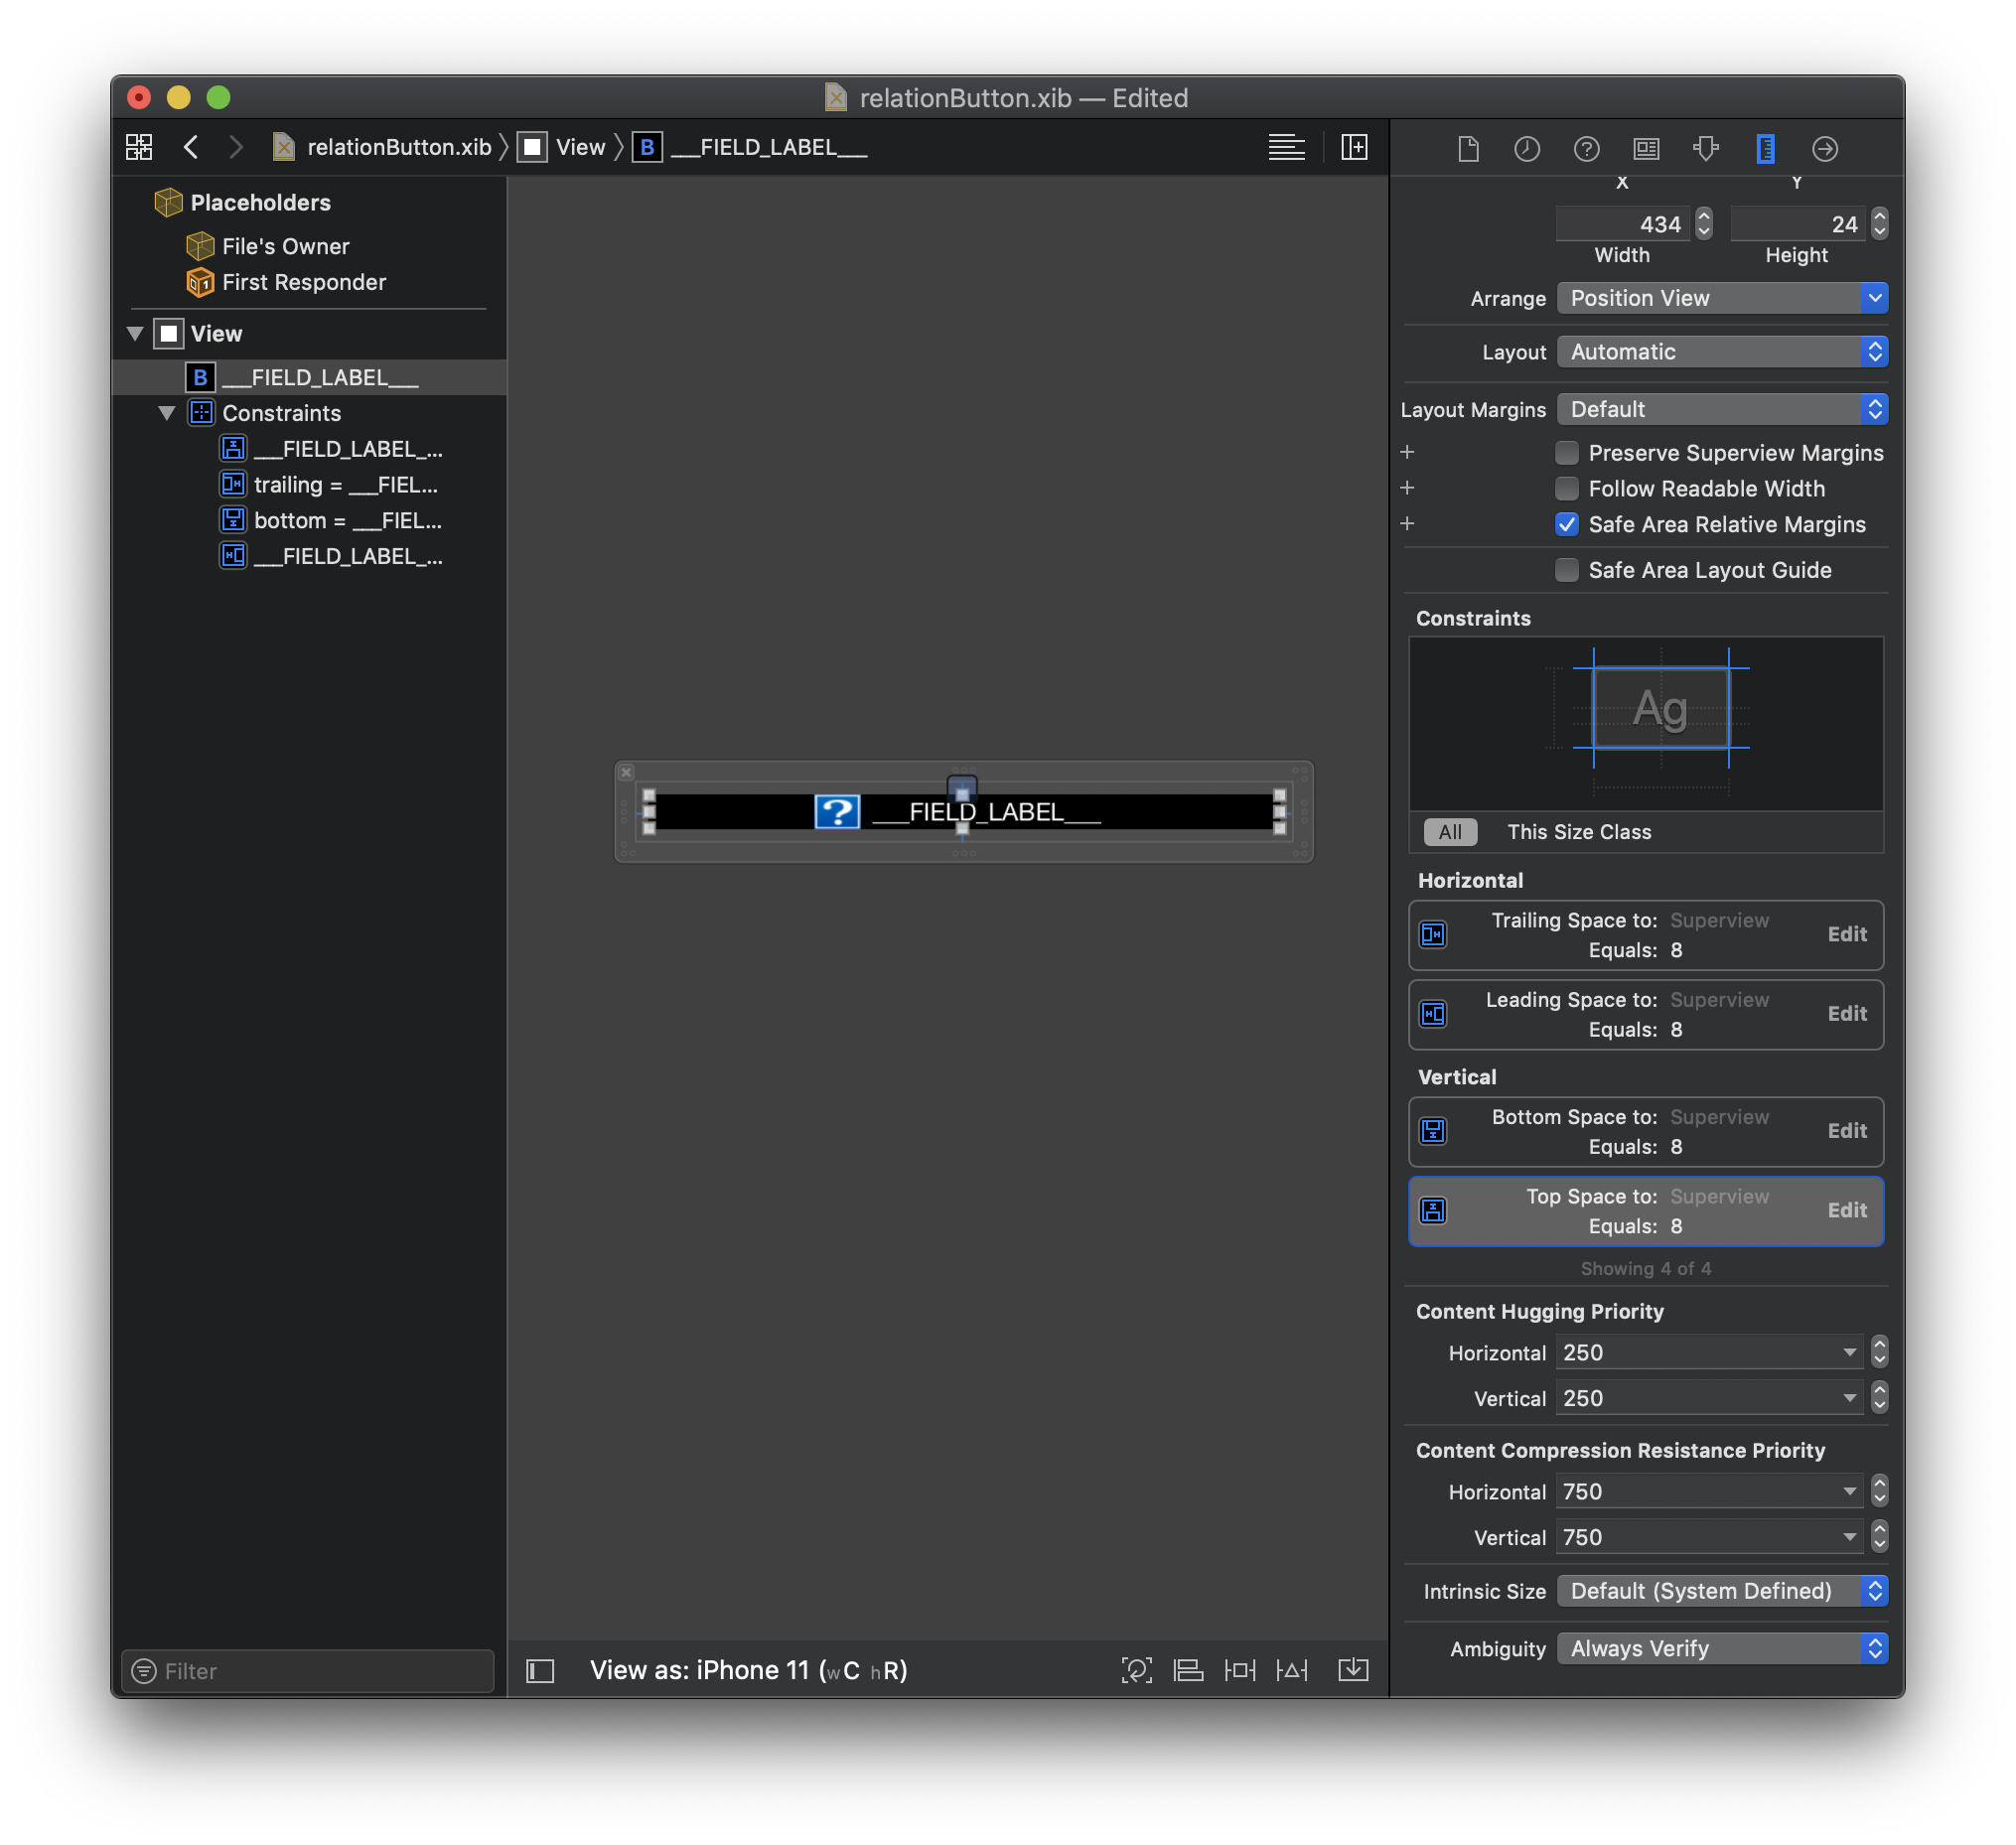
Step 3. Do the same thing with Bottom Space Constraint and change it from 8 to 0
You should get this:
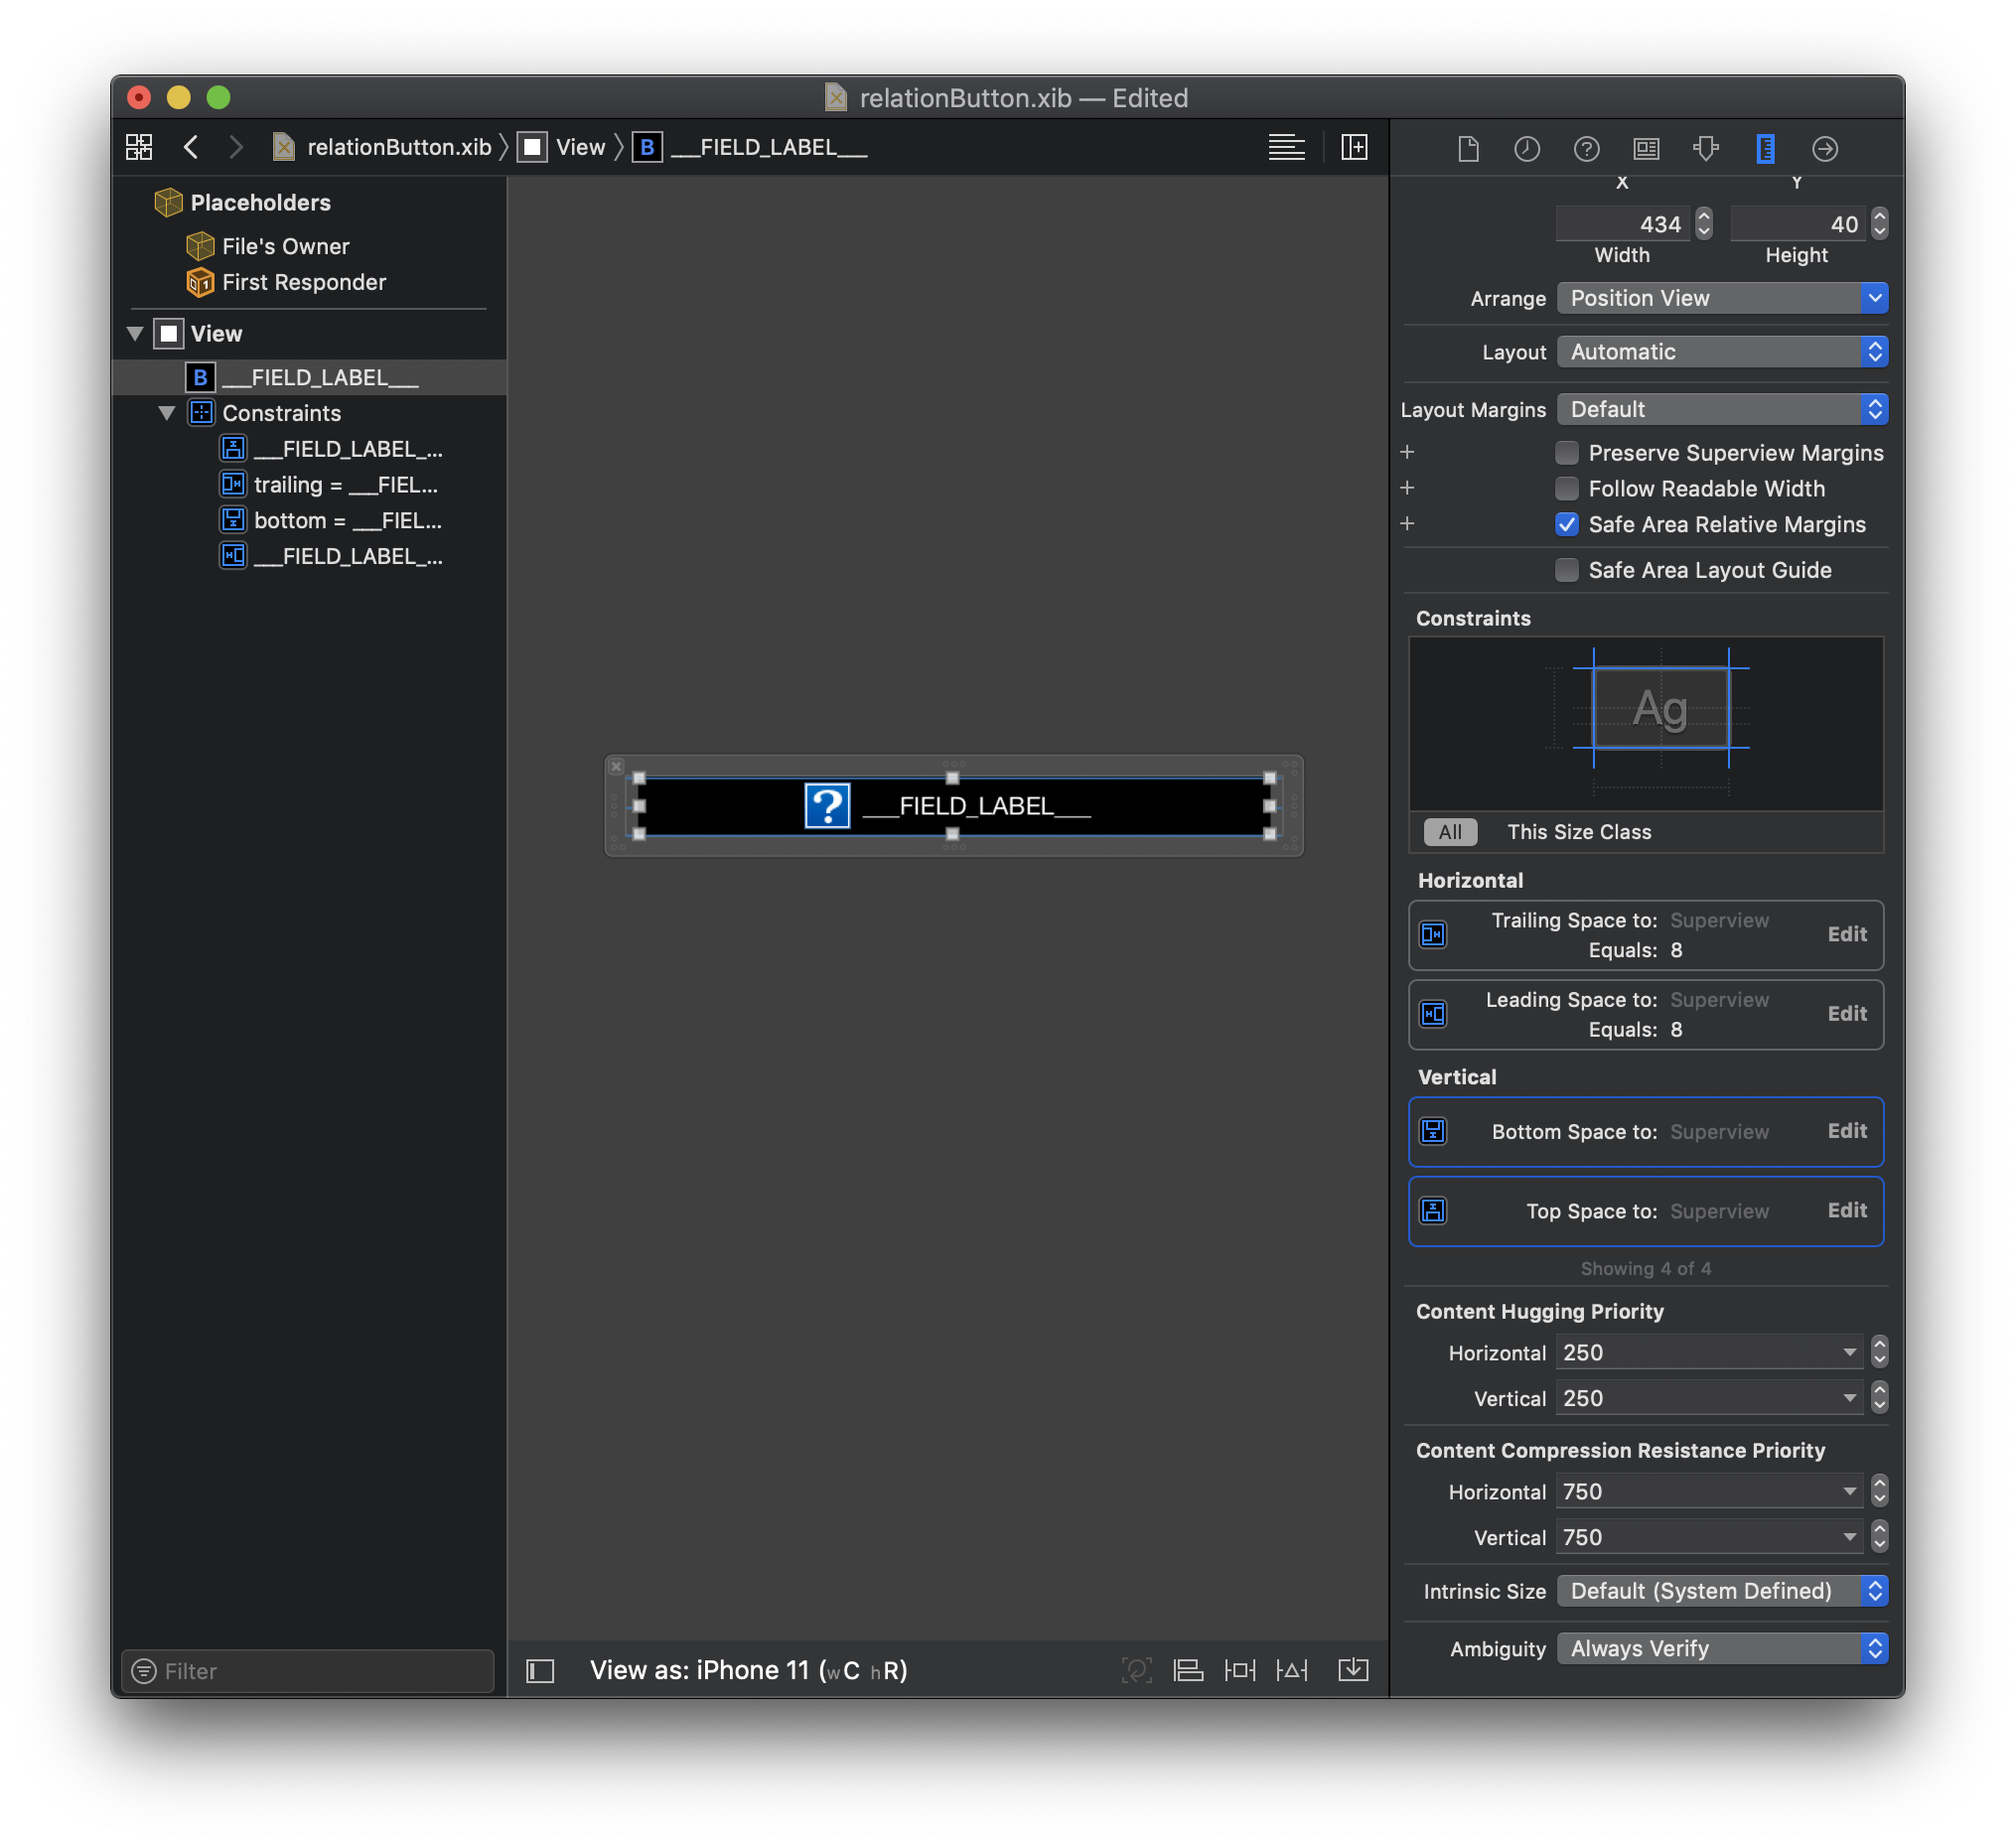
Step 4. Add a height constraint of 40
You should get this:
In order to indicate in the project editor that all of the elements included in this view will be duplicated, we need to add a TAG to each element and constraint.
Add TAGS
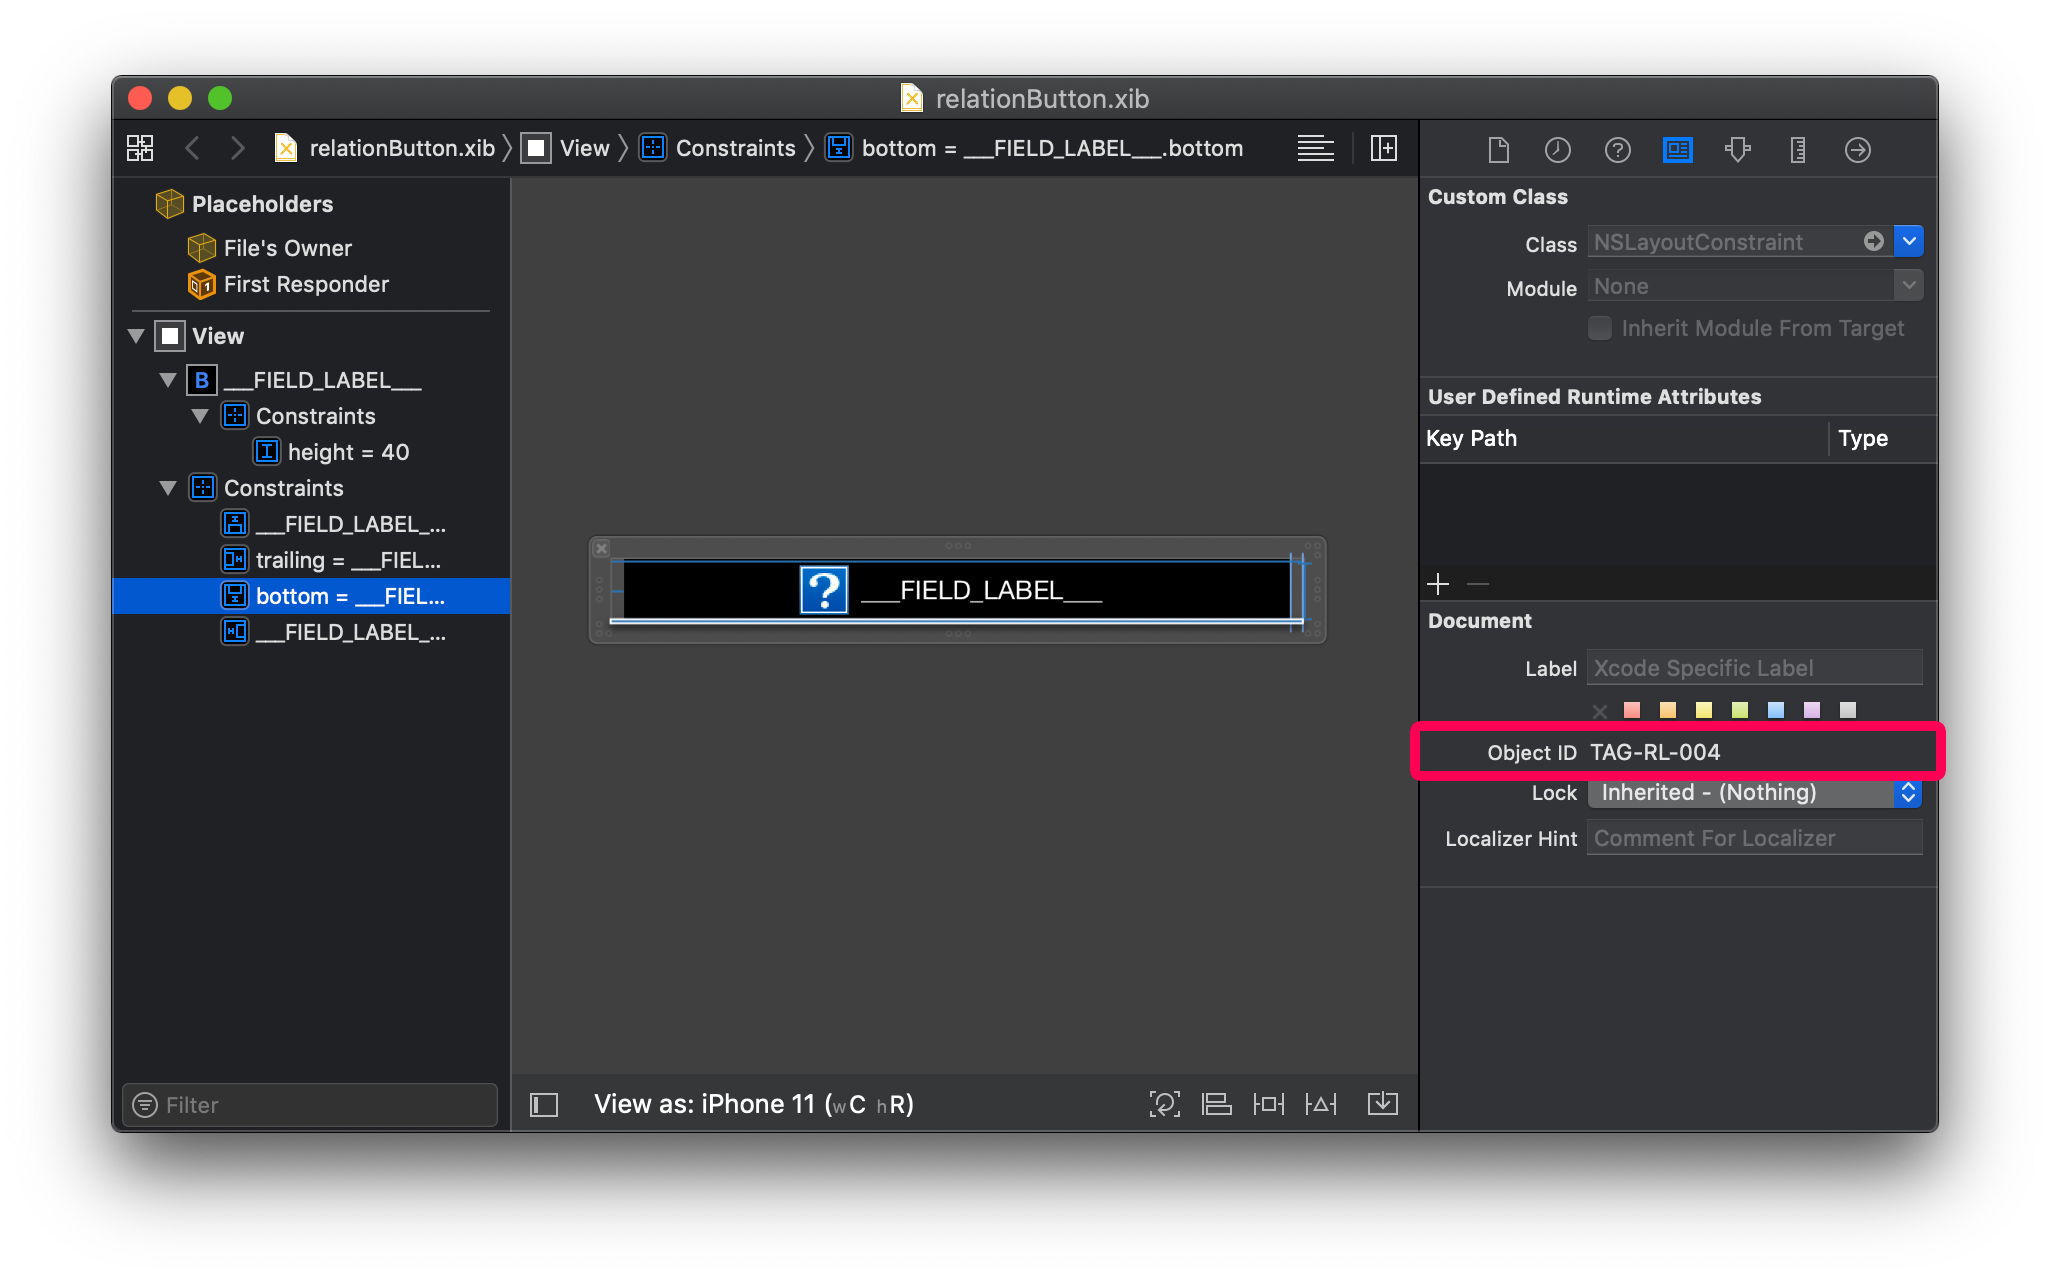
Each storyboard element has an Object ID. For example, if you select Field View 2 and go to the Identity inspector, you'll see its Object ID:
The process is a little bit tricky... So let's begin by opening the storyboard file with your favorite code editor!
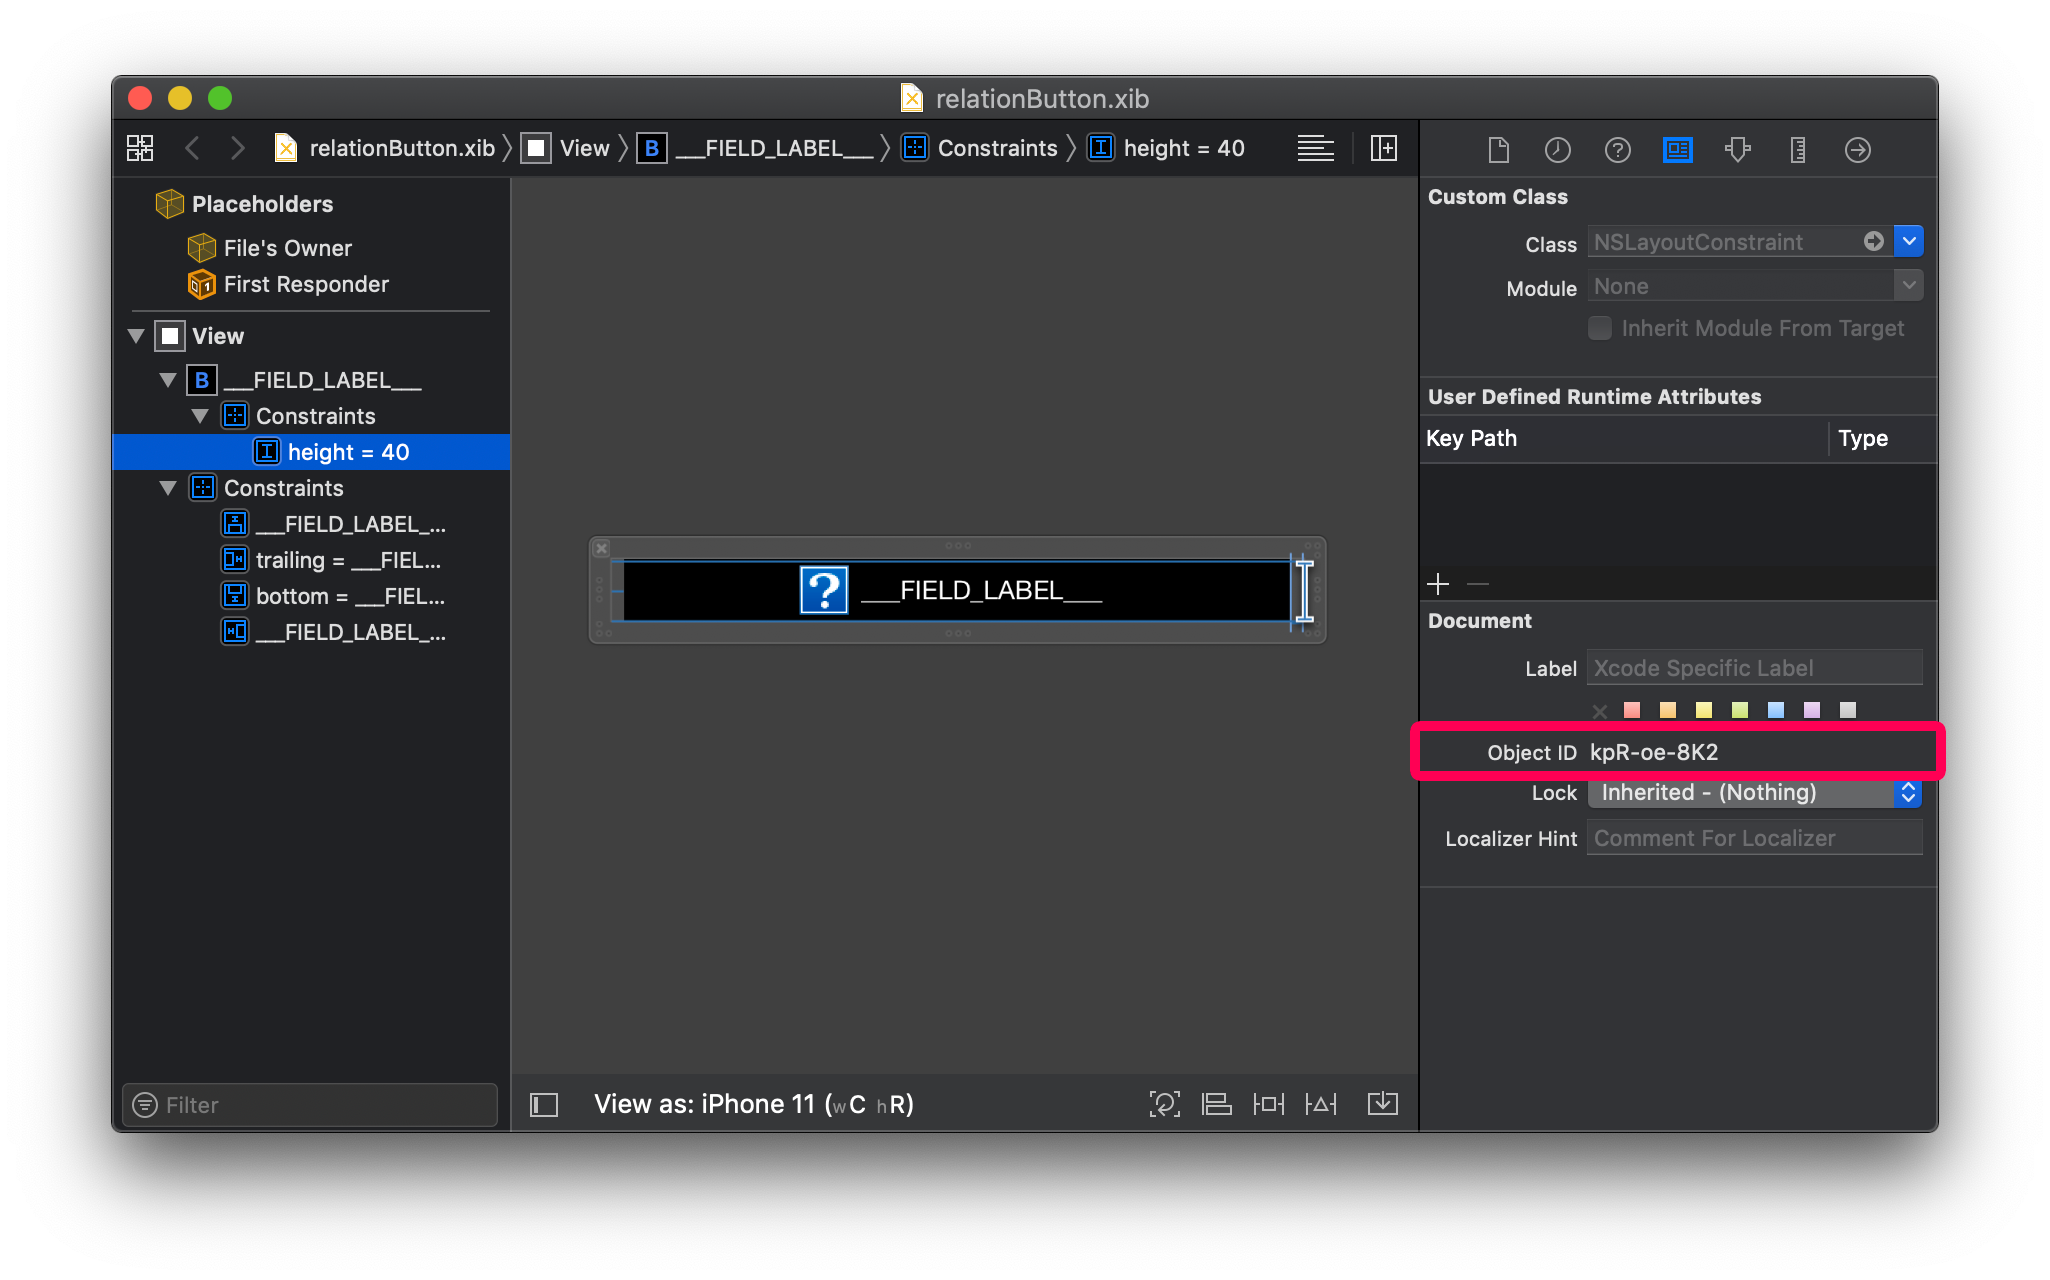
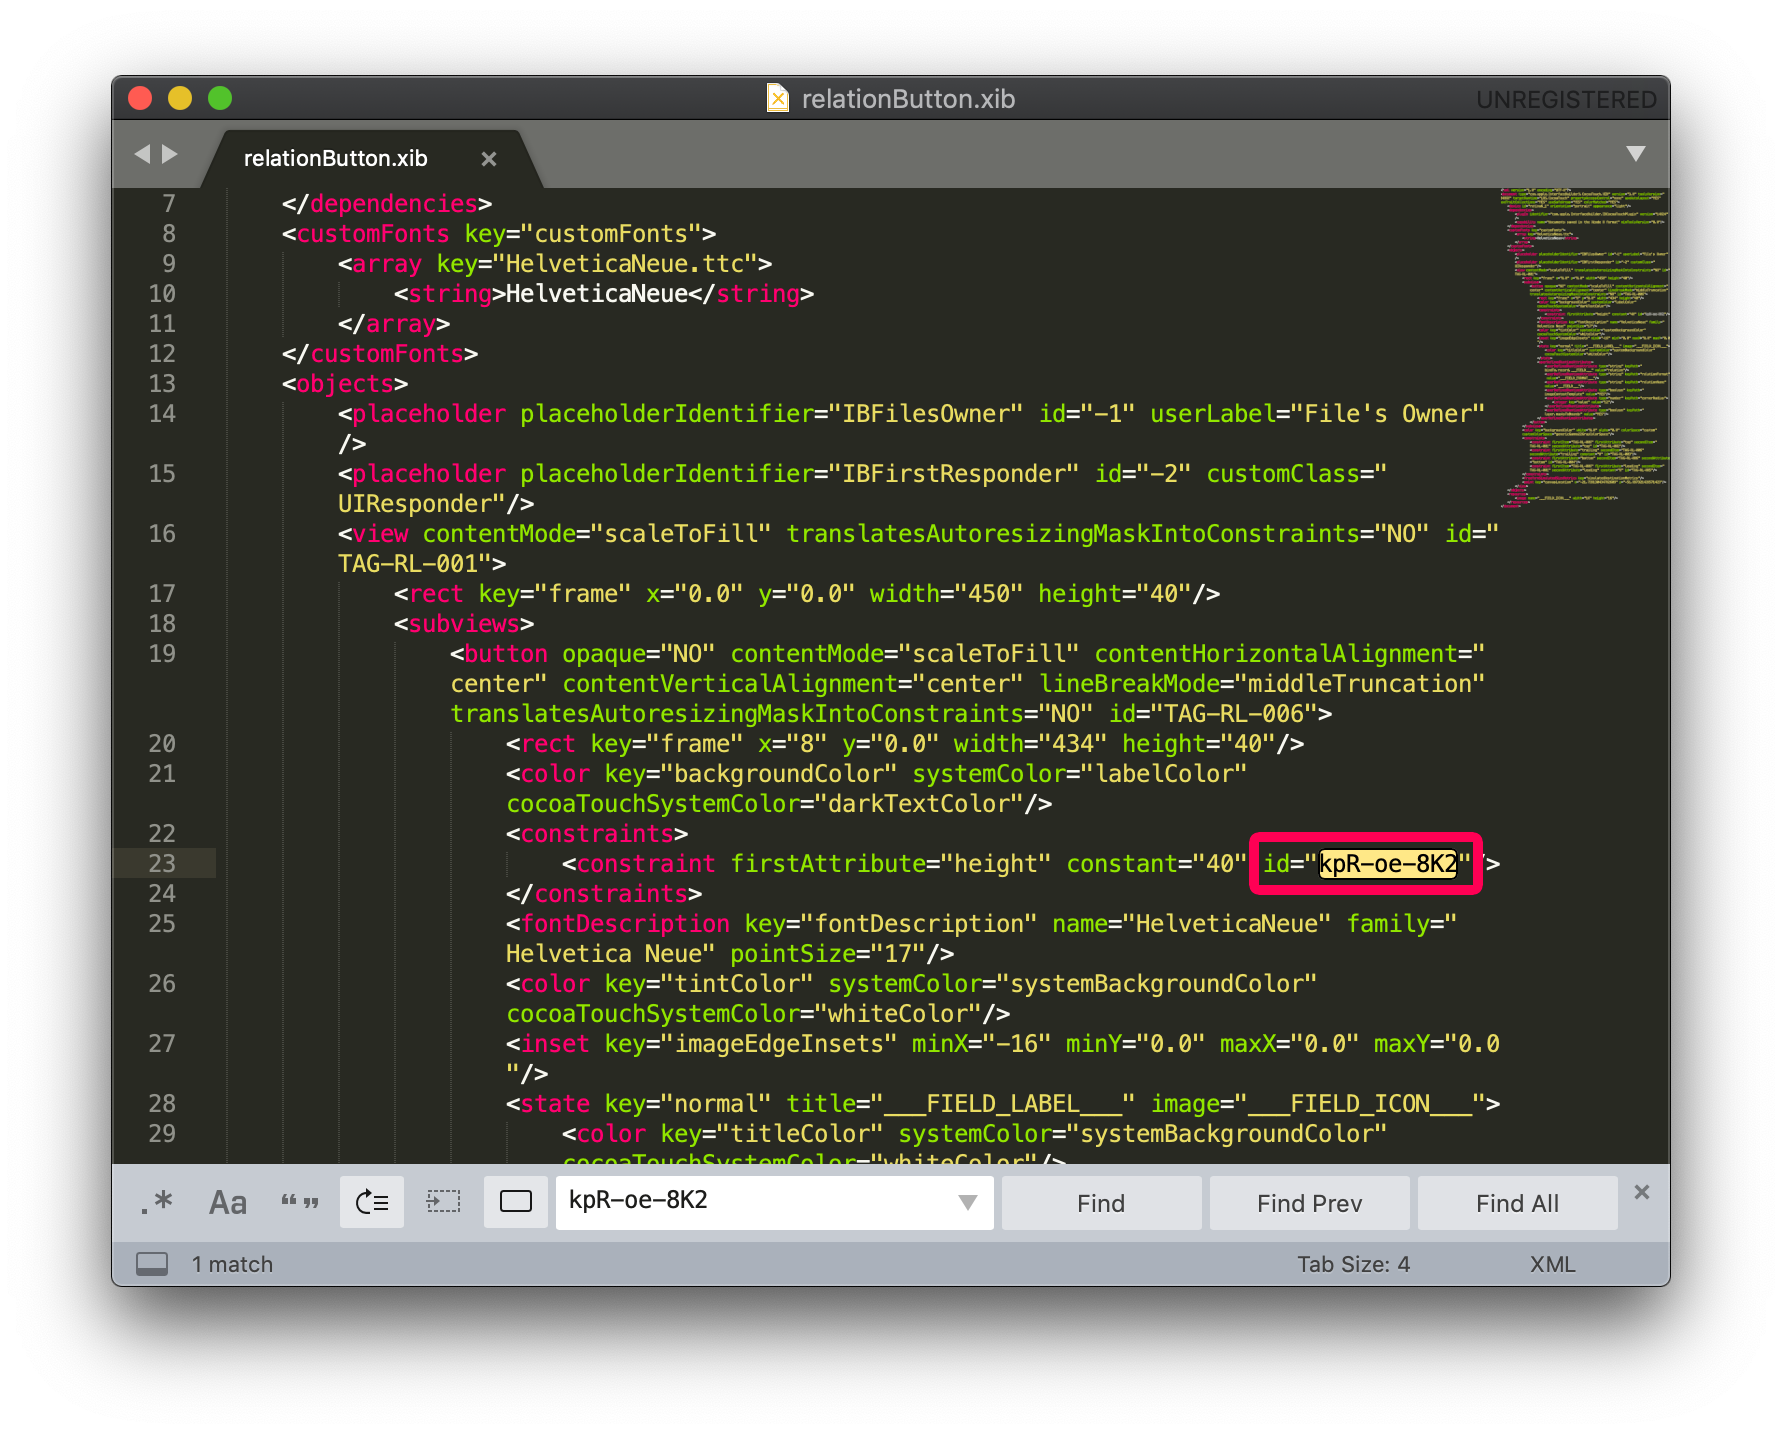
Add a tag to the height constraint
Step 1. Select it from the Storyboard to get the Object ID
Step 2. Search for this ID in the xml file and put TAG-RL-007 instead (a Tag that is not already used).
Step 3. Save the xml file
Step 4. Focus on the Storyboard to check if the constraint has been updated correctly

And that's it! Your button is now fully duplicable if you have more that one relation button to display...
Where to go from here?
In this tutorial, we've covered the basics for creating custom relation buttons. Click on Final Project below to download the custom relation button.
Download the completed project: