Installing on your iOS device
OBJECTIVES
Install a 4D for iOS application on a connected device
PREREQUISITES
- Apple Developer Program.
- Apple configurator 2 installed on your Mac to automate app installation (optional).
NOTE
Apple configurator 2 requires macOS 10.14 or later.
Depending on your objectives and preferences, you can choose to enroll in one of the following:
- Free Apple Developer Program: For testing only
- Apple Developer Program for organization or individual: For an App Store Deployment
- Apple Enterprise Developer Program: To deploy your app in-house
Let's go through the process...
STEP 1. Account creation
Apple ID: Create your Apple ID. If you don’t already have one, click here.
Developer Account: Choose an Apple Developer Program (for organizations or individuals) for App Store deployment or the Apple Developer Enterprise Program (for in-house deployment).
STEP 2. Xcode configuration
- Developer Account: In Xcode > Preferences > Accounts, add your Apple ID.
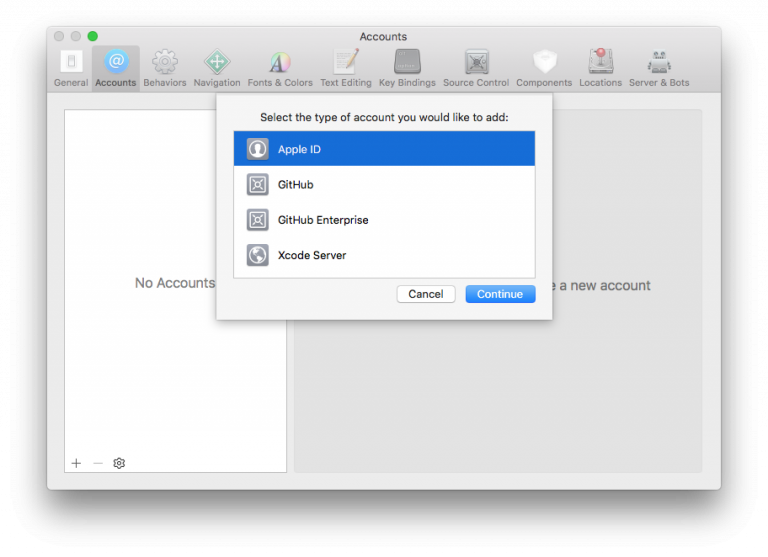
STEP 3. Get your Team ID
- If your are using a Free Apple Developer Program go to step 4.
- If your are using an Apple Developer Program for organization, individual or an Apple Enterprise Developer Program go to step 5.
STEP 4. Team ID for Free account
Let Xcode generate your provisioning profile and certificate
- Open your current project from the BUILD tab.
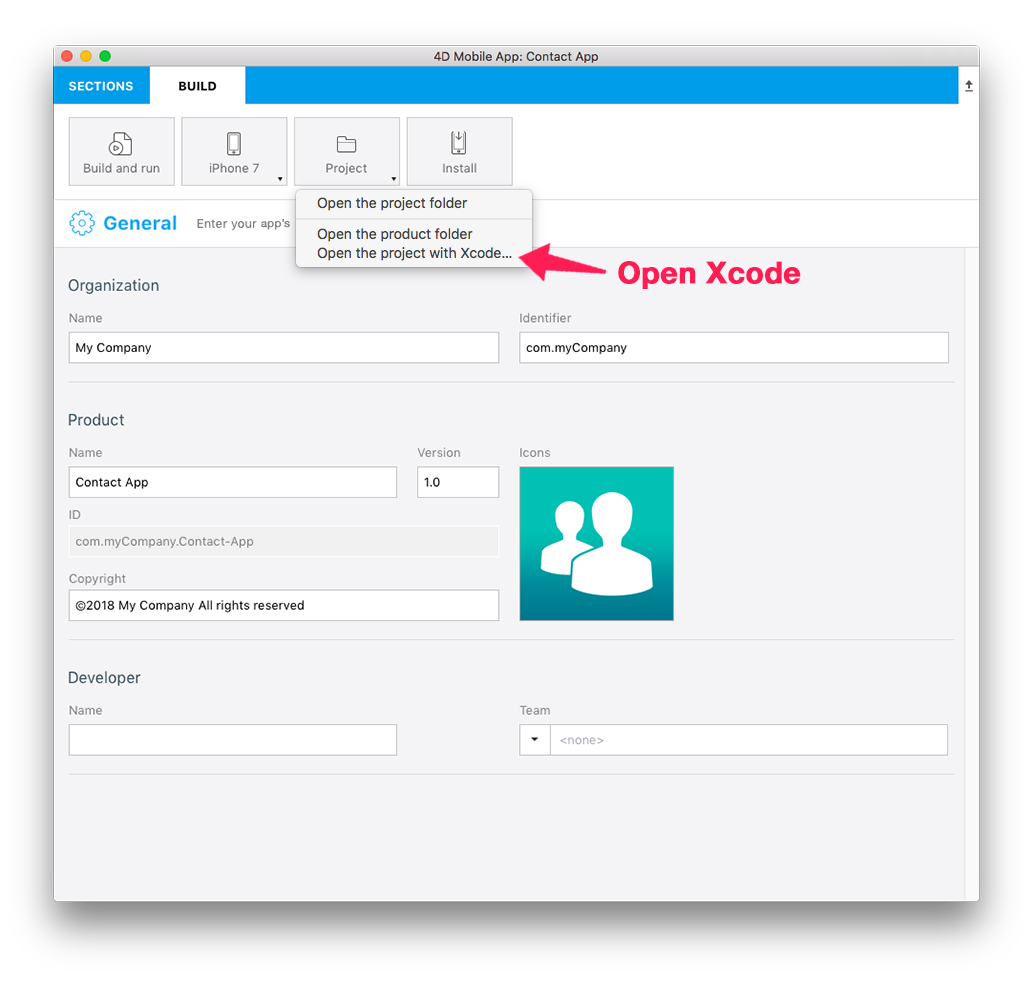
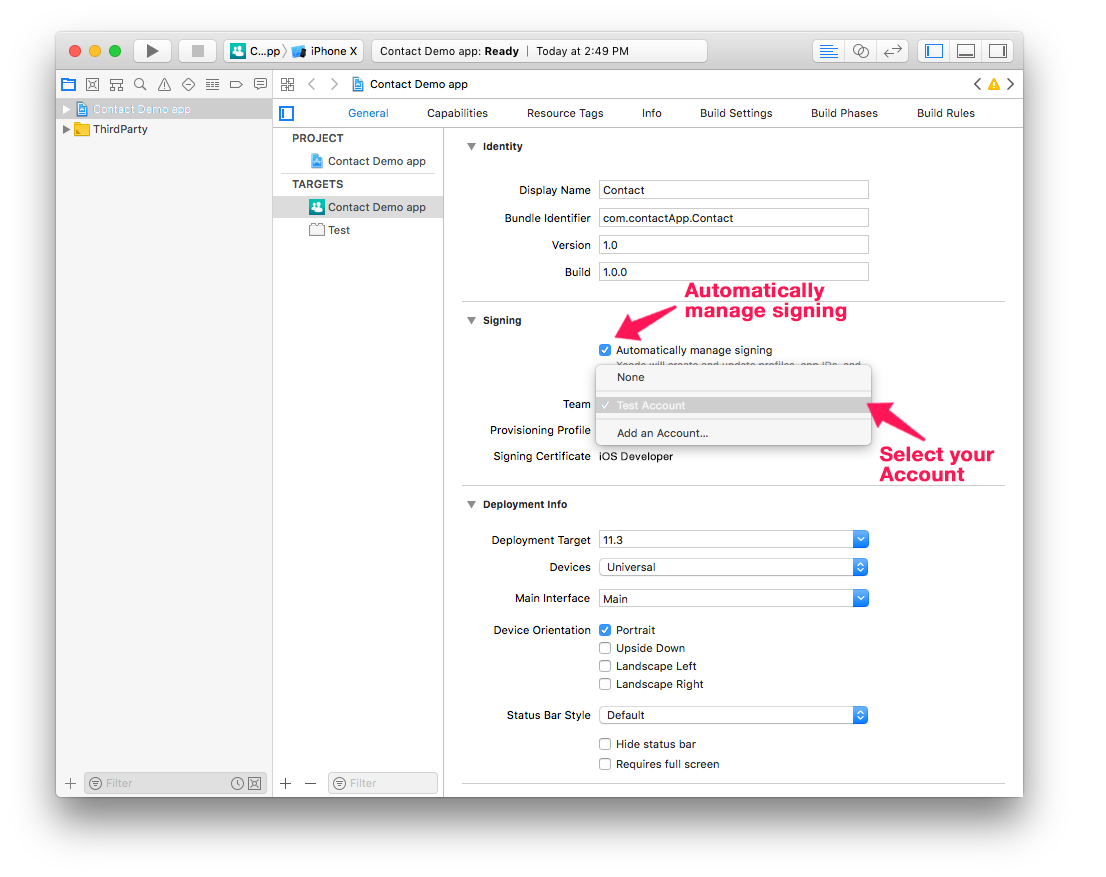
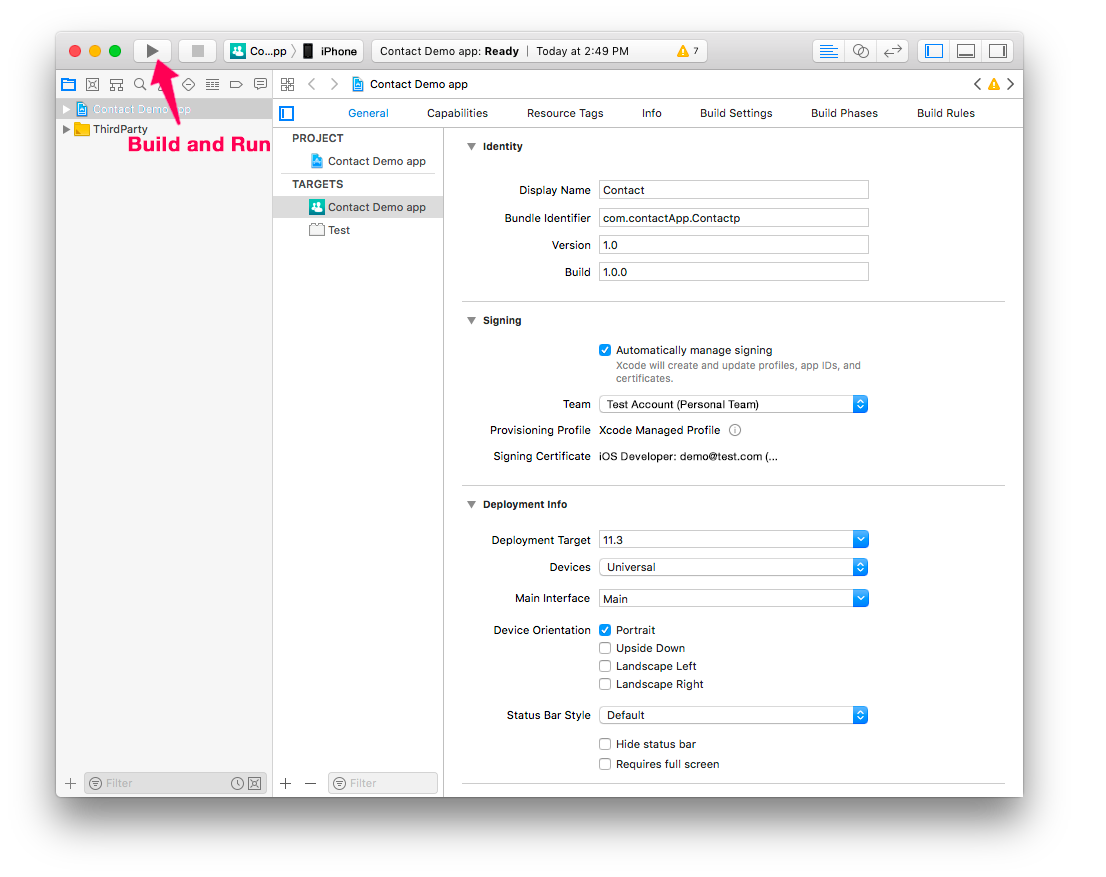
- Verify that the Automatically manage signing option is checked and select the account you added here from the Team dropdown list.
- Connect your device to your computer and select it from the top menu in Xcode.
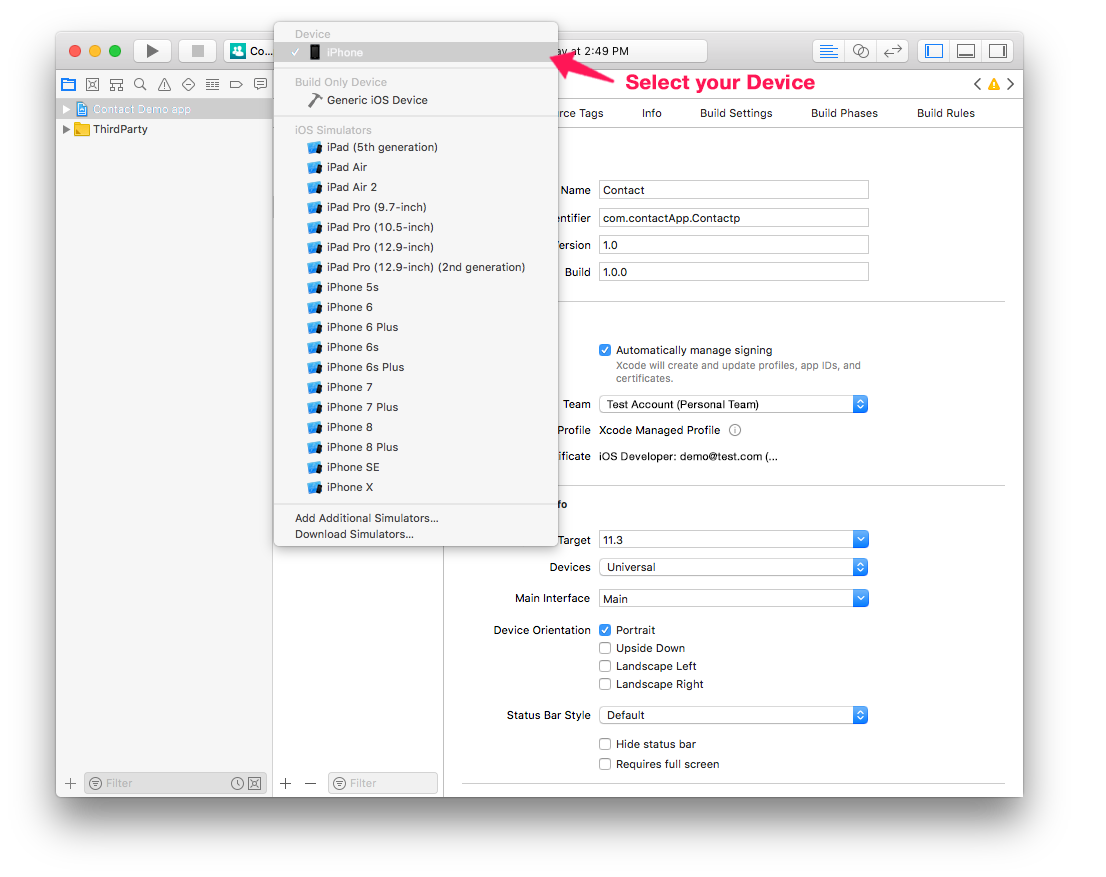
- Xcode automatically generates the necessary provisioning profiles and certificates you'll need to build your app.
Build your project from Xcode using your Free Account
- Press the Build and run Button from Xcode !
STEP 5. Team ID for paid subscription account
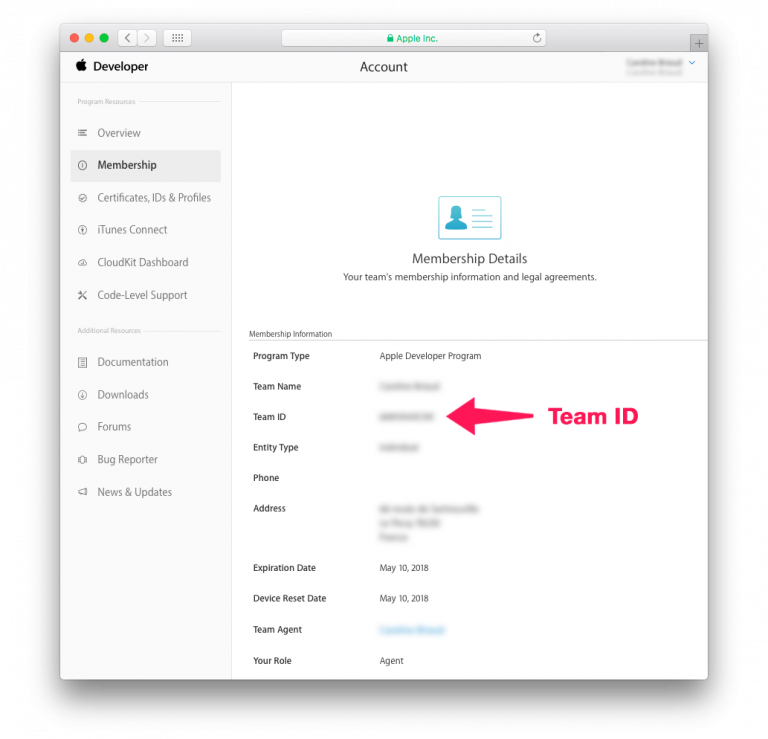
Team ID: Go to Developer Account > Membership and get your Team ID.
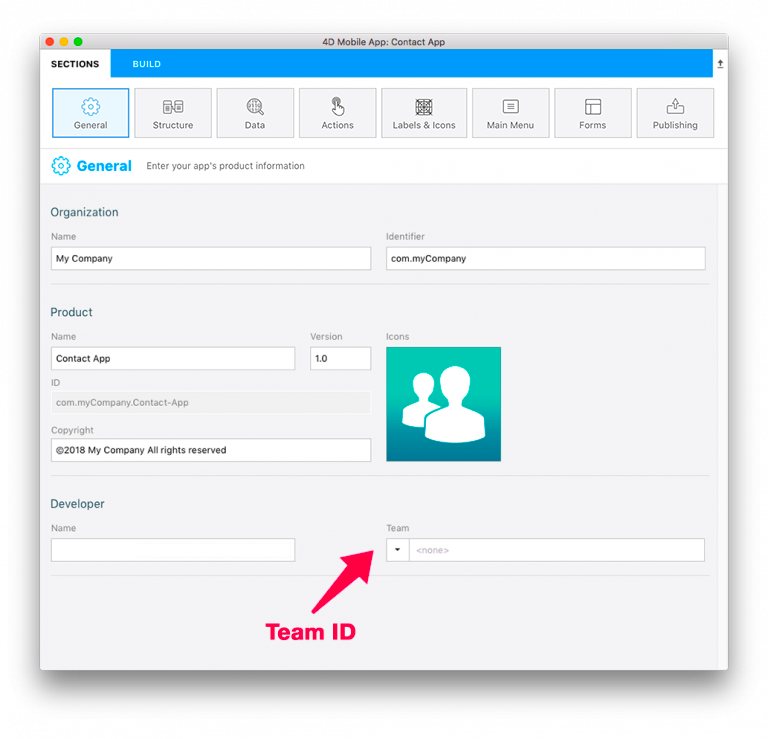
4D for iOS: Launch 4D for iOS in Sections > General and enter your Team ID.
Go to STEP 6 to run your project on your device.
STEP 6. Installation
Install automatically with Apple Configurator 2
- When your app is ready, open the BUILD tab.
- Connect your device to your computer with a USB cable.
- From the BUILD tab, click on Install.
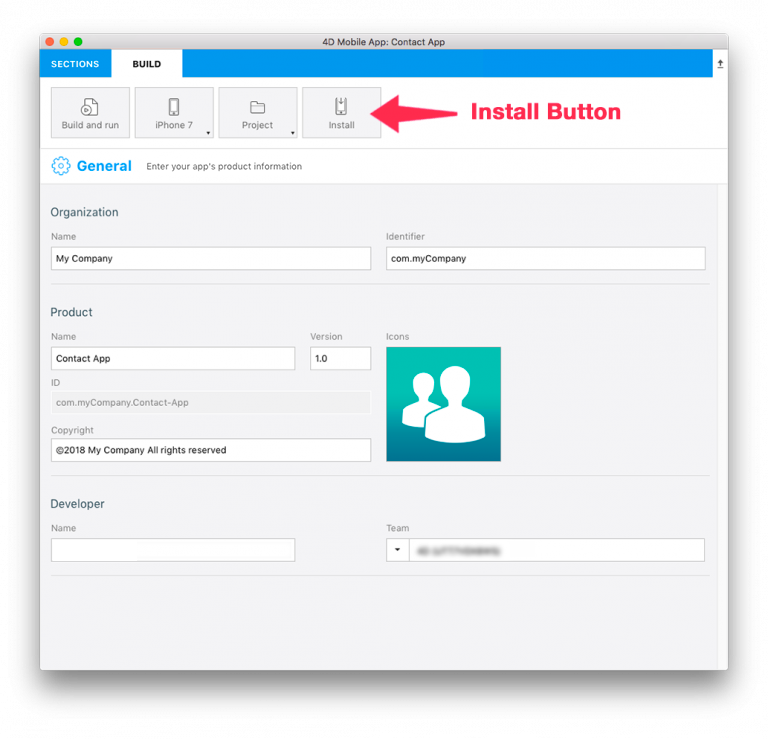
- The app is being installed on your device!
Install manually using Xcode
- When your app is ready, open the BUILD tab.
- Connect your device to your computer with a USB cable.
- From the BUILD tab, click on Install.
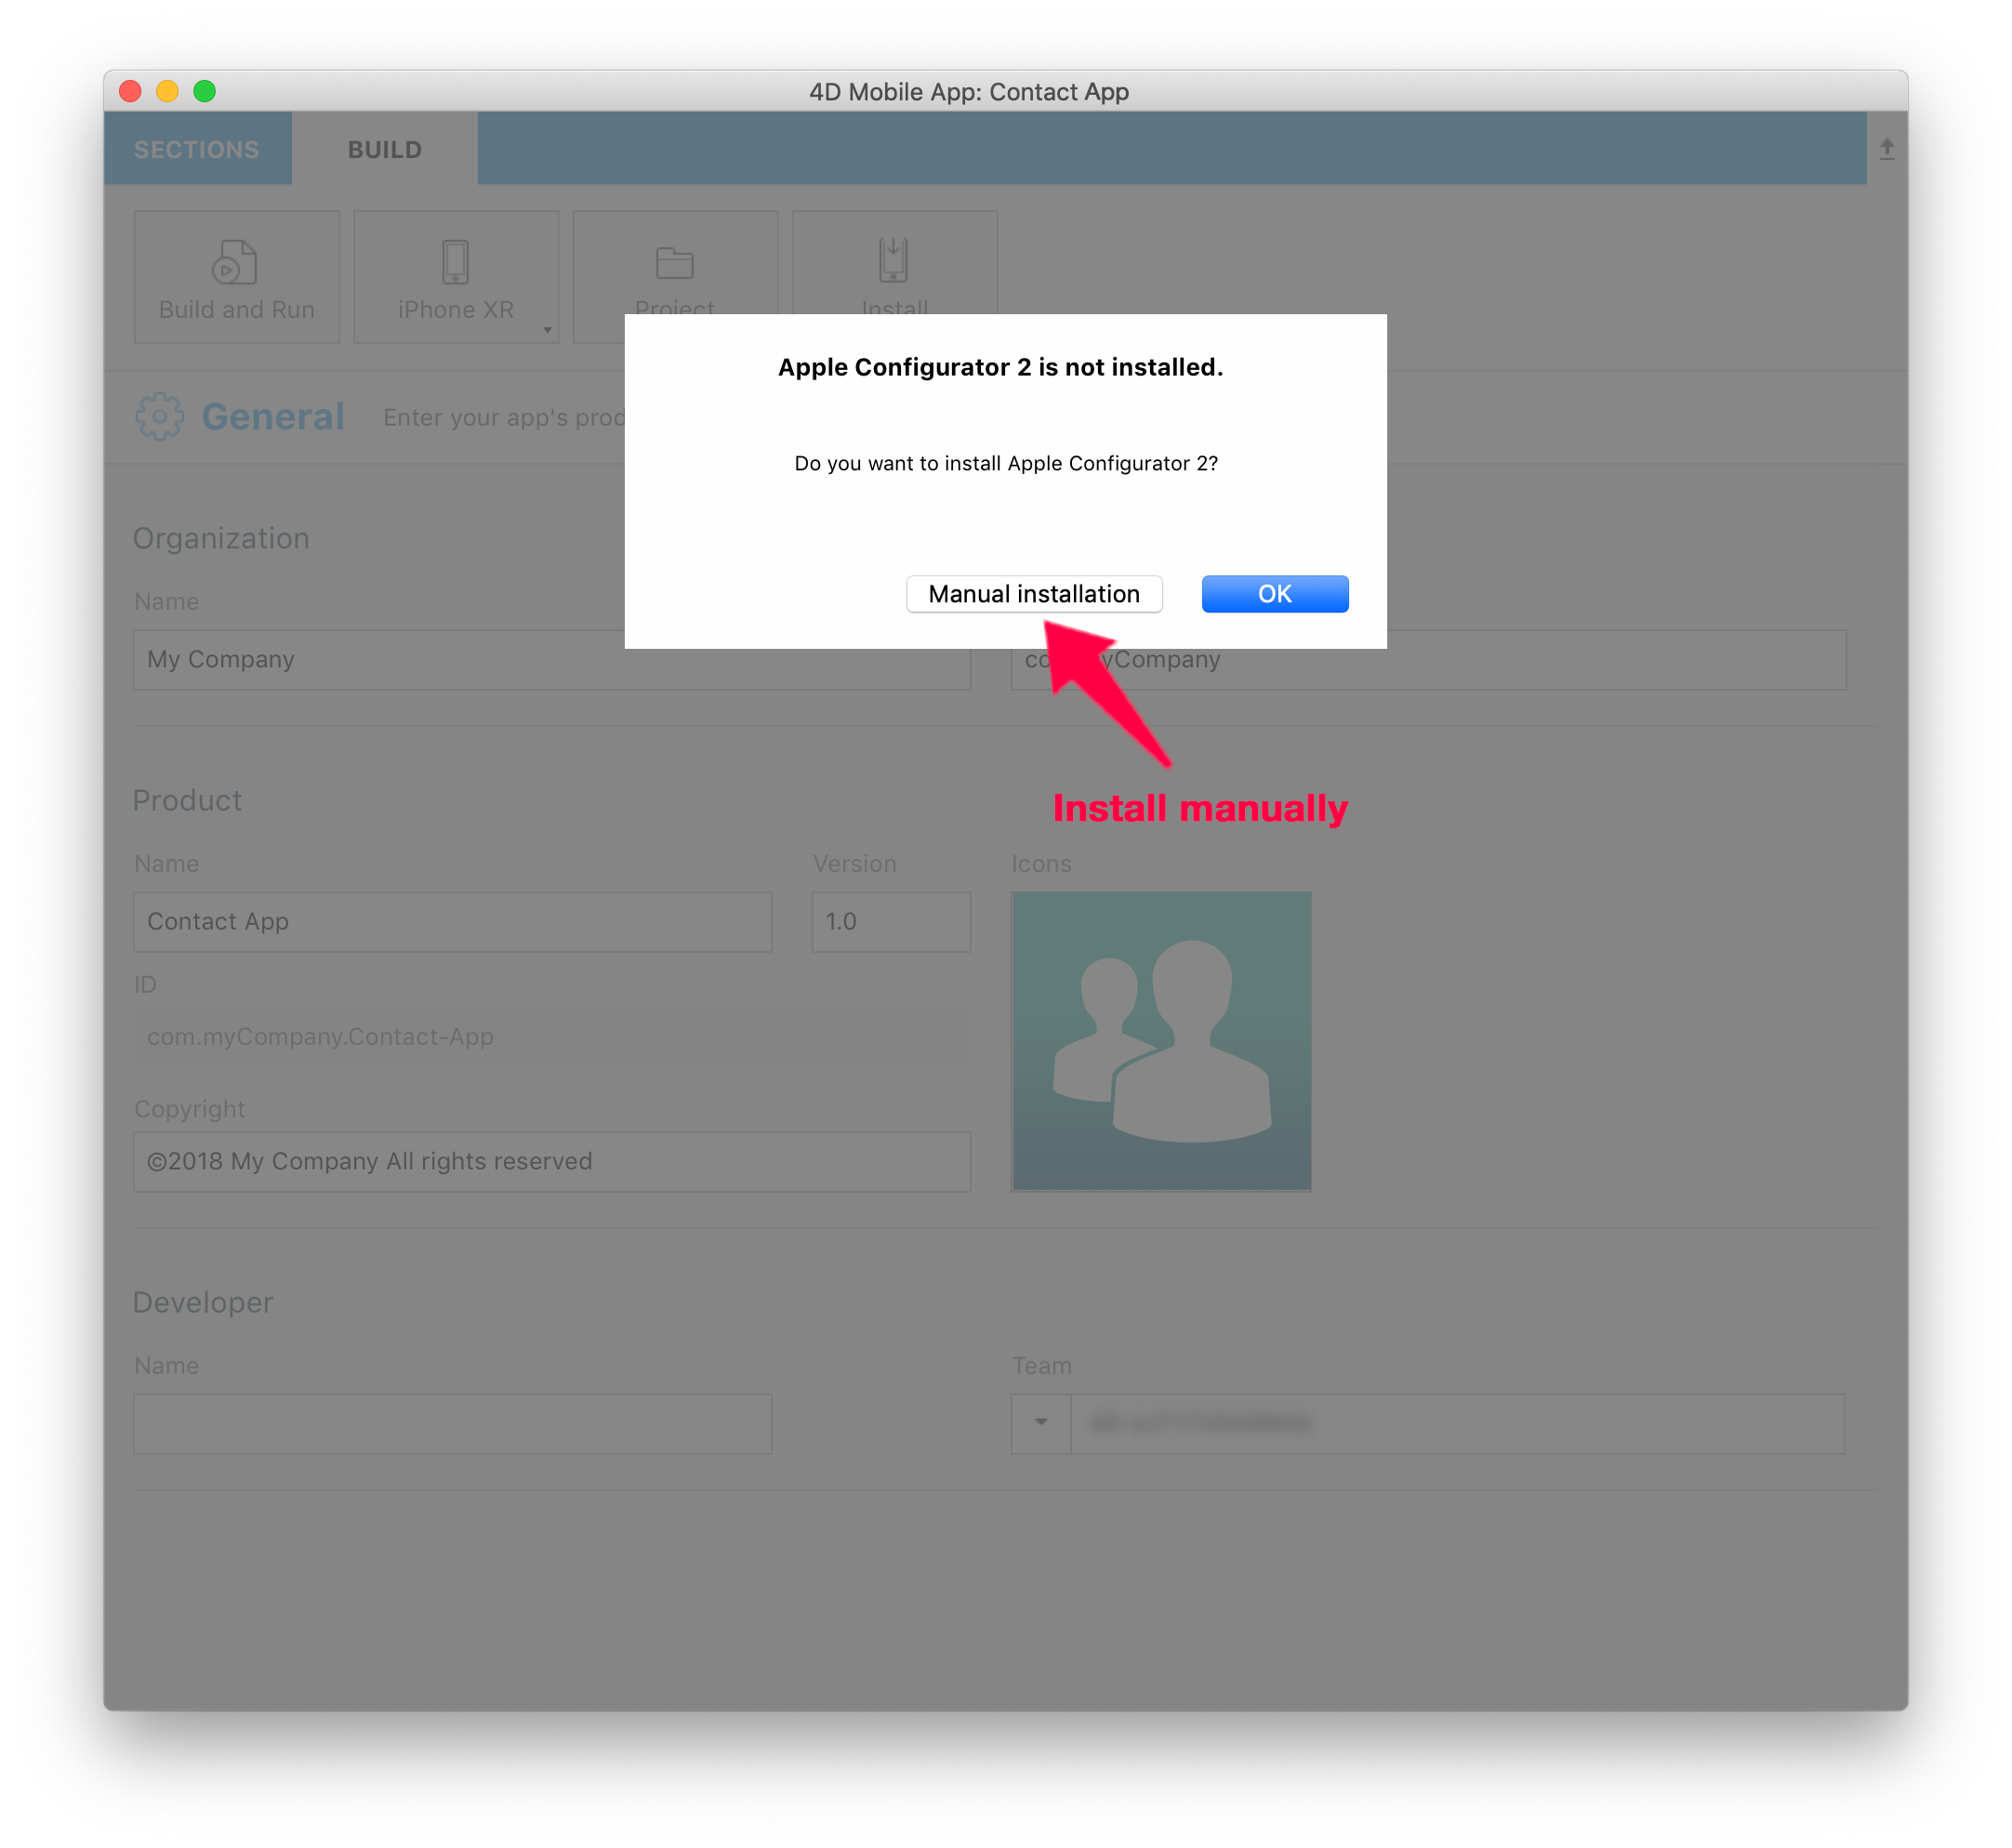
- An archive of your project is created
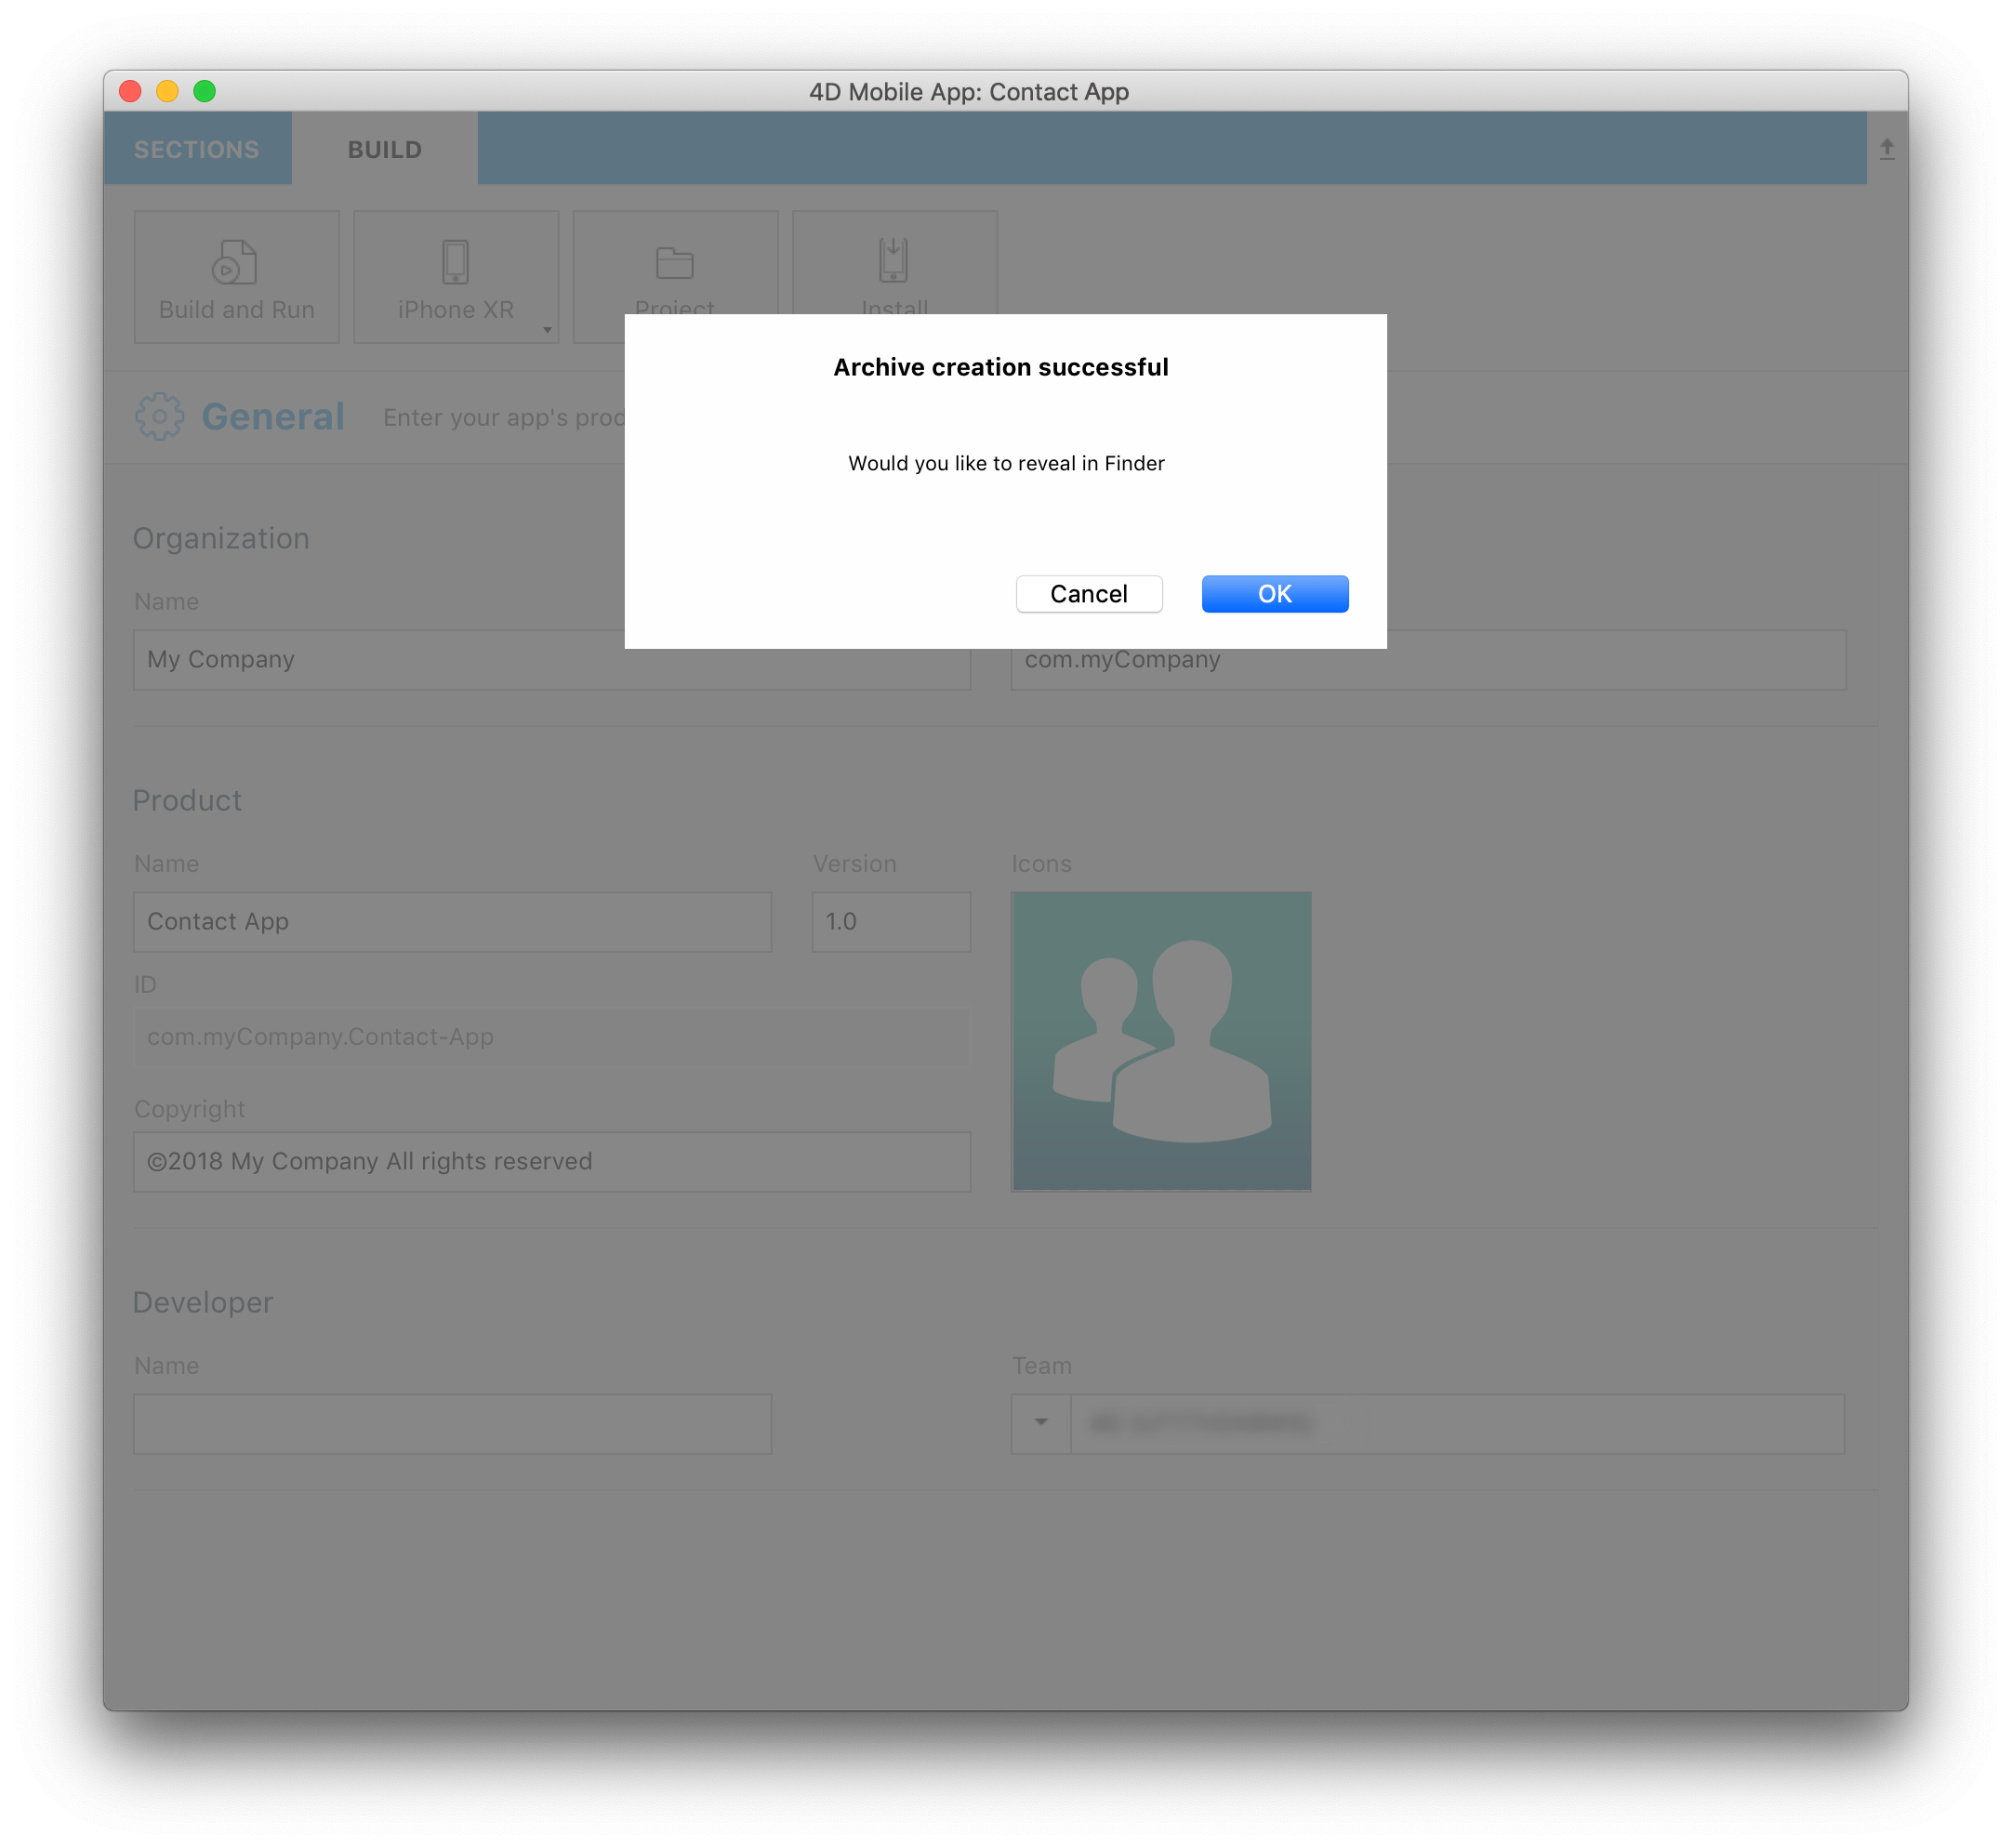
- Reveal the generated archive in Finder
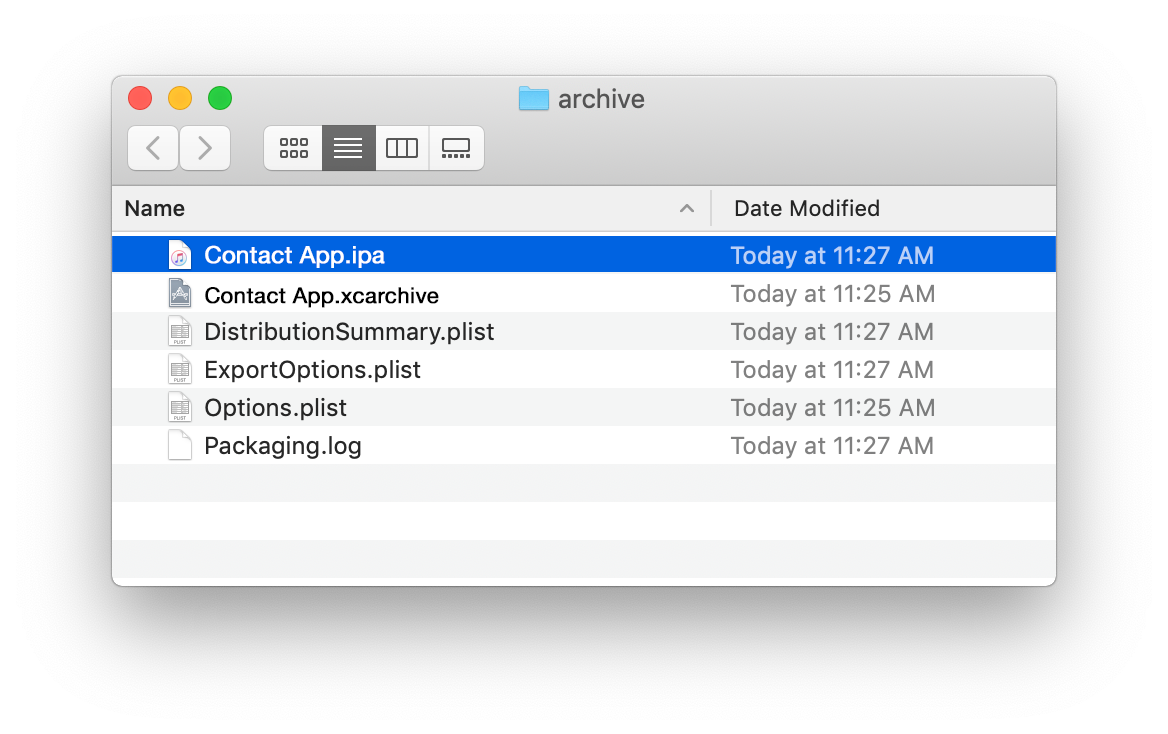
- Open Xcode and go to Menu > Window > Devices and Simulator and drag and drop the generated ipa file in the Installed Apps section.
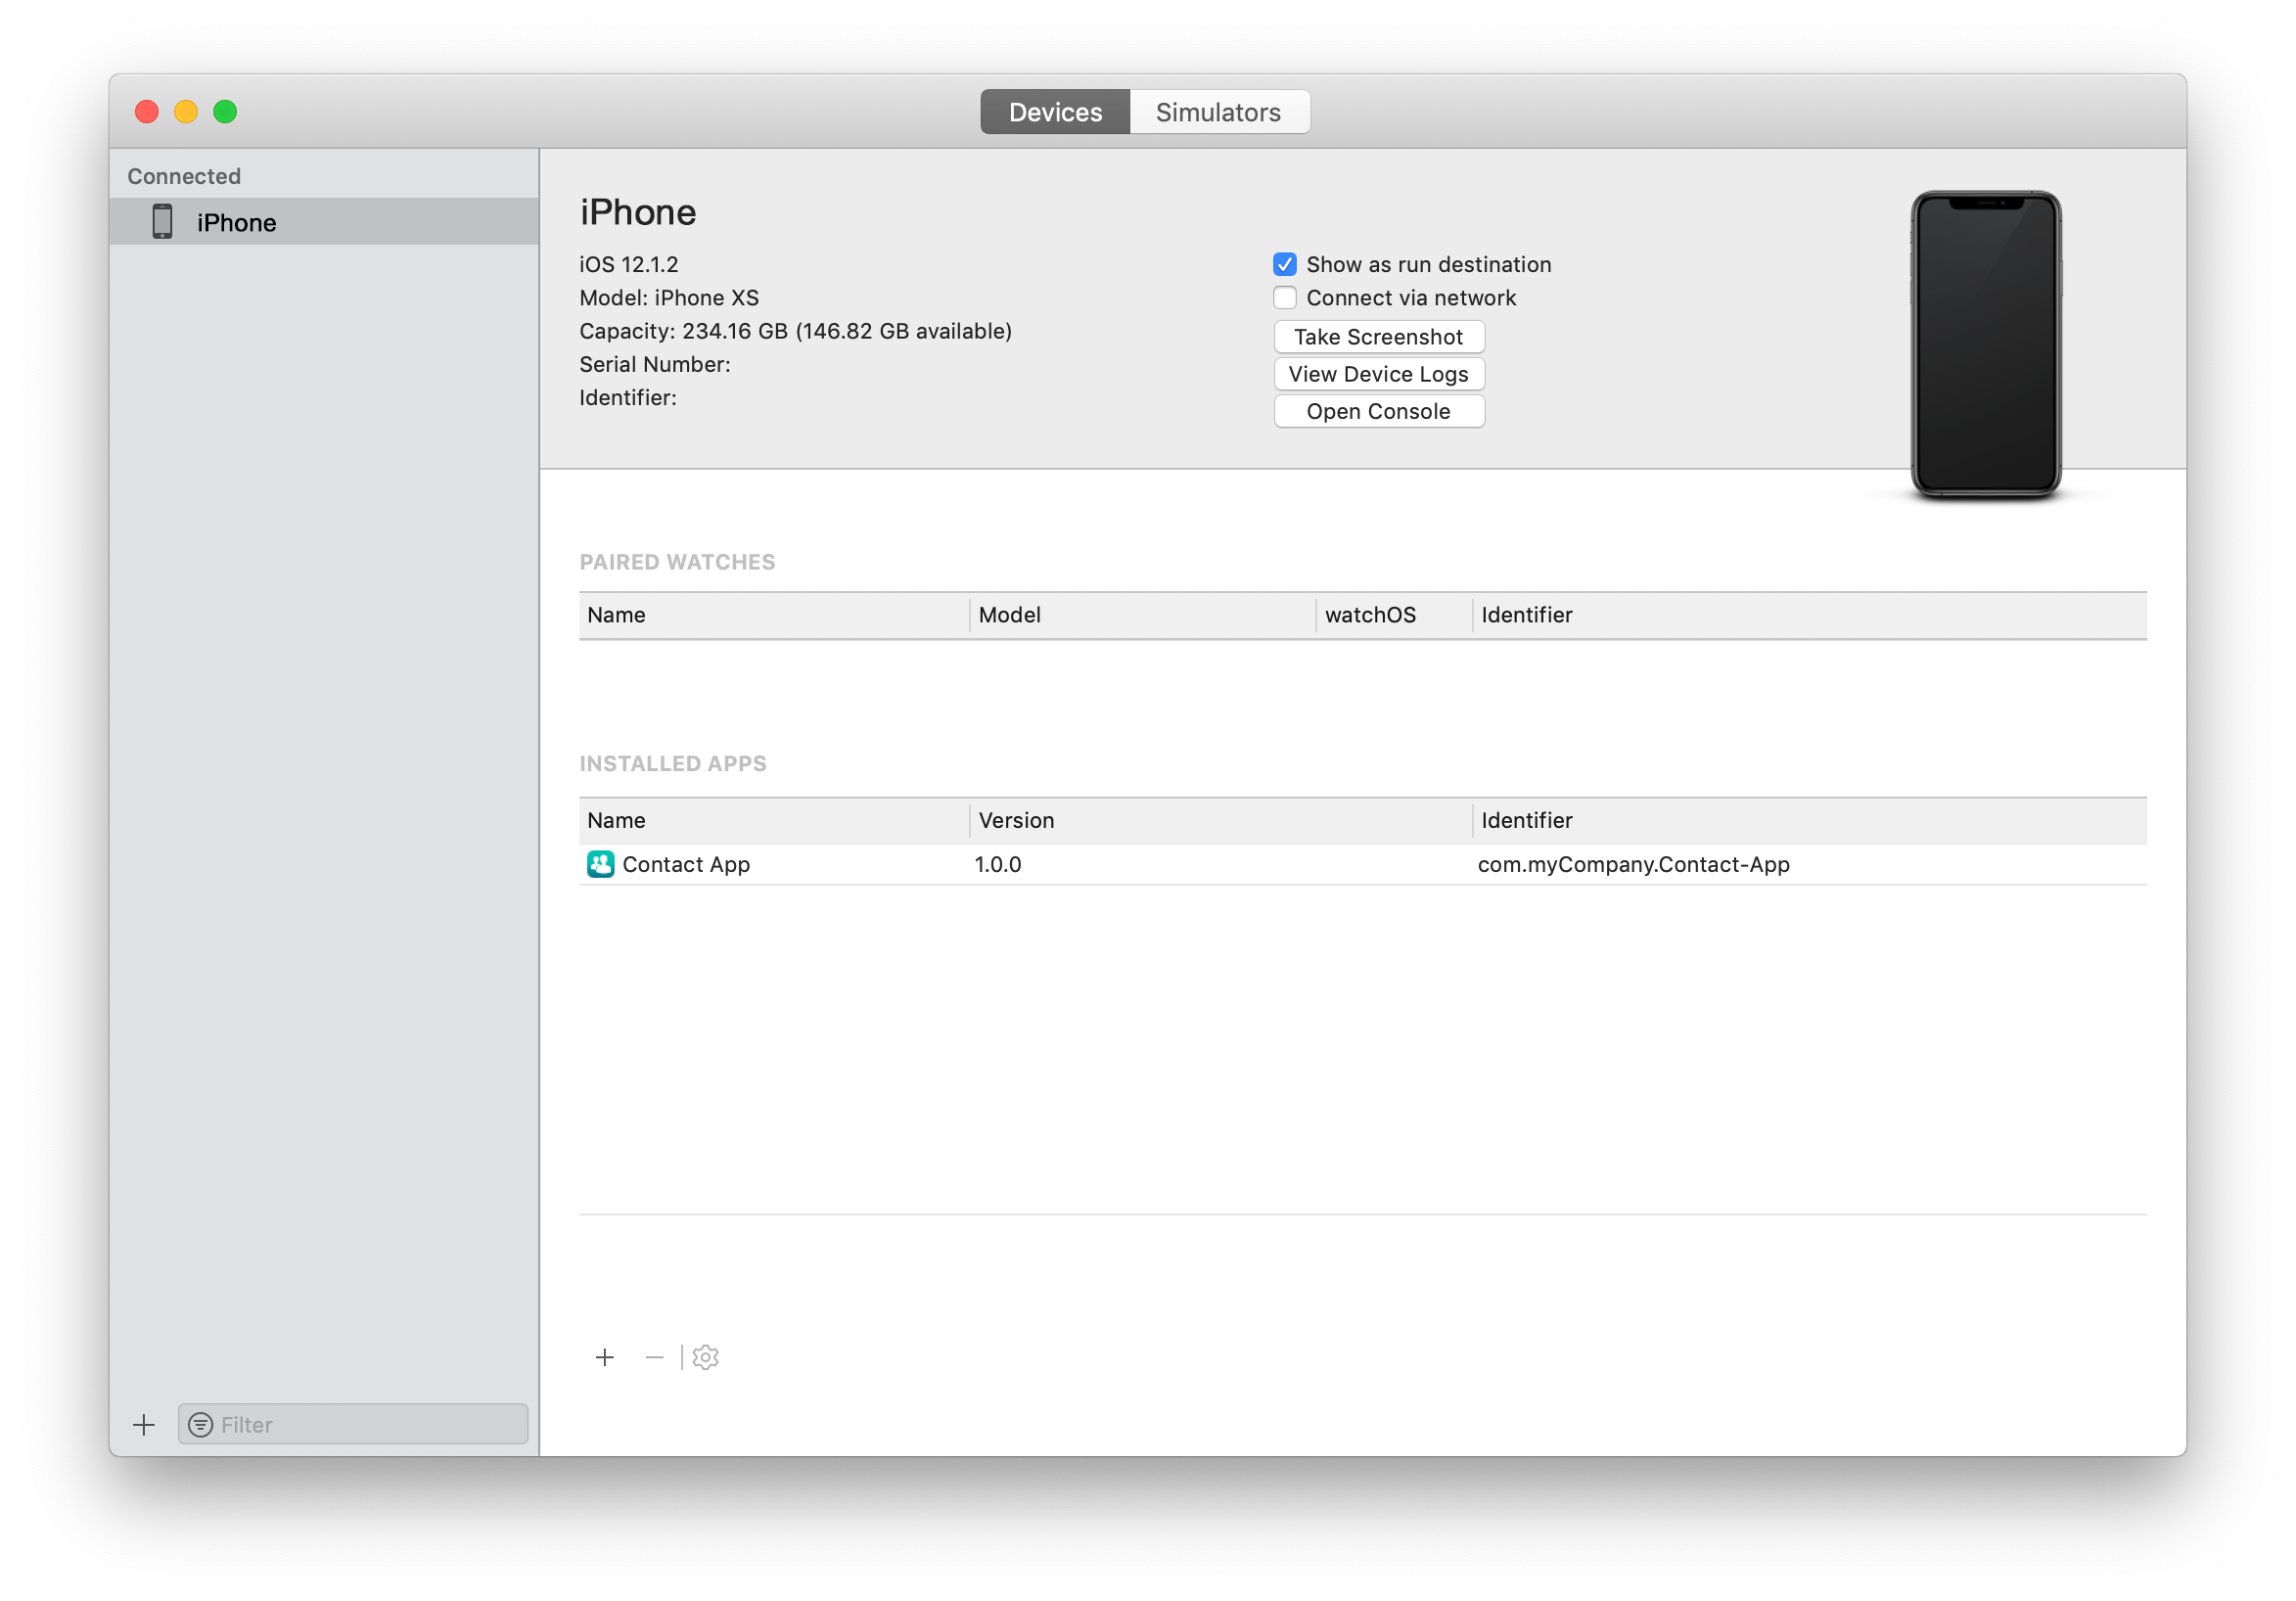
- The app is being installed on your device!