Publishing
This is where you define or create your app's:
- Web Server Settings
- Authentication Mode
- Authentication Method
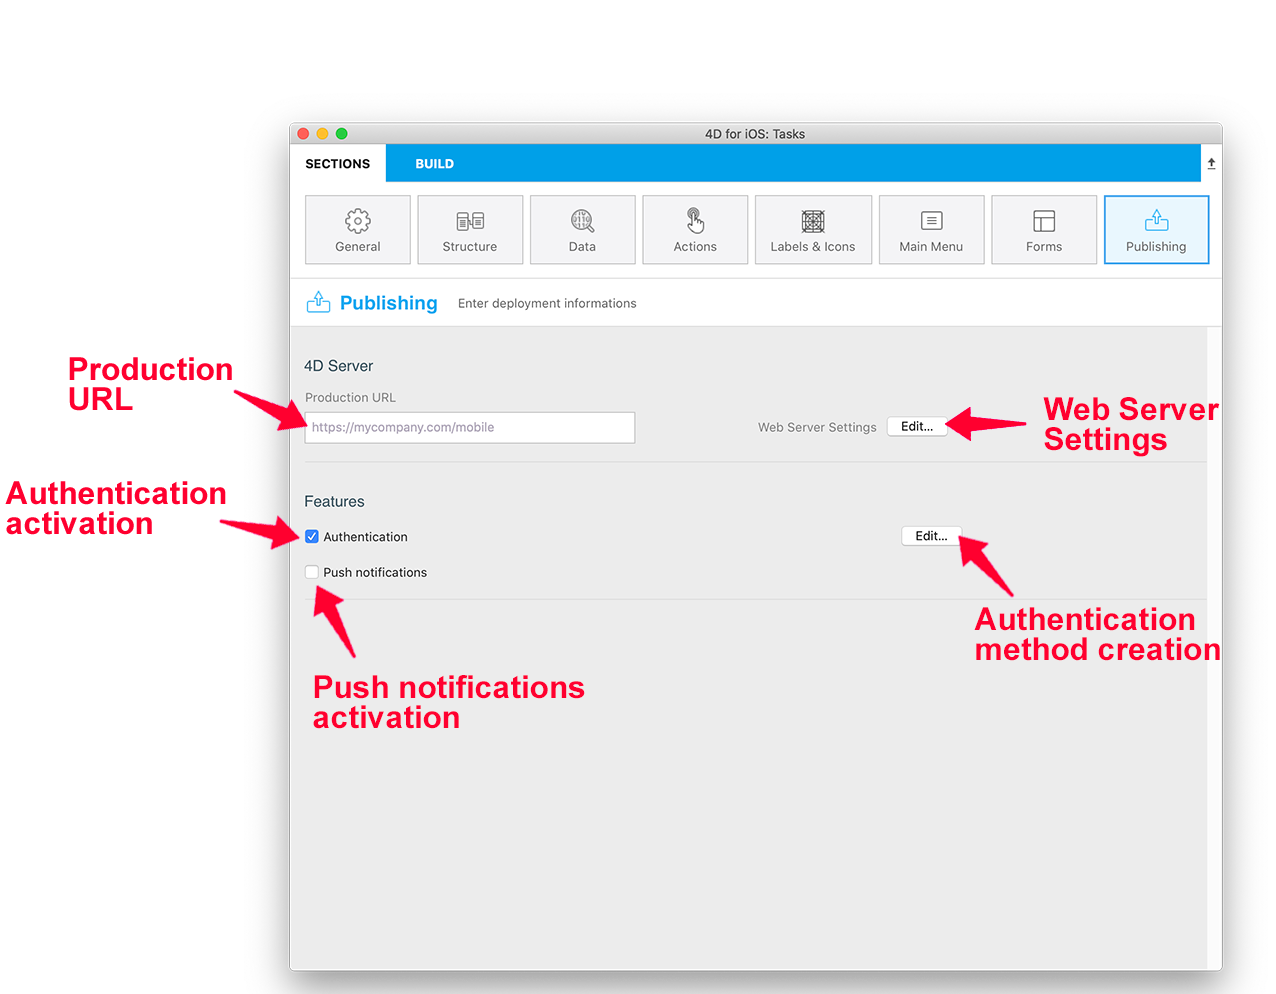
Web Server Settings
Activate and define your HTTPS and/or HTTP ports, if you haven't already done so. You can do this by clicking on the Edit button.
Activating the HTTPS port requires certificate installation to work properly. You can create test certificates with 4D.
NOTE
- The Simulator works locally (127.0.0.1 or localhost).
- If the production URL is defined, both HTTP and HTTPS are accepted. Otherwise, the IP address is used.
- If both HTTP and HTTPS are activated, HTTP is used.
Authentication
Authorized User: Check the Login required option to display a login form when the app starts.
Guest: Leave the Login required option unchecked. No login form will appear when the app starts.
Authentication Method
On Mobile App Authentication Database Method
- Development: The authentication method allows you to use the app locally.
- Deployment: You must create/edit the On Mobile App Authentication database method to authorize specific emails or devices, even in Guest mode.
A template is available to obtain all necessary information about the session, as well as user information (email address, app information, device, team ID, etc.)
You can customize this method according to your needs!
Session Management
When a user opens the app for the first time, a session file is created and stored next to the current data file in the MobileApps folder.
The session files are organized and grouped by app folder. The Team ID and app bundle ID are concatenated to create the app folder names.
Here is an example of a 4D for iOS-generated session file:
{
"application":{
  "id":"com.contactApp.Contact",
  "name":"Contact",
  "version":"1.0.0"
},
"team":{
  "id":"UTT7VDX8W5"
},
"language":{
  "id":"en_US",
  "code":"en",
  "region":"US"
},
"email":"",
"device":{
  "description":"iPhone X",
  "version":"11.3",
  "id":"0DC5132E-1EF4-407C-A832-5FE33D818AF3",
  "simulator":true
},
"send":"link",
"session":{
  "id":"7023d9205074199d1c16fc00d24354e778137675",
  "ip":"::ffff:192.168.5.4"
},
"status":"accepted",
"token":"eyJhcHBOYW1lSUQiOiJjb20uY29udGFjdEFwcC5Db250YWN0IiwiaWQiOiI3MDIzZDkyMDUwNzQxOTlkMWMxNmZjMDBkMjQzNTRlNzc4MTM3Njc1IiwidGVhbUlEIjoiVVRUN1ZEWDhXNSJ9"
}
If you want the ability to manually validate the first login for every user session, you must change the "accepted" default status to "pending" by adding $response.verify:=True to the On Mobile App Authentication database method.
Mobile Session Management Component
Sessions can be managed by the MOBILE SESSION MANAGEMENT:
- Download and unzip the zip file
- Go to Build / Components file and get the MOBILE SESSION MANAGEMENT.4dbase
- Create a Components folder next to the 4D database with the app's data.
- Place the MOBILE SESSION MANAGEMENT component in the newly created Components folder.
- Restart 4D.
- Click on the Execute button from the toolbar
- In the 4D Methods Explorer, select the MOBILE SESSION MANAGEMENT method and click on the Execute button.
- The Apps window will appear displaying all of your apps:
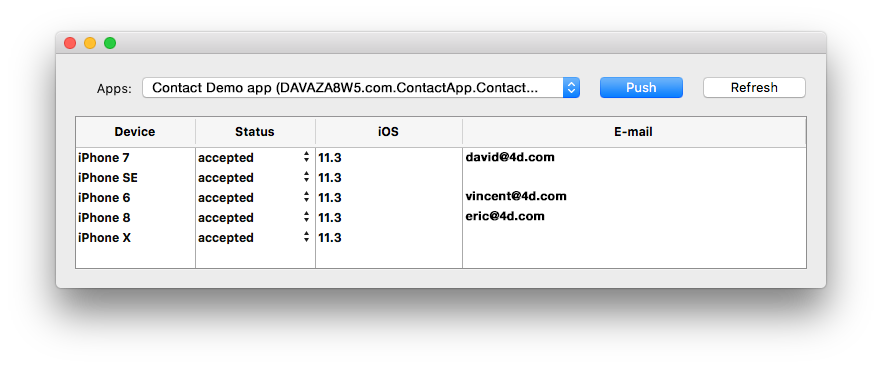
- Right click on a session to reveal the session file in the Finder or delete it.
- You can change and define the session status for each device: accepted or pending
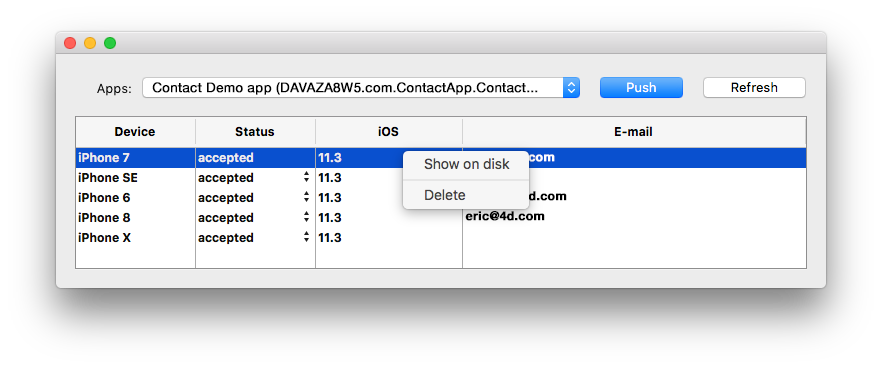
- The Push button will update the session in memory.
- The Refresh button updates the session list.
How it looks on a device
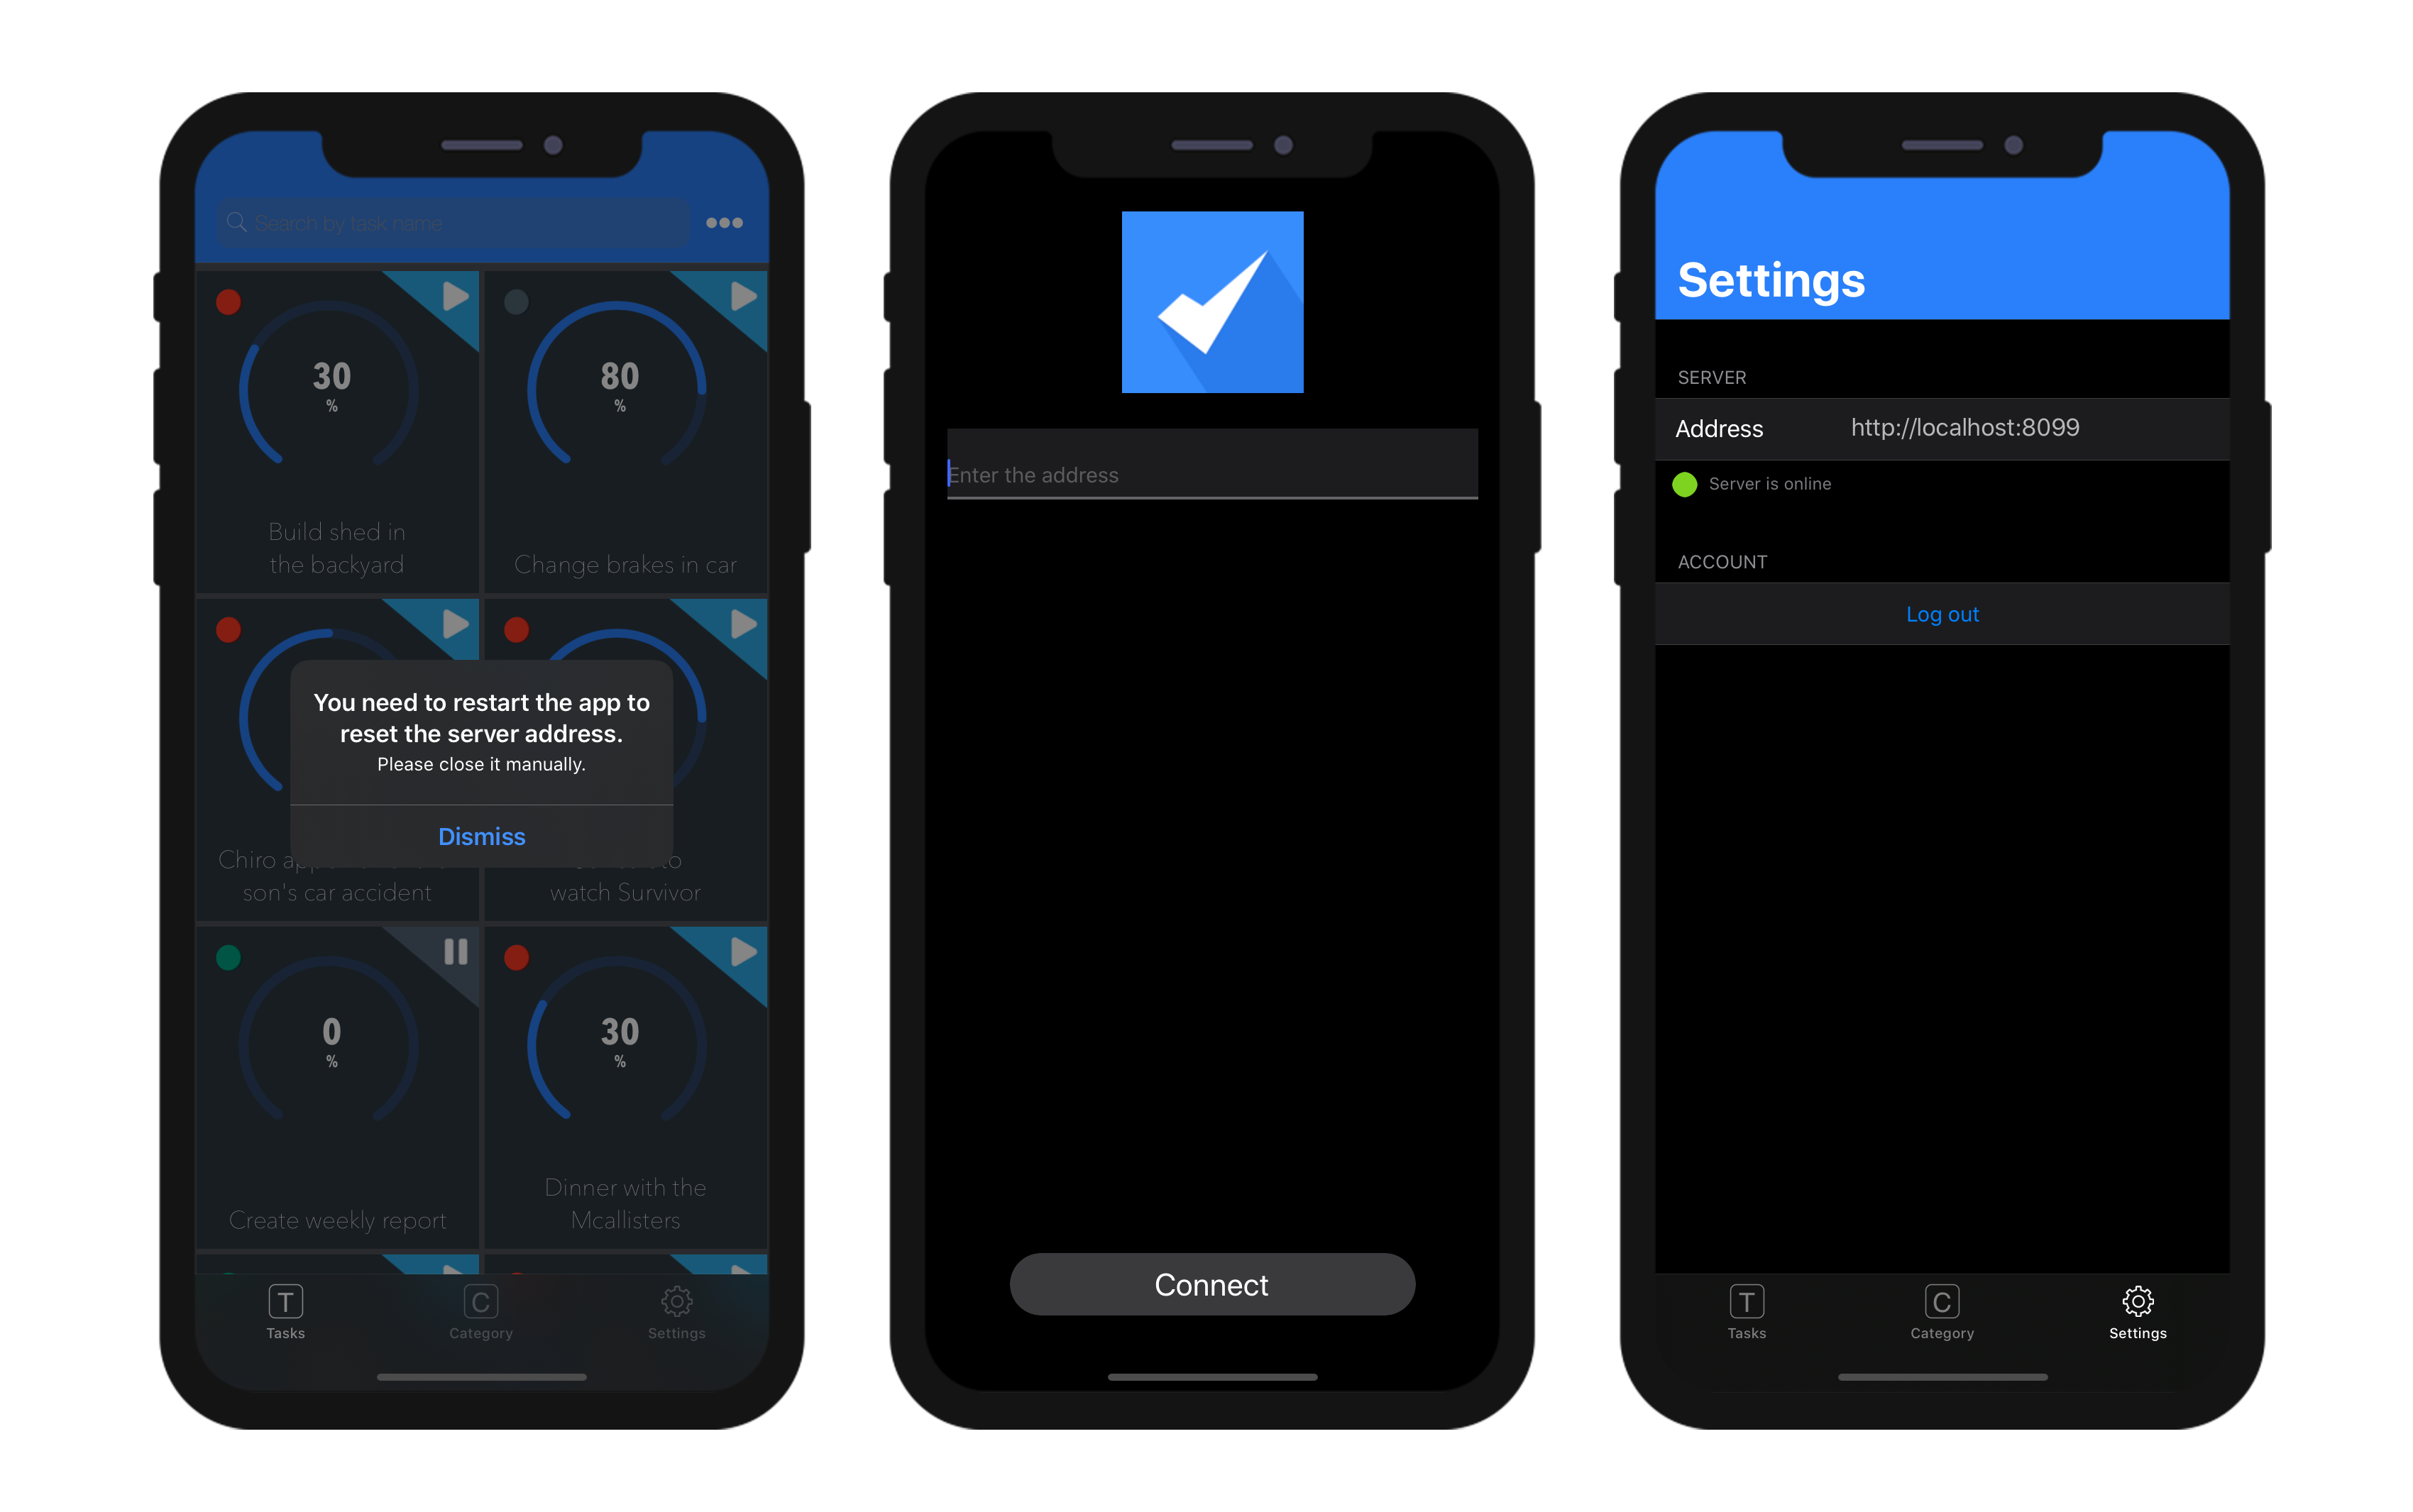
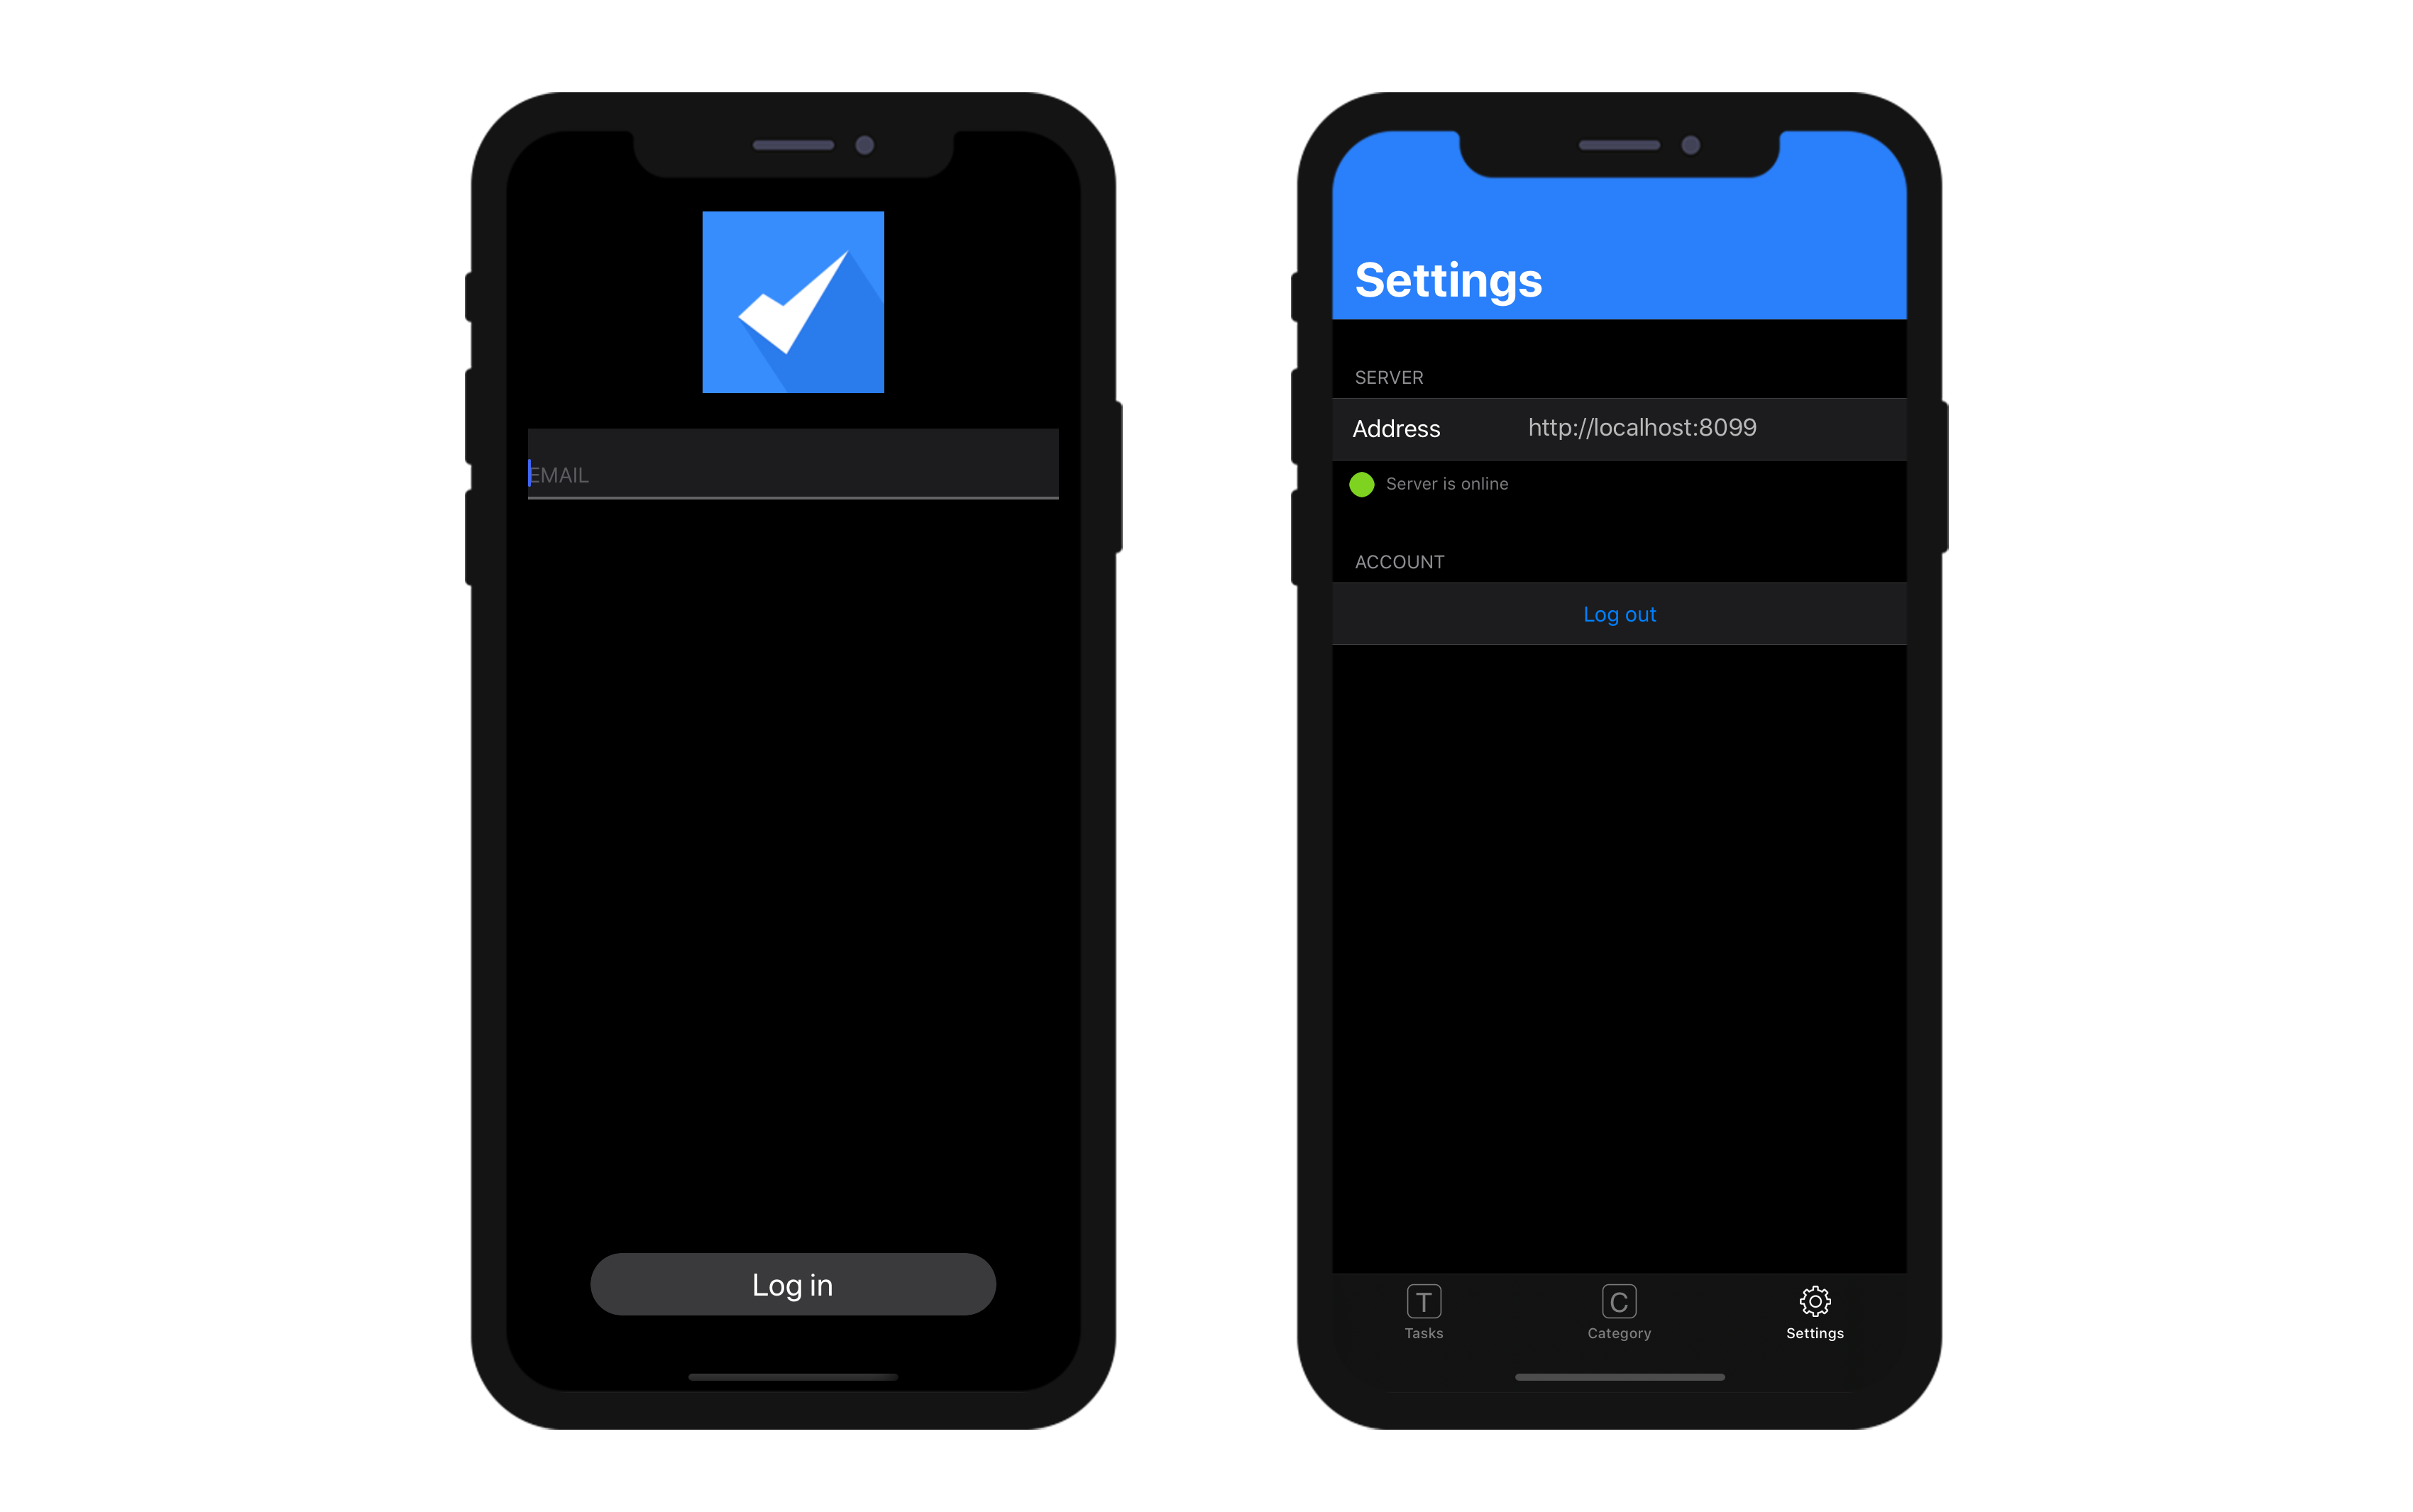
Settings screen
A Settings screen is available from the tab bar. You can also find it from the More tab if necessary (i.e., your app has more than four tables).
Settings allows you to:
- Consult your remote URL and it's state
- Log out (if connected as an Authorized User)
Reset remote url
You can easily update your remote url from iPhone Settings :
- Open your iPhone Settings
- Select the app you want the remote url to be updated
- Switch on the "Reset server address" option
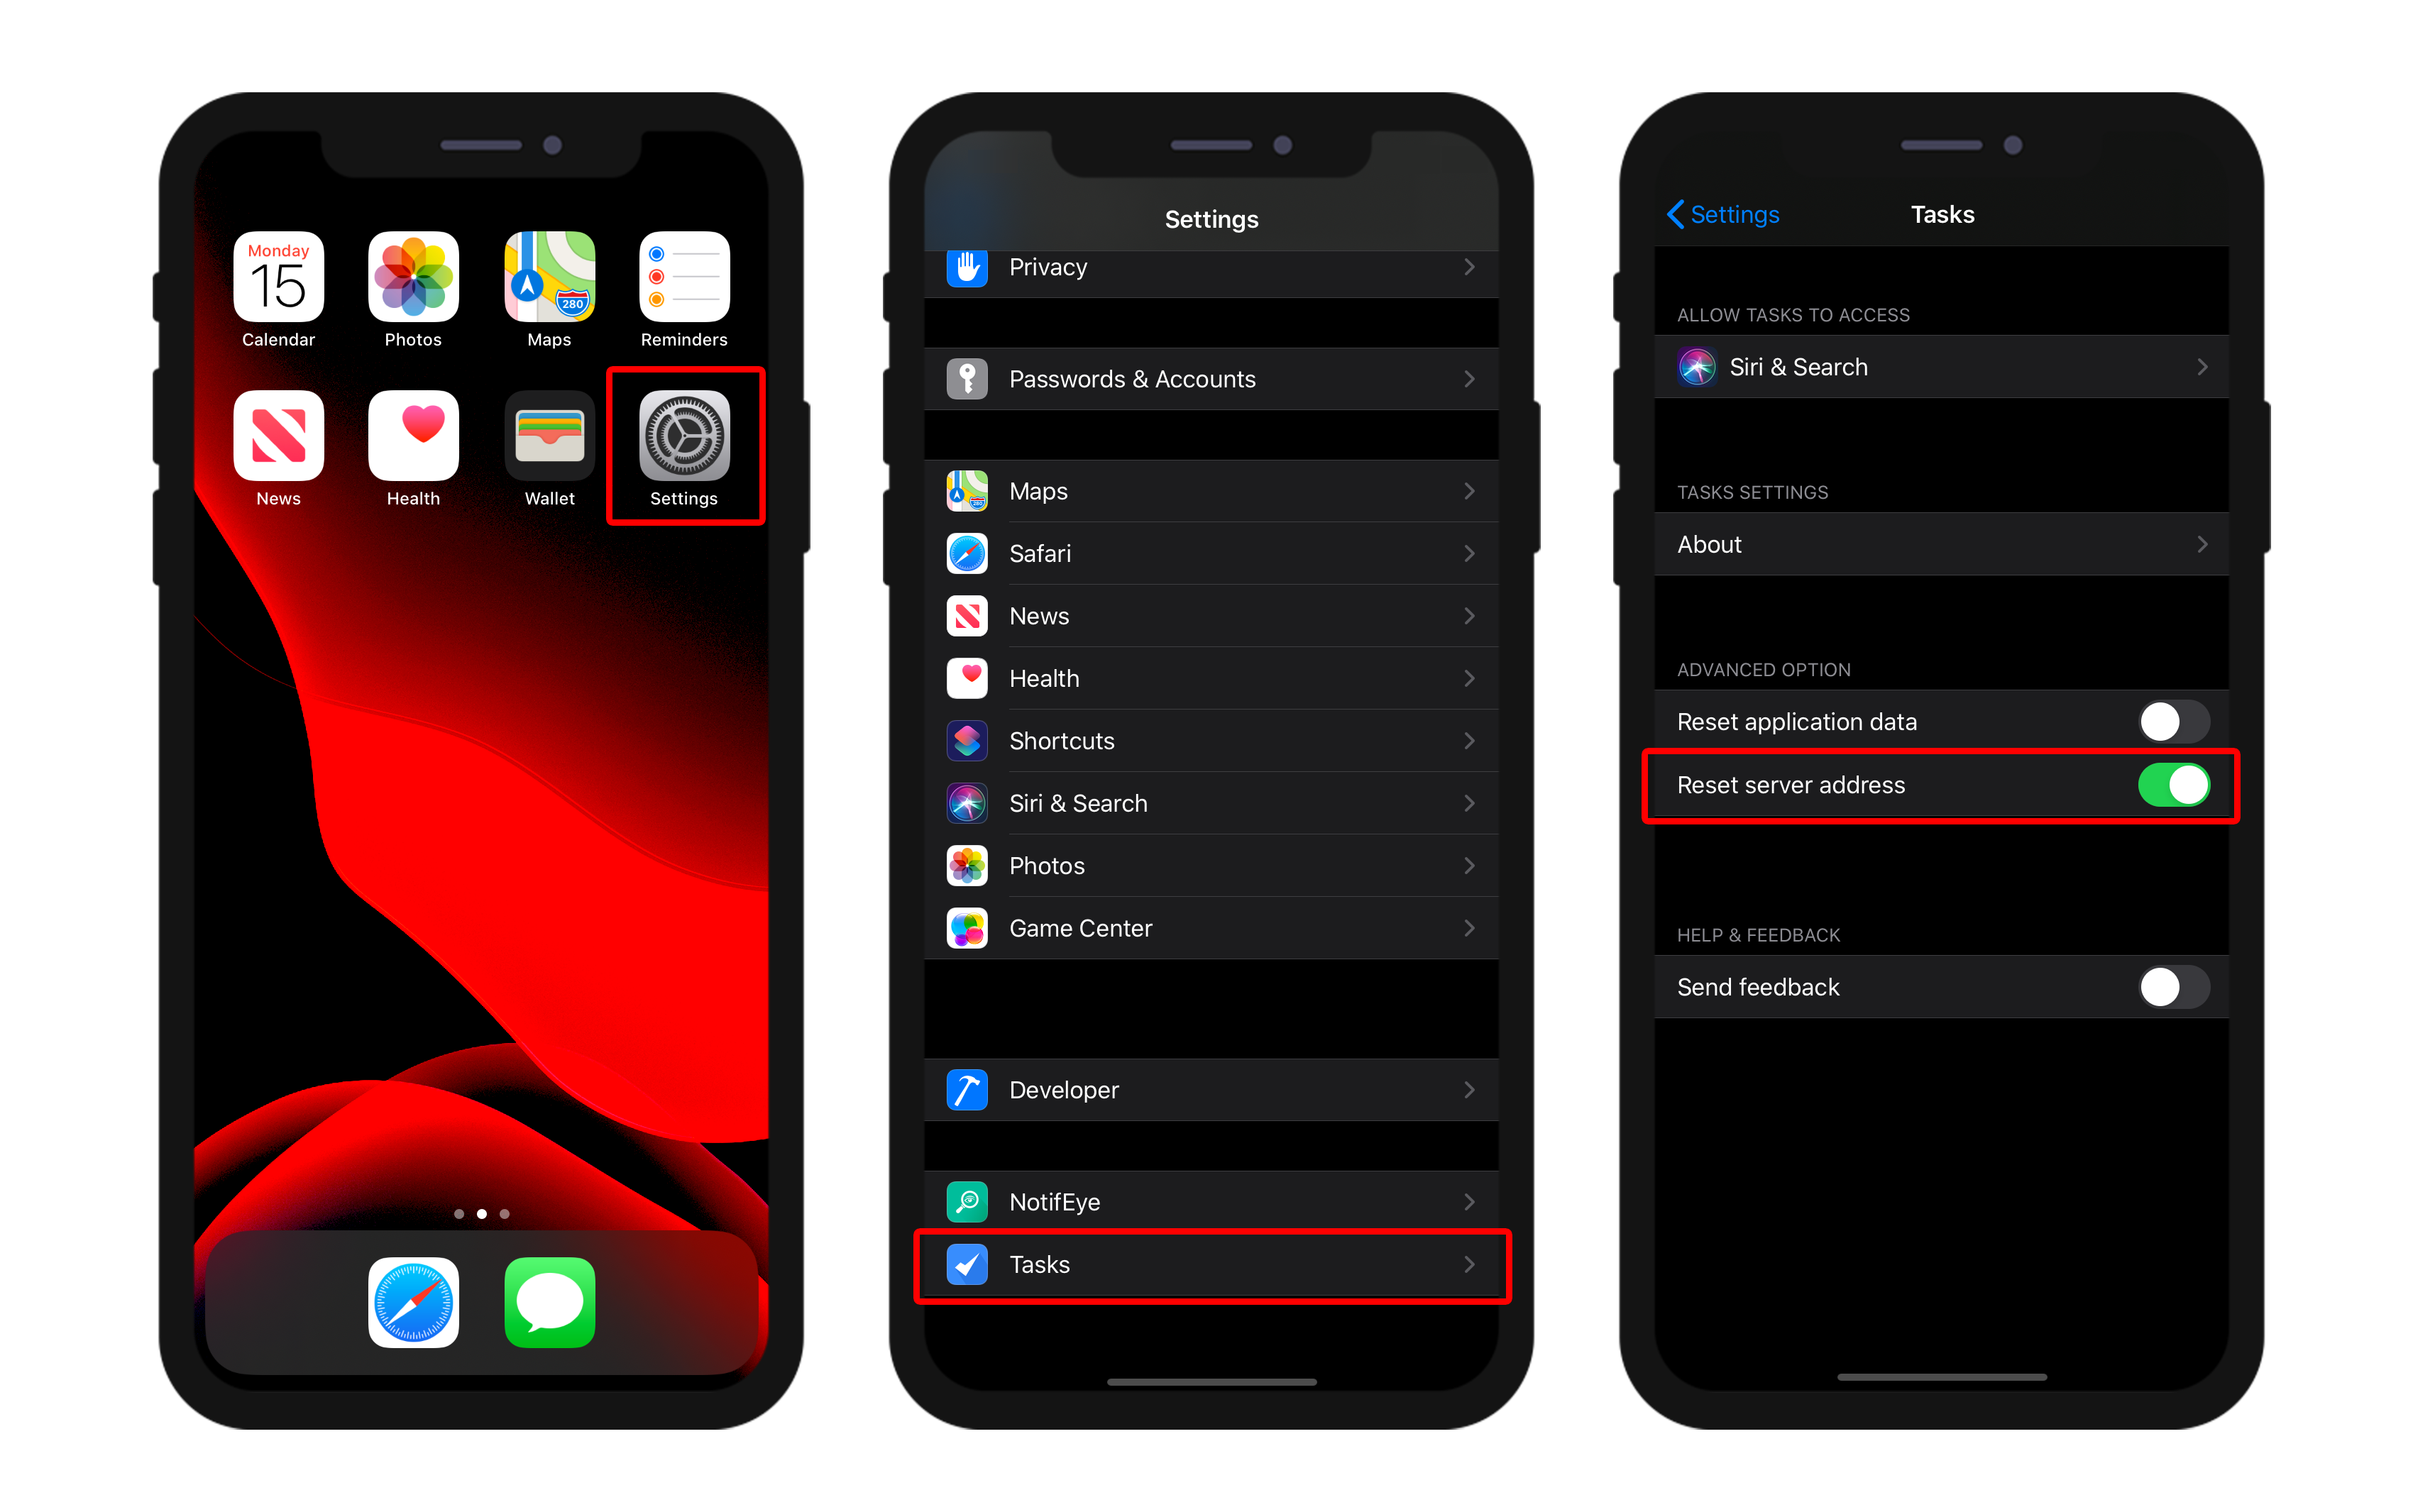
- Then restart your app to reset the server address
- And finally define the new remote url
