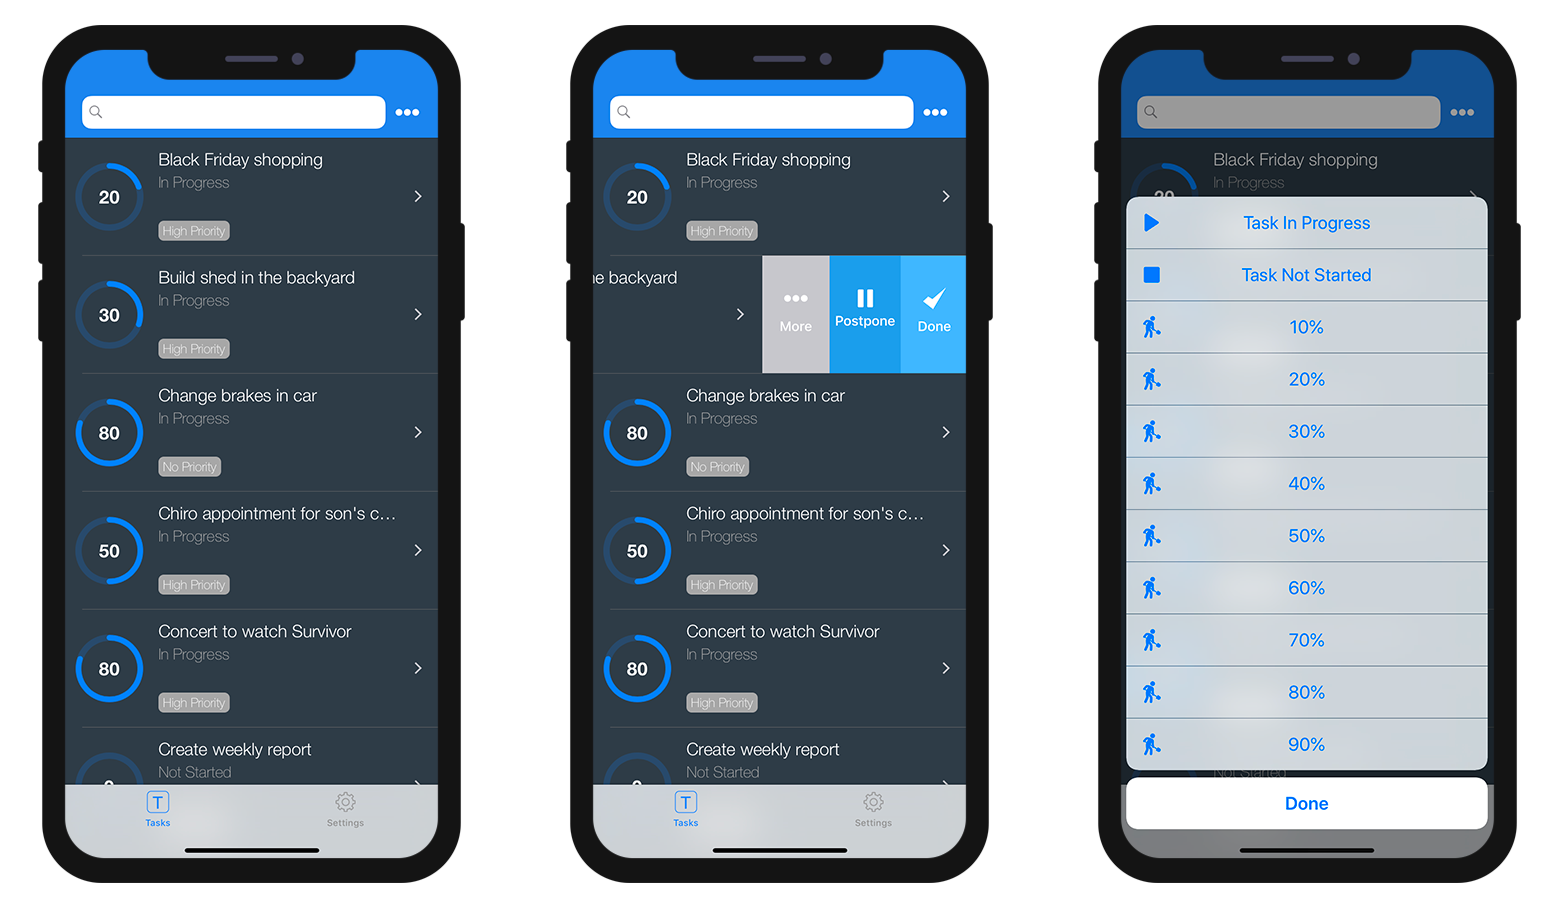
テンプレートにアクションを追加する
OBJECTIVES
Add actions to custom List and Detail forms templates.
PREREQUISITES
はじめにここをクリックして,すべての条件が揃っていることを確かめましょう!
In this tutorial, we are going to see how easy it can be to add actions to custom templates.
⒈ ⒈ プロジェクトをダウンロードする
To begin, download the Starter Project, which includes:
- リスト画面のカスタムテンプレートが2個(TasksList および TasksCollection)
- 詳細画面のカスタムテンプレートが1個(TasksDetail)
- データベース(Tasks.4dbase)
⒉ ⒉ 4D for iOS プロジェクトにカスタムテンプレートを追加する
First, drop:
- TasksList and TasksCollection template folders in Tasks.4dbase/Resources/Mobile/form/list folder

- TasksDetail template folders in Tasks.4dbase/Resources/Mobile/form/detail folder

⒊ ⒊ リスト画面にアクションを追加する
As we have seen previously in the actions section description, two types of actions are availble (Table actions and Entity actions).
Let's first open the list/TasksList/Sources/Forms/Tables/___TABLE___/___TABLE___ListForm.Storyboard file.Storyboard file.
TasksList カスタムテンプレートにアクションを追加する
A A テーブルアクションタグを追加する
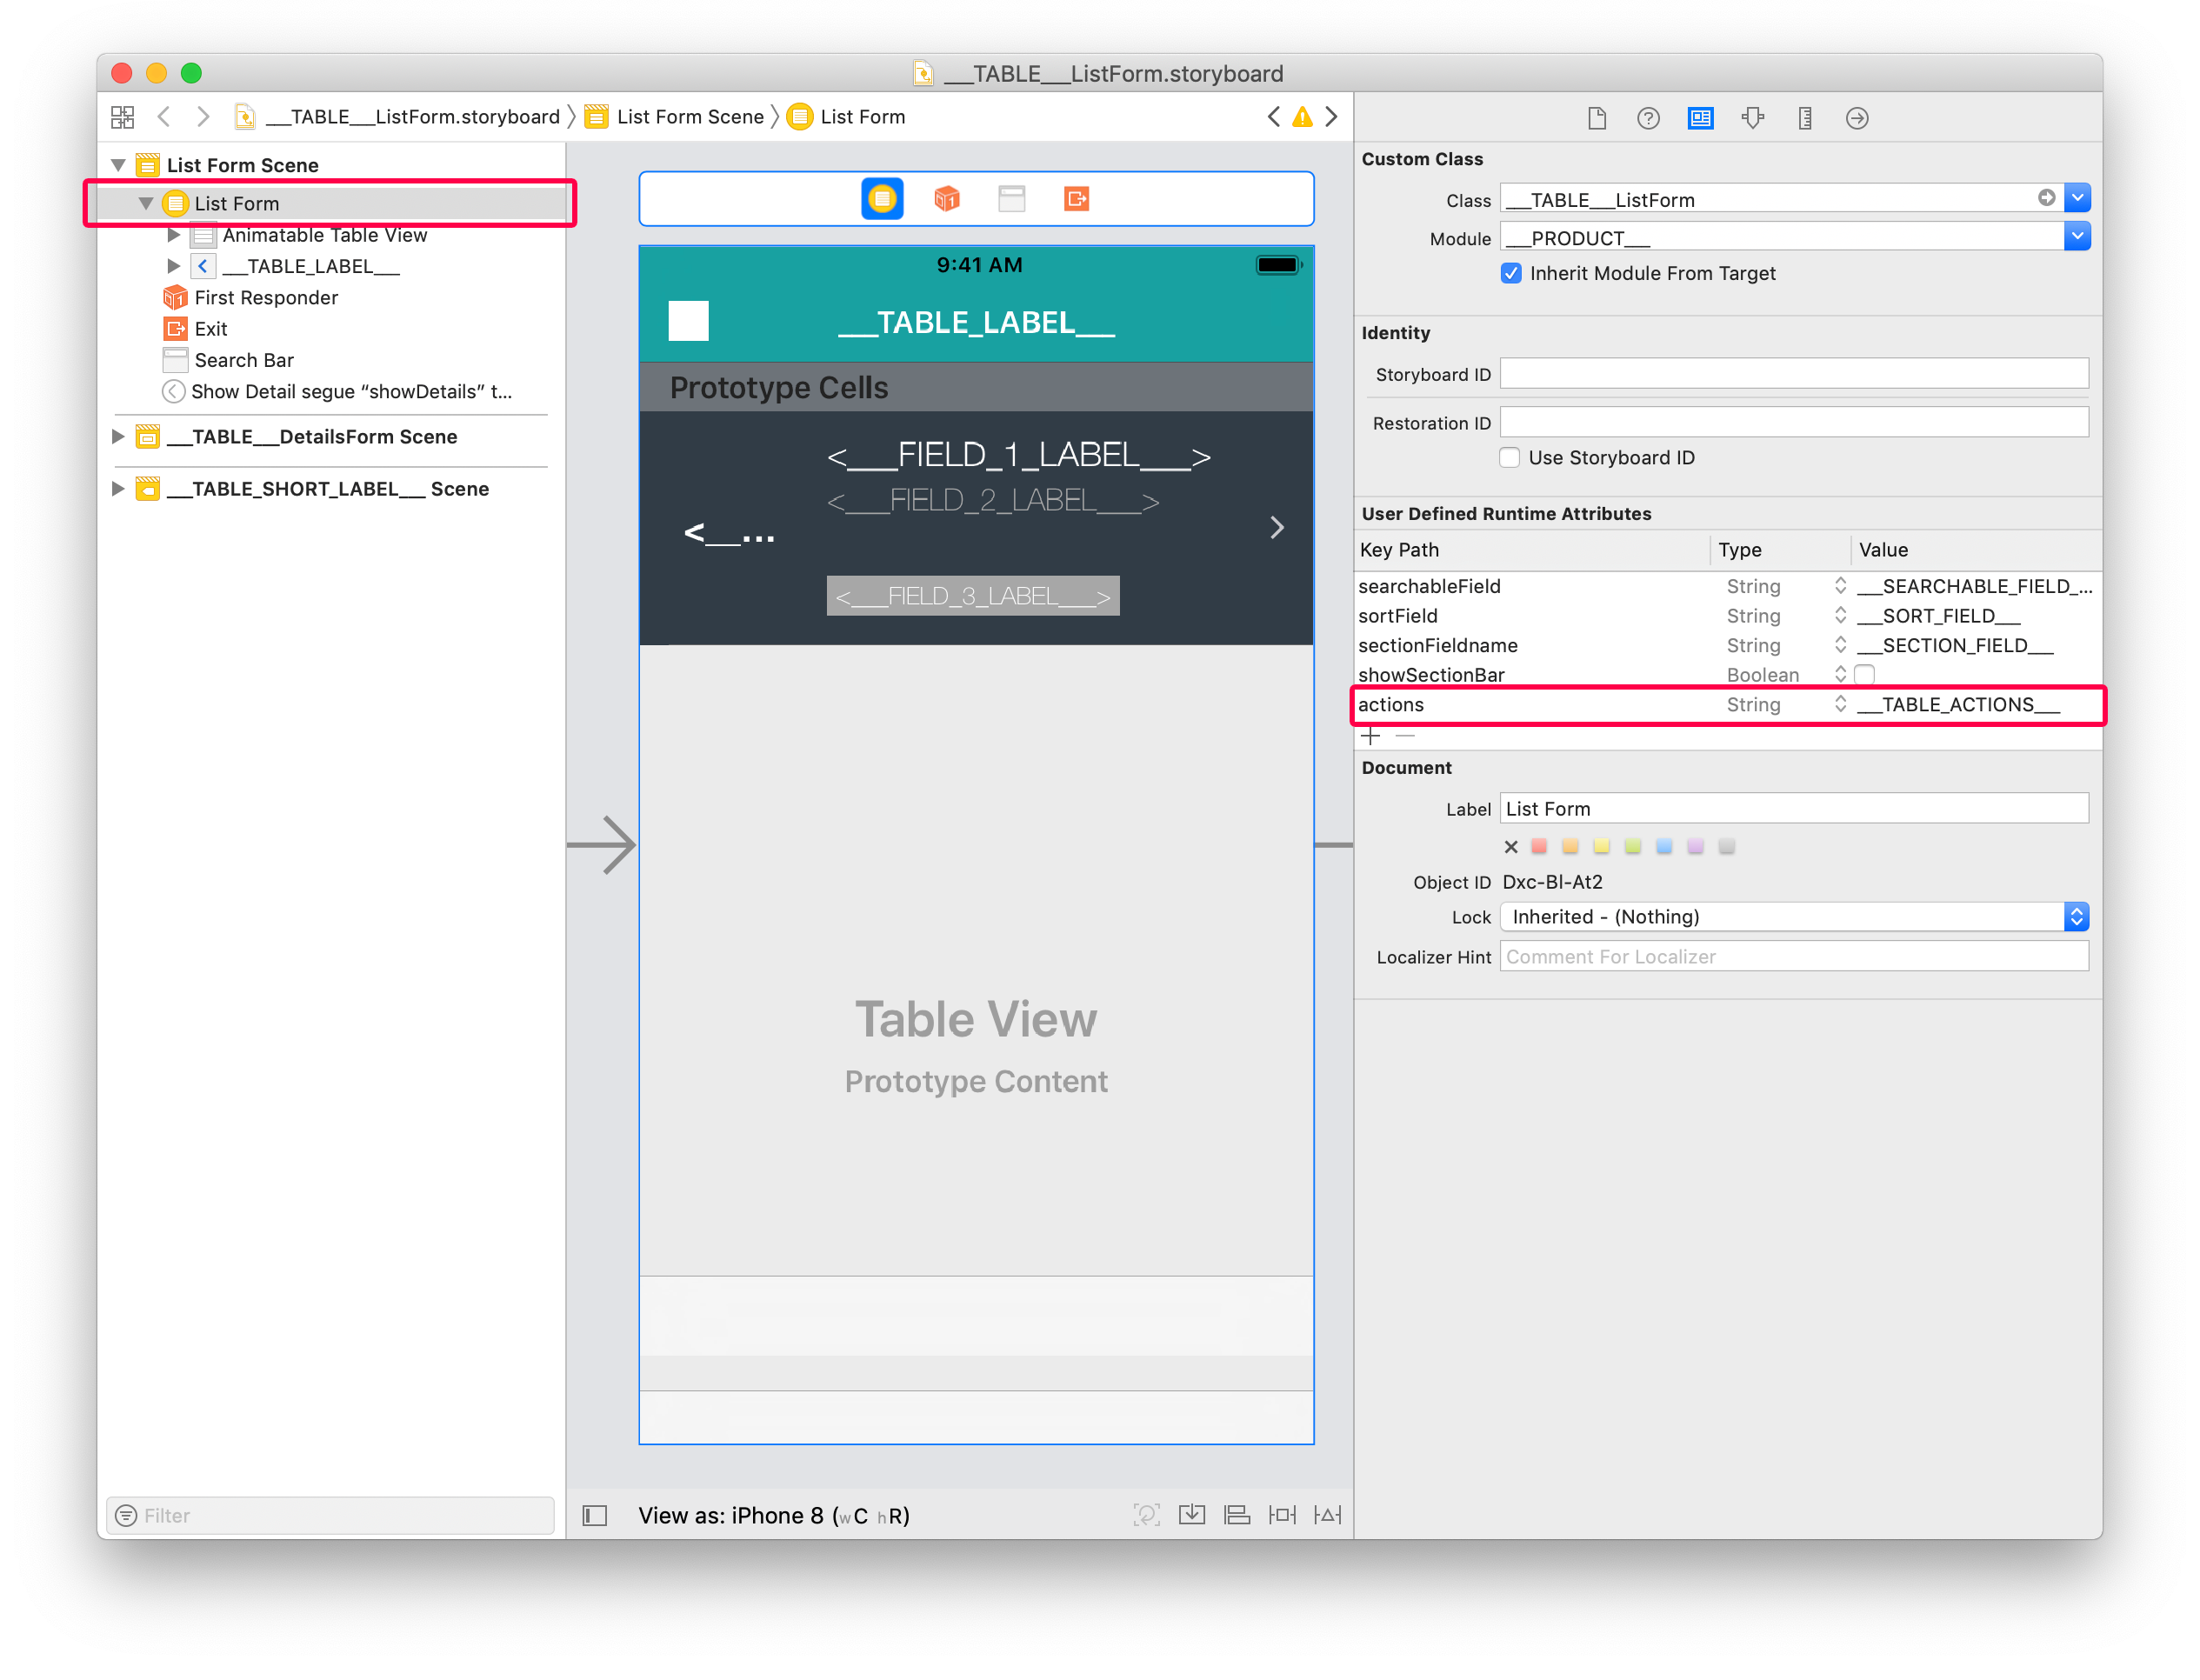
Select the List form Controller and add this line in the User Defined Runtime Attributes (Identity inspector):
- Key Path:
actions - Type:
String - Value:
___TABLE_ACTIONS___
B B エンティティアクションタグを追加する
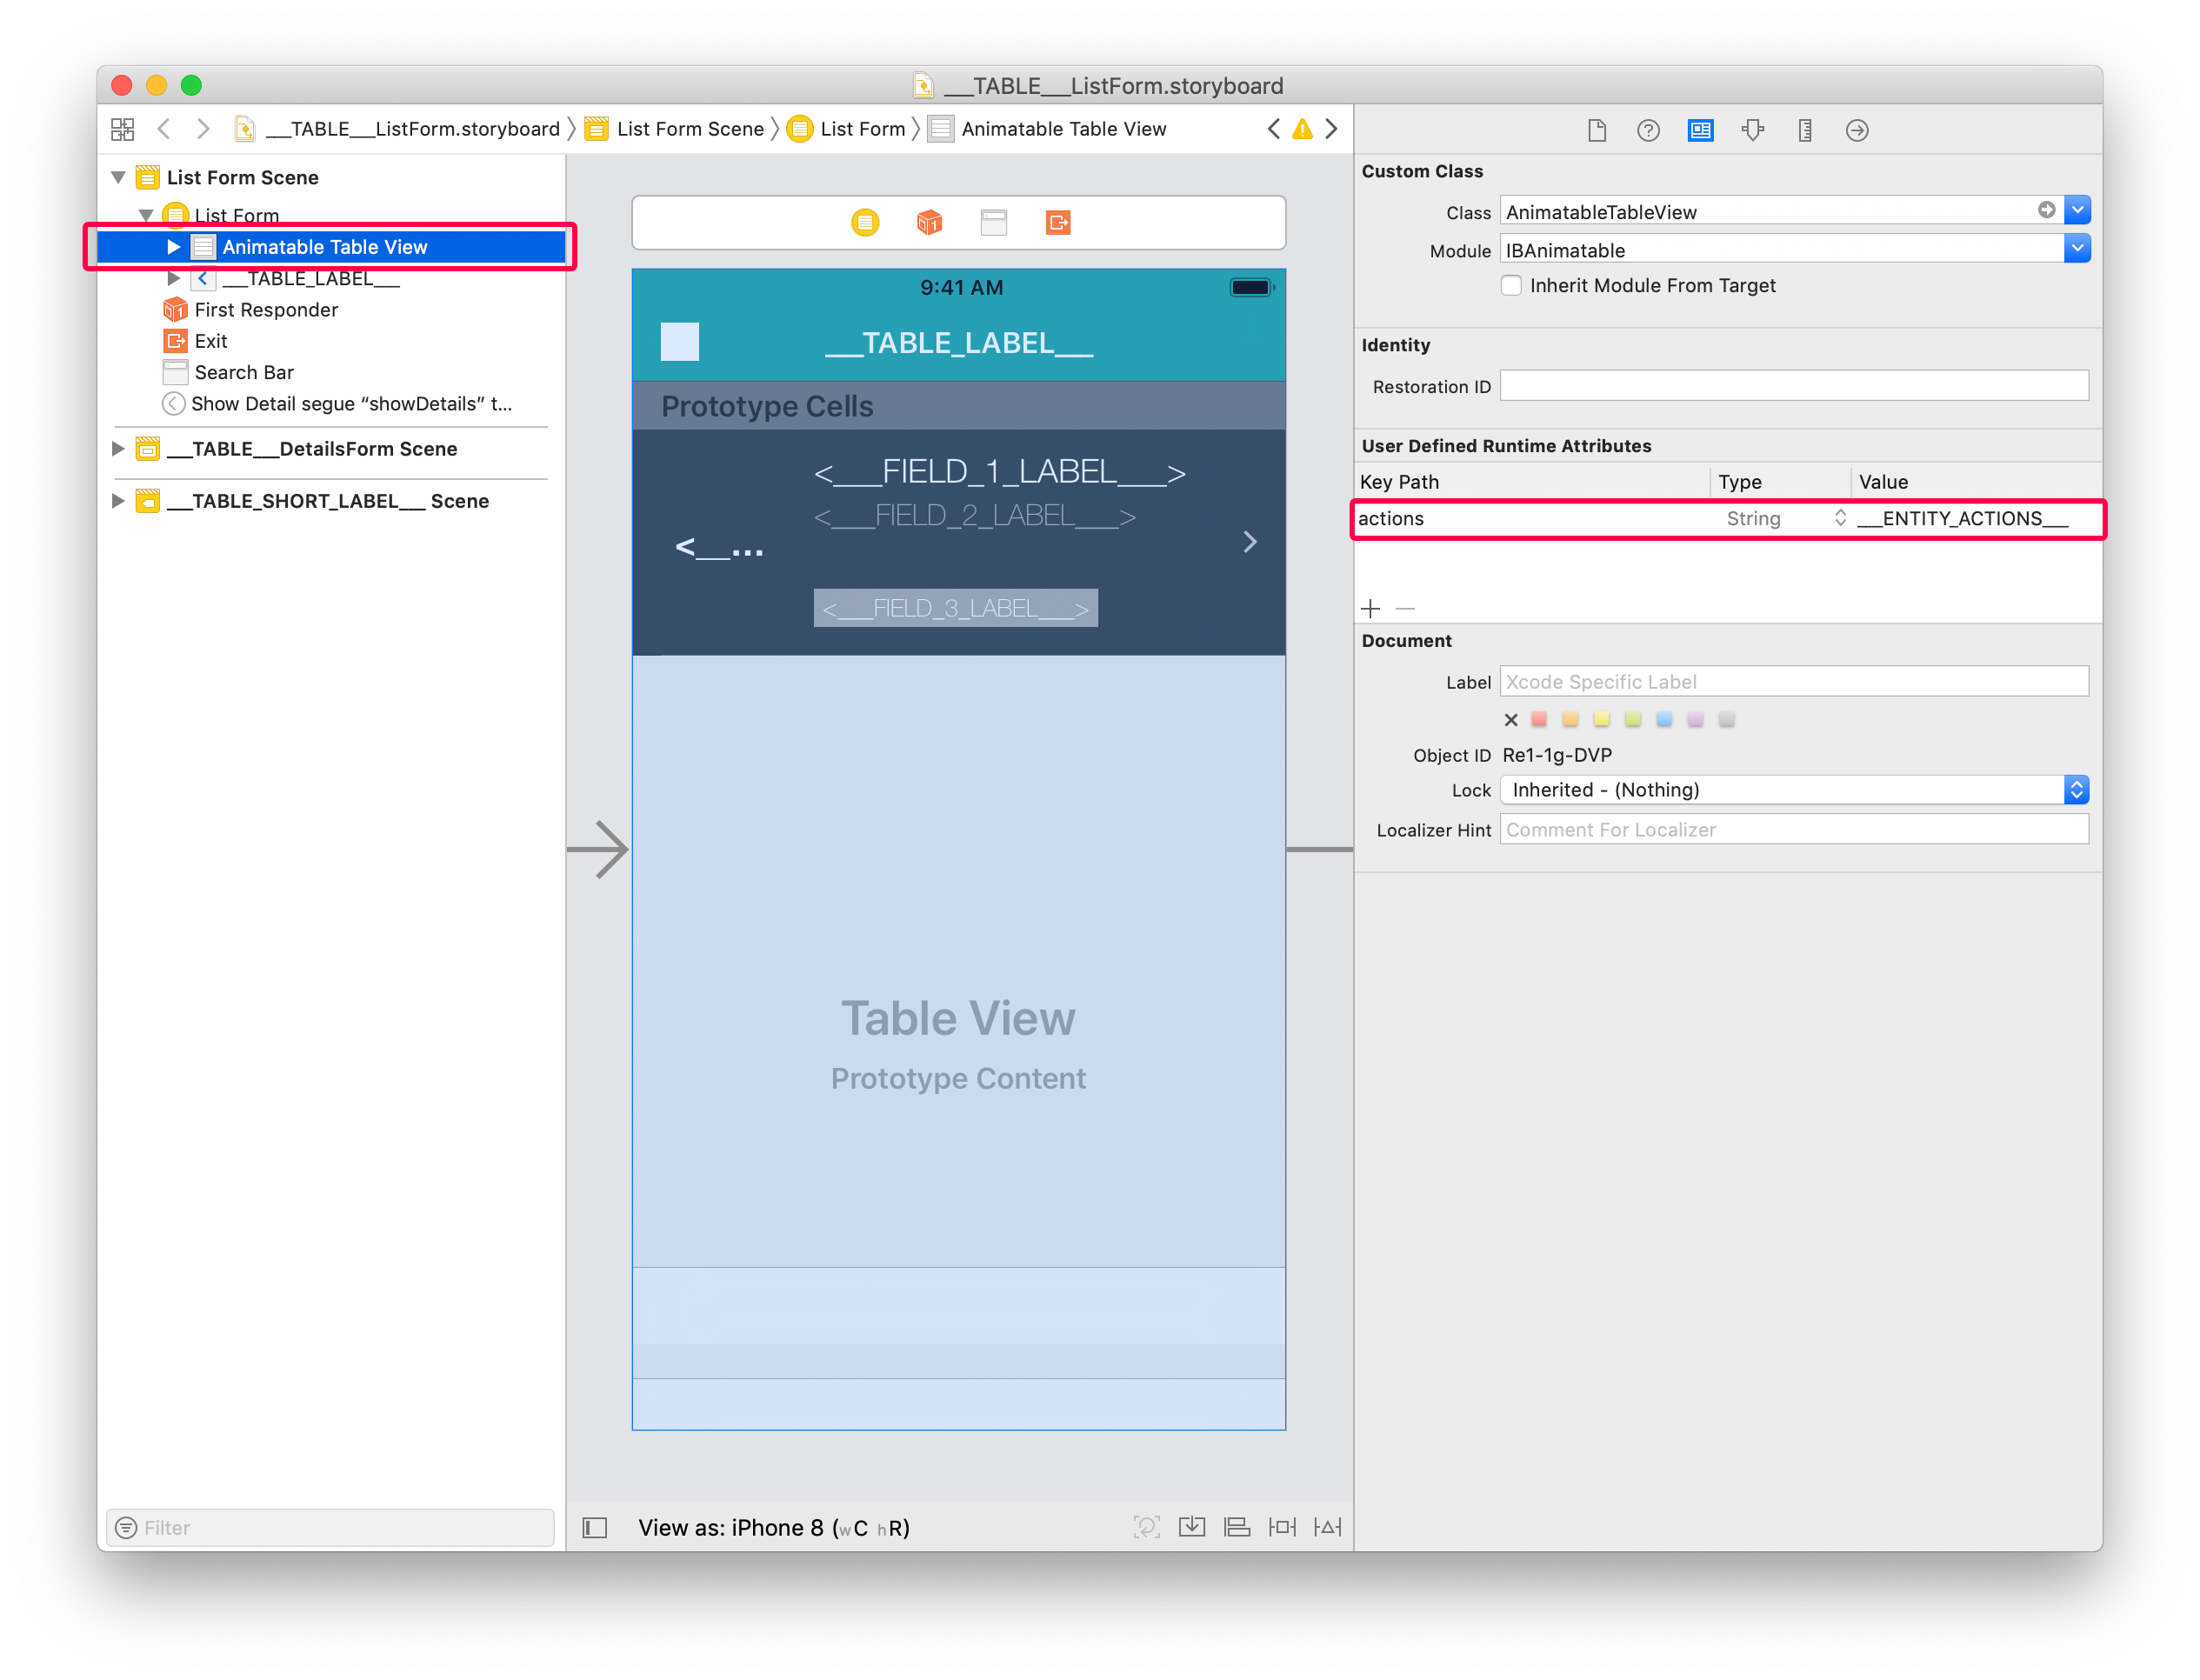
Select the Animatable Table View and add this line in the User Defined Runtime Attributes (Identity inspector):
- Key Path:
actions - Type:
String - Value:
___ENTITY_ACTIONS___
Your custom template is ready to display actions!
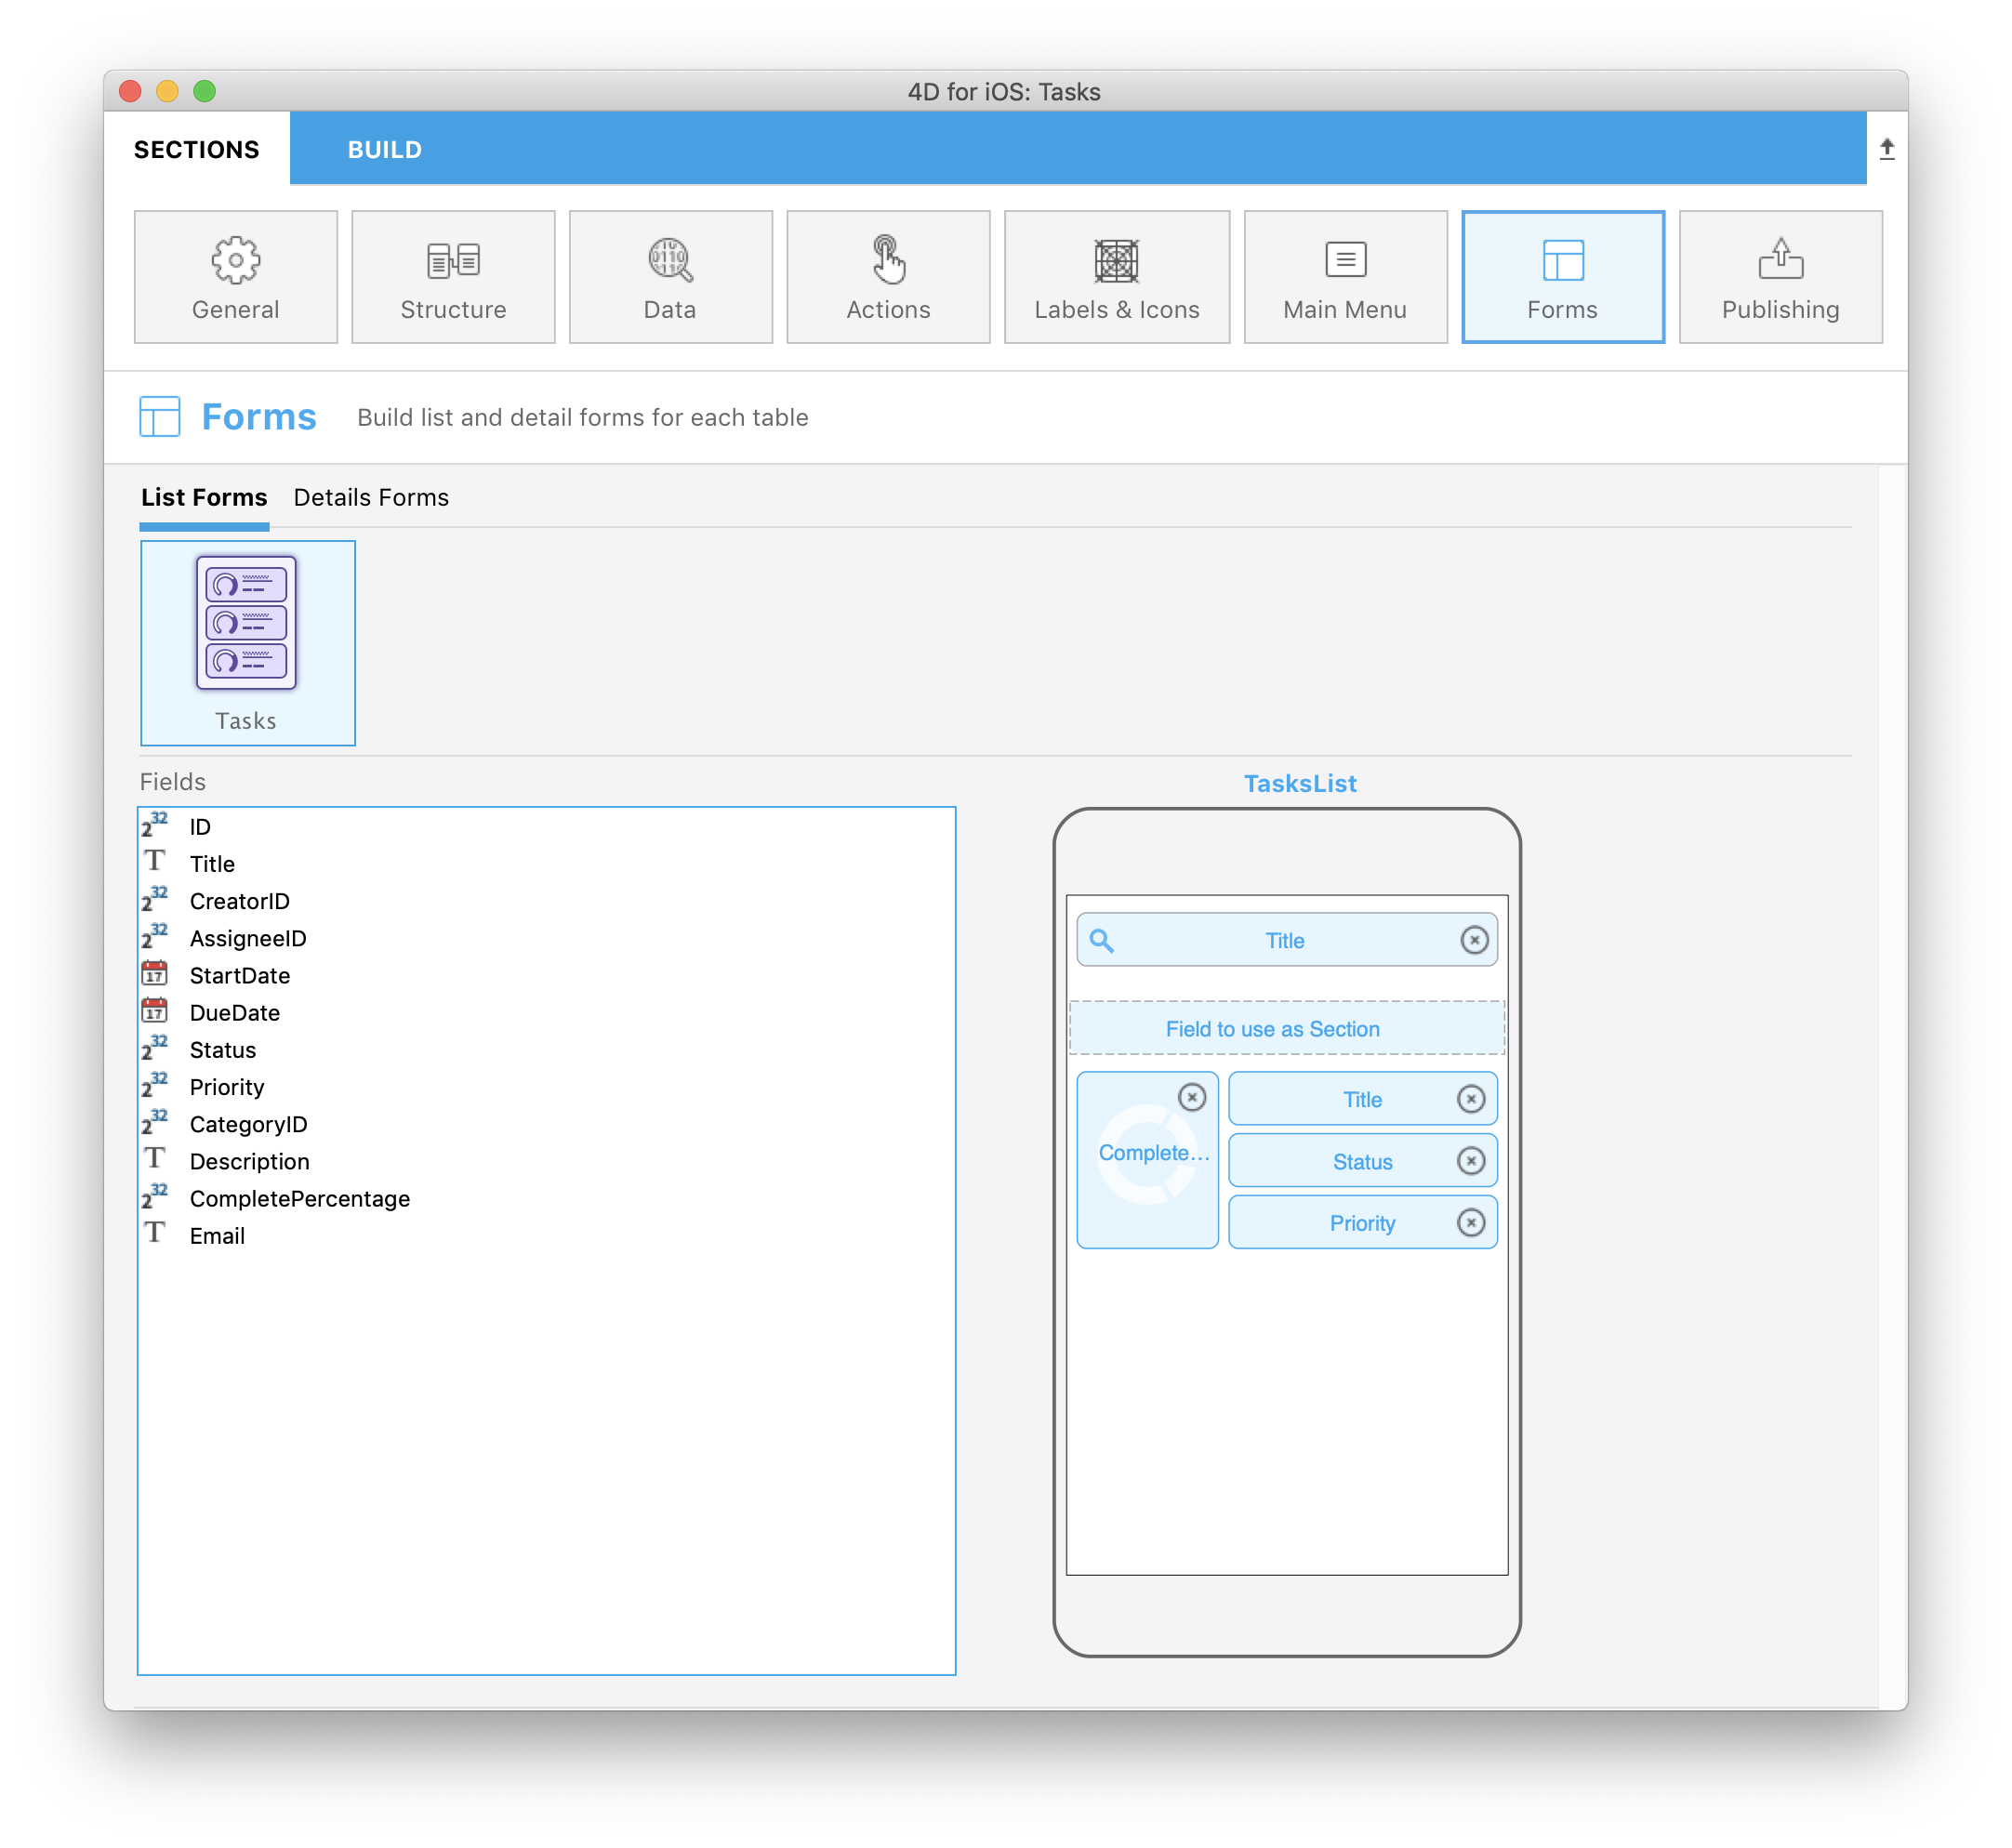
You can select the TaskList custom template from the Forms section and add the following fields:
Now let's add action tags to the TasksCollection custom template
TasksCollection カスタムテンプレートにアクションを追加する
To do so, open the list/TasksCollection/Sources/Forms/Tables/___TABLE___/___TABLE___ListForm.Storyboard file.Storyboard file.
A A テーブルアクションタグを追加する
The process is quite as similar as TasksList custom template's process.
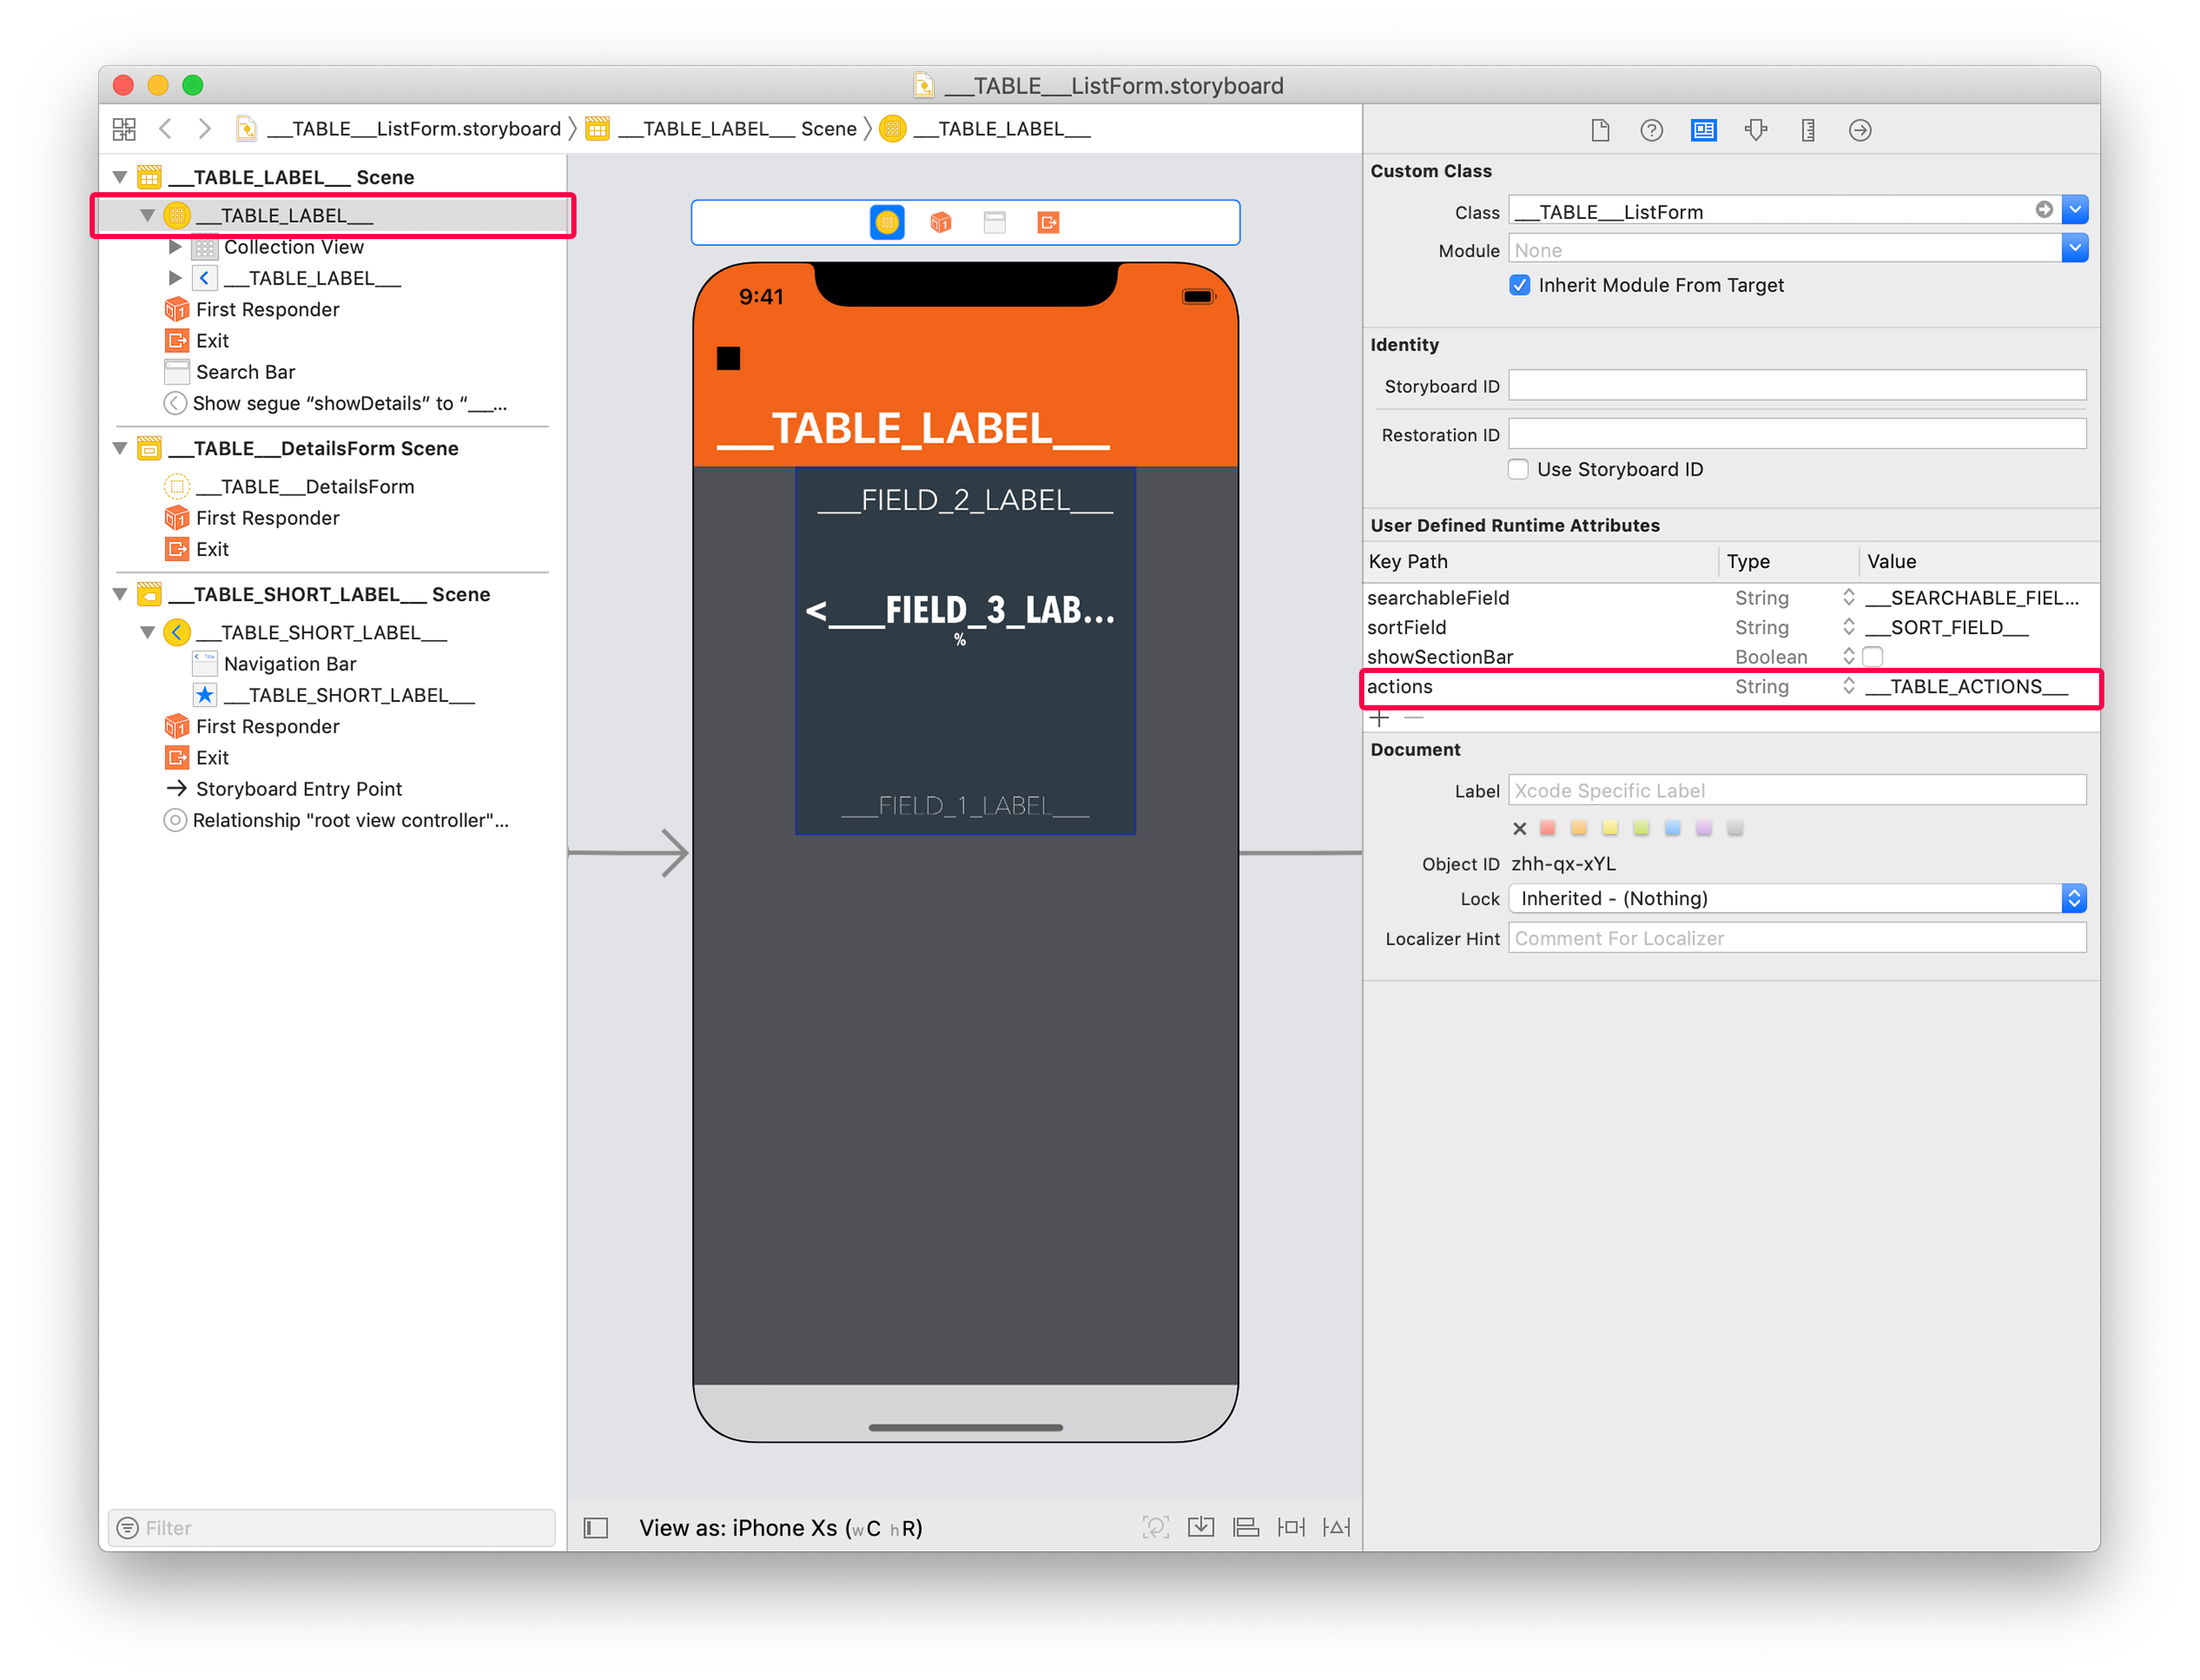
Select the List form Controller and add this line in the User Defined Runtime Attributes (Identity inspector):
- Key Path:
actions - Type:
String - Value:
___TABLE_ACTIONS___
B B エンティティアクションタグを追加する
For entity, the way you display actions is quite different than TableView: swipe action are not really adapted to CollectionViews.
So with collection views, the best way to display actions is to use a long pressure gesture on the cells you want to interact with.
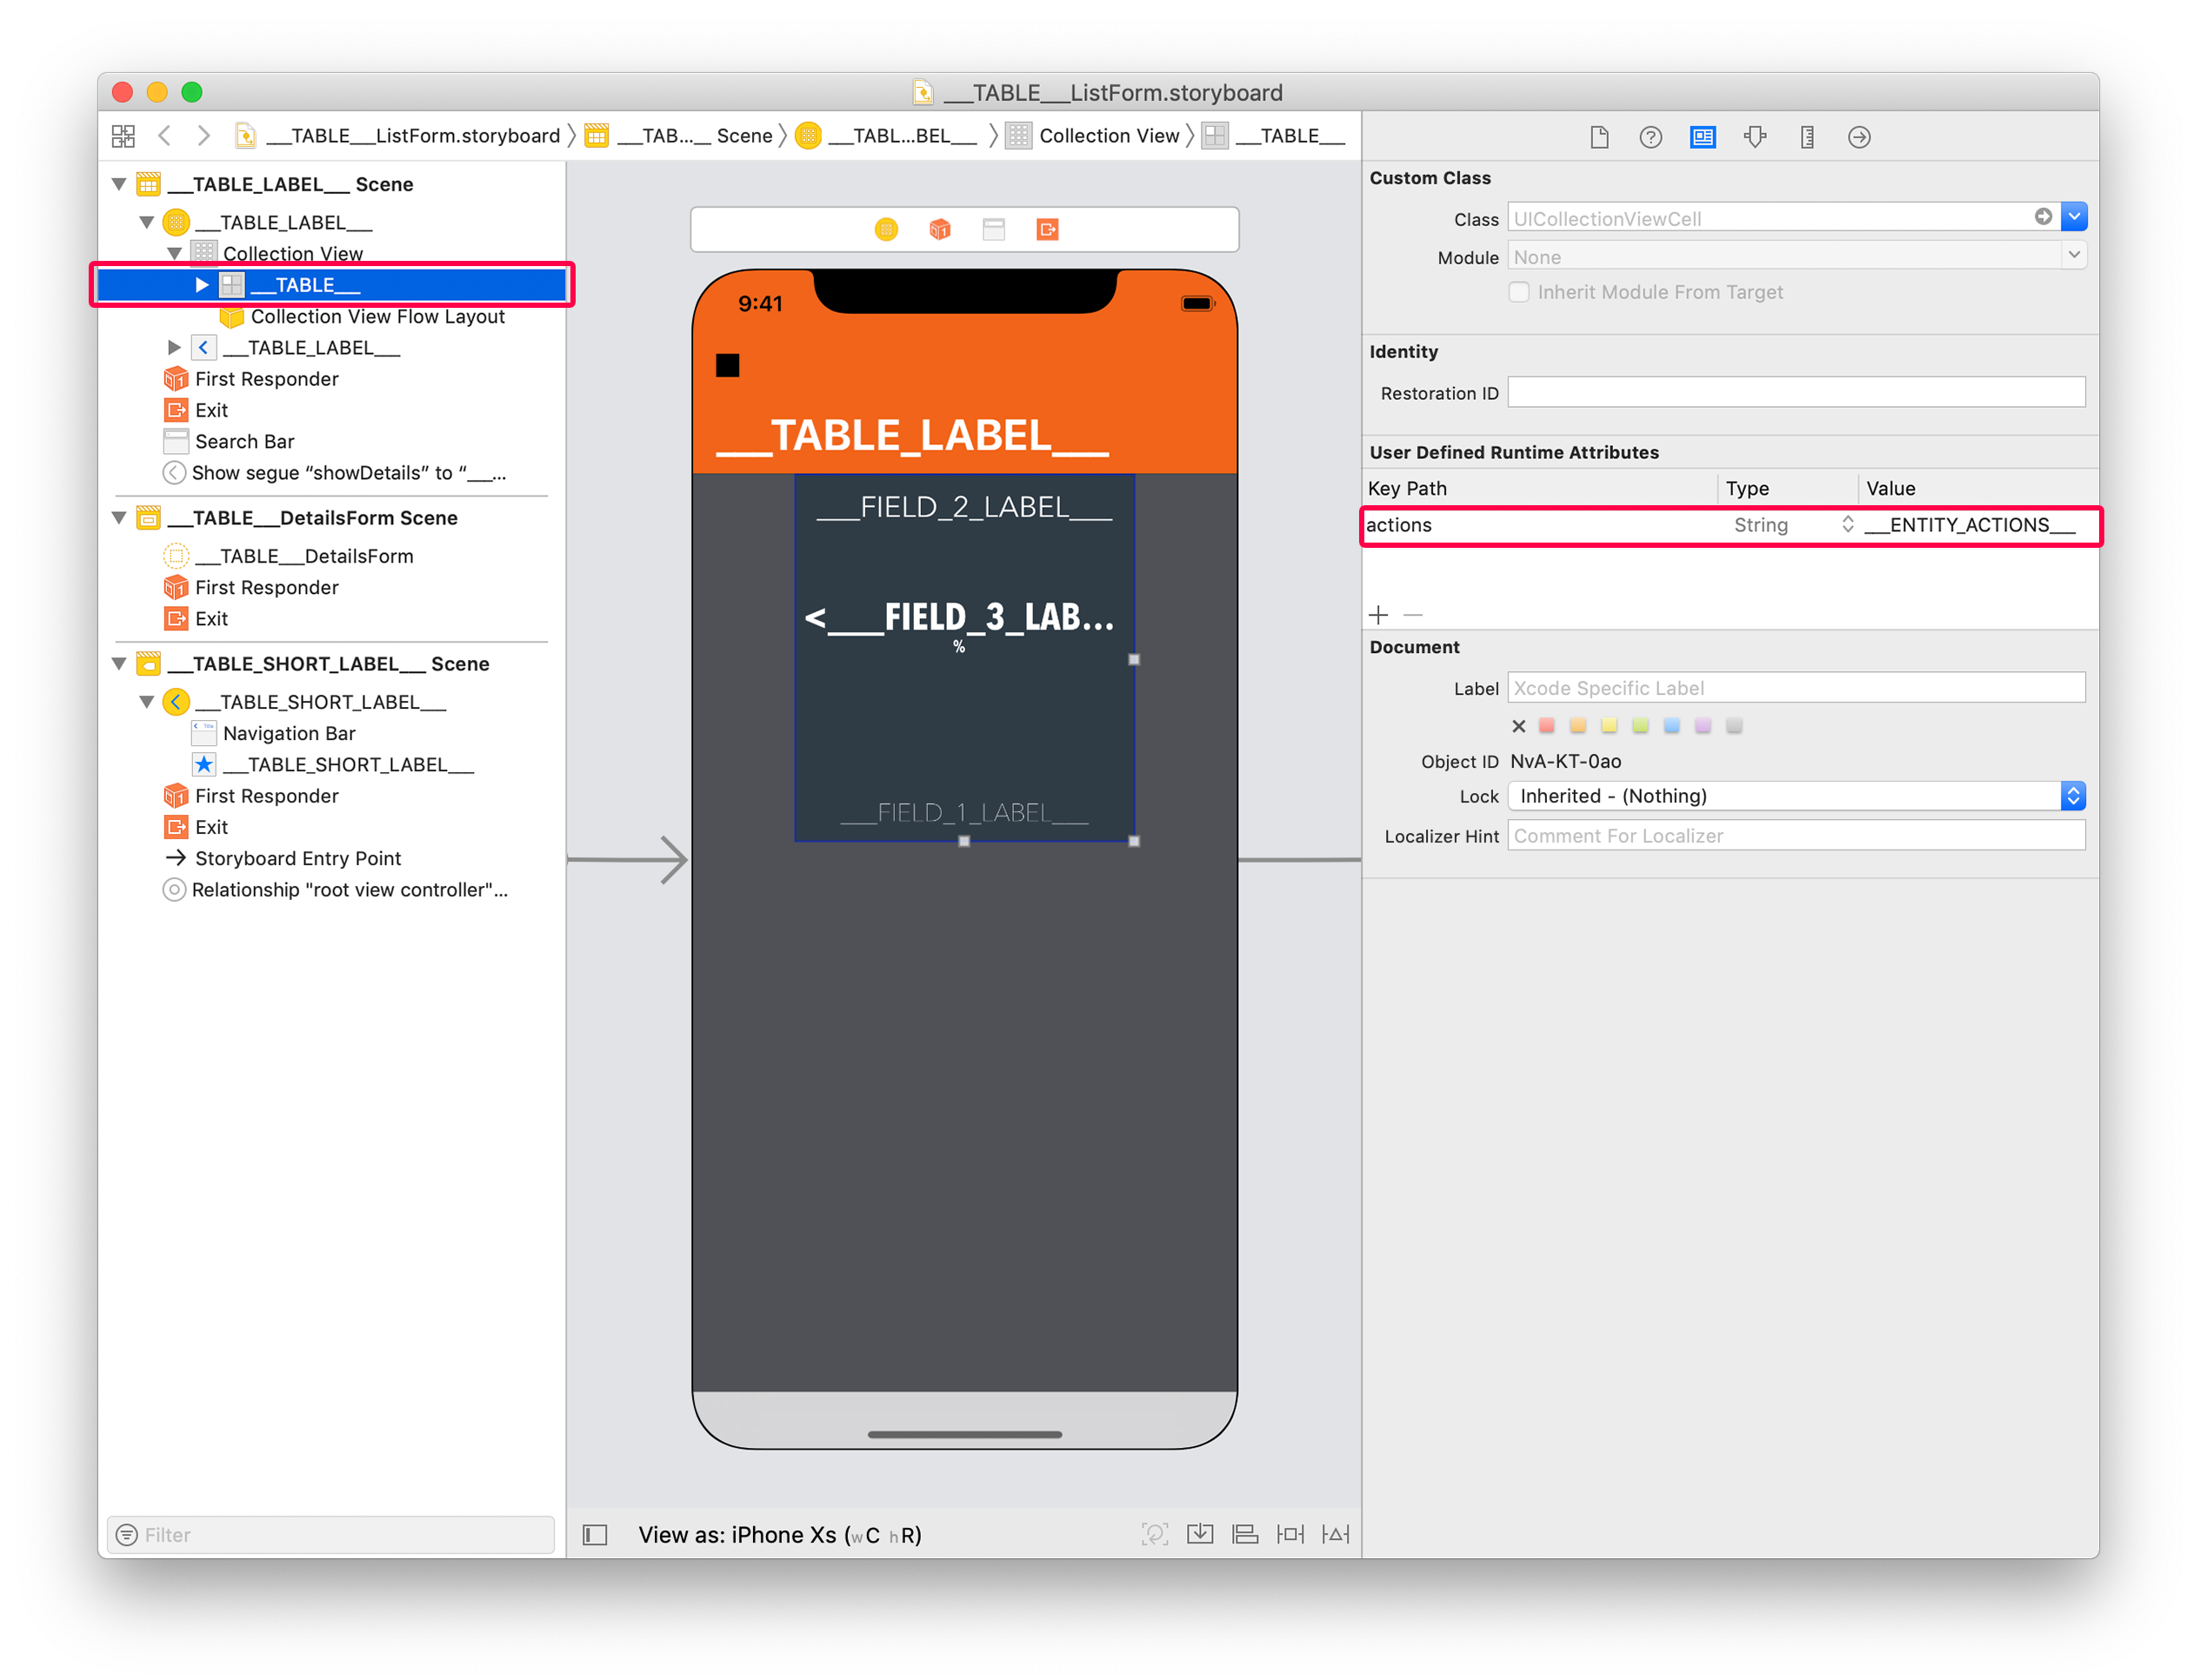
For that, select the collectionView cell and add this line in the User Defined Runtime Attributes (Identity inspector):
- Key Path:
actions - Type:
String - Value:
___ENTITY_ACTIONS___
To optimize the interaction rendering, you can add a scale effect with a haptic feedback adding the following line in the User Defined Runtime Attributes (Identity inspector):
- Key Path:
touch.zoomScale - Type:
Number - Value:
0,96(adapt the scale ratio depending on the result you want to get)
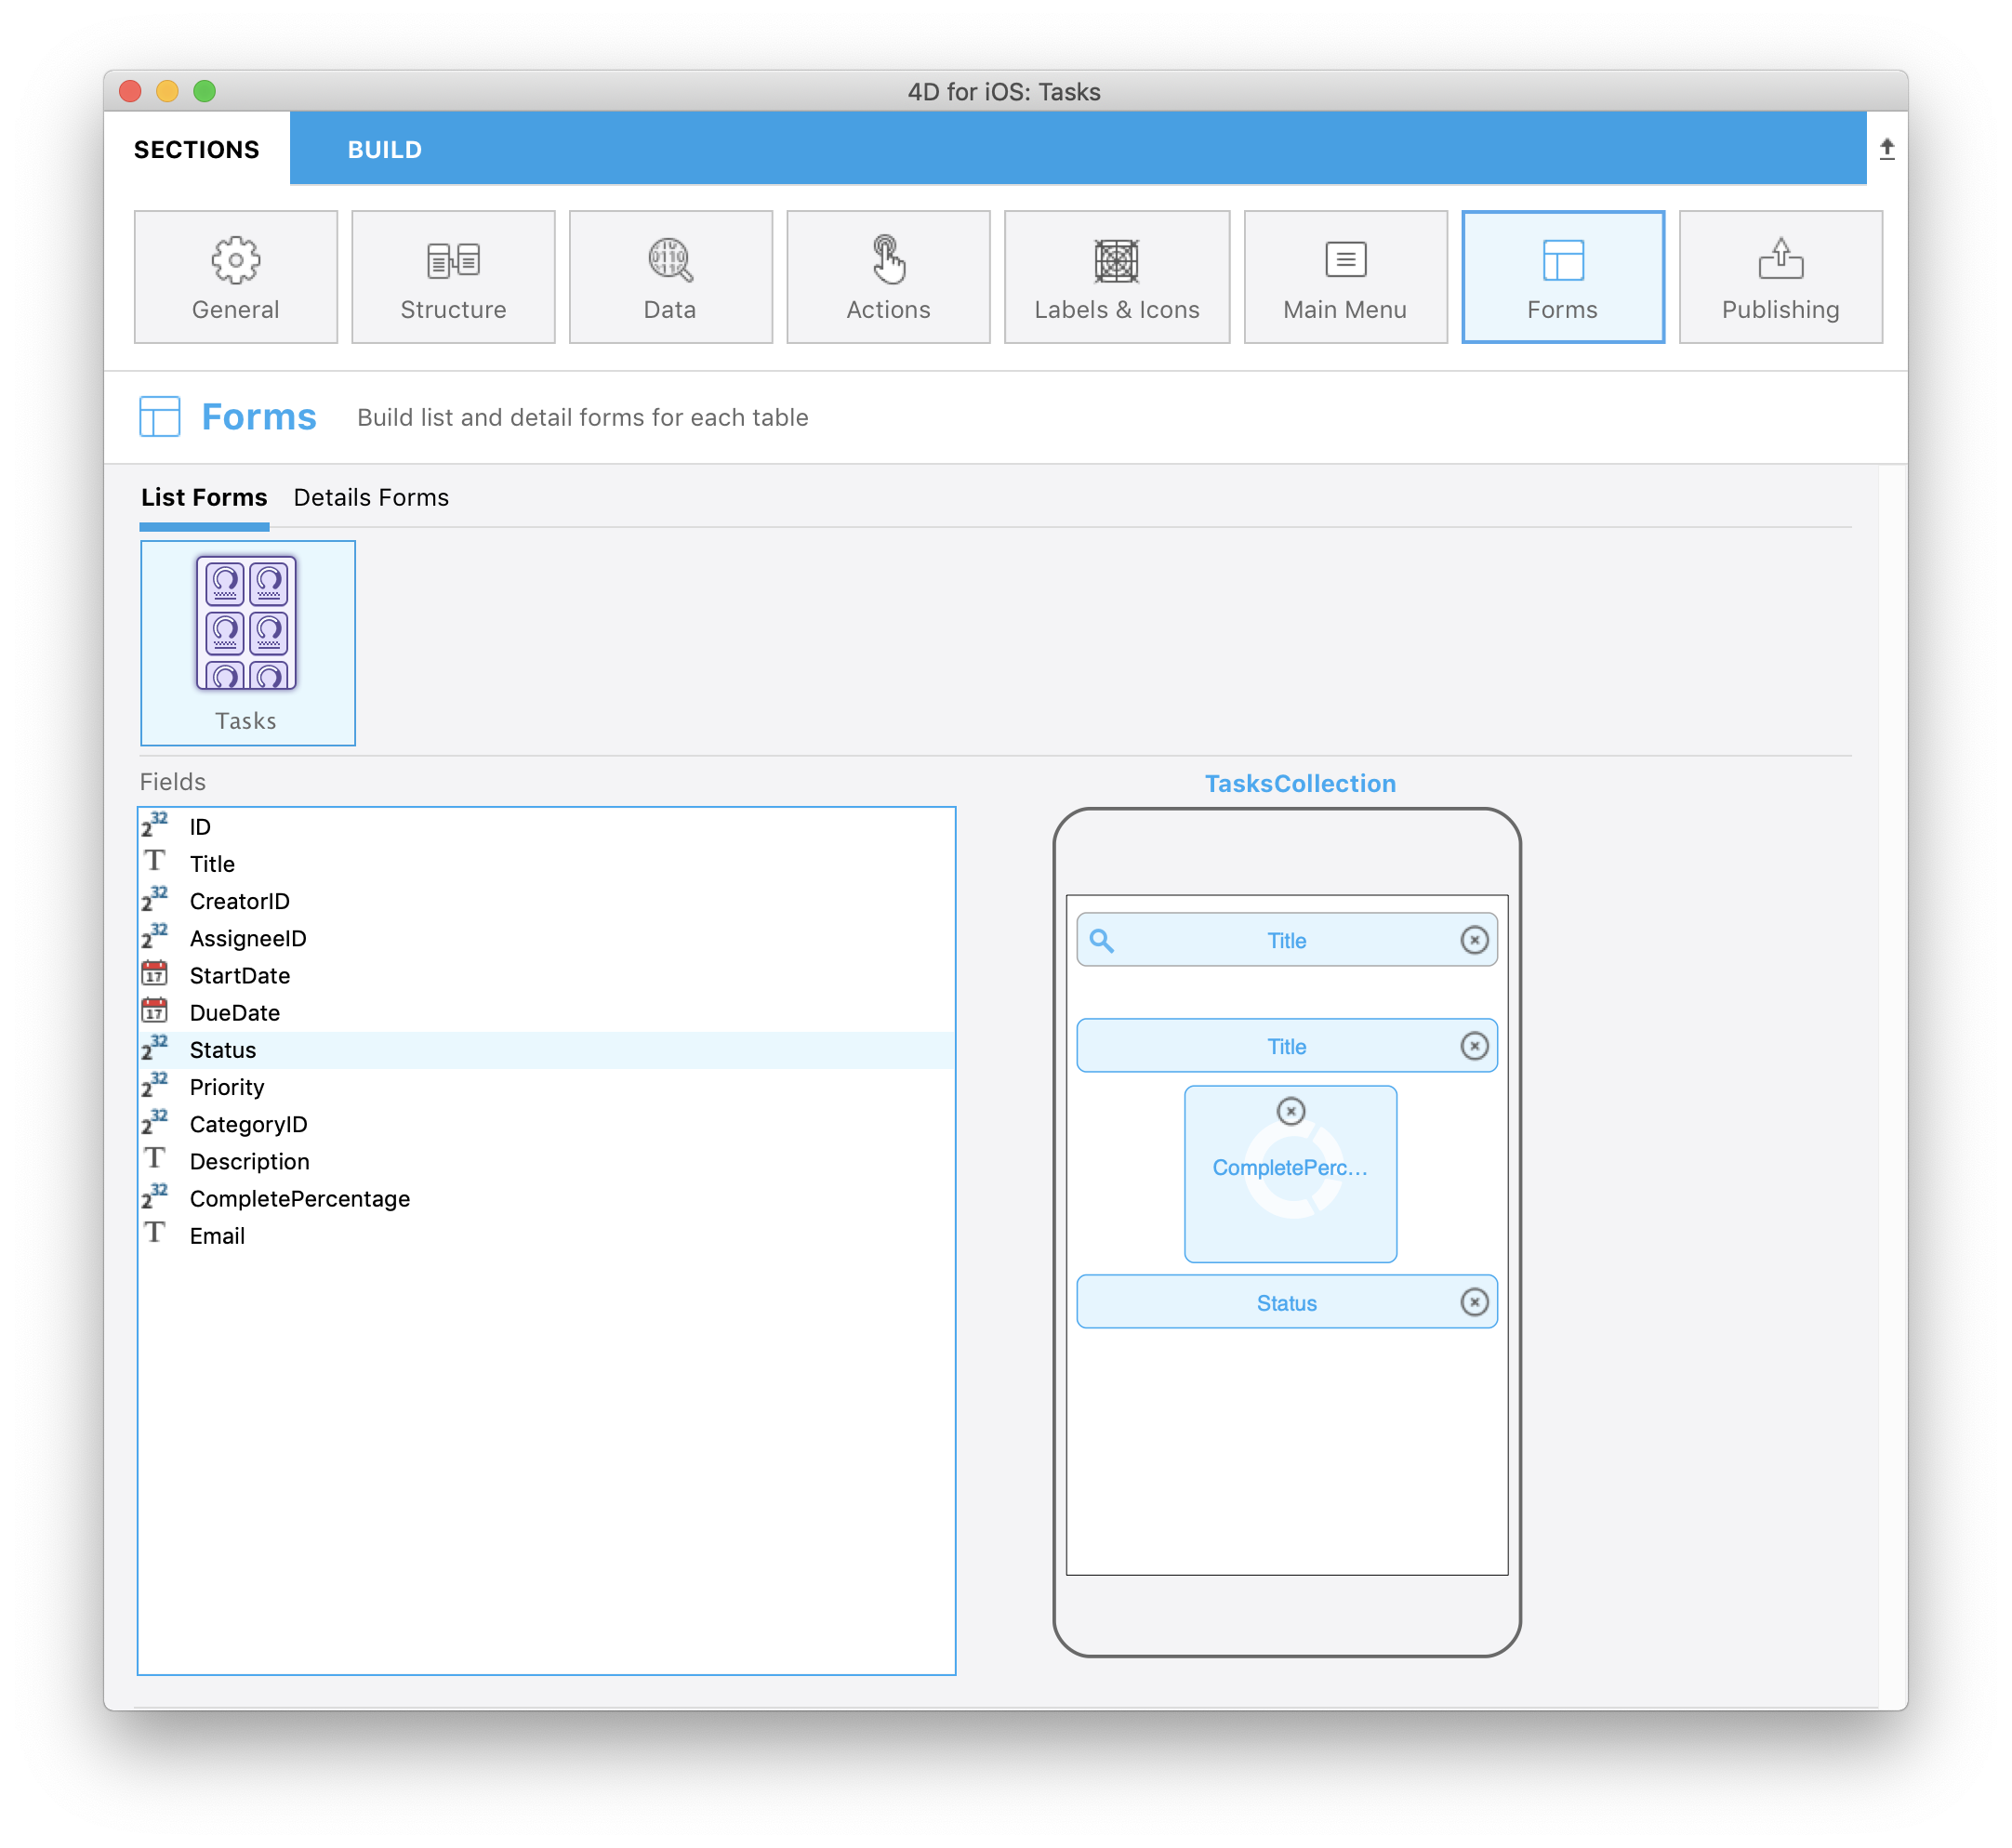
You can select the TasksCollection custom template from the Forms section and add the following fields:
⒋ ⒋ 詳細画面にアクションを追加する
In Detail forms, you can use the generic button in the navigation bar or create easily your own custom action button. In both cases, you have to add tags.
For generic button embedded in the navigation bar, select the Controller and add this line in the User Defined Runtime Attributes (Identity inspector):
- Key Path:
actions - Type:
String - Value:
___ENTITY_ACTIONS___
In our tutorial, we want to build our own generic button. For that, open the detail/TasksDetail/Sources/Forms/Tables/___TABLE___/___TABLE___DetailsForm.storyboard file.
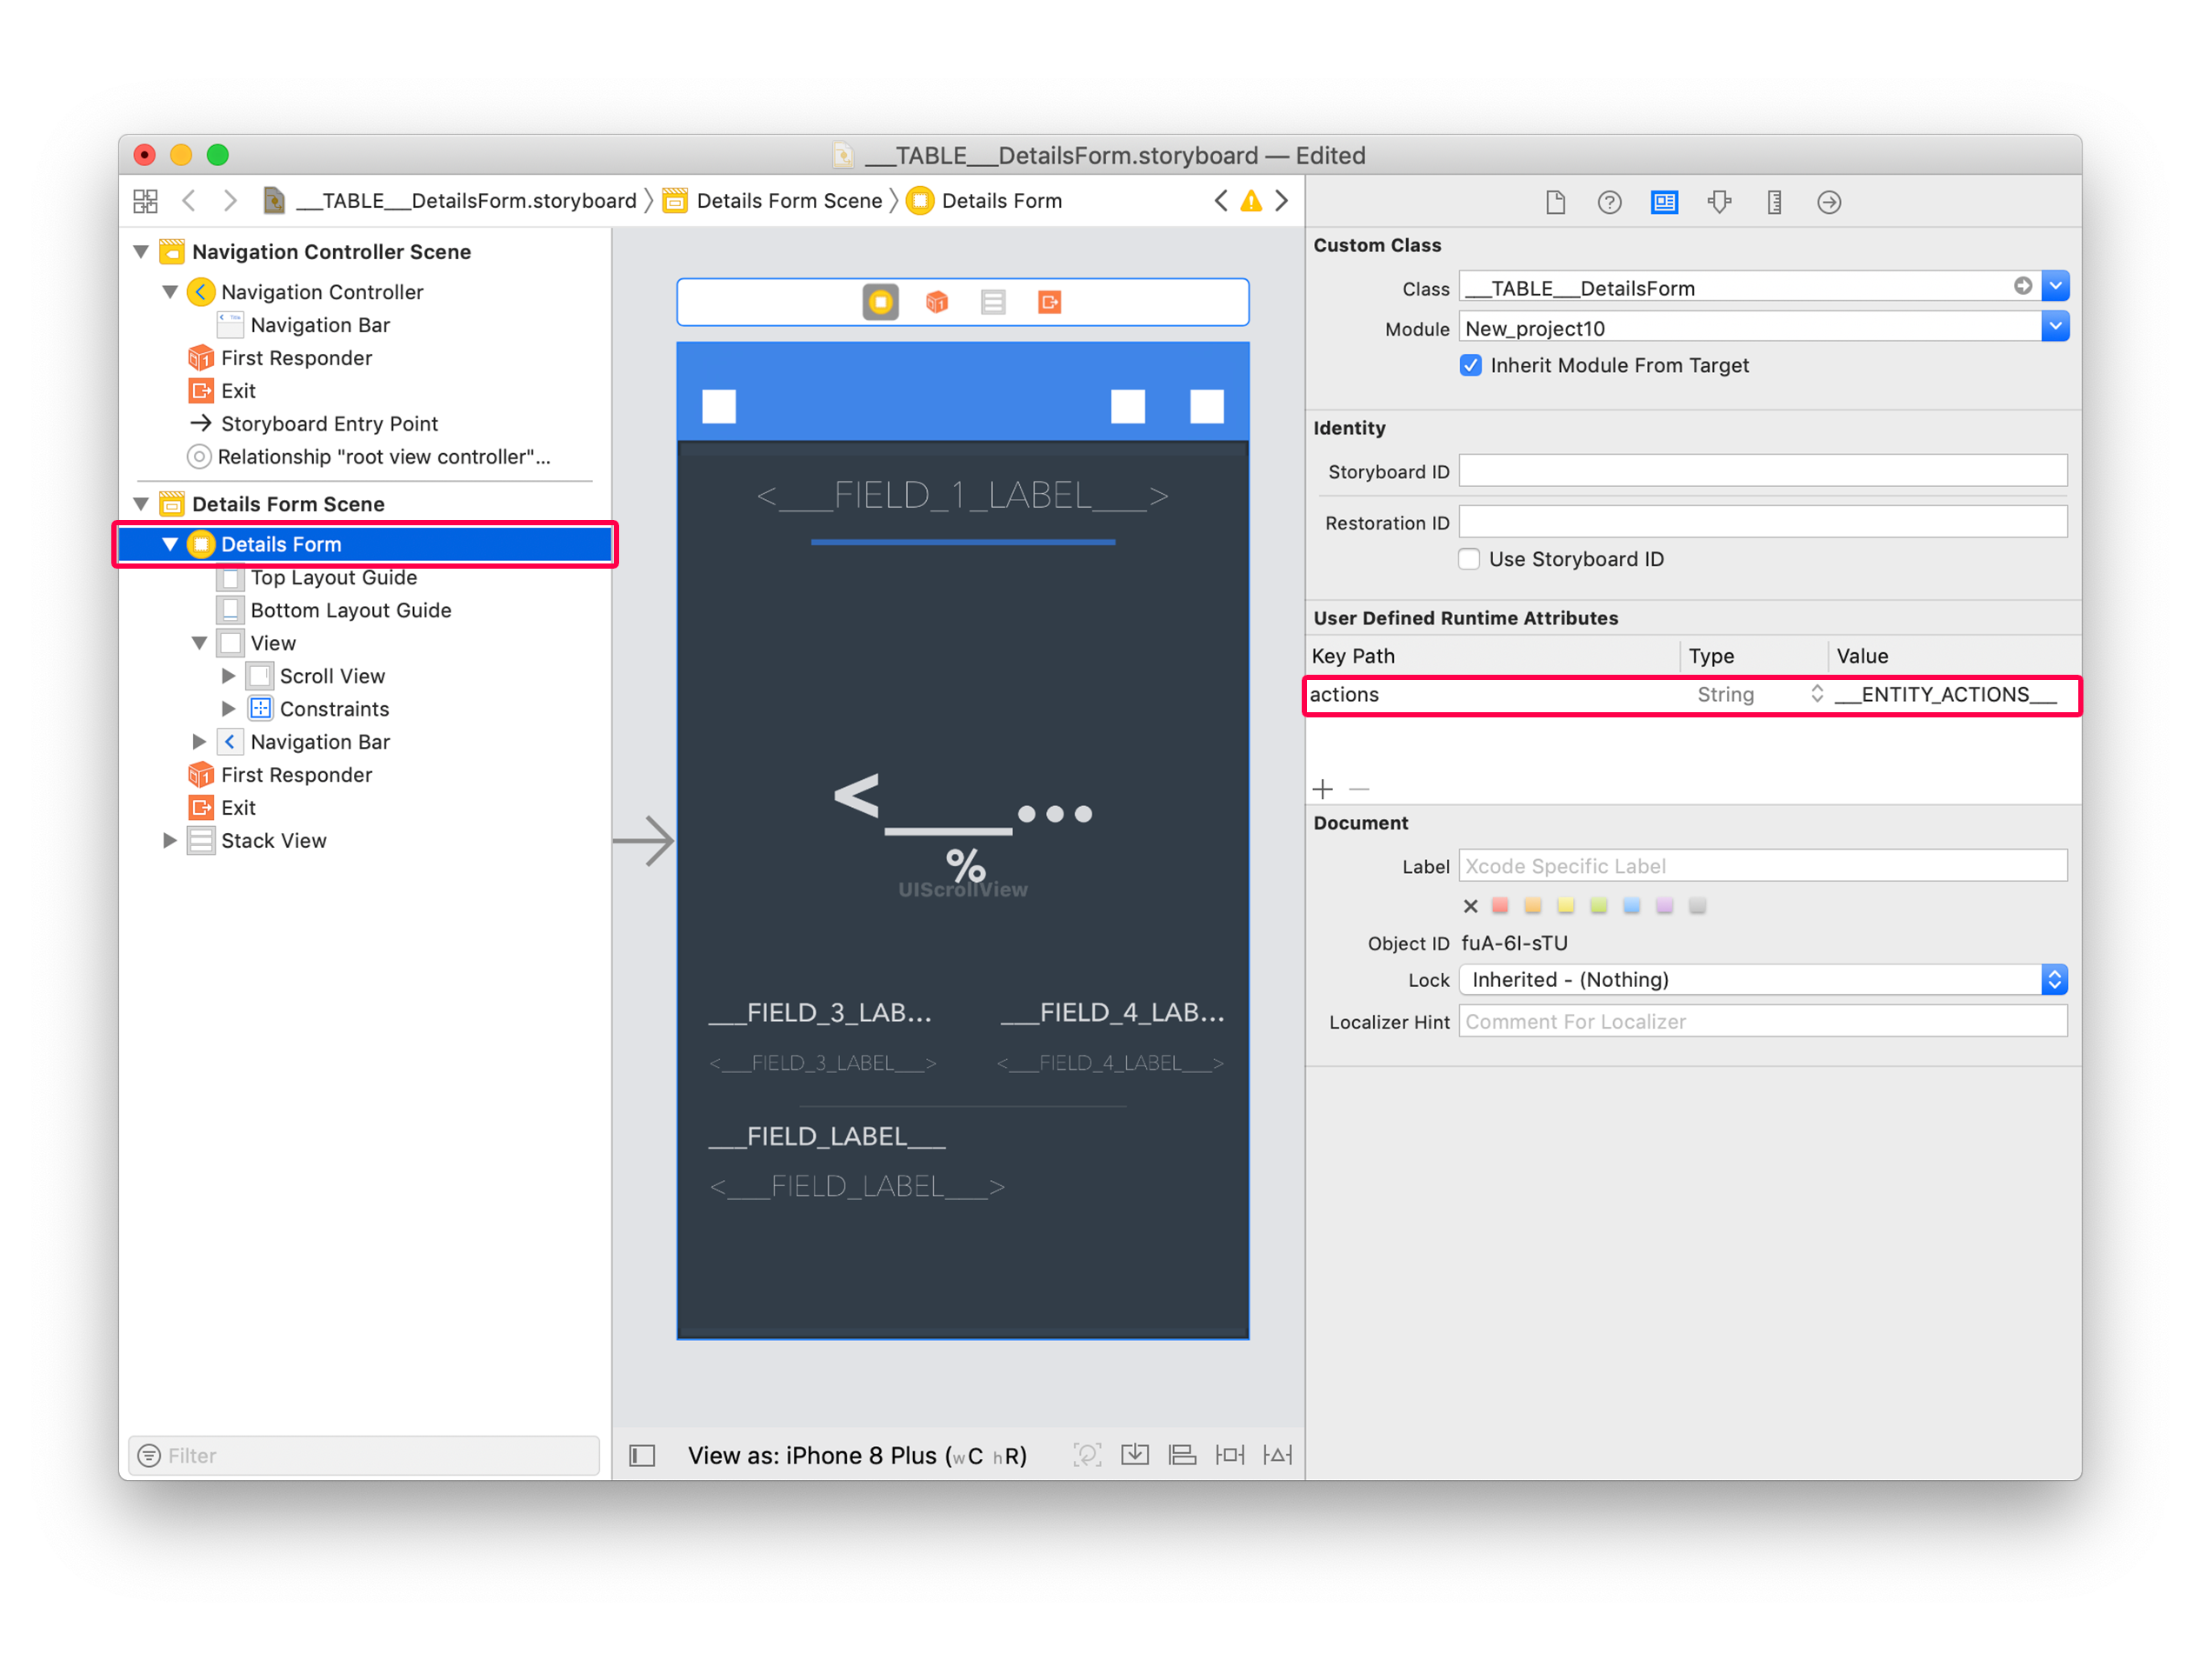
Open it, select the button at bottom right and add this line in the User Defined Runtime Attributes (Identity inspector):
- Key Path:
actions - Type:
String - Value:
___ENTITY_ACTIONS___
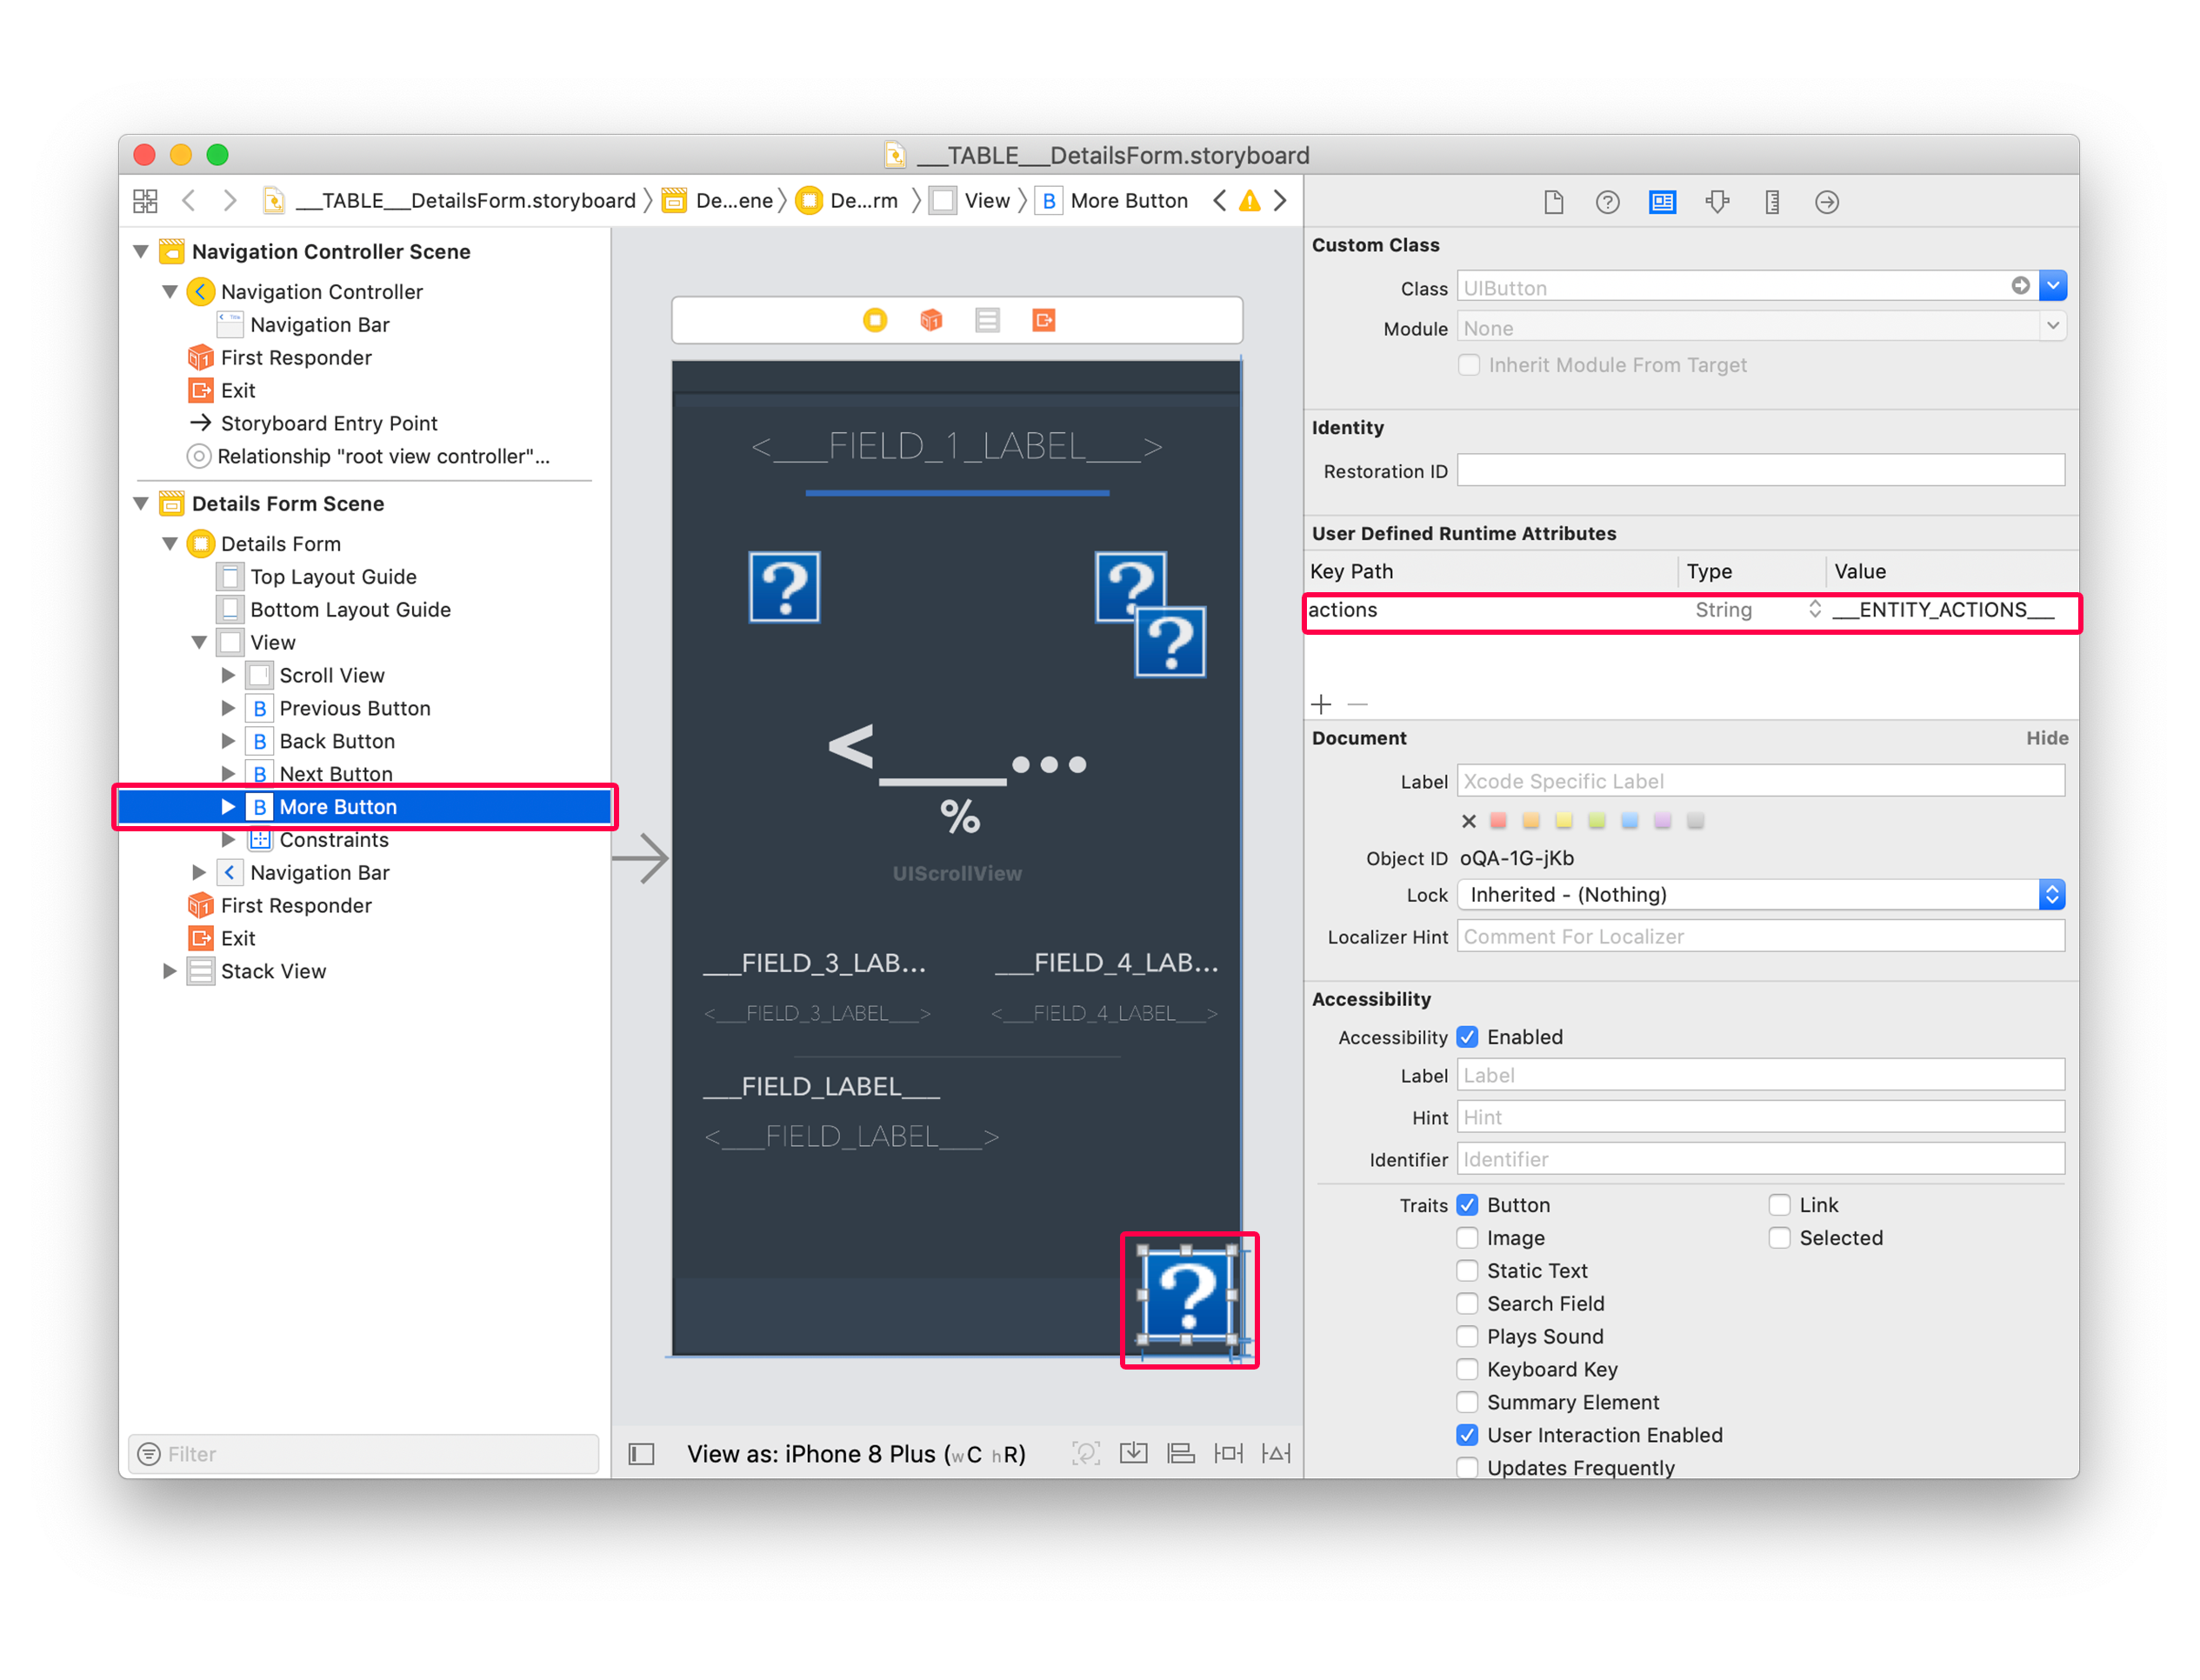
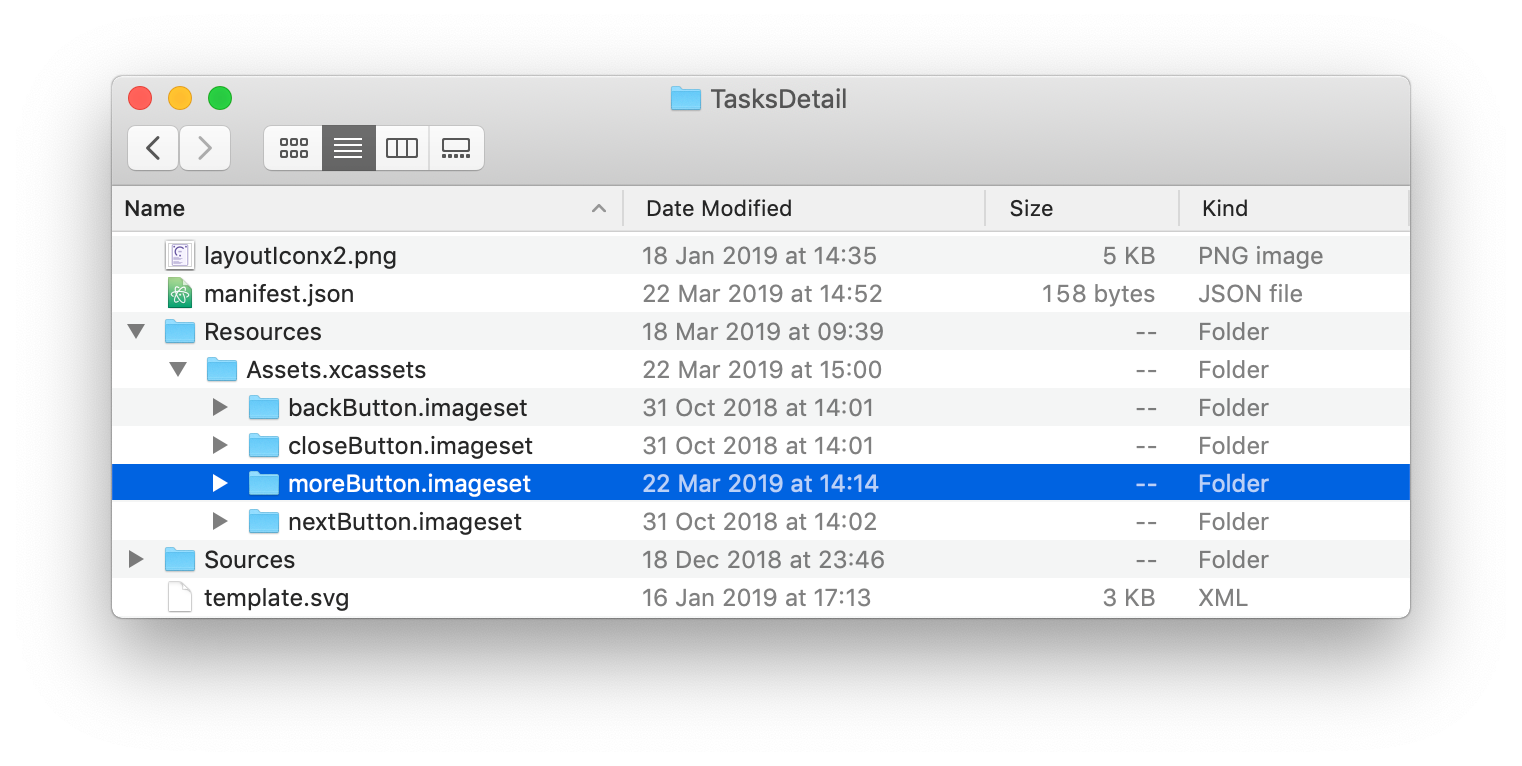
As you can see, a few visual buttons are missing in the Storyboard file. You can actually find those visuals in the Resources folder template. They will be included in the project during the build process.
For example for the moreButton.imageset:
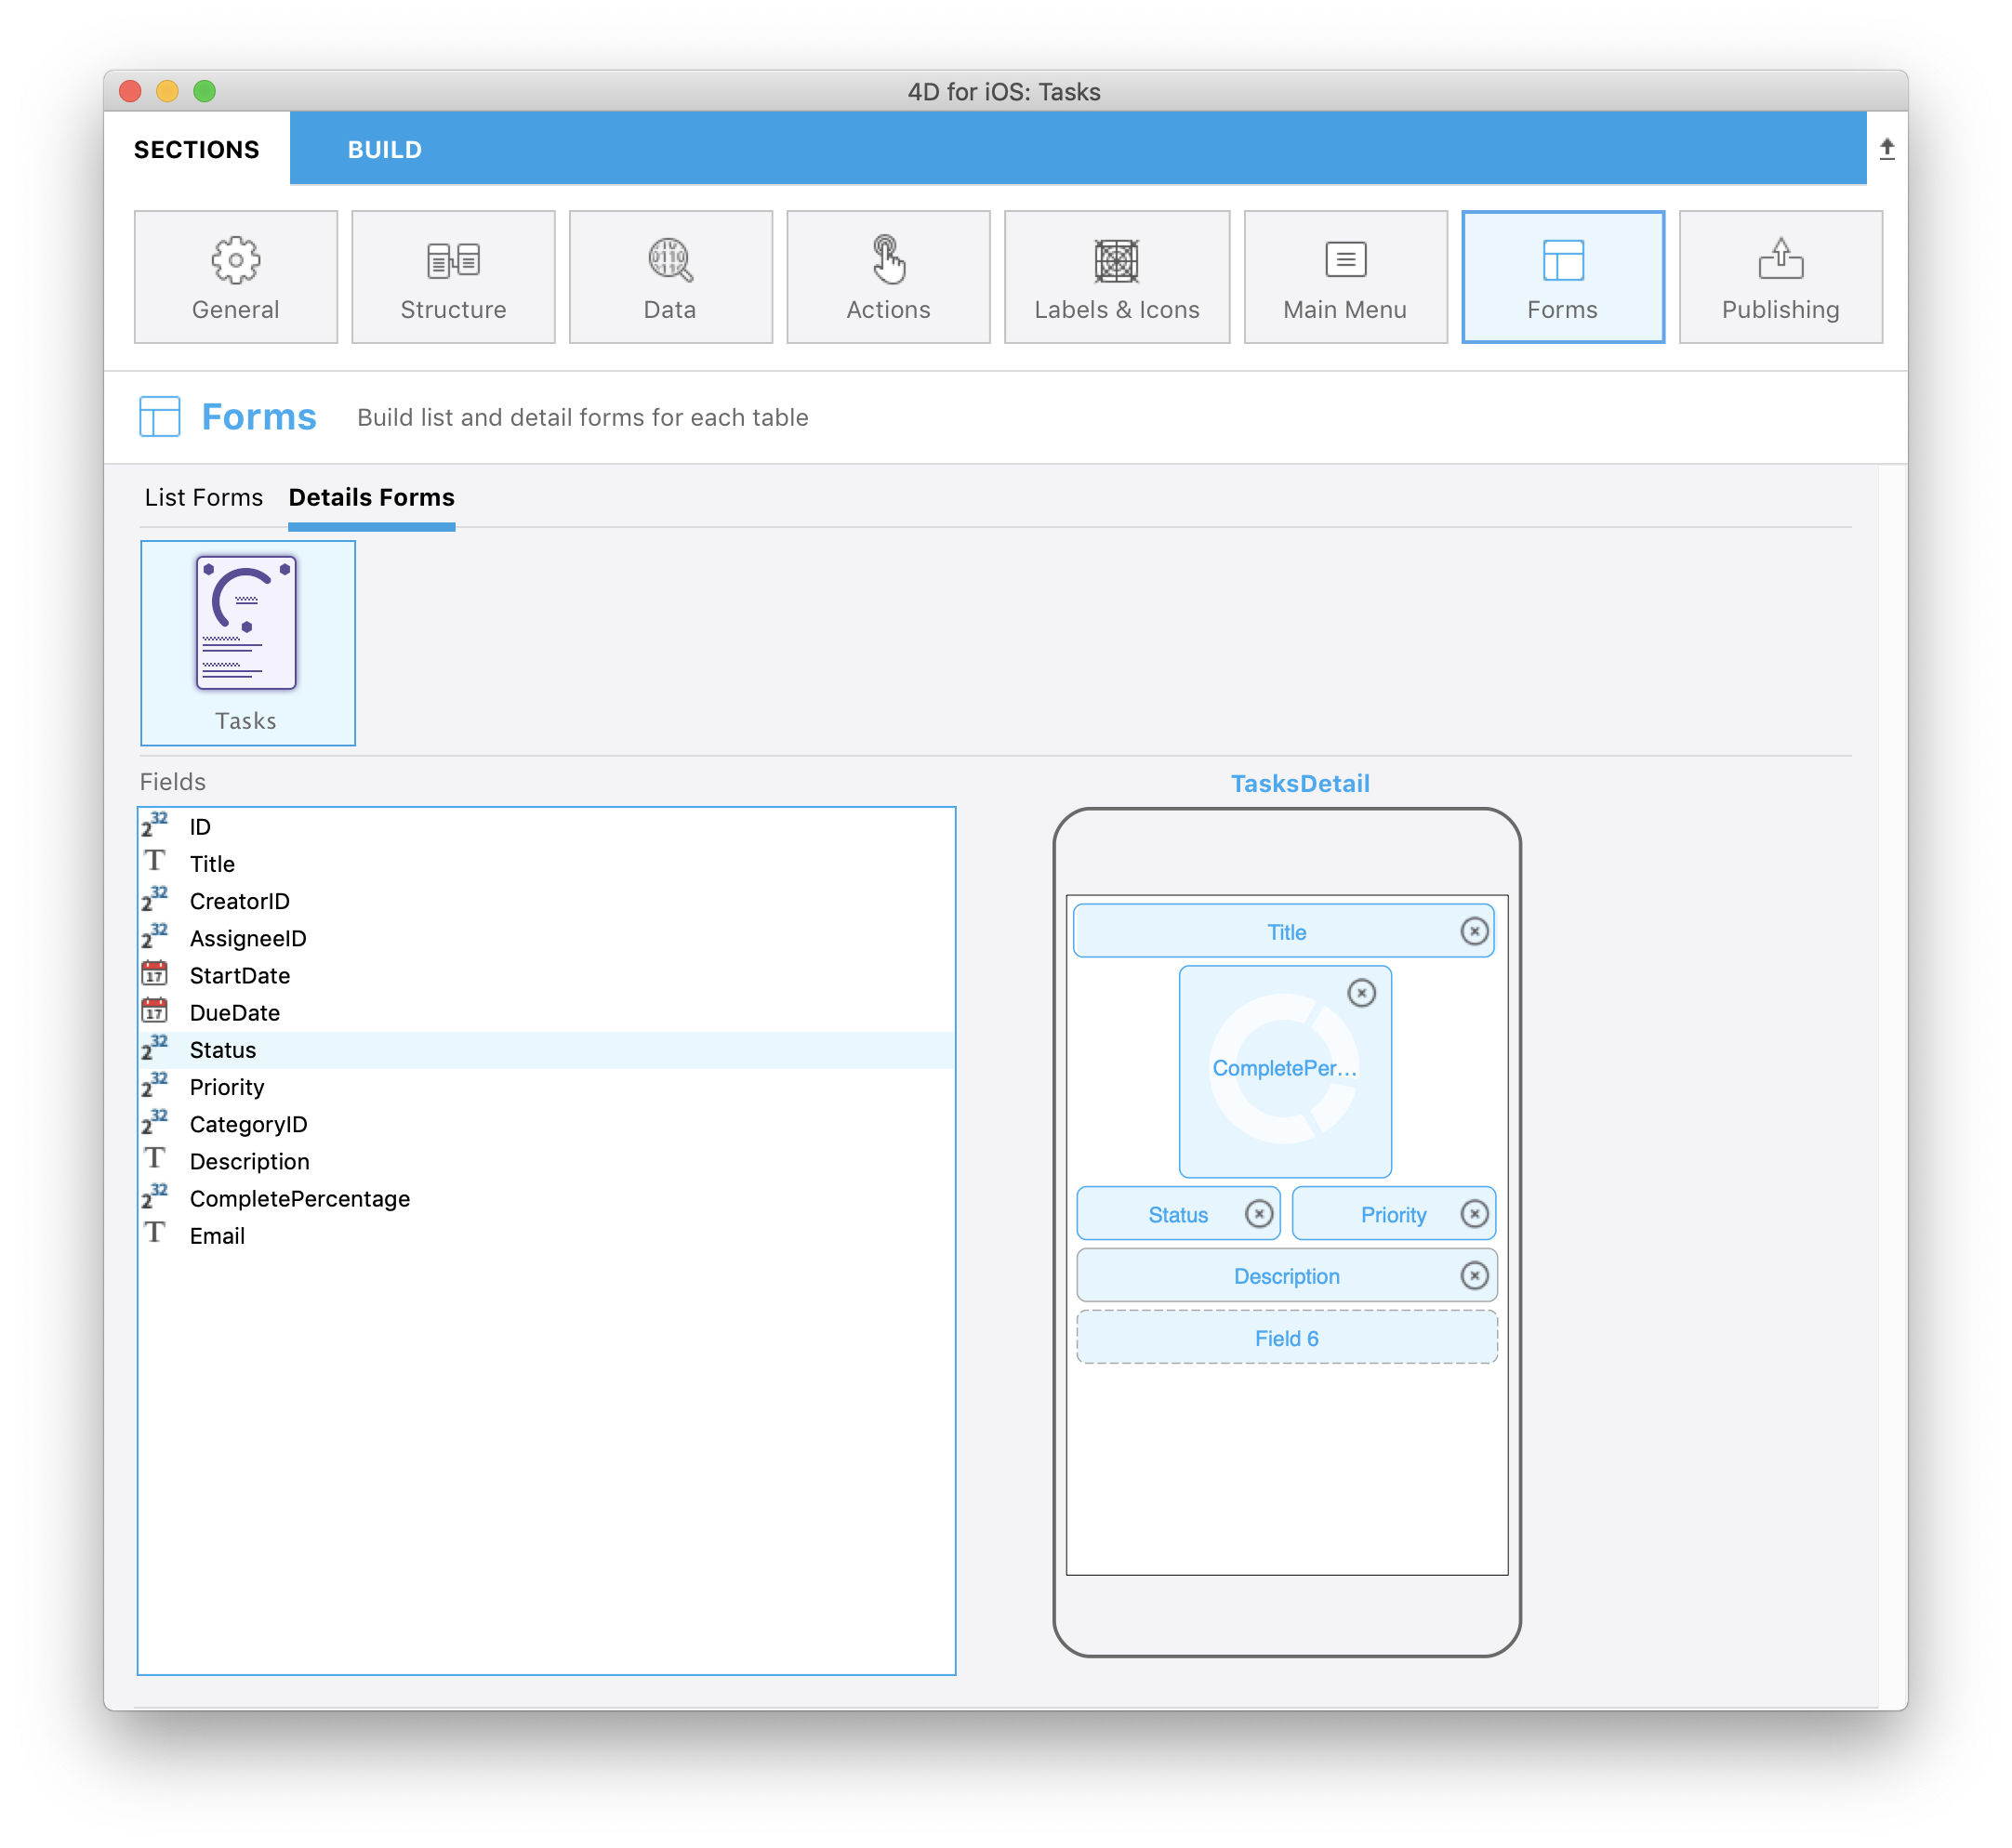
You can select the TasksDetail custom template from the Forms section and add the following fields:
Congratulations, your Tasks iOS app is now complete and includes actions in List form and Detail form !
