ストーリーボード
iOSアプリのカスタム詳細画面をXcodeで作成しましょう!
完成イメージ
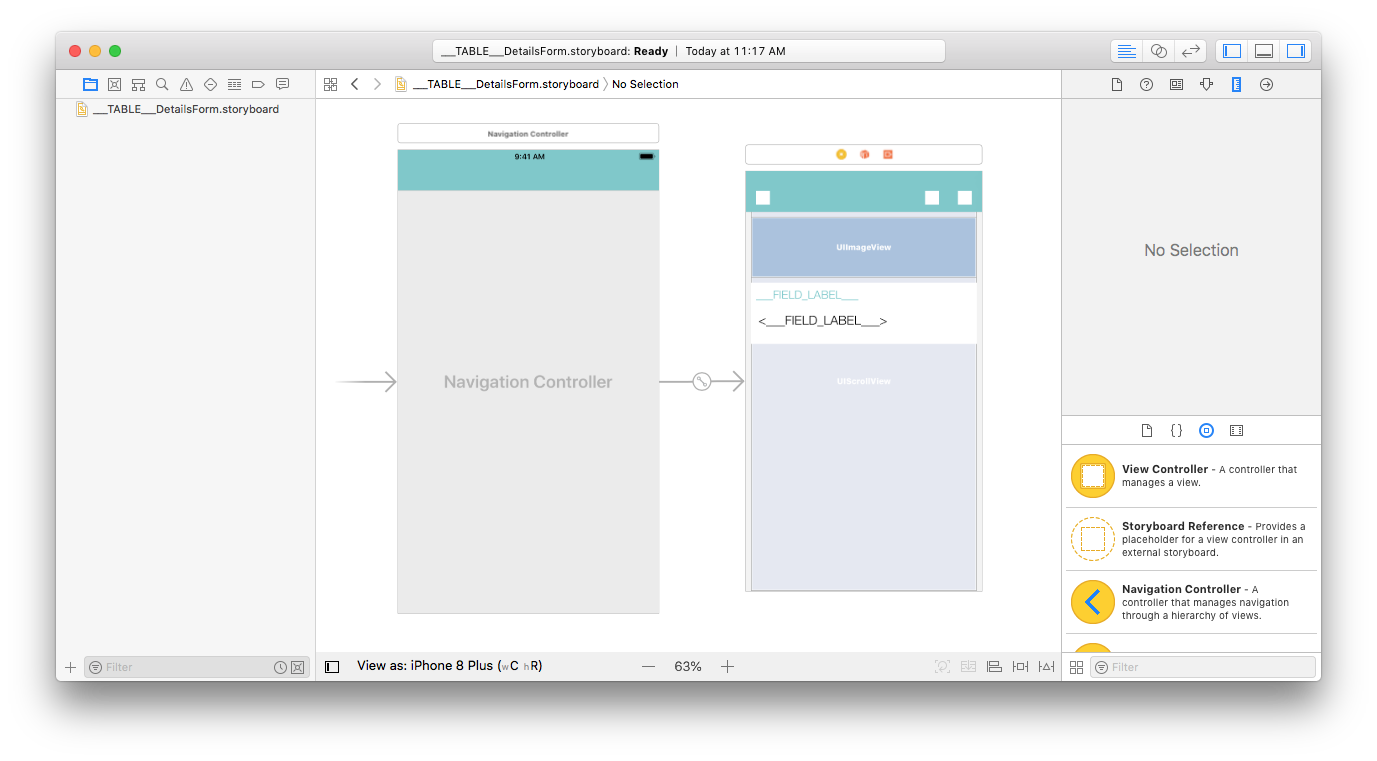
セル内に表示されるフィールドのレイアウトをデザインしましょう。
- プロフィールのヘッダー画像
- 繰り返されるフィールド
ストーリーボードをXcodeで開く
storyboardファイル(拡張子は非表示かもしれません)をXcodeで開きます。
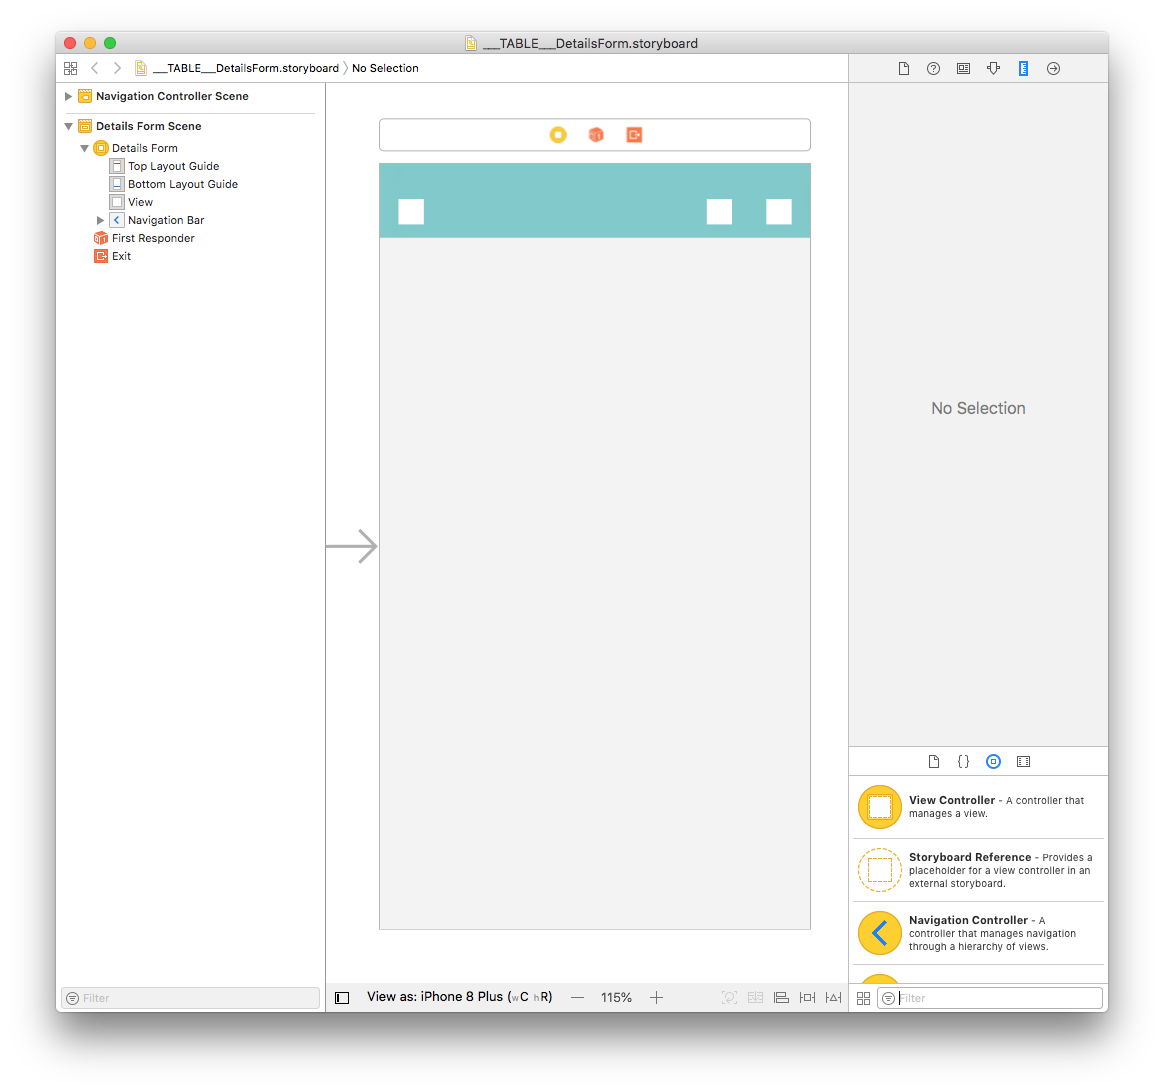
ほとんど白紙の状態です。早速,中身を追加しましょう!
Scroll Viewを追加する
For our detail form to be scrollable, the first step is to drag and drop a "Scroll View" from the Object library.
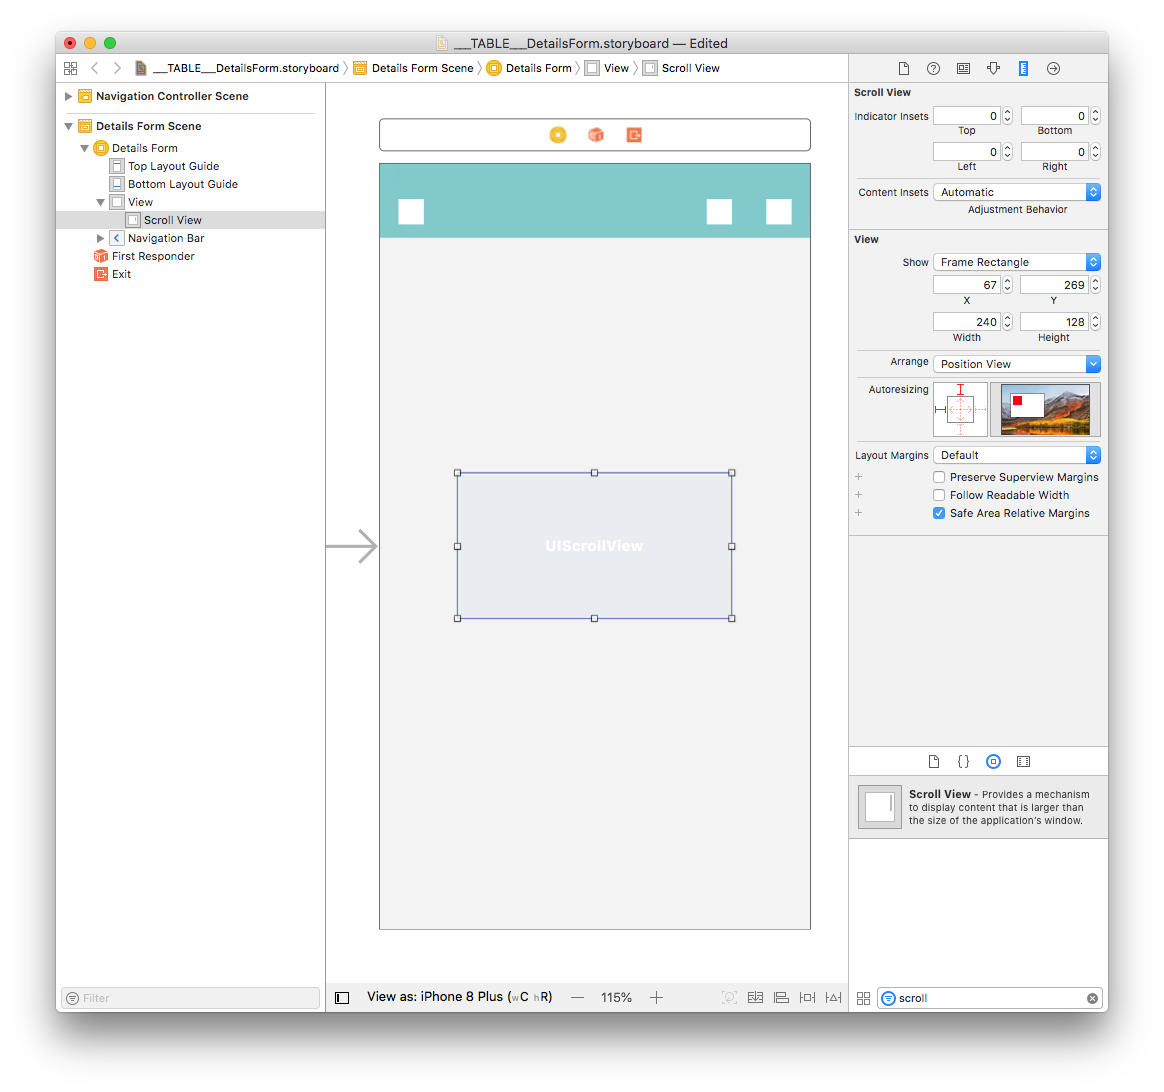
From the Size inspector panel (on the right side of the Interface Builder window), set the Scroll View Width value to 359 and the Height value to 667. X 座標を 8 に,Y 座標を 0 に設定しましょう。
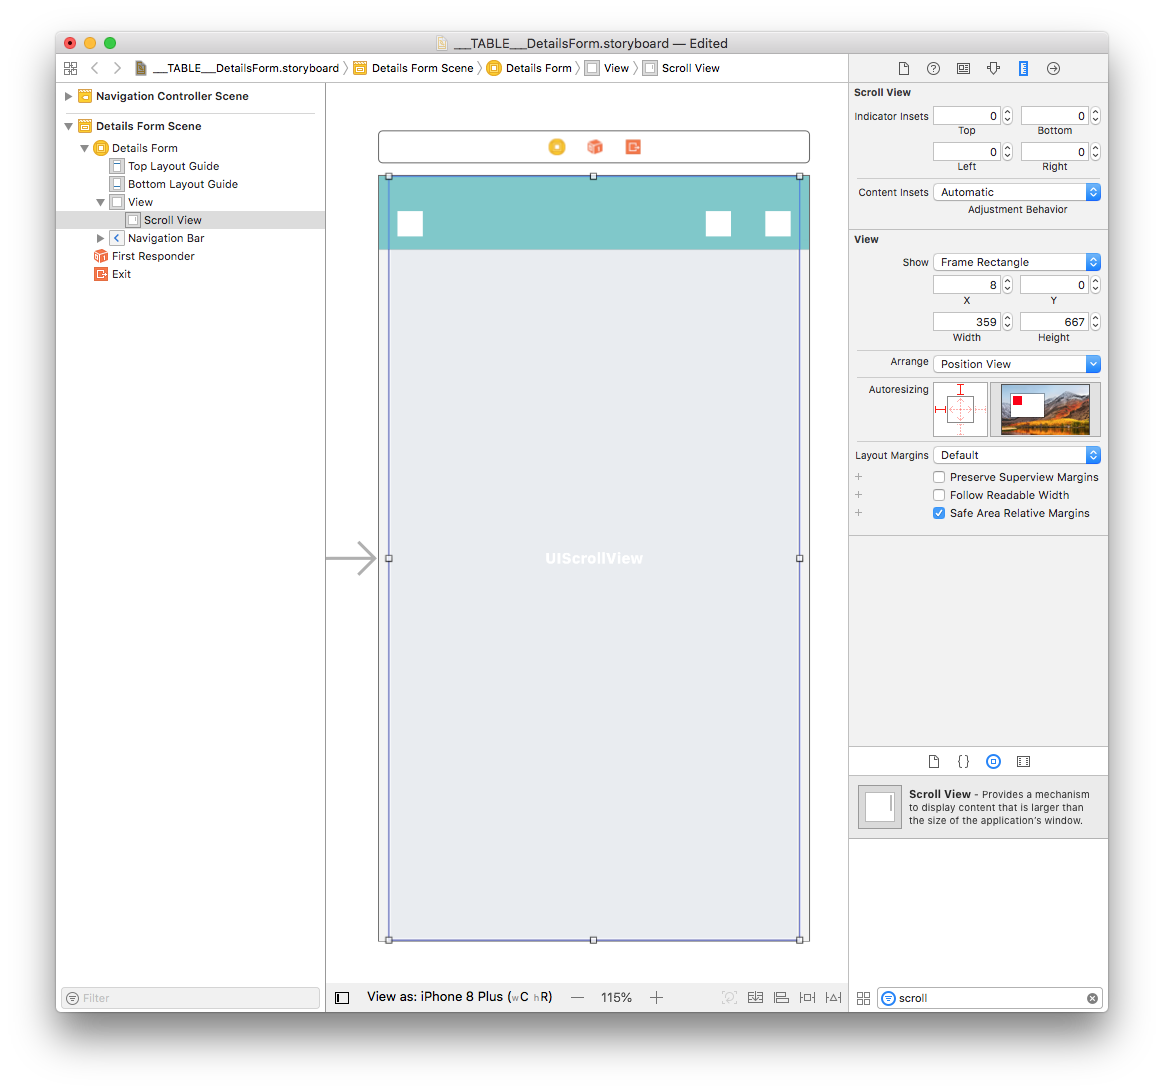
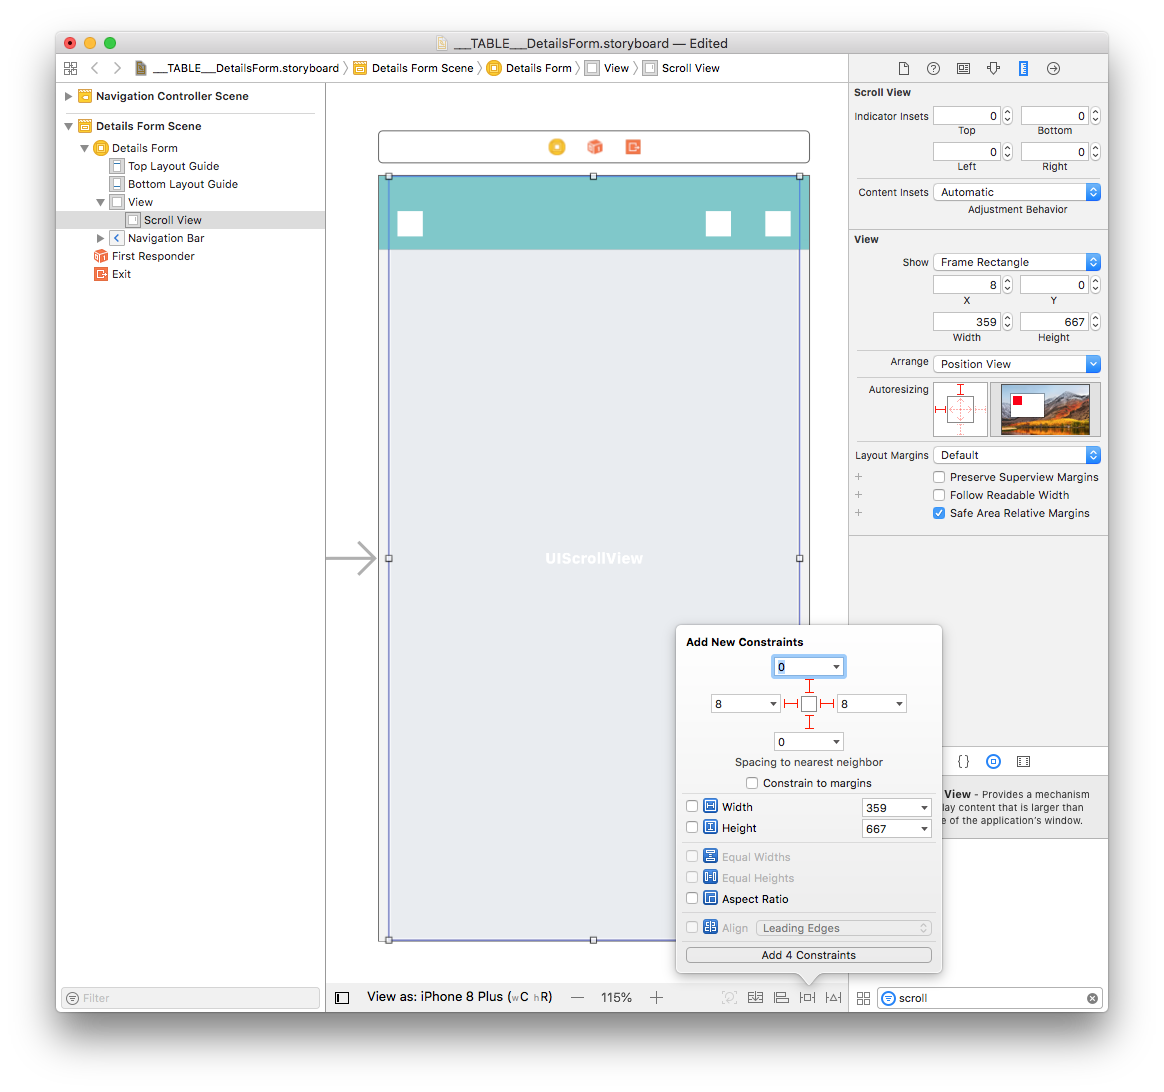
Next, add four constraints by clicking on the Add New Constraints button (Trailing: 8, Leading: 8, Top: 0, and Bottom: 0) as shown below:
Vertical Stack Viewを追加する
Drag and drop a Vertical Stack View from the Object library in Scroll View. Then, from the Size inspector panel (on the right side of the Interface Builder window) set the Width value to 359 and the Height value to 202. X 座標を 0 に,Y 座標を 8 に設定しましょう。
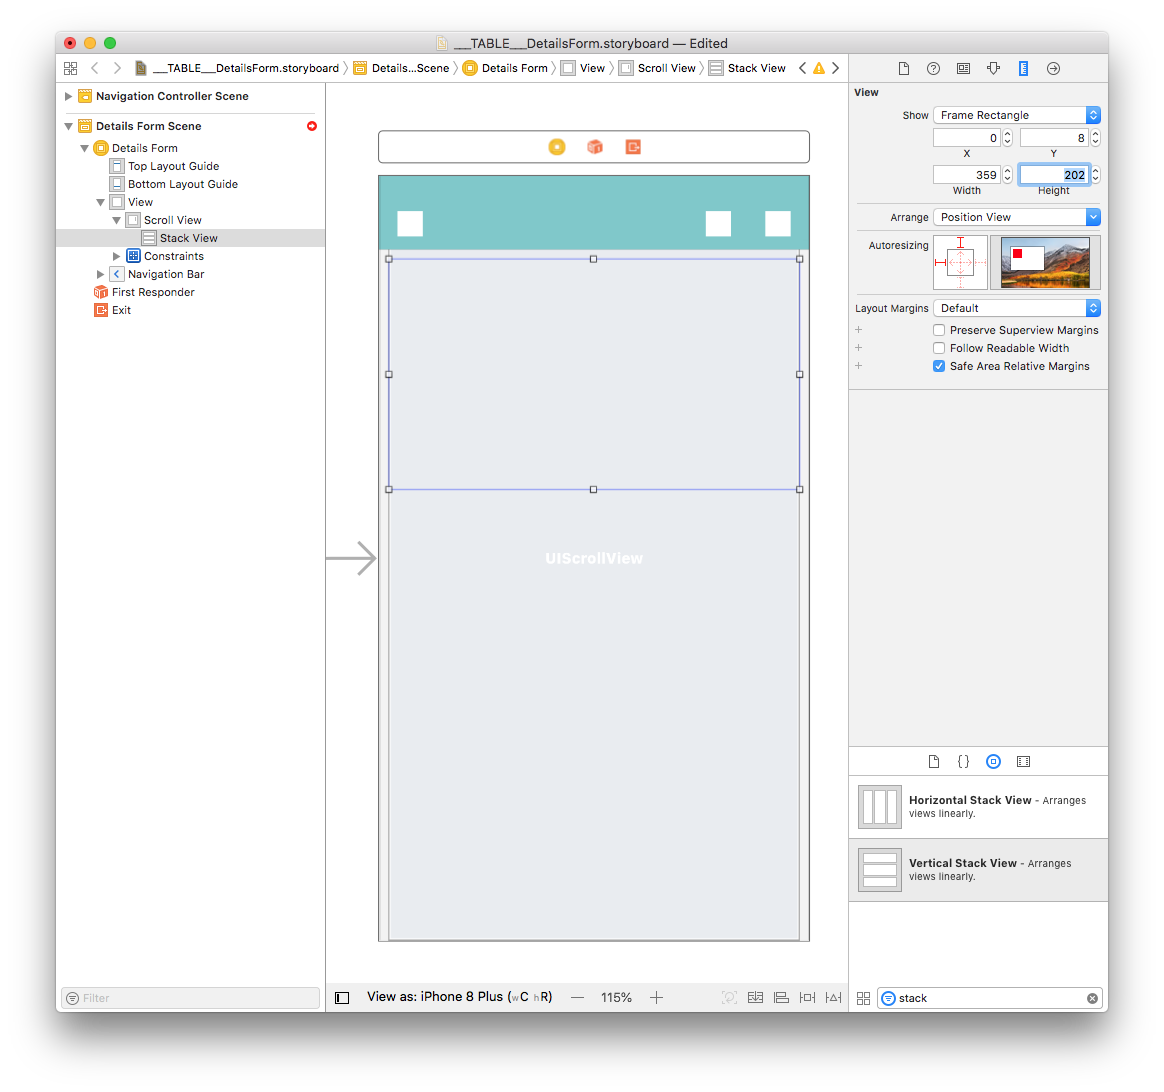
Stack Viewの幅と高さは,内包しているオブジェクトによって決まるため,サイズの制約はもう少し後に設定します。
Stack Viewに他のViewを追加する
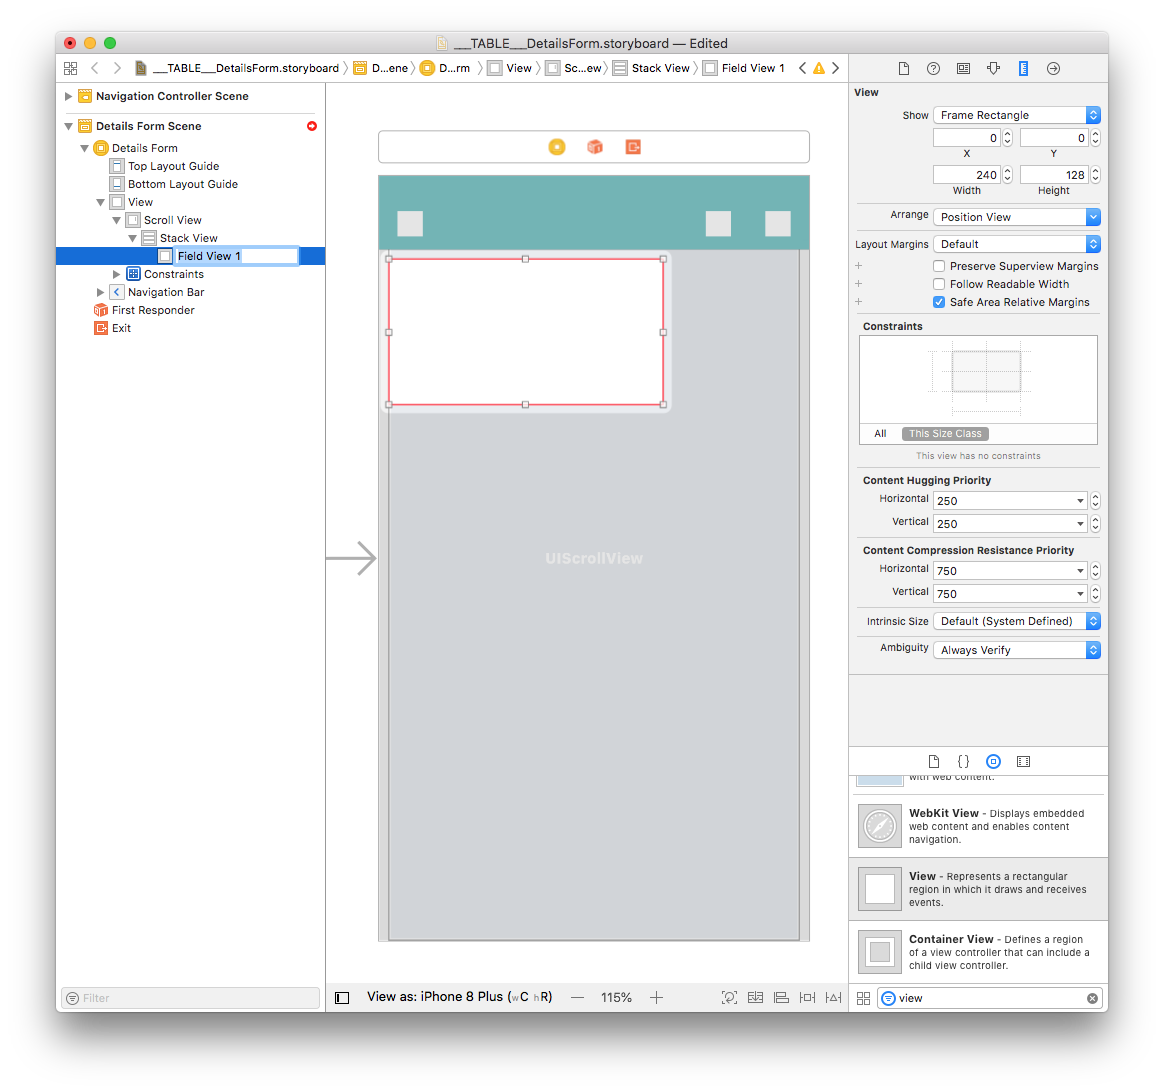
Drag and drop a view from the Object library to the Stack View you've just added to your storyboard. Let's name it Field View 1.
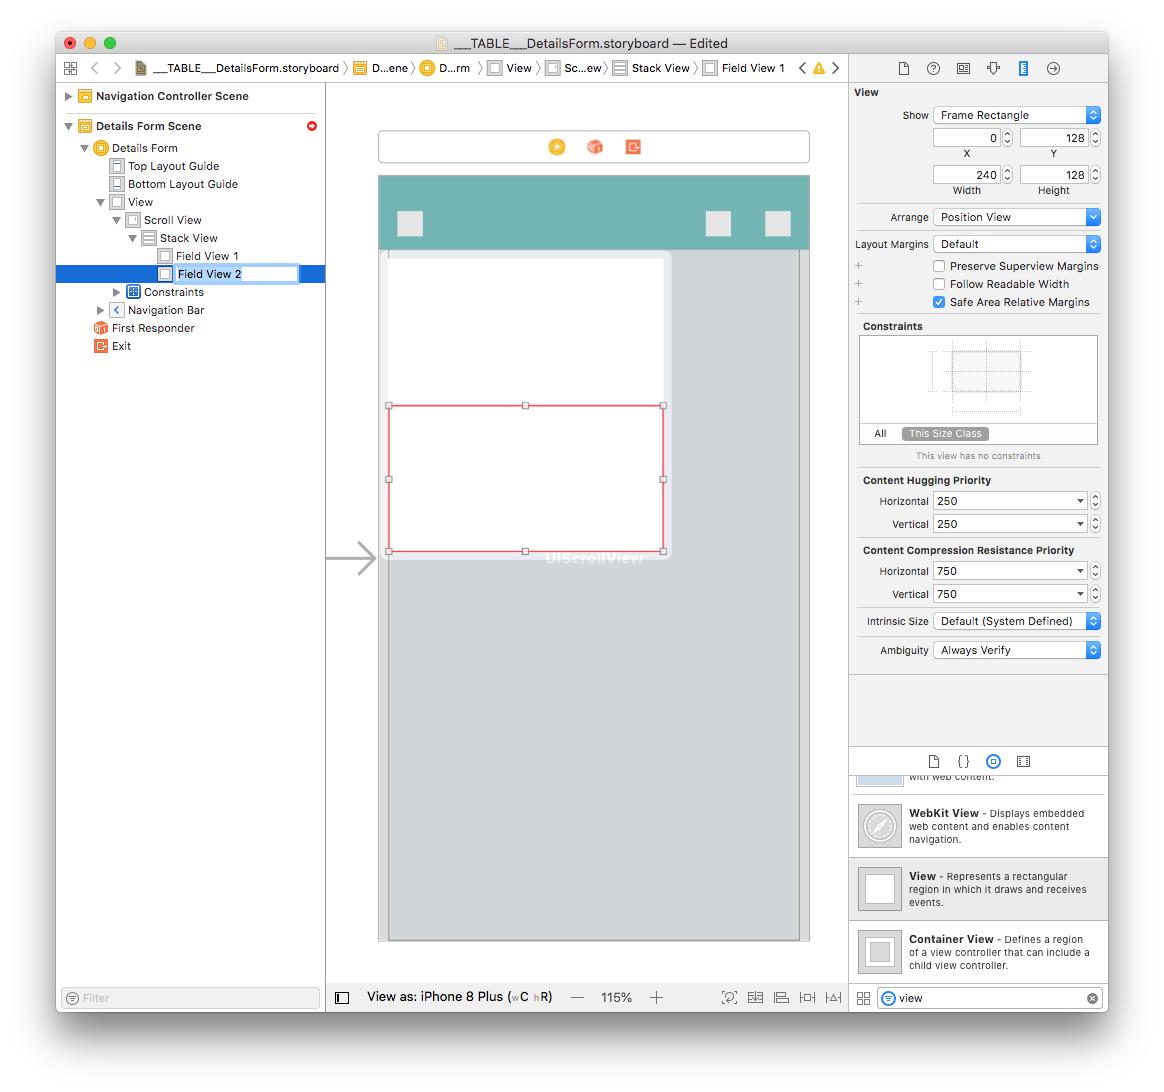
Then drag and drop another view from the Object library directly into the Document Outline at the same level as Field View 1 (to include it in the Stack View) and name it Field View 2.
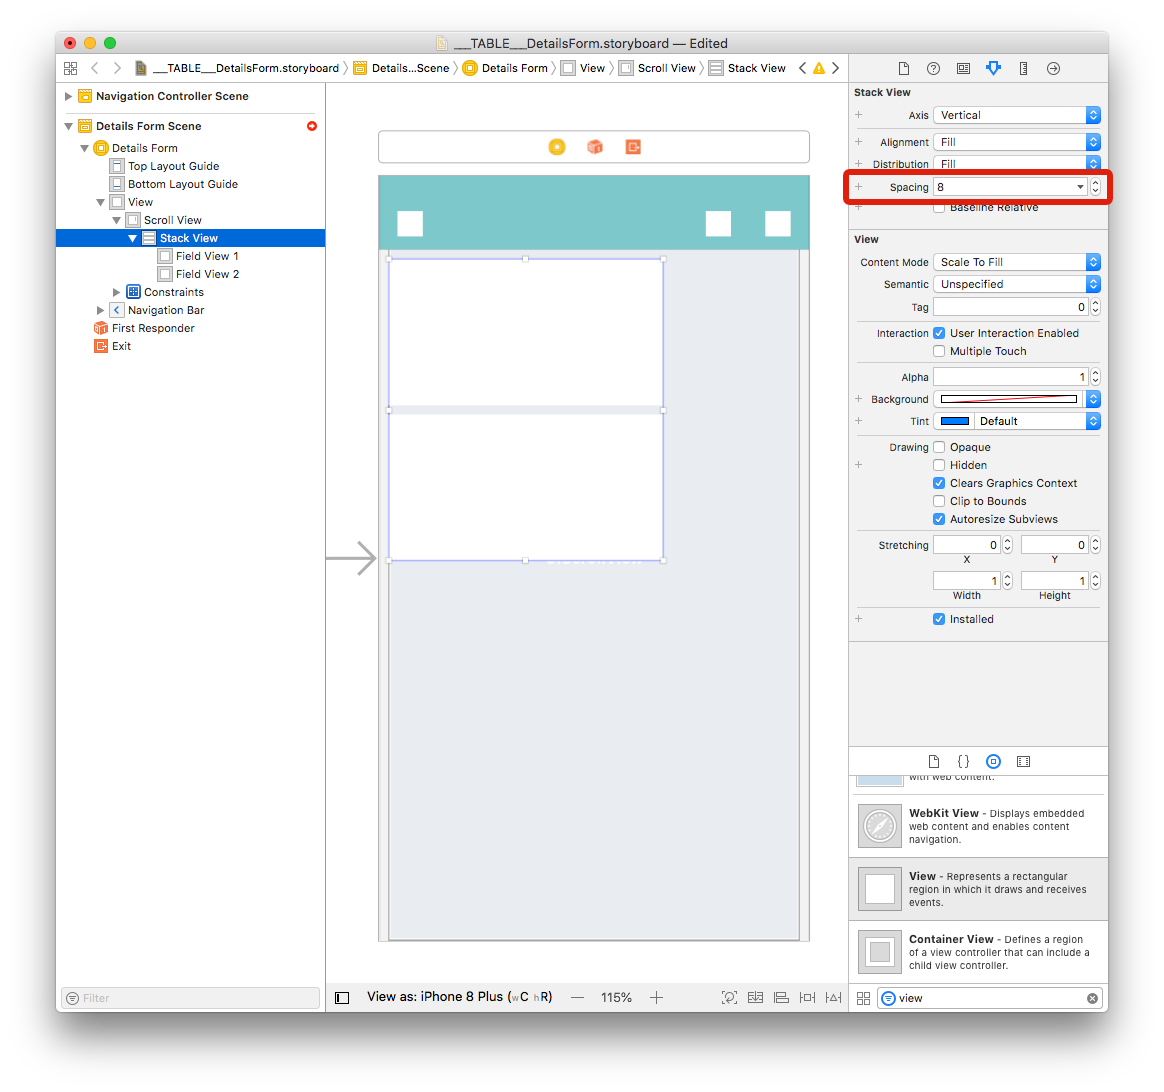
ビュー同士の間隔を空けるために,属性インスペクターで「spacing」の値を 8 に変更します。
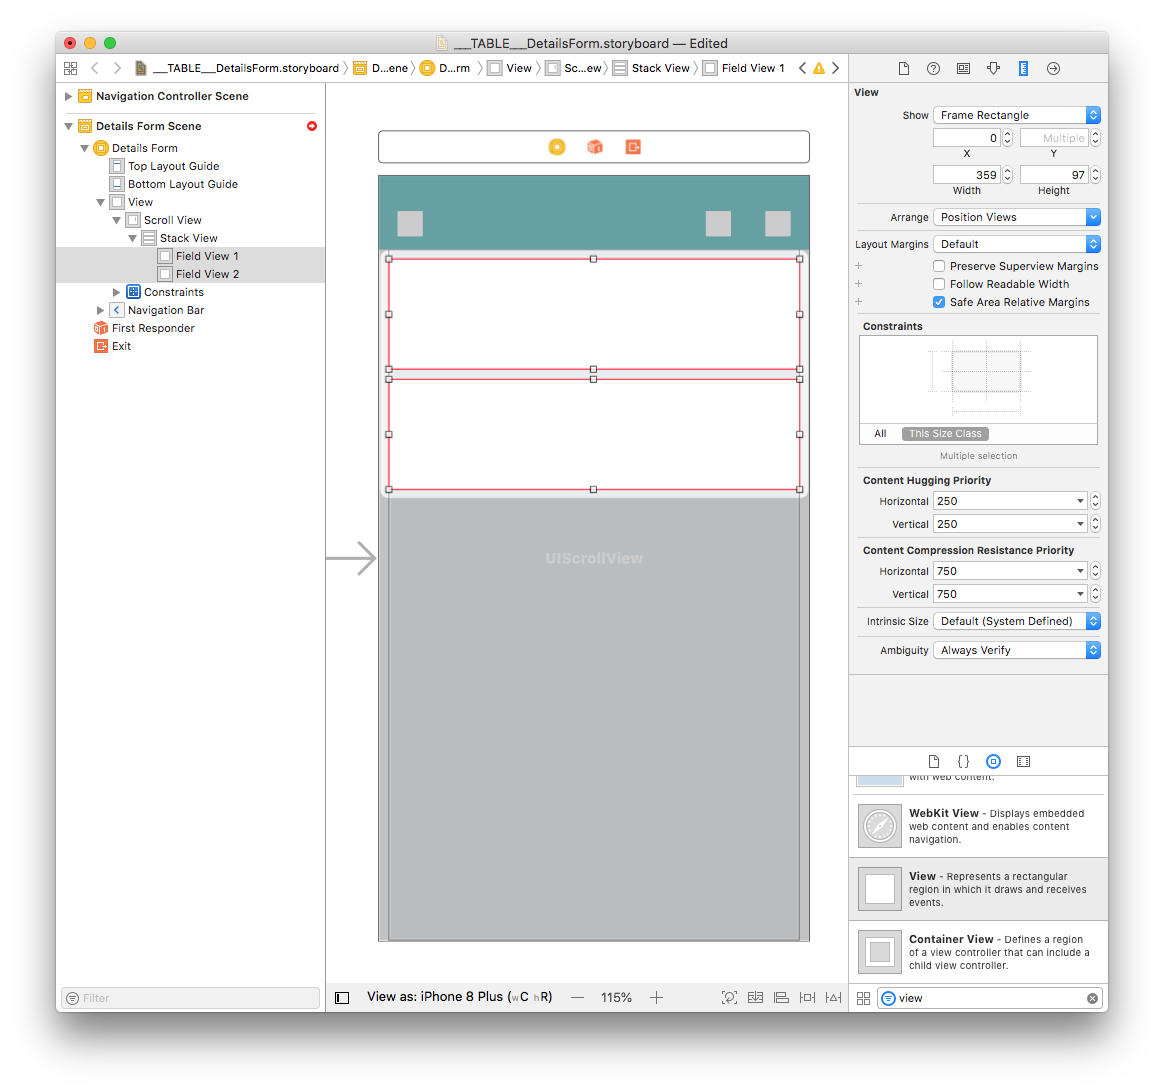
Select both Field View 1 and Field View 2 and in the Size inspector panel (on the right side of the Interface Builder window), set Width value to 359 and the Height value to 97.
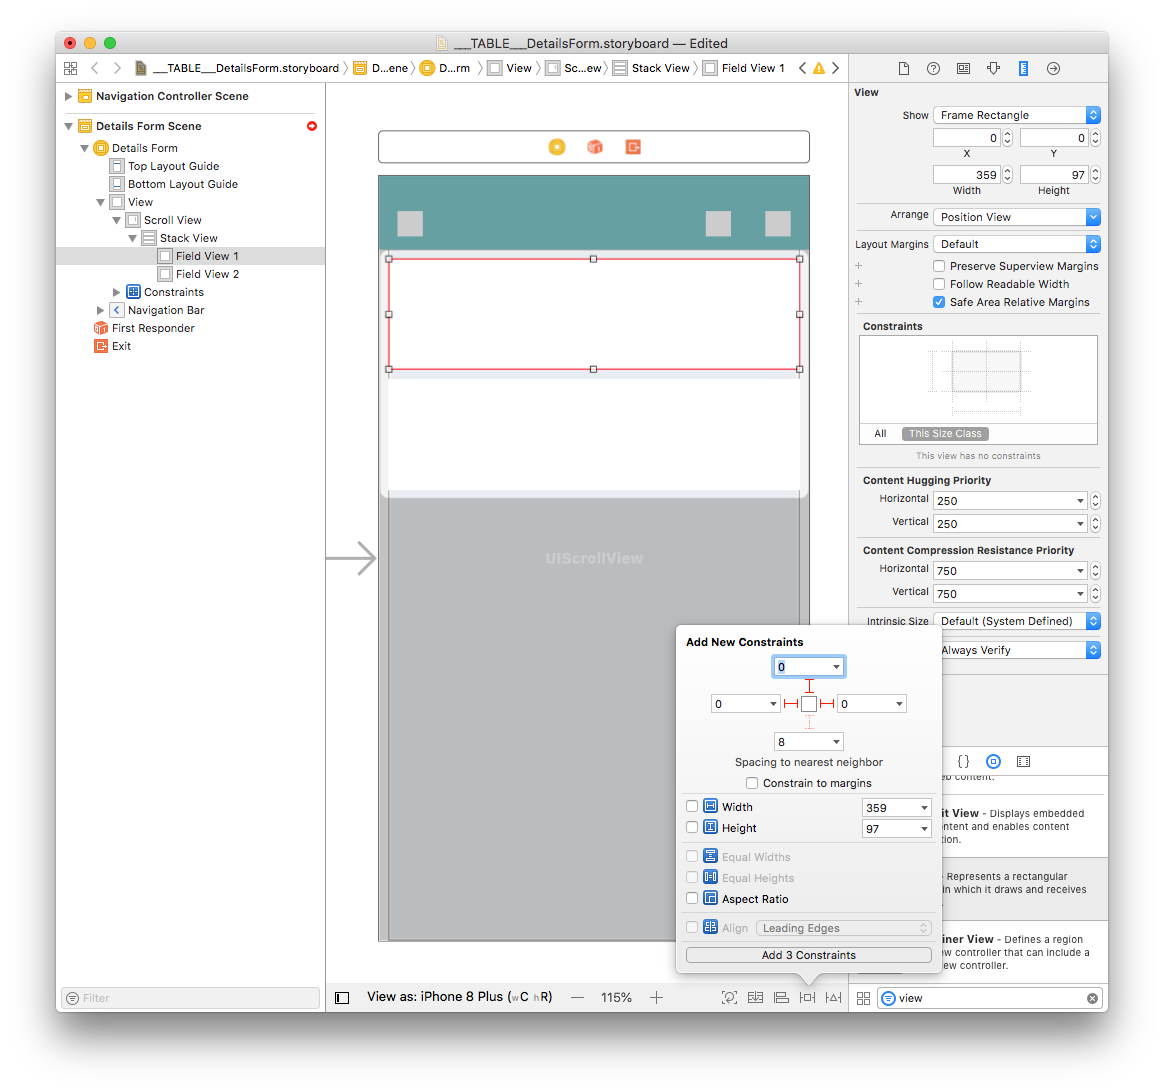
Select Field View 1 add three constraints by clicking on the Add New Constraints button (Trailing: 0, Leading: 0, and Top: 0):
Stack ViewがScroll Viewと同じ幅になるよう,もう1個の制約を追加します。
Controlキーを押しながらStack Viewをドラッグし,Scroll Viewに重ね合わせます。 マウスボタンを離すと同時に,ここで設定できる制約の選択肢が表示されます。 「Equal Width」を選択してください。
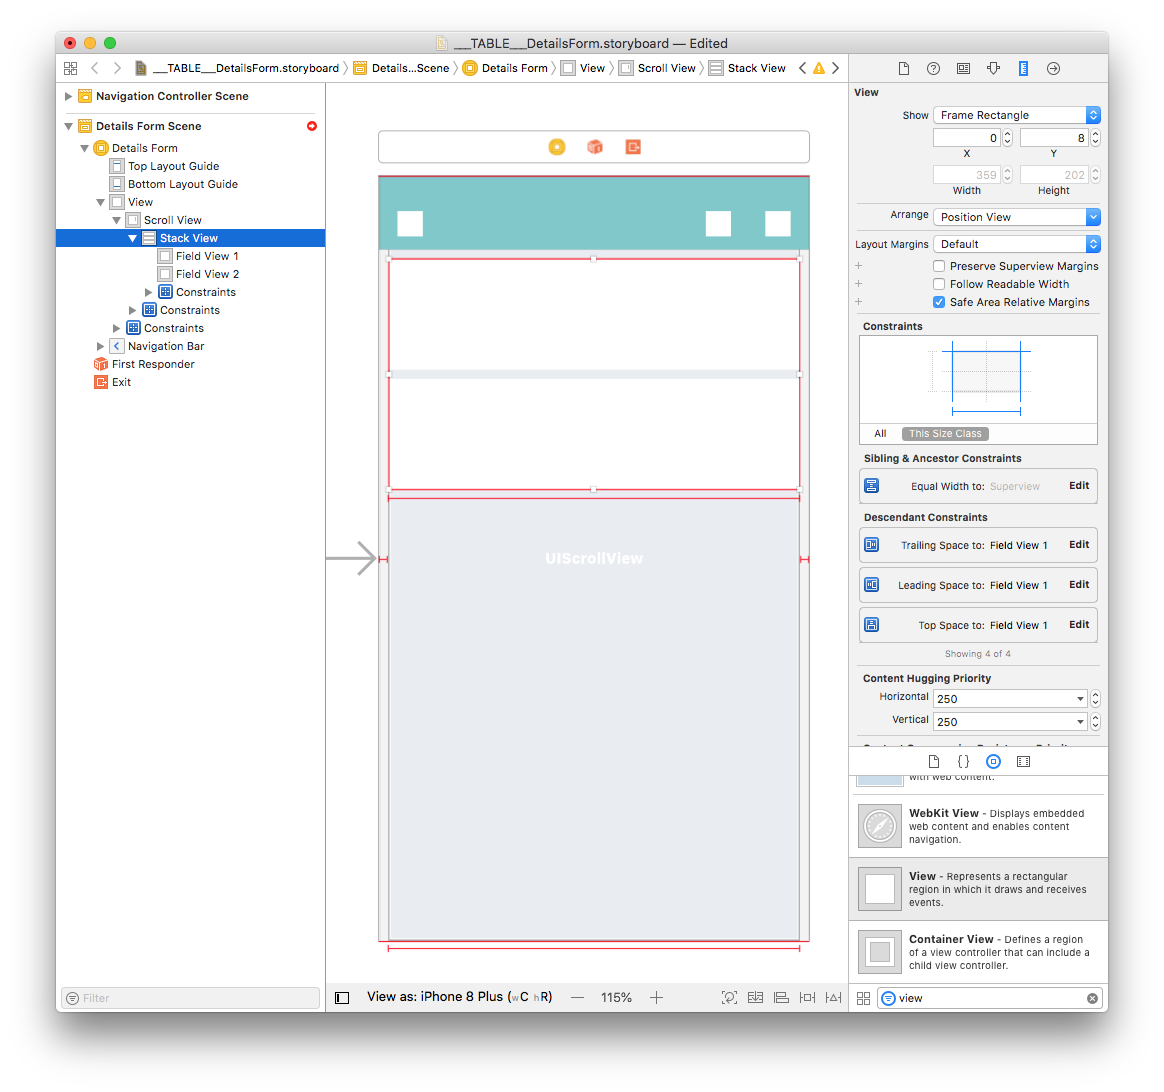
Next, with the Stack View selected add four constraints by clicking on the Add New Constraints button (Trailing: 0, Leading: 0, Top: 8, and Bottom: 0) as shown below:
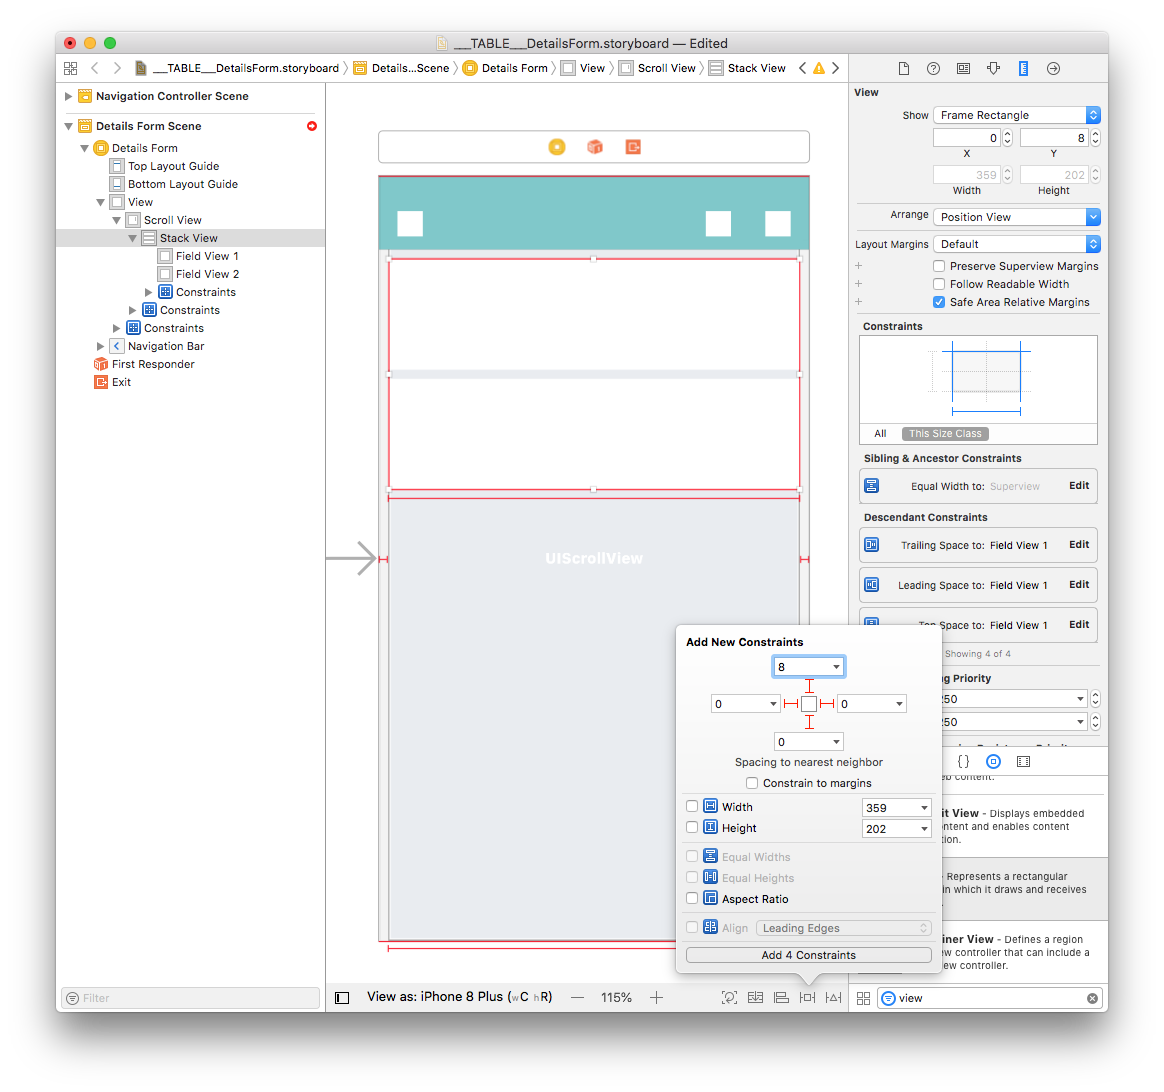
制約が設定されると,下図のように表示が変化するはずです。
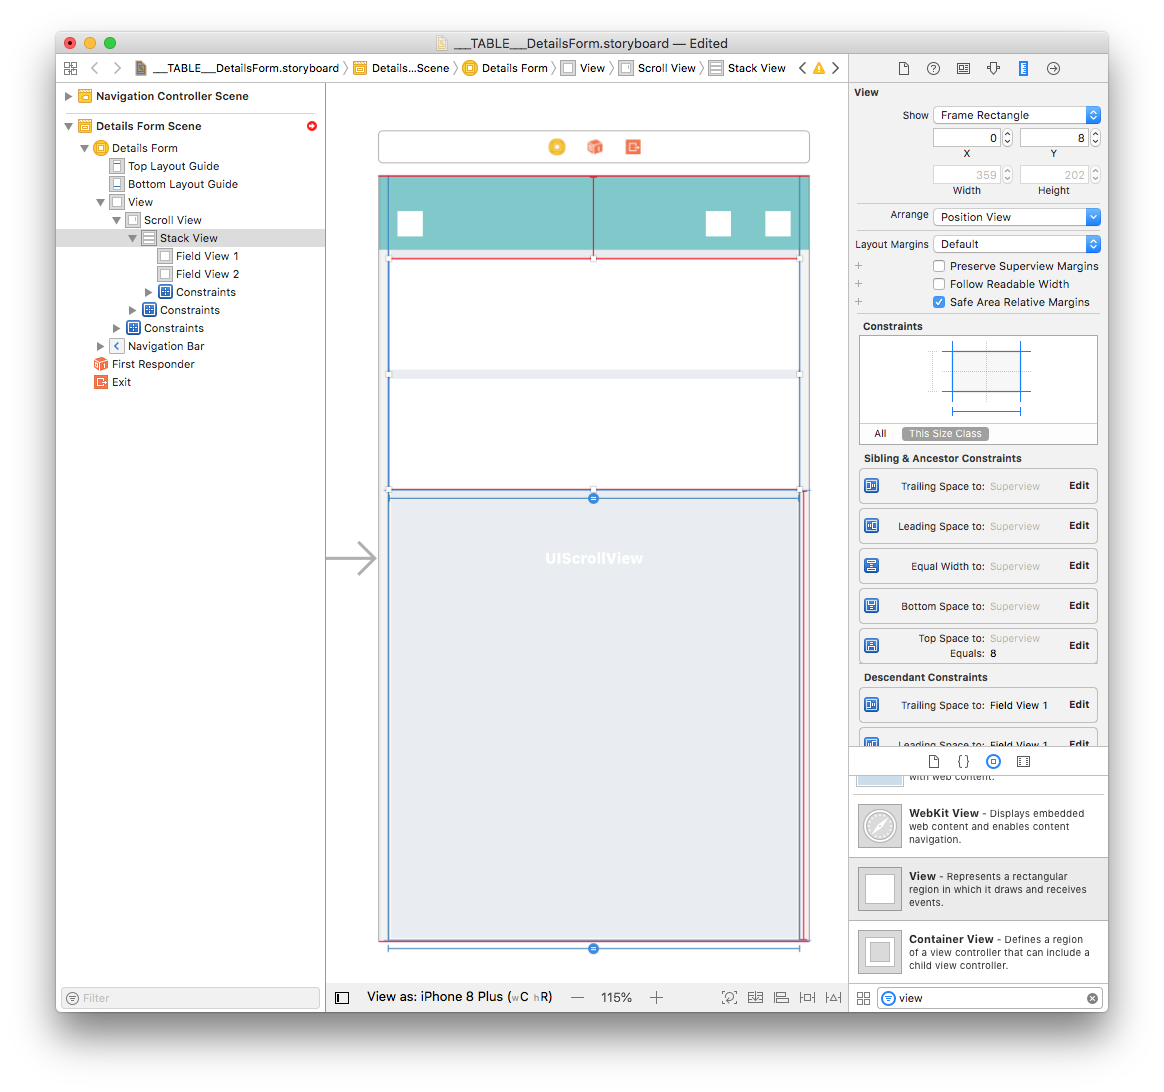
Stack Viewに2個ビューを追加し,制約もきちんと設定できました。 Field View 1の作業に移りましょう。
Field View 1にImage Viewを追加する
From the Object library, drag and drop an Image View into Field View 1.
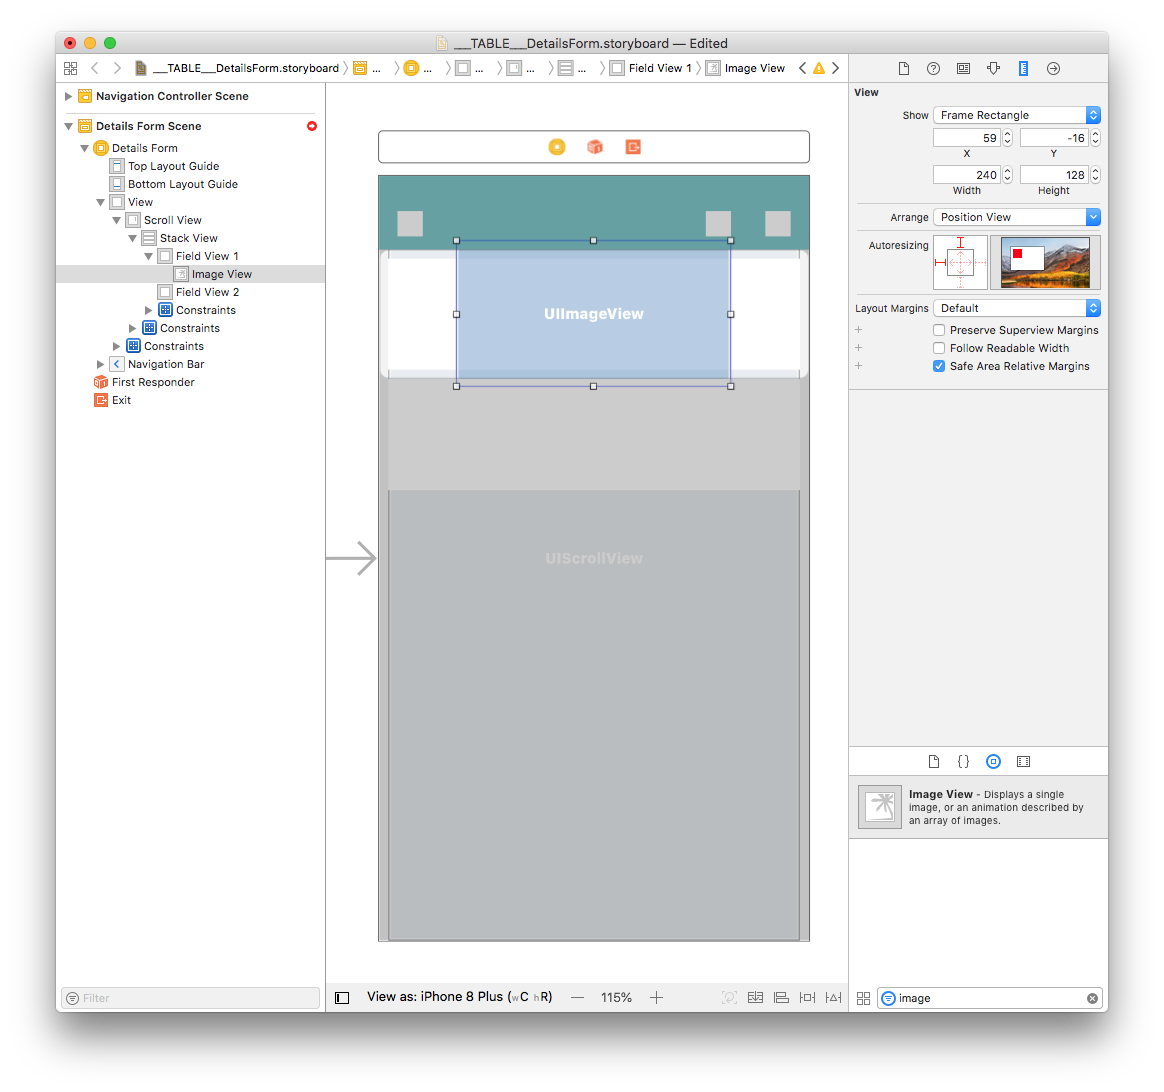
In the Size inspector panel (on the right side of the Interface Builder window), set the Image View Width value to 359 and the Height value to 97. X 座標を 0 に,Y 座標を 0 に設定しましょう。
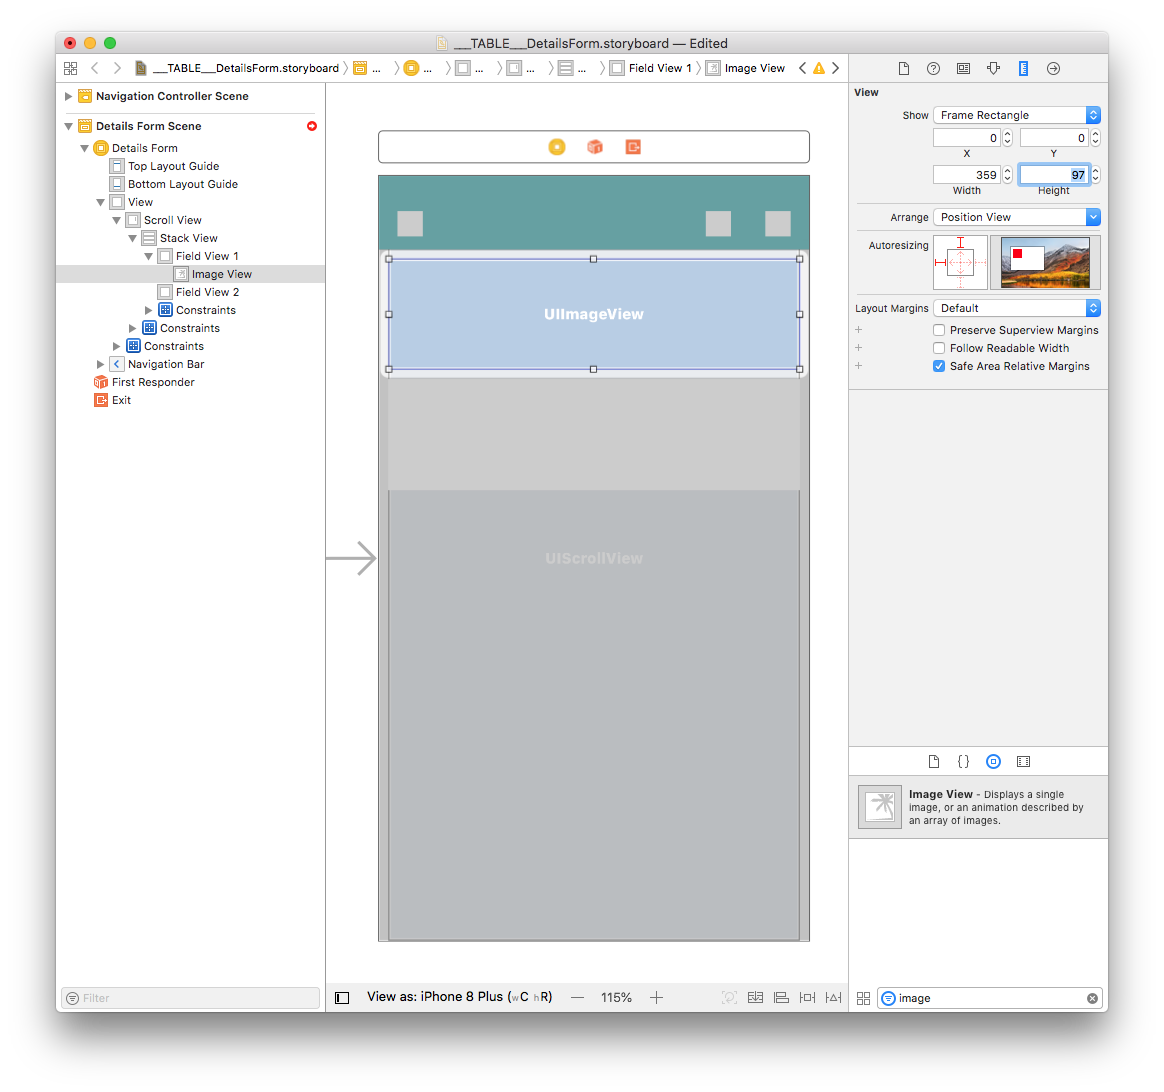
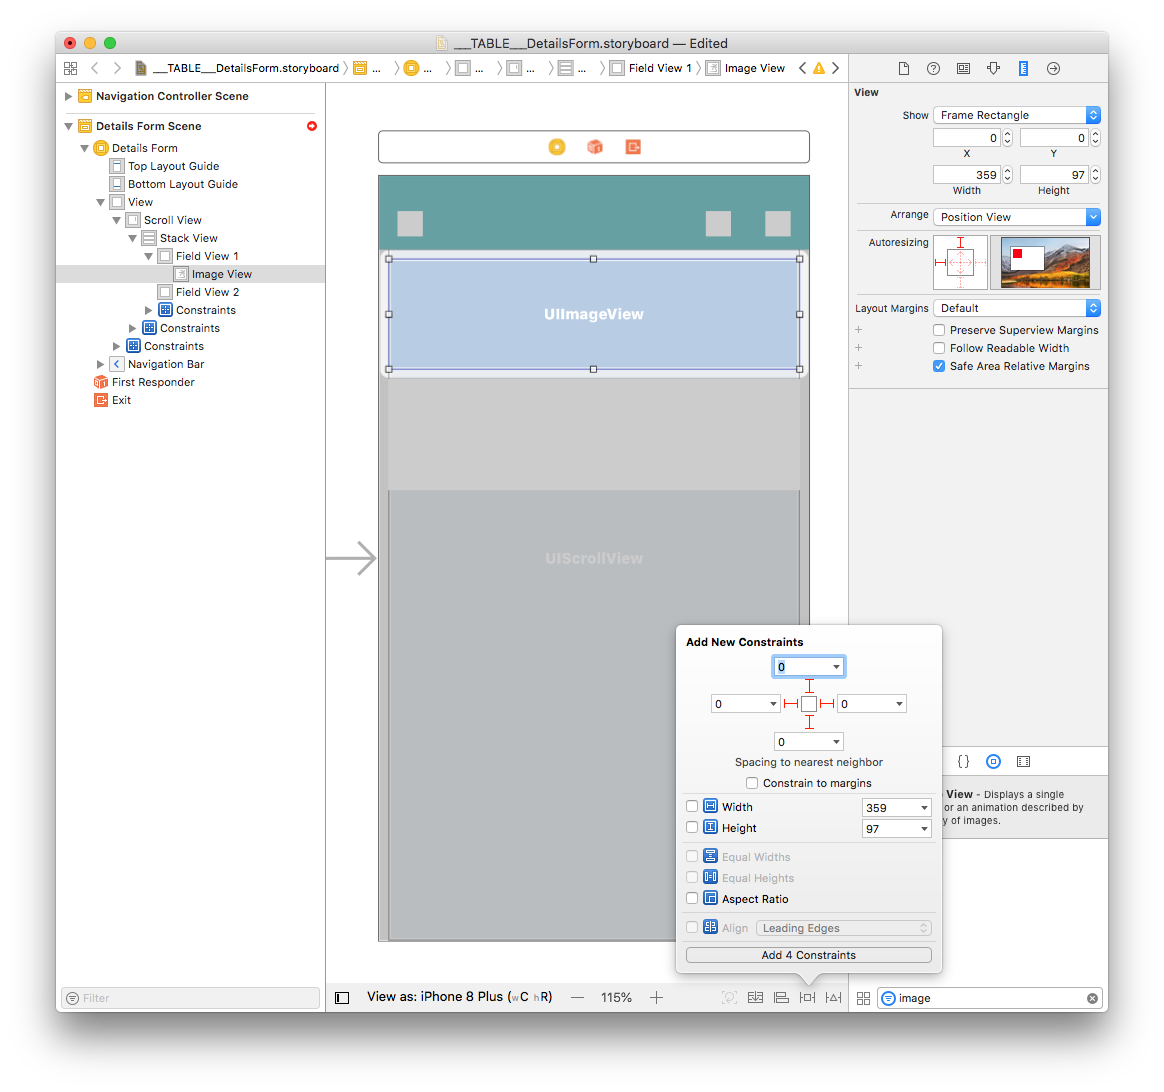
Next, add four constraints by clicking on the Add New Constraints button (Trailing:0, Leading:0, Top:0, and Bottom:0) as shown below:
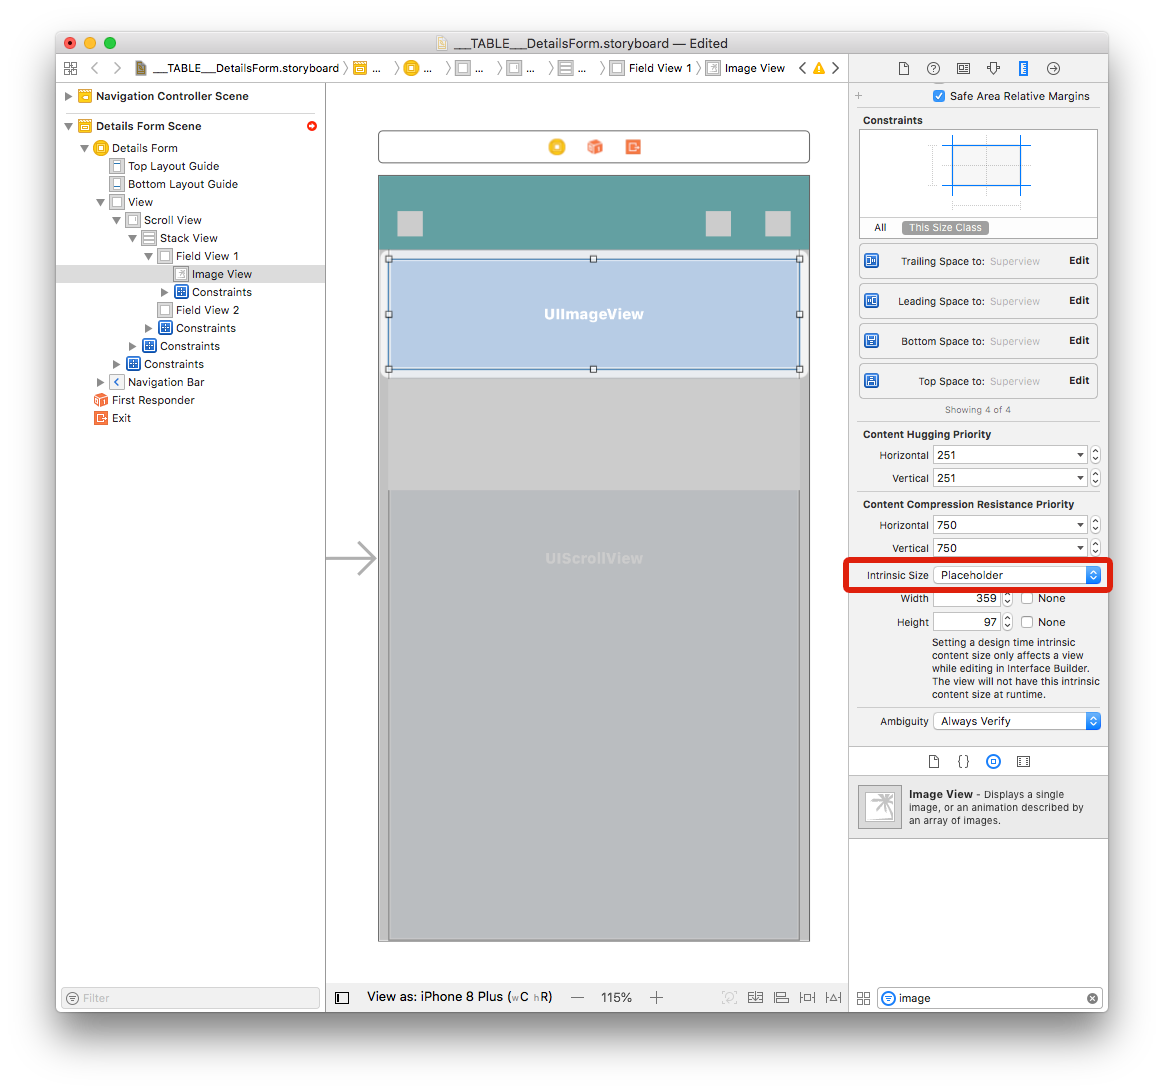
In the Size inspector panel change the Intrinsic Size from Default to Placeholder.
Field View 2にラベルを追加する
Title ラベル
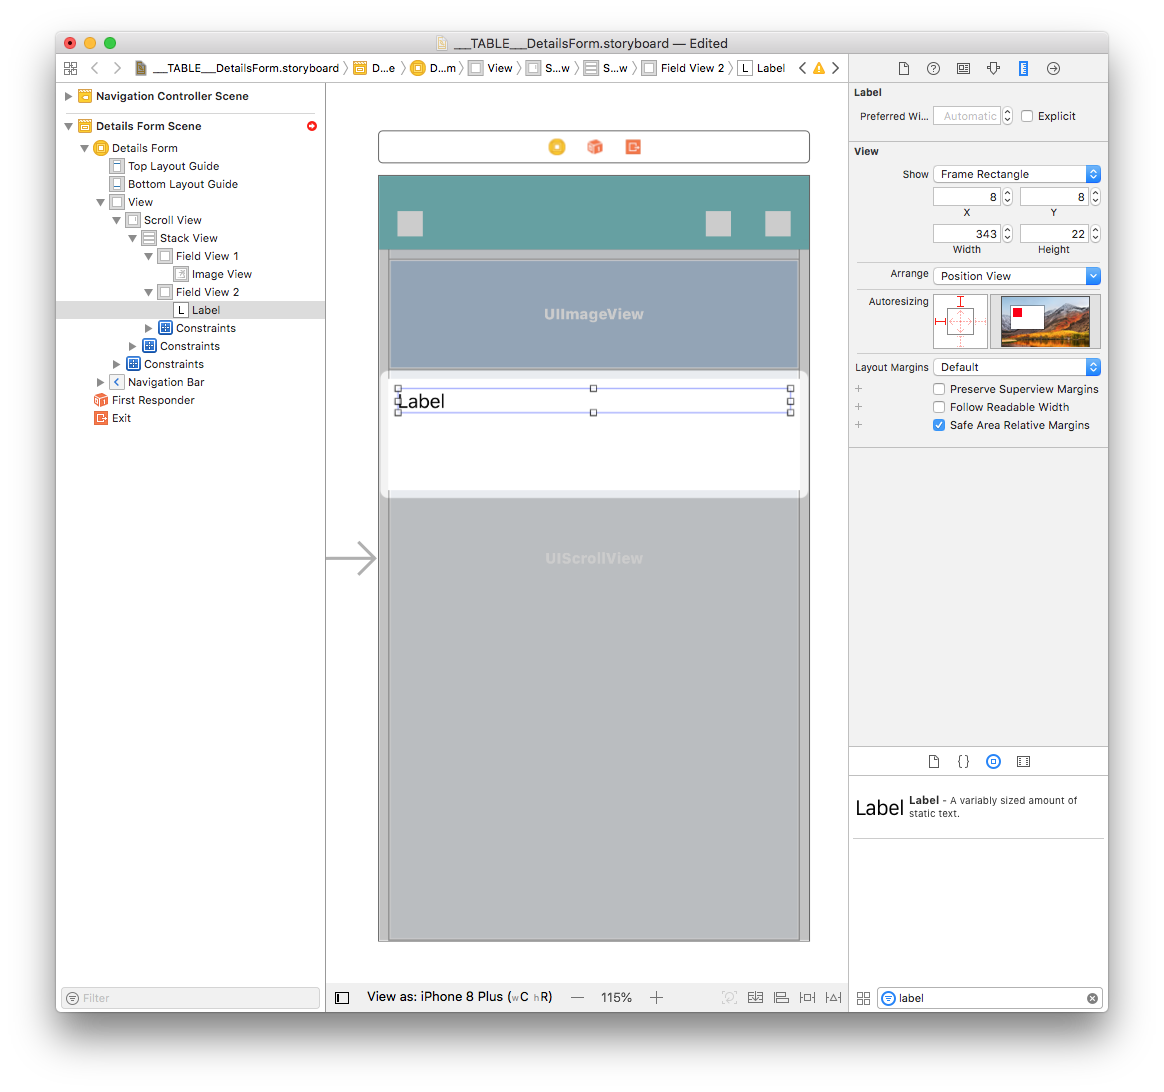
In the Object library, drag and drop a Label into Field View 2 and set the Width value to 343 and the Height value to 22. また,X座標を8に,Y座標も8に設定します。
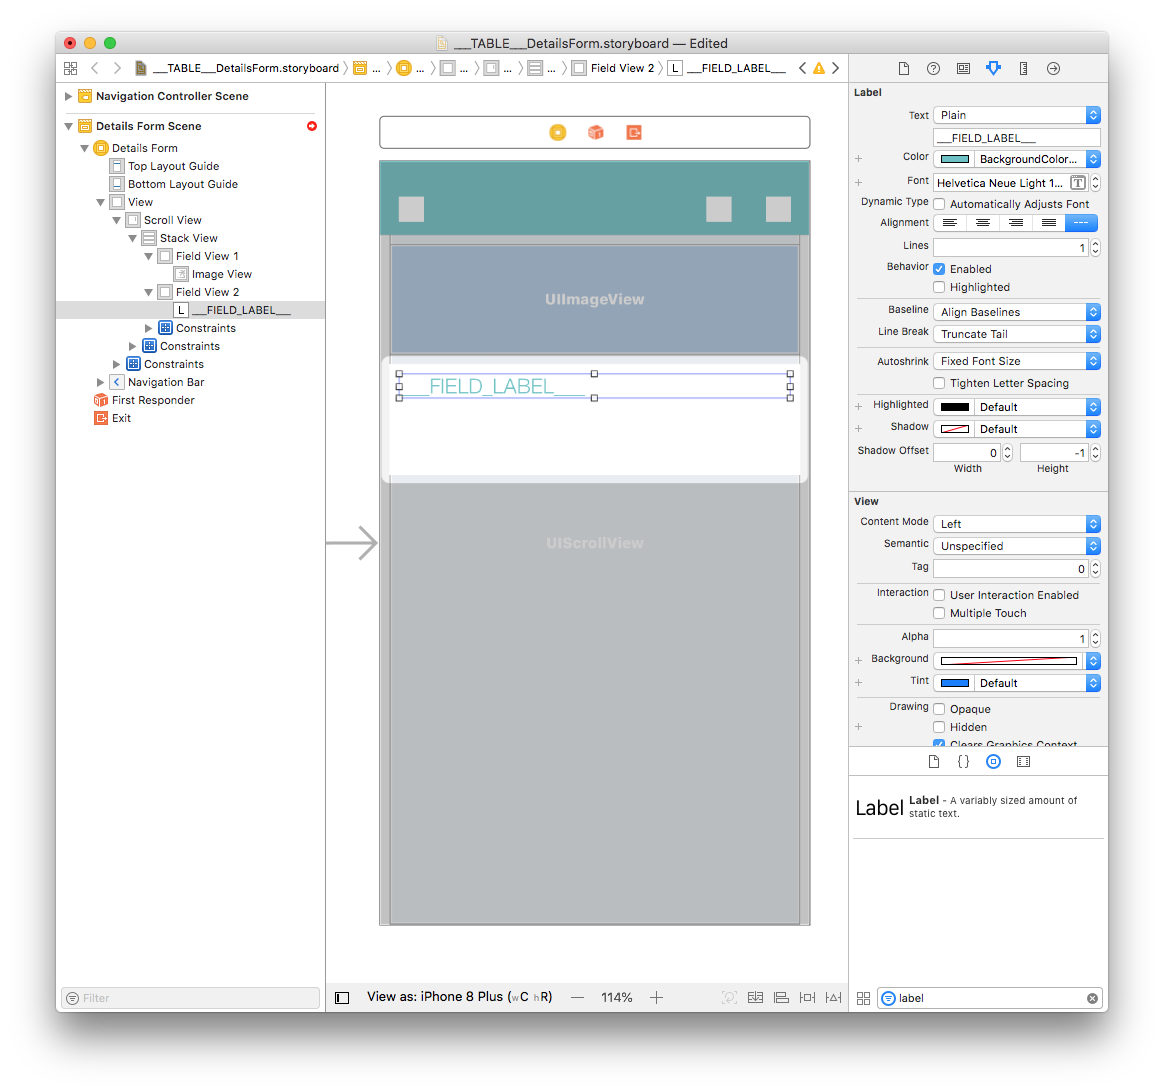
Double click on the label and name it "___FIELD_LABEL___". Then in the attribute inspector set the font to Helvetica Neue Light 18.0 and the color to BackgroundColor:
Content ラベル
Title ラベルを複製し,幅を 339 に,高さを 44 に変更します。 X座標を 12 に,Y座標は 37 に設定します。
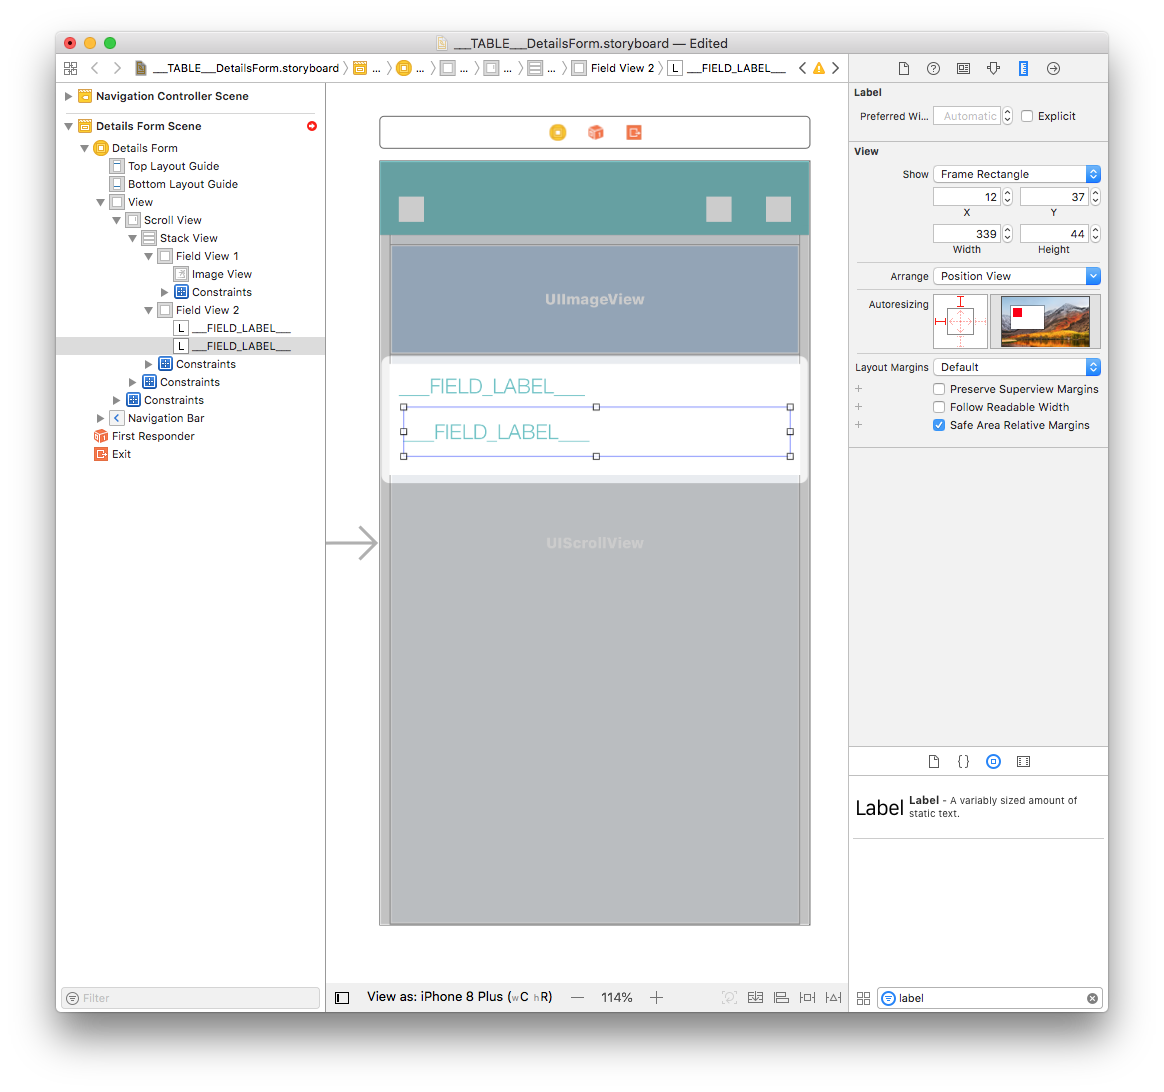
Double click on the label and name it "<___FIELD_LABEL___>". Then from the attribute inspector set the font to Helvetica Neue Light 20.0 and the color to Black Color:
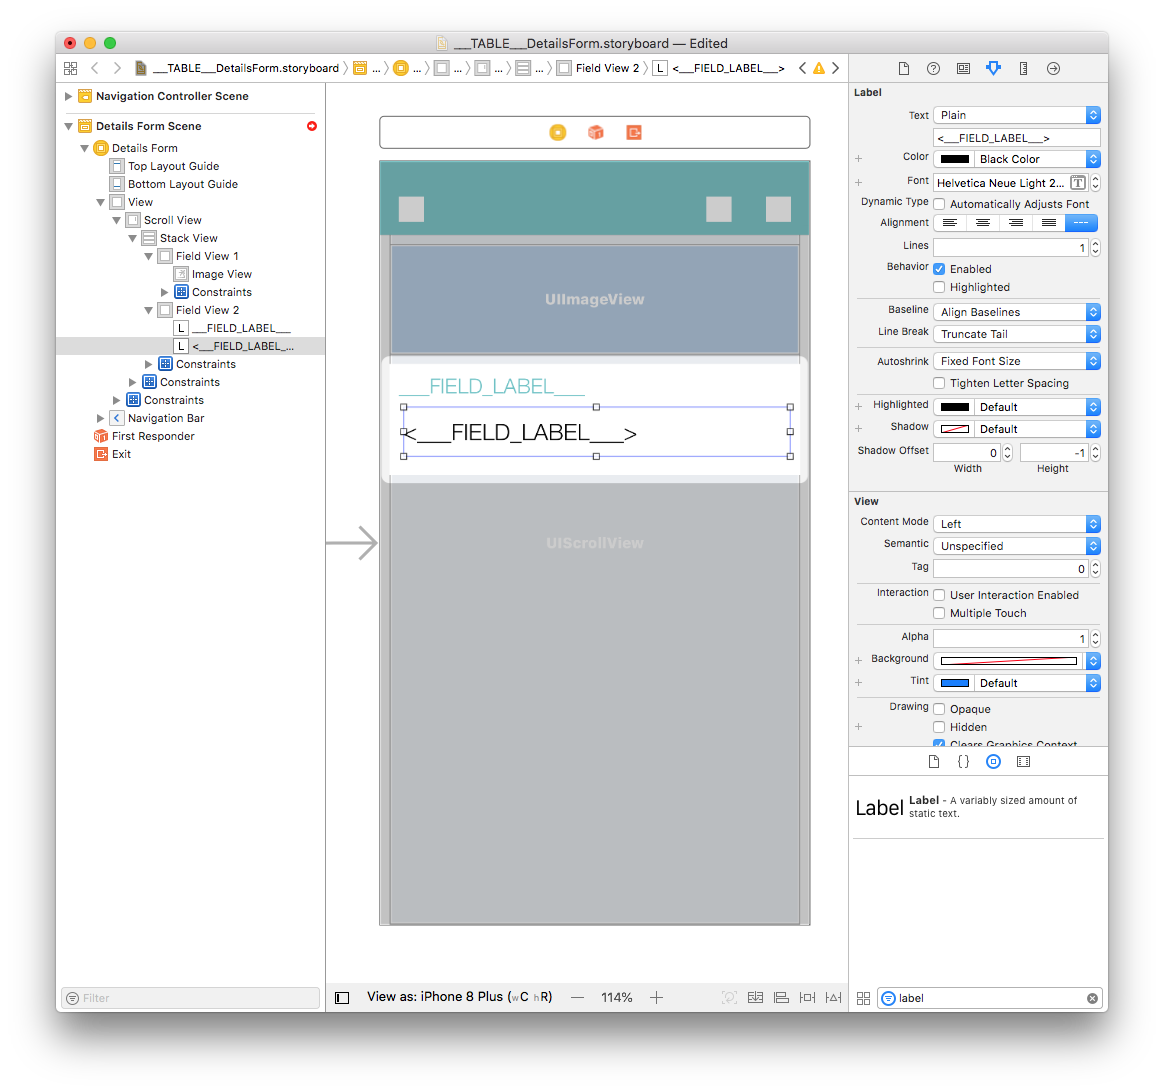
Select the Content and Title labels and add four constraints by clicking on the Add New Constraints button (Trailing: 8, Leading: Multiple, Top: Multiple, and Bottom: Multiple) as shown below:
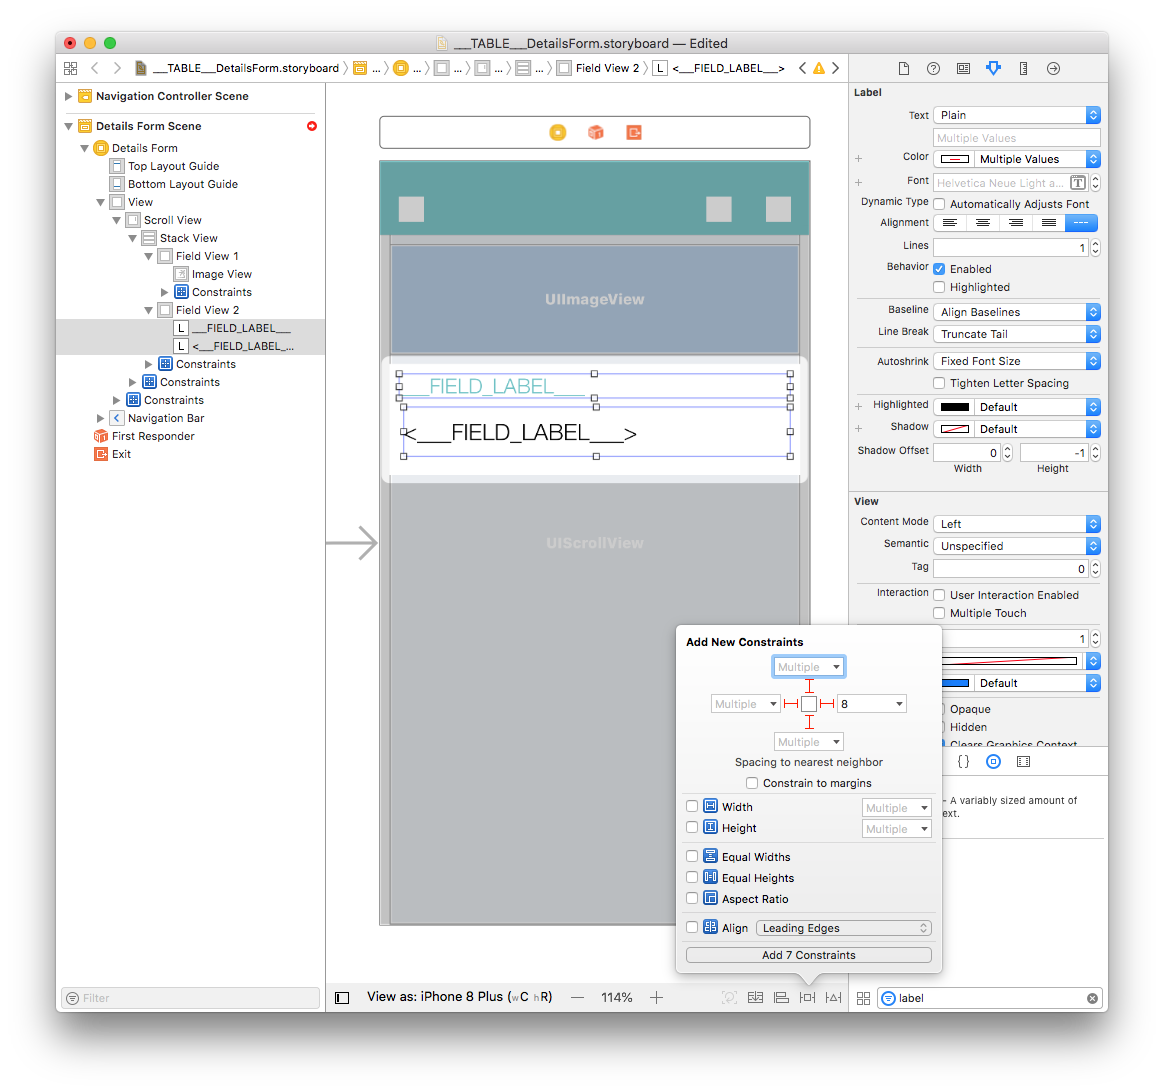
外観に関する設定がひと段落しました! 制約の設定はこれで完了です!
セルにデータが表示されるようにする
Image View
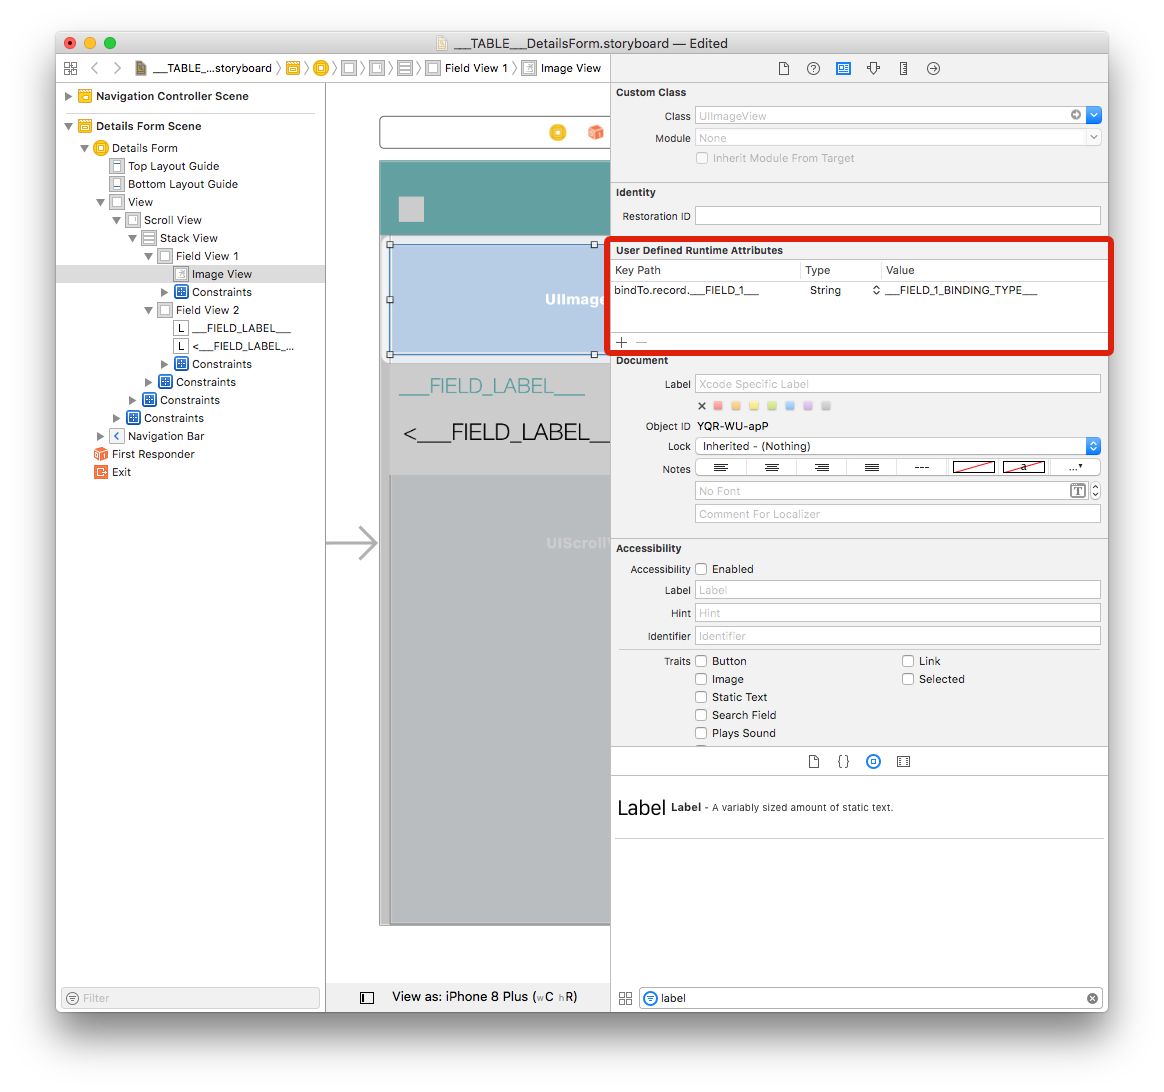
Select your Image View and go to Identity inspector > User Defined Runtime Attributes. Click the + button to add a row.
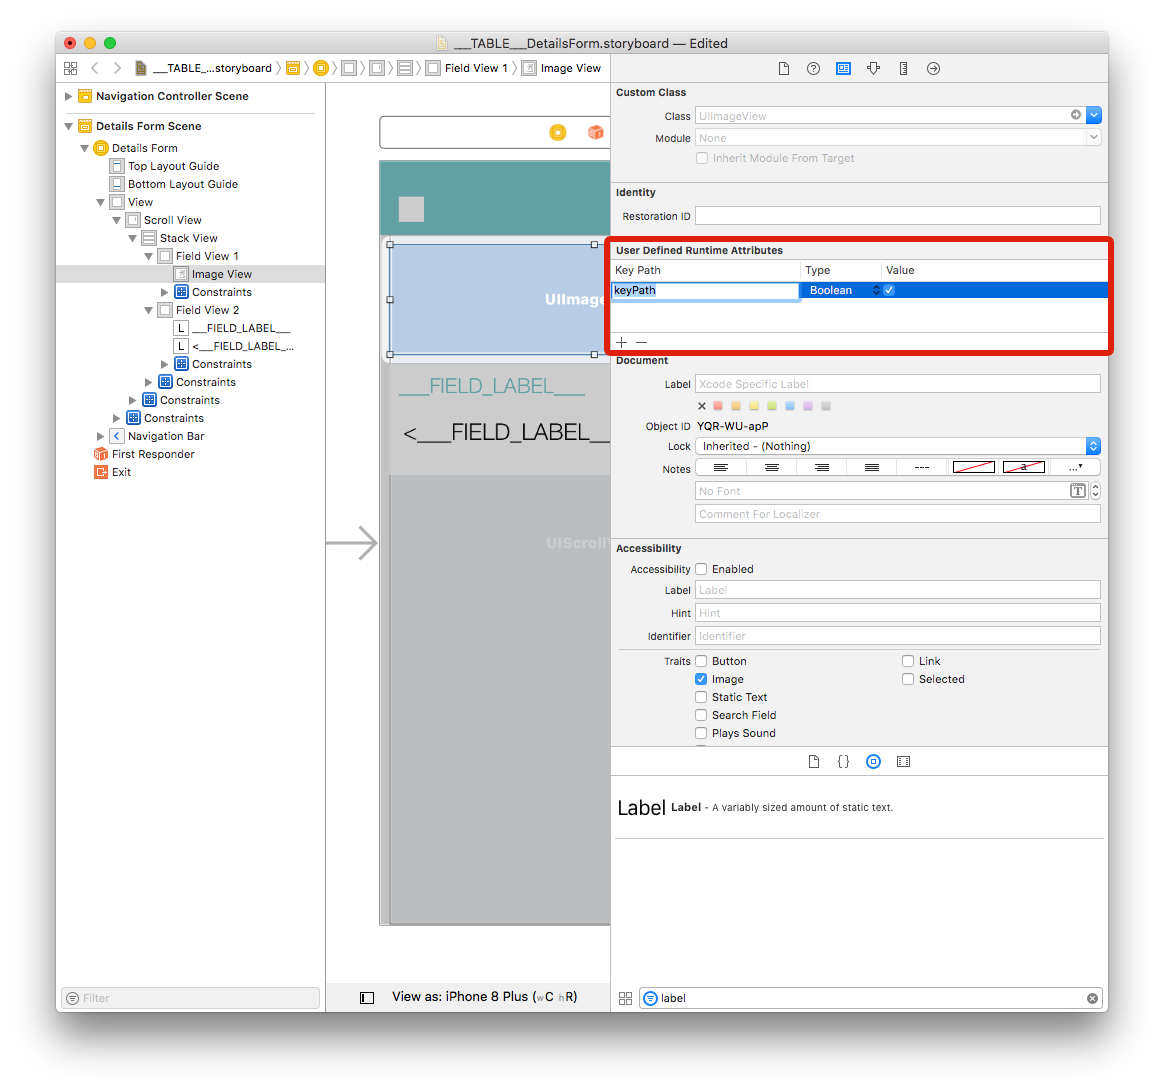
Key Path: Start with bindTo to activate binding on the component. Enter
bindTo.record.___FIELD_1___Type: Always
StringValue: The attribute name. Enter
___FIELD_1_BINDING_TYPE___
ラベル
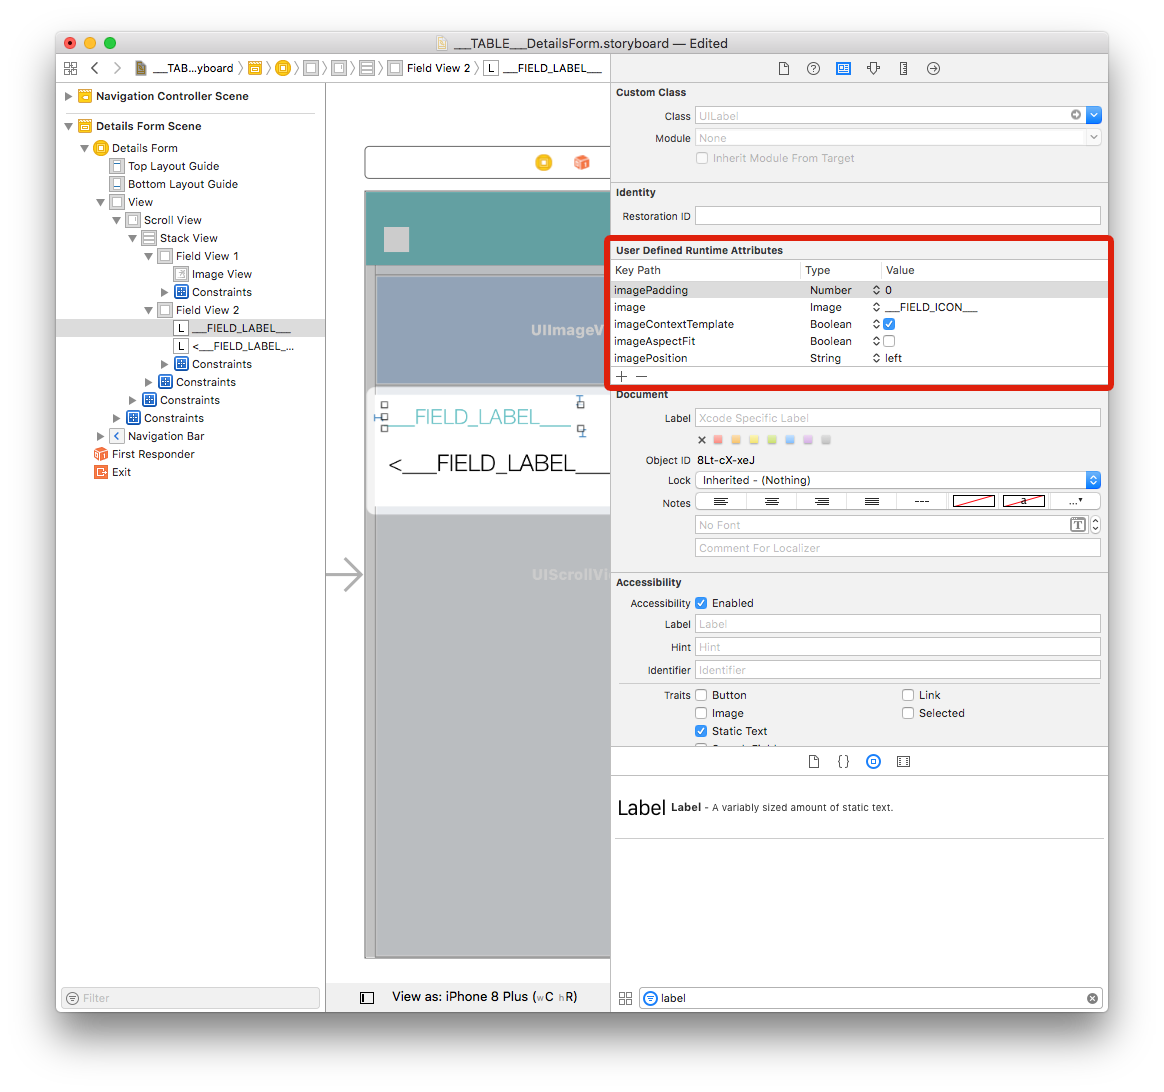
For the first label we are going to add several lines mainly to display icons:
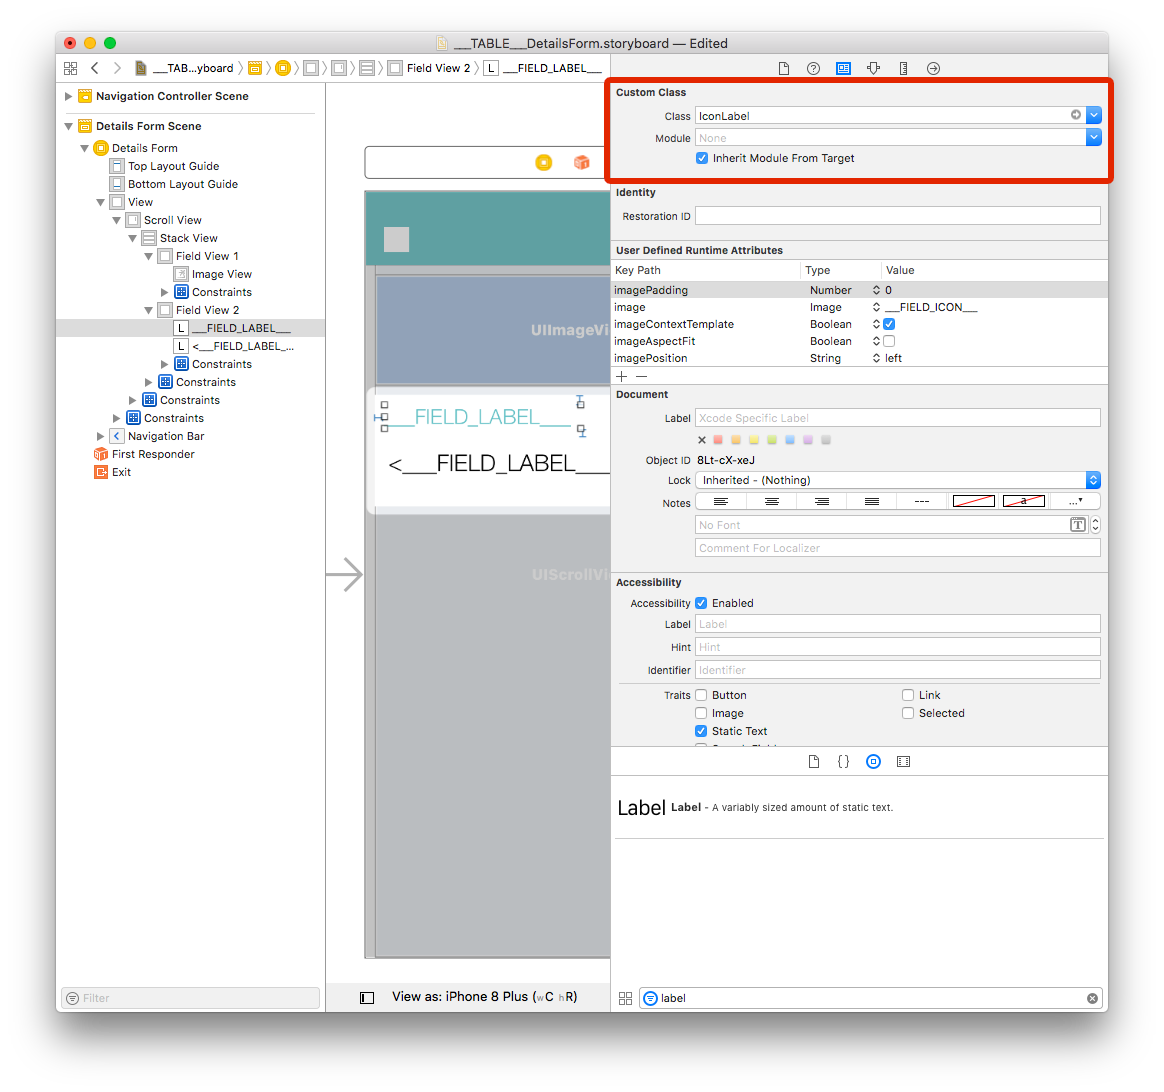
You also need to set the Class to IconLabel and check the Inherit Module From Target checkbox as we can see below:
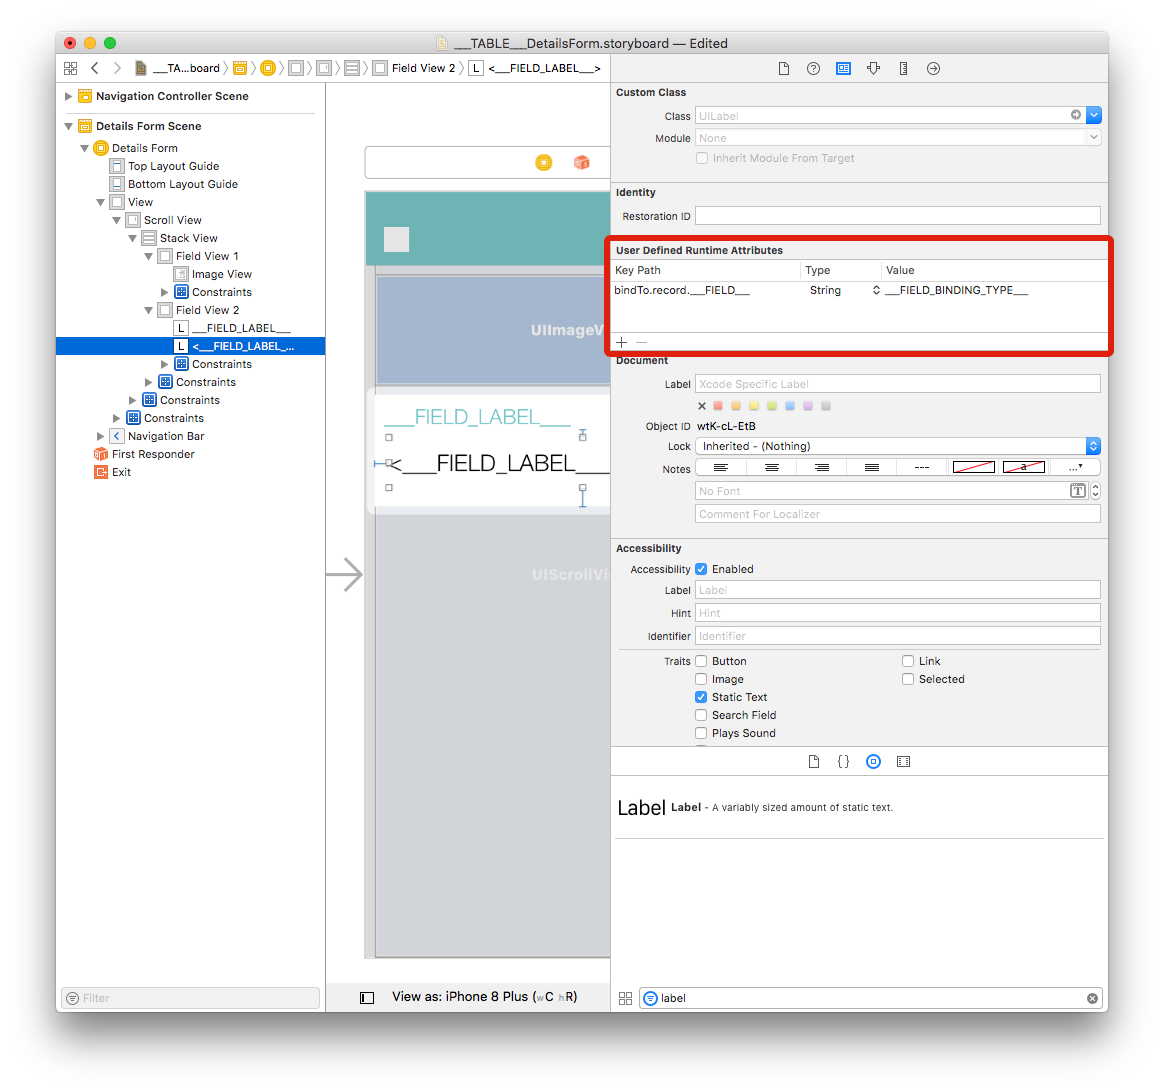
Select the second label and add a row in the Defined Runtime Attributes:
Key Path:
bindTo.record.___FIELD___Type:
StringValue:
___FIELD_BINDING_TYPE___
繰り返し使用されるセルにタグを設定する
プロジェクトエディターで複数のフィールドをフォームに追加した場合,Field View 2は何度も複製されることになります。
ストーリーモード内の要素には,固有のオブジェクトIDが割り振られています。 For example, if you select Field View 2 and go to the Identity inspector, you'll see its Object ID:
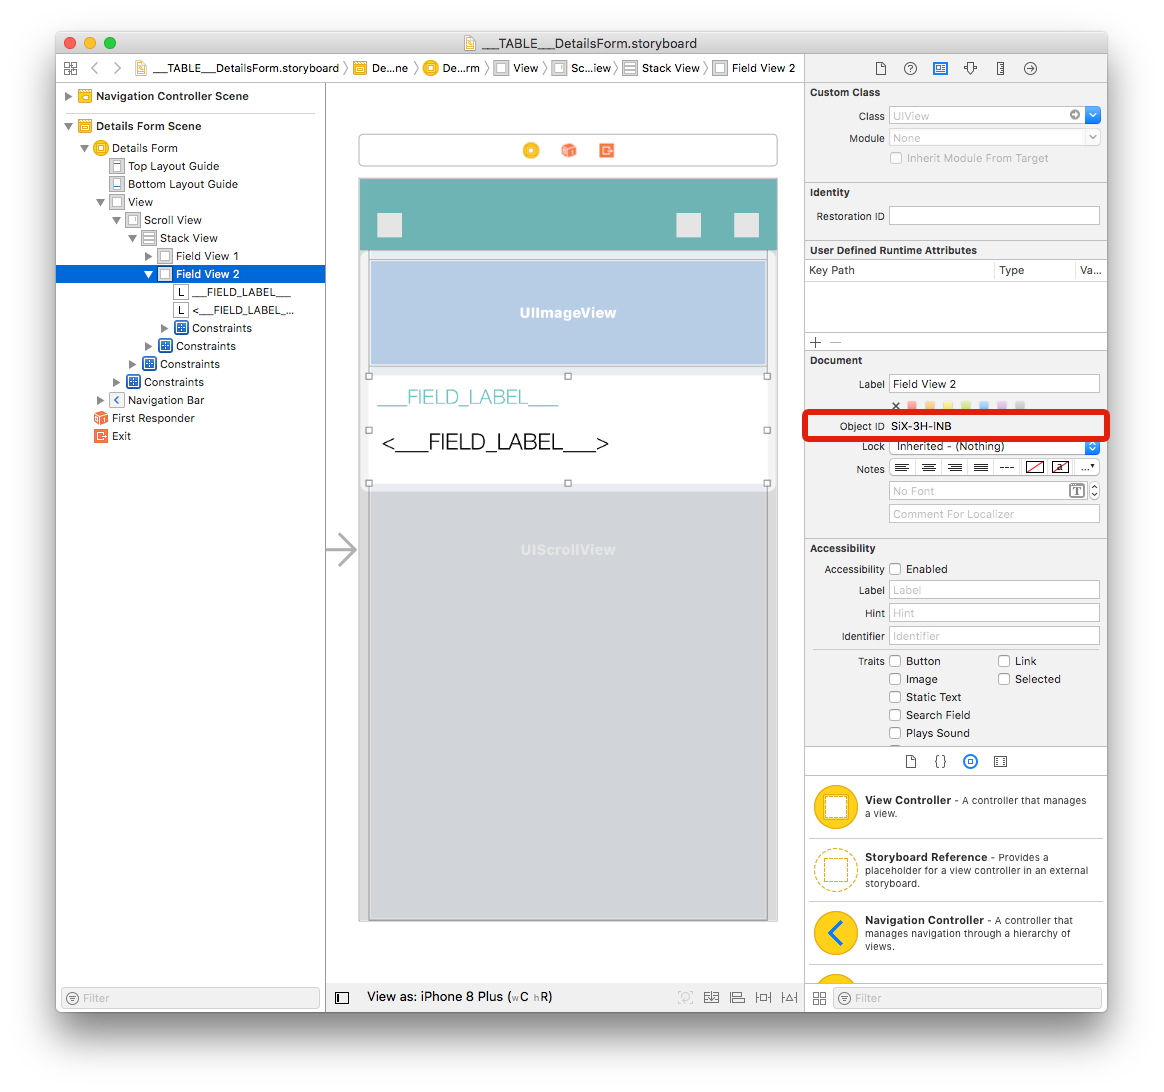
プロジェクトエディターに対し,このビューに含まれる要素はまとmて複製されるべきグループに属していることを知らせるため,要素とタグのそれぞれにタグを設定することが必要です。
ひとつずつ変更するのは,なかなか面倒ですし,途中でミスをしてしまうかもしれません。 ここはストーリーボードファイルを使い慣れたコードエディターで開いて作業を進めることにしましょう!
Field View 2
Select Field View 2 and get its Object ID from the Identity Inspector (on the right side of the Interface Builder window). In our project, Field View 2 ID is: SiX-3H-lNB.
Search for this ID in the storyboard xml code and replace it with TAG-FD-001 each time it appears. オブジェクトIDは,何度か出現するので,見落とさないように気をつけましょう!

ストーリーボードXMLファイルを保存します。 Xcodeに表示されるField View 2のオブジェクトIDが変化していることに注目してください。
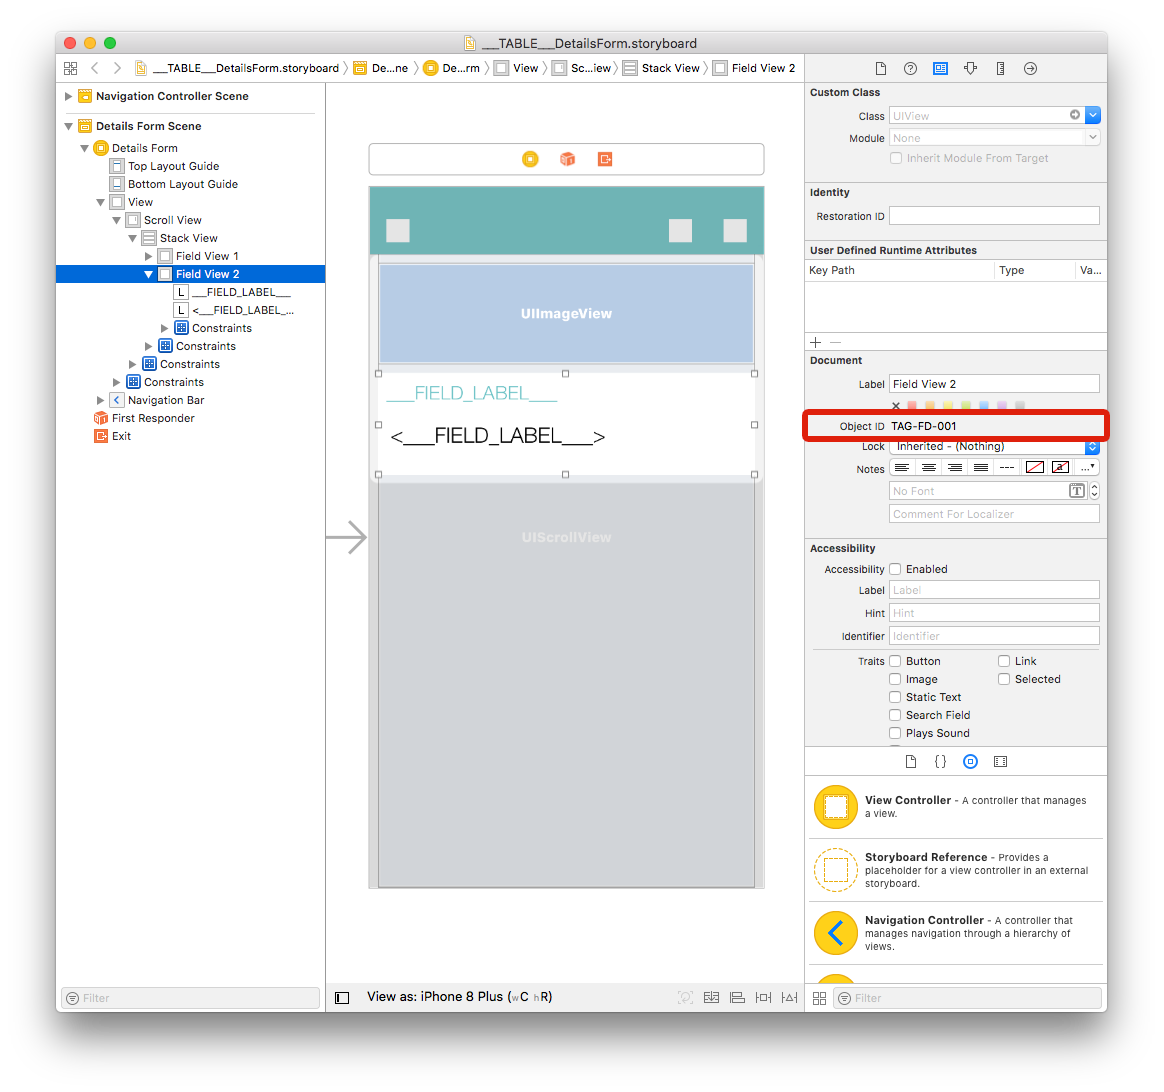
First label
- Now, get the first label Object ID from the Identity Inspector and replace it with TAG-FD-002 each time it appears in the storyboard xml code.
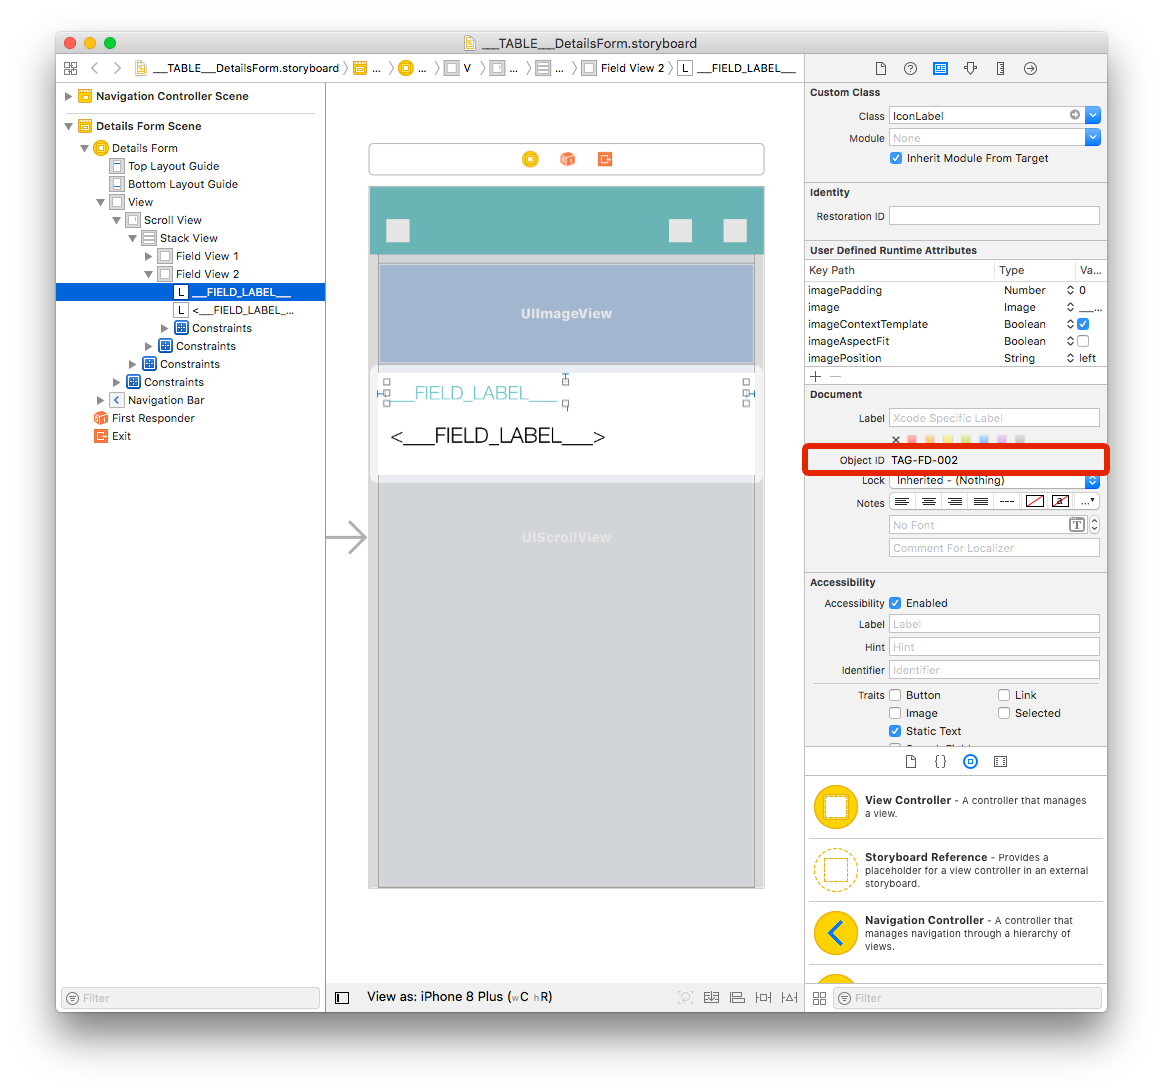
これで一丁あがり,ですね!
Second label
- Next, get the second label Oject ID from the Identity Inspector and replace it with TAG-FD-003 each time it appears in the storyboard xml code.
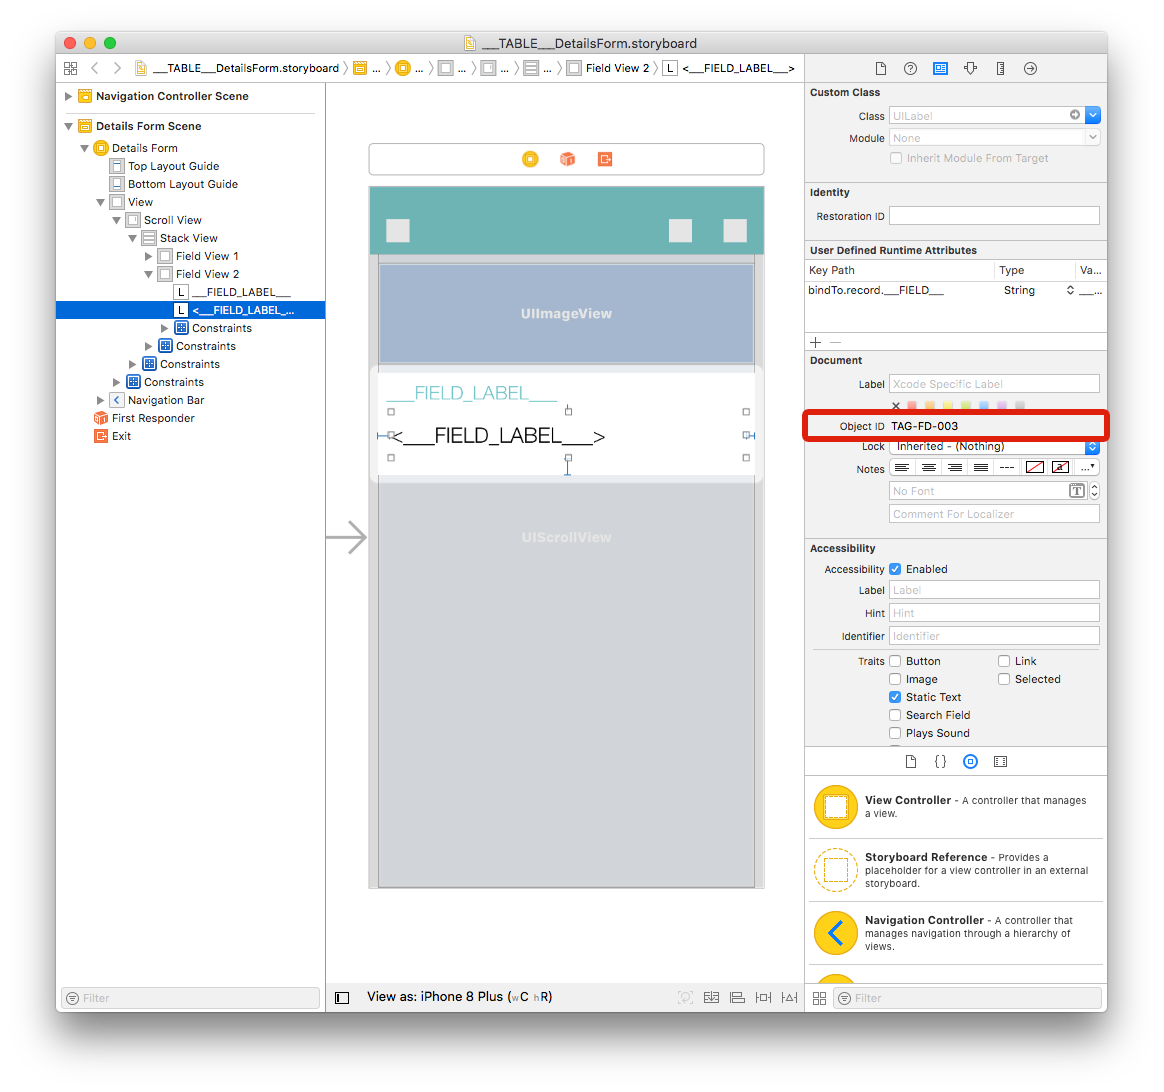
うまく置換できました!
制約にタグを設定する
どちらのラベルも制約があるので,タグを設定する必要があります。
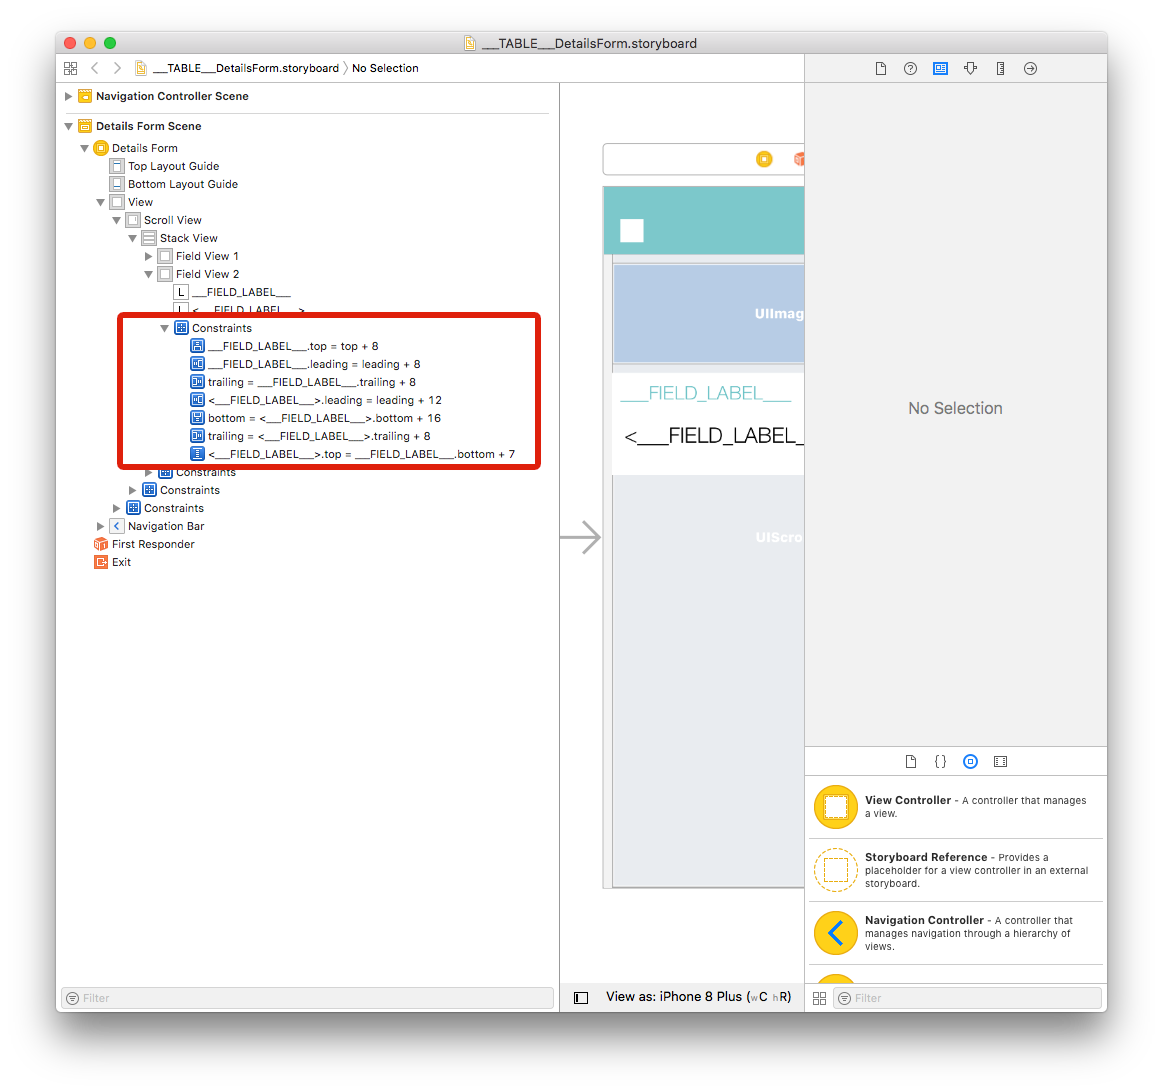
Just like View Field 2 and label, get all 7 Constraints Object IDs from the Identity Inspector and replace them with: TAG-FD-004, TAG-FD-005, TAG-FD-006, TAG-FD-007, TAG-FD-008, TAG-FD-009 and TAG-FD-010.
プロジェクトエディターの「フォーム」セクションで自作の詳細フォームのテンプレートを選択し,「ビルド」をクリックします。
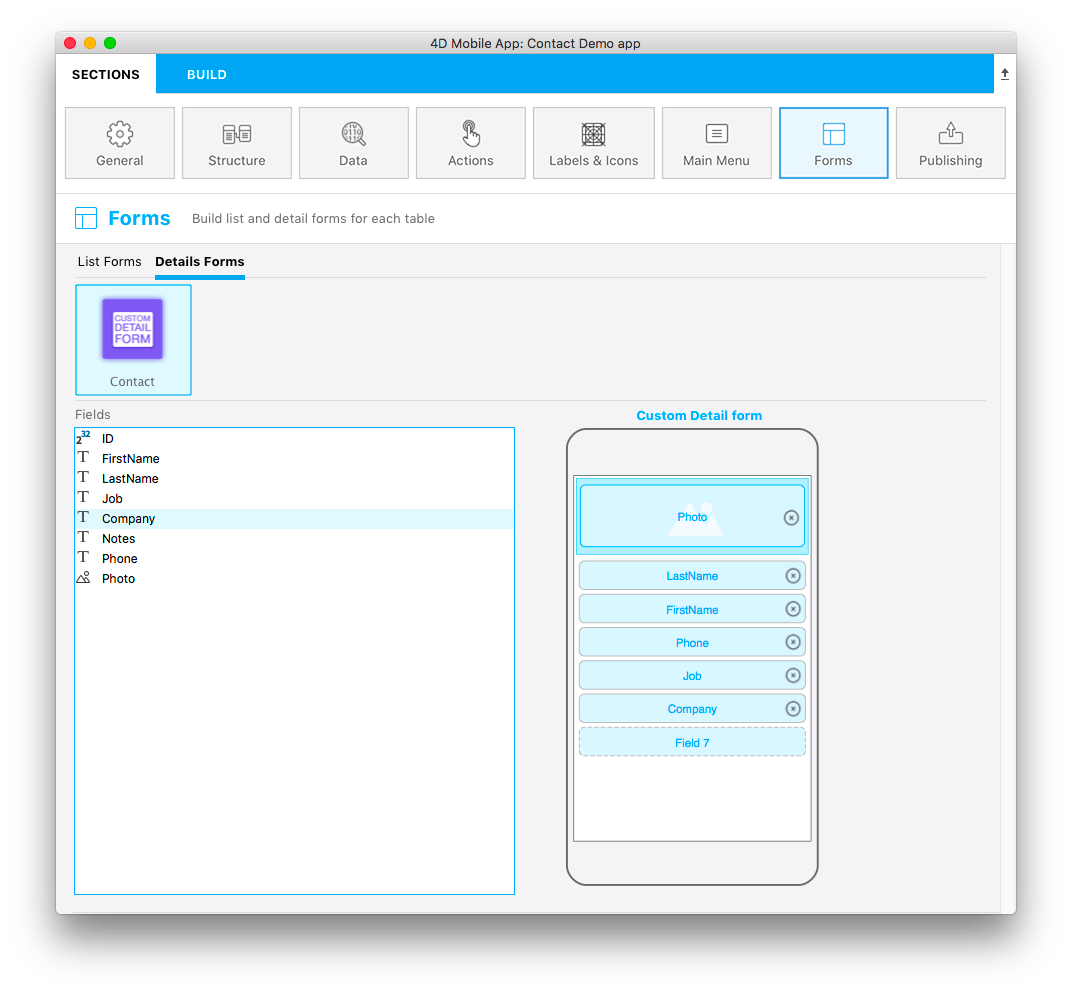
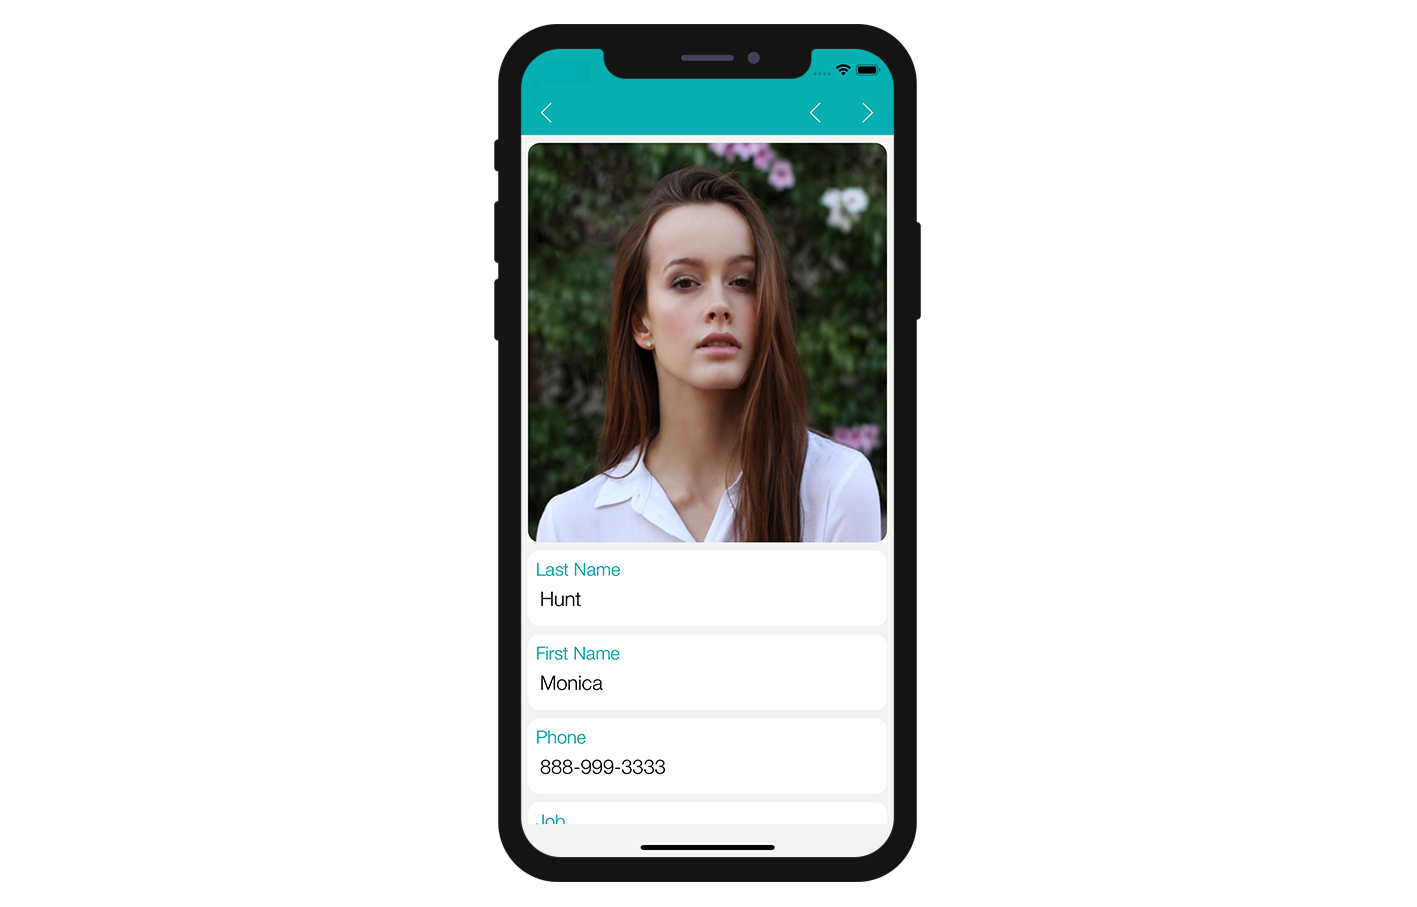
カスタム詳細画面が作成できました! :)
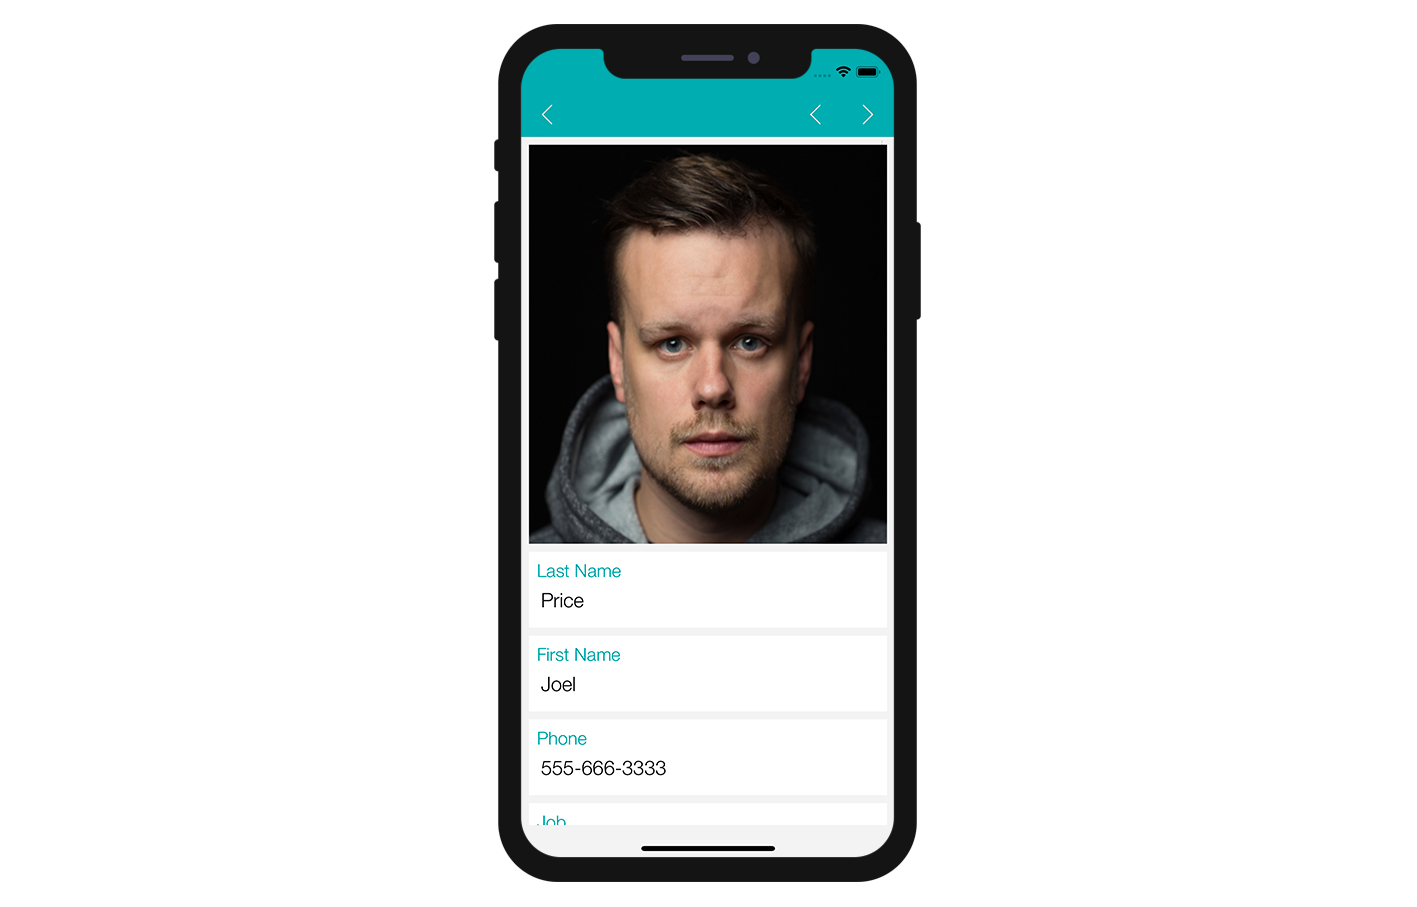
Field View 2をコピーすることができました。 しかし,アプリにもう少し彩りを添えることはできないでしょうか。
さらにカスタマイズする
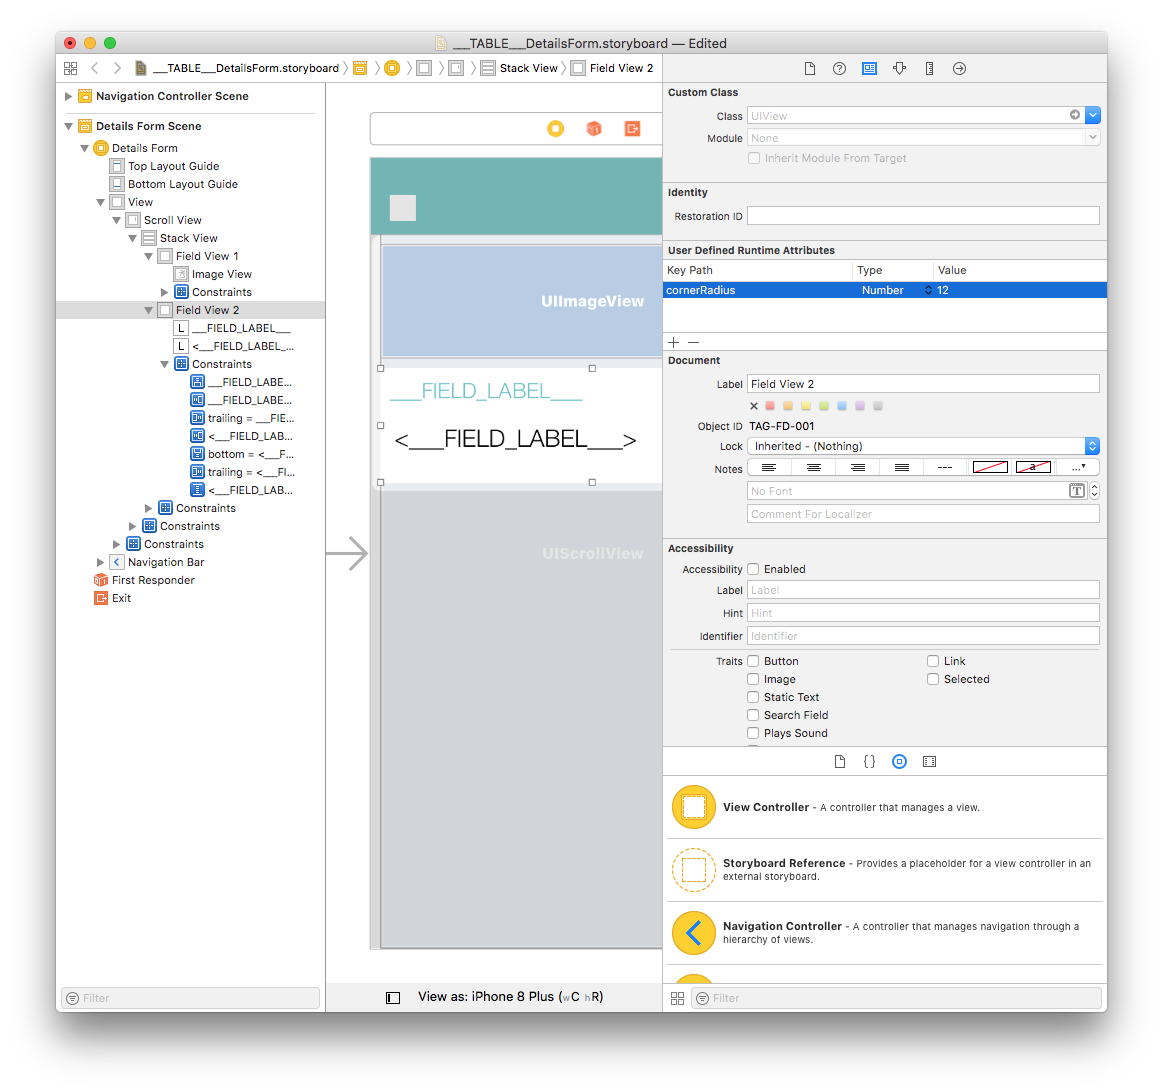
Image ViewおよびField View 2に角の丸みを追加しましょう。
Image Viewを選択し,User Defined Runtime Attributesにユーザー定義属性を入力します。
Key Path:
cornerRadiusType:
NumberValue:
12
その他
Key Path:
layer.masksToBoundsType:
BooleanValue: Check the box
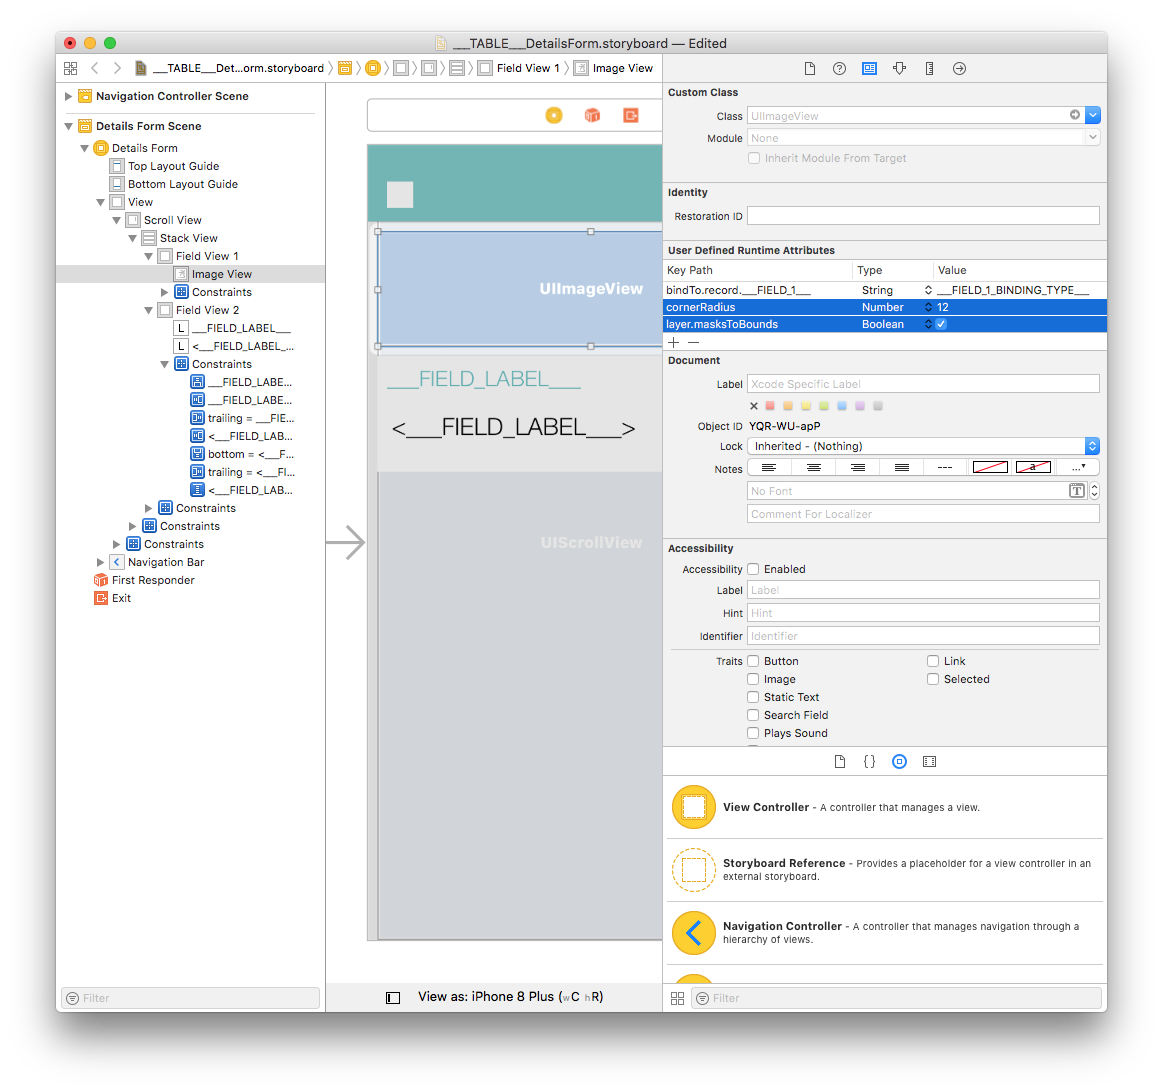
Field View 2を選択し,下記のように設定します。
Key Path:
cornerRadiusType:
NumberValue:
12
これでカスタムテンプレートがプロジェクトエディターで使用できるようになりました!
これからどうする?
このレッスンでは,詳細画面のカスタムテンプレートを作成する方法を紹介しました。 素材プロジェクトから始めて,シンプルなカスタムテンプレートが簡単に自作できる,という手応えが得られたのではないでしょうか。 Click on Final Project below to download the completed template folder.