はじめてのアプリ
OBJECTIVES
Create your first app with 4D for iOS PREREQUISITES PREREQUISITES
はじめにここをクリックして,すべての条件が揃っていることを確かめましょう!
This tutorial will let you dive right into 4D for iOS development. It will allow you to quickly and easily create your first application.
Scenario: You're a commercial business manager and you want to consult your contact information on the go.
We're going to create an iPhone directory app to search for contact names from a list and then view the details of each contact. We'll call it "Contact".
⒈ データベースを用意する
Download our Starter Project, which contains a database file and project icon, but no mobile project yet.
⒉ ⒉ プロジェクトの作成
Let's start with a very simple structure using a single table. From 4D, go to New > Mobile project.
The Welcome screen displays the main app-creation stages of this magnificent tool. 🙂
Give your project a name and click Create.
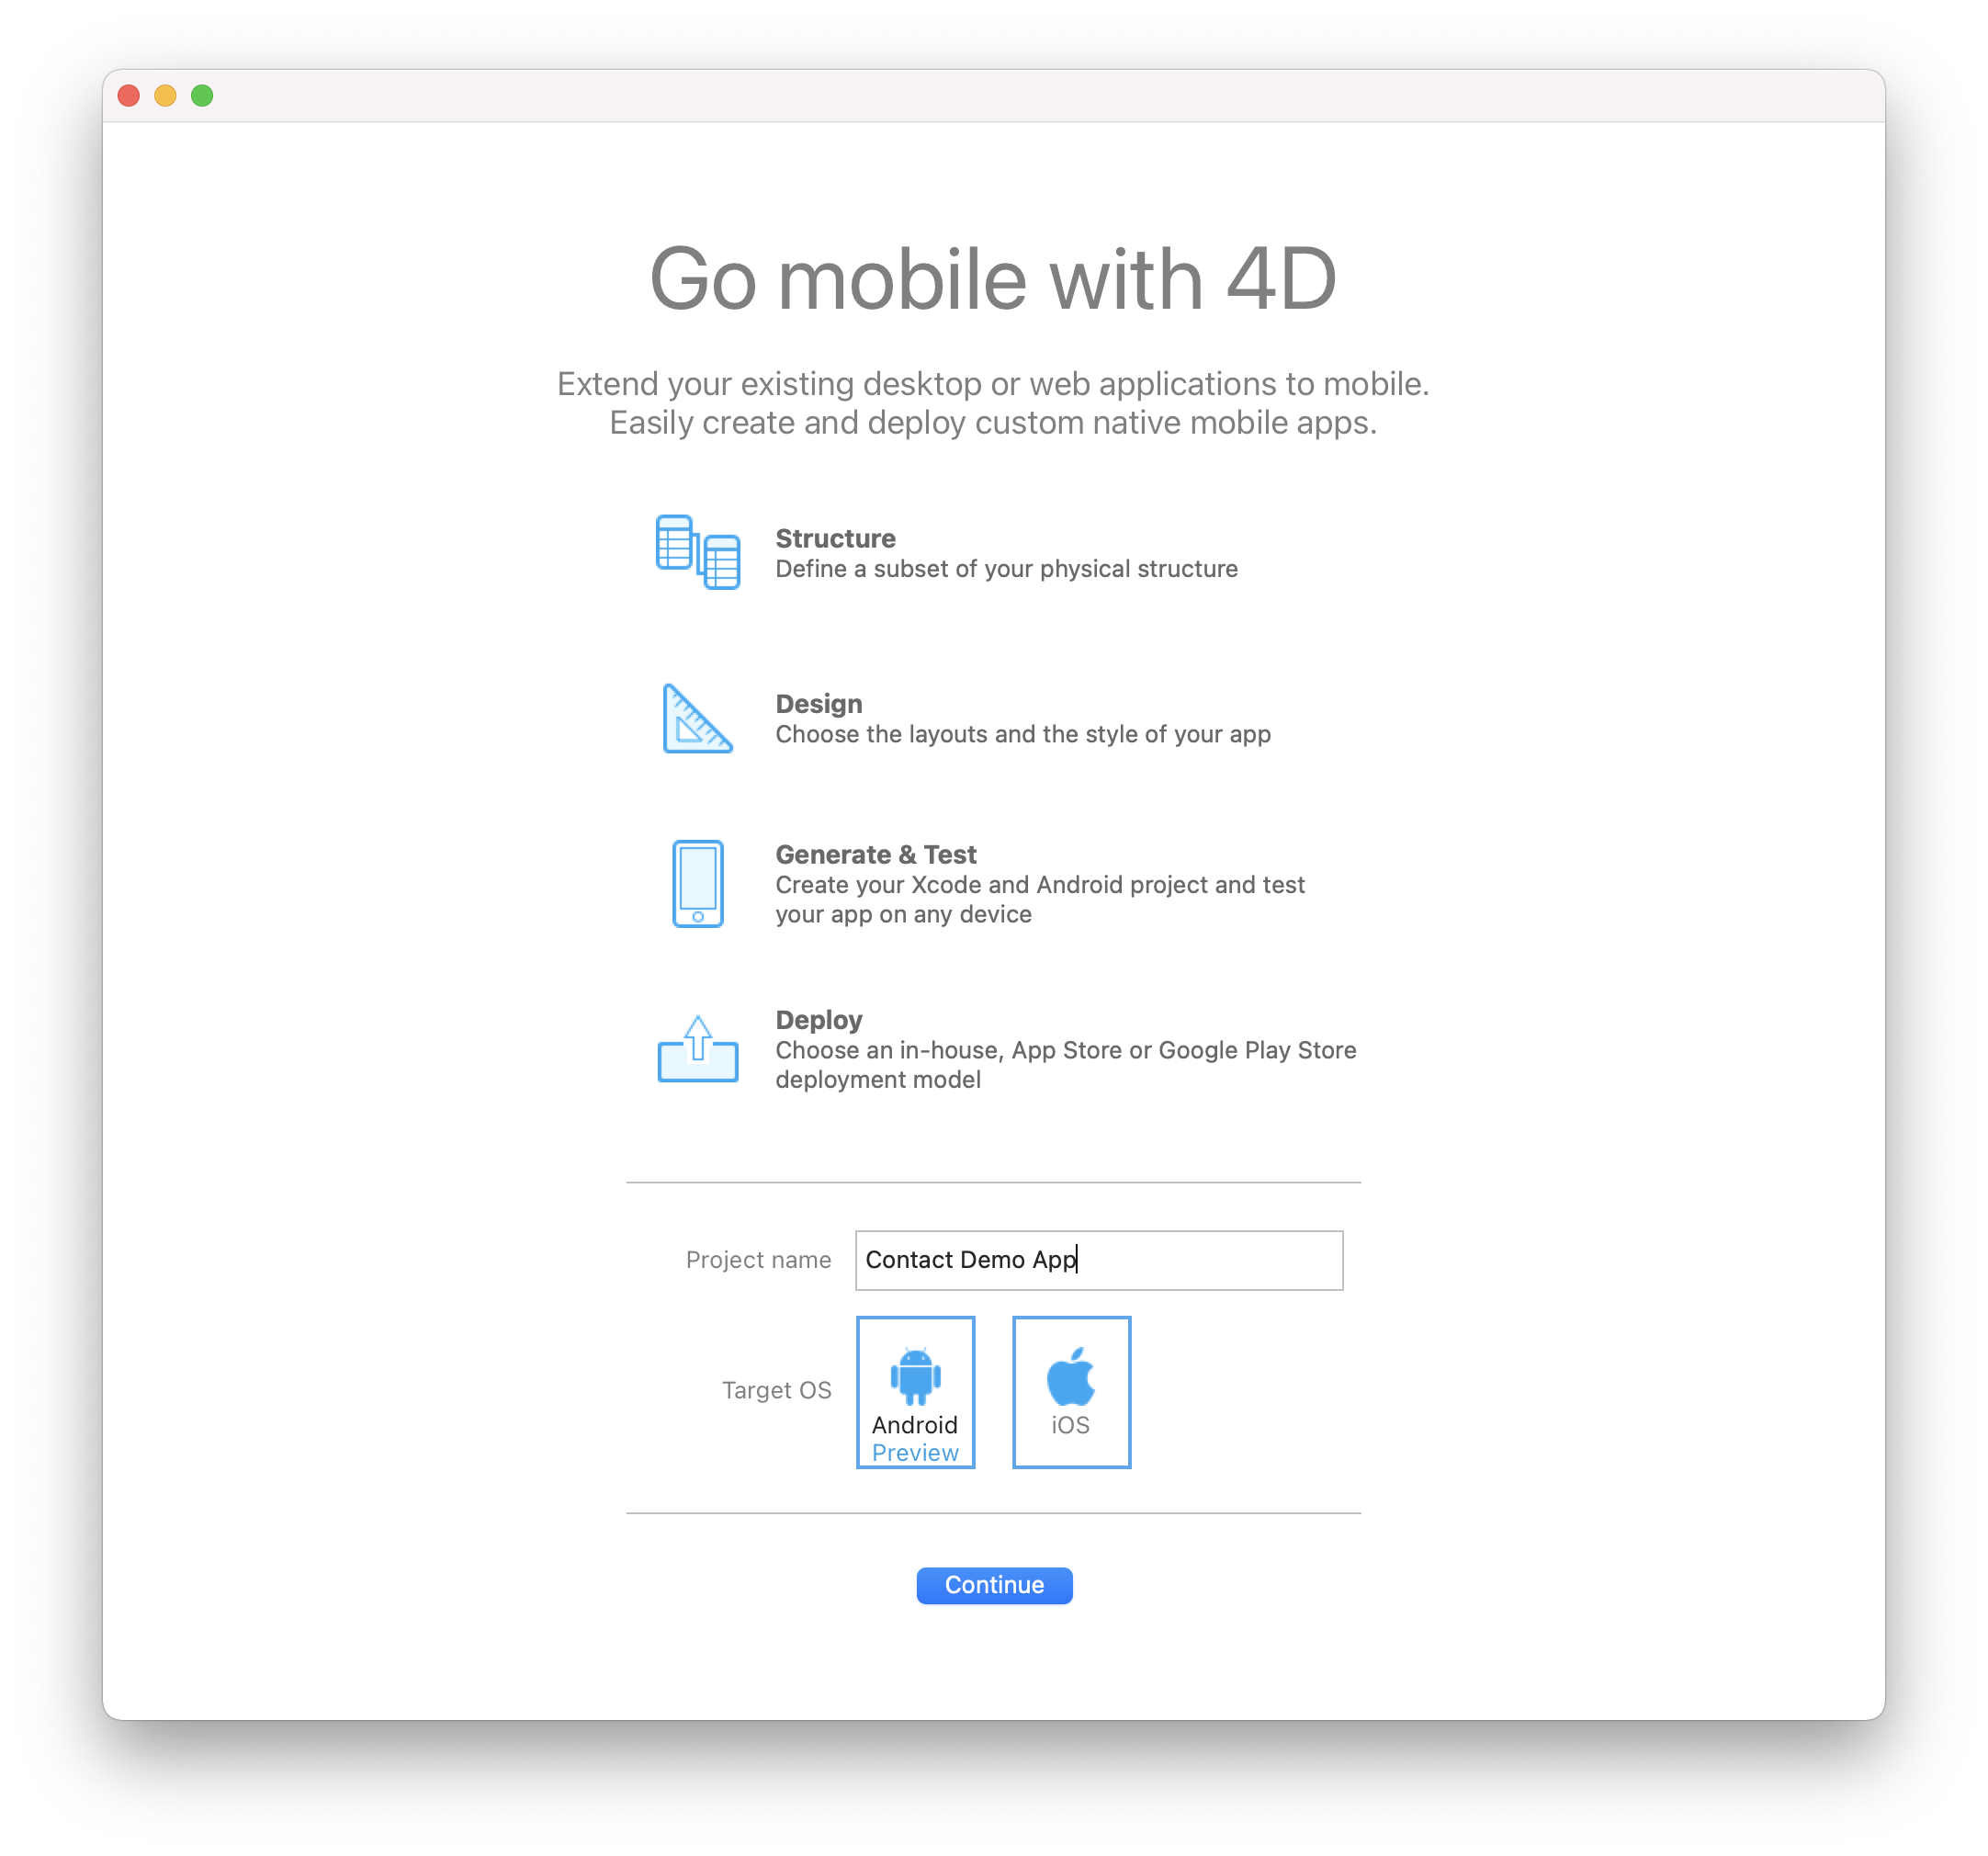
Click Continue.
Additionnal components will be downloaded to develop your Android project :
⒊ 一般
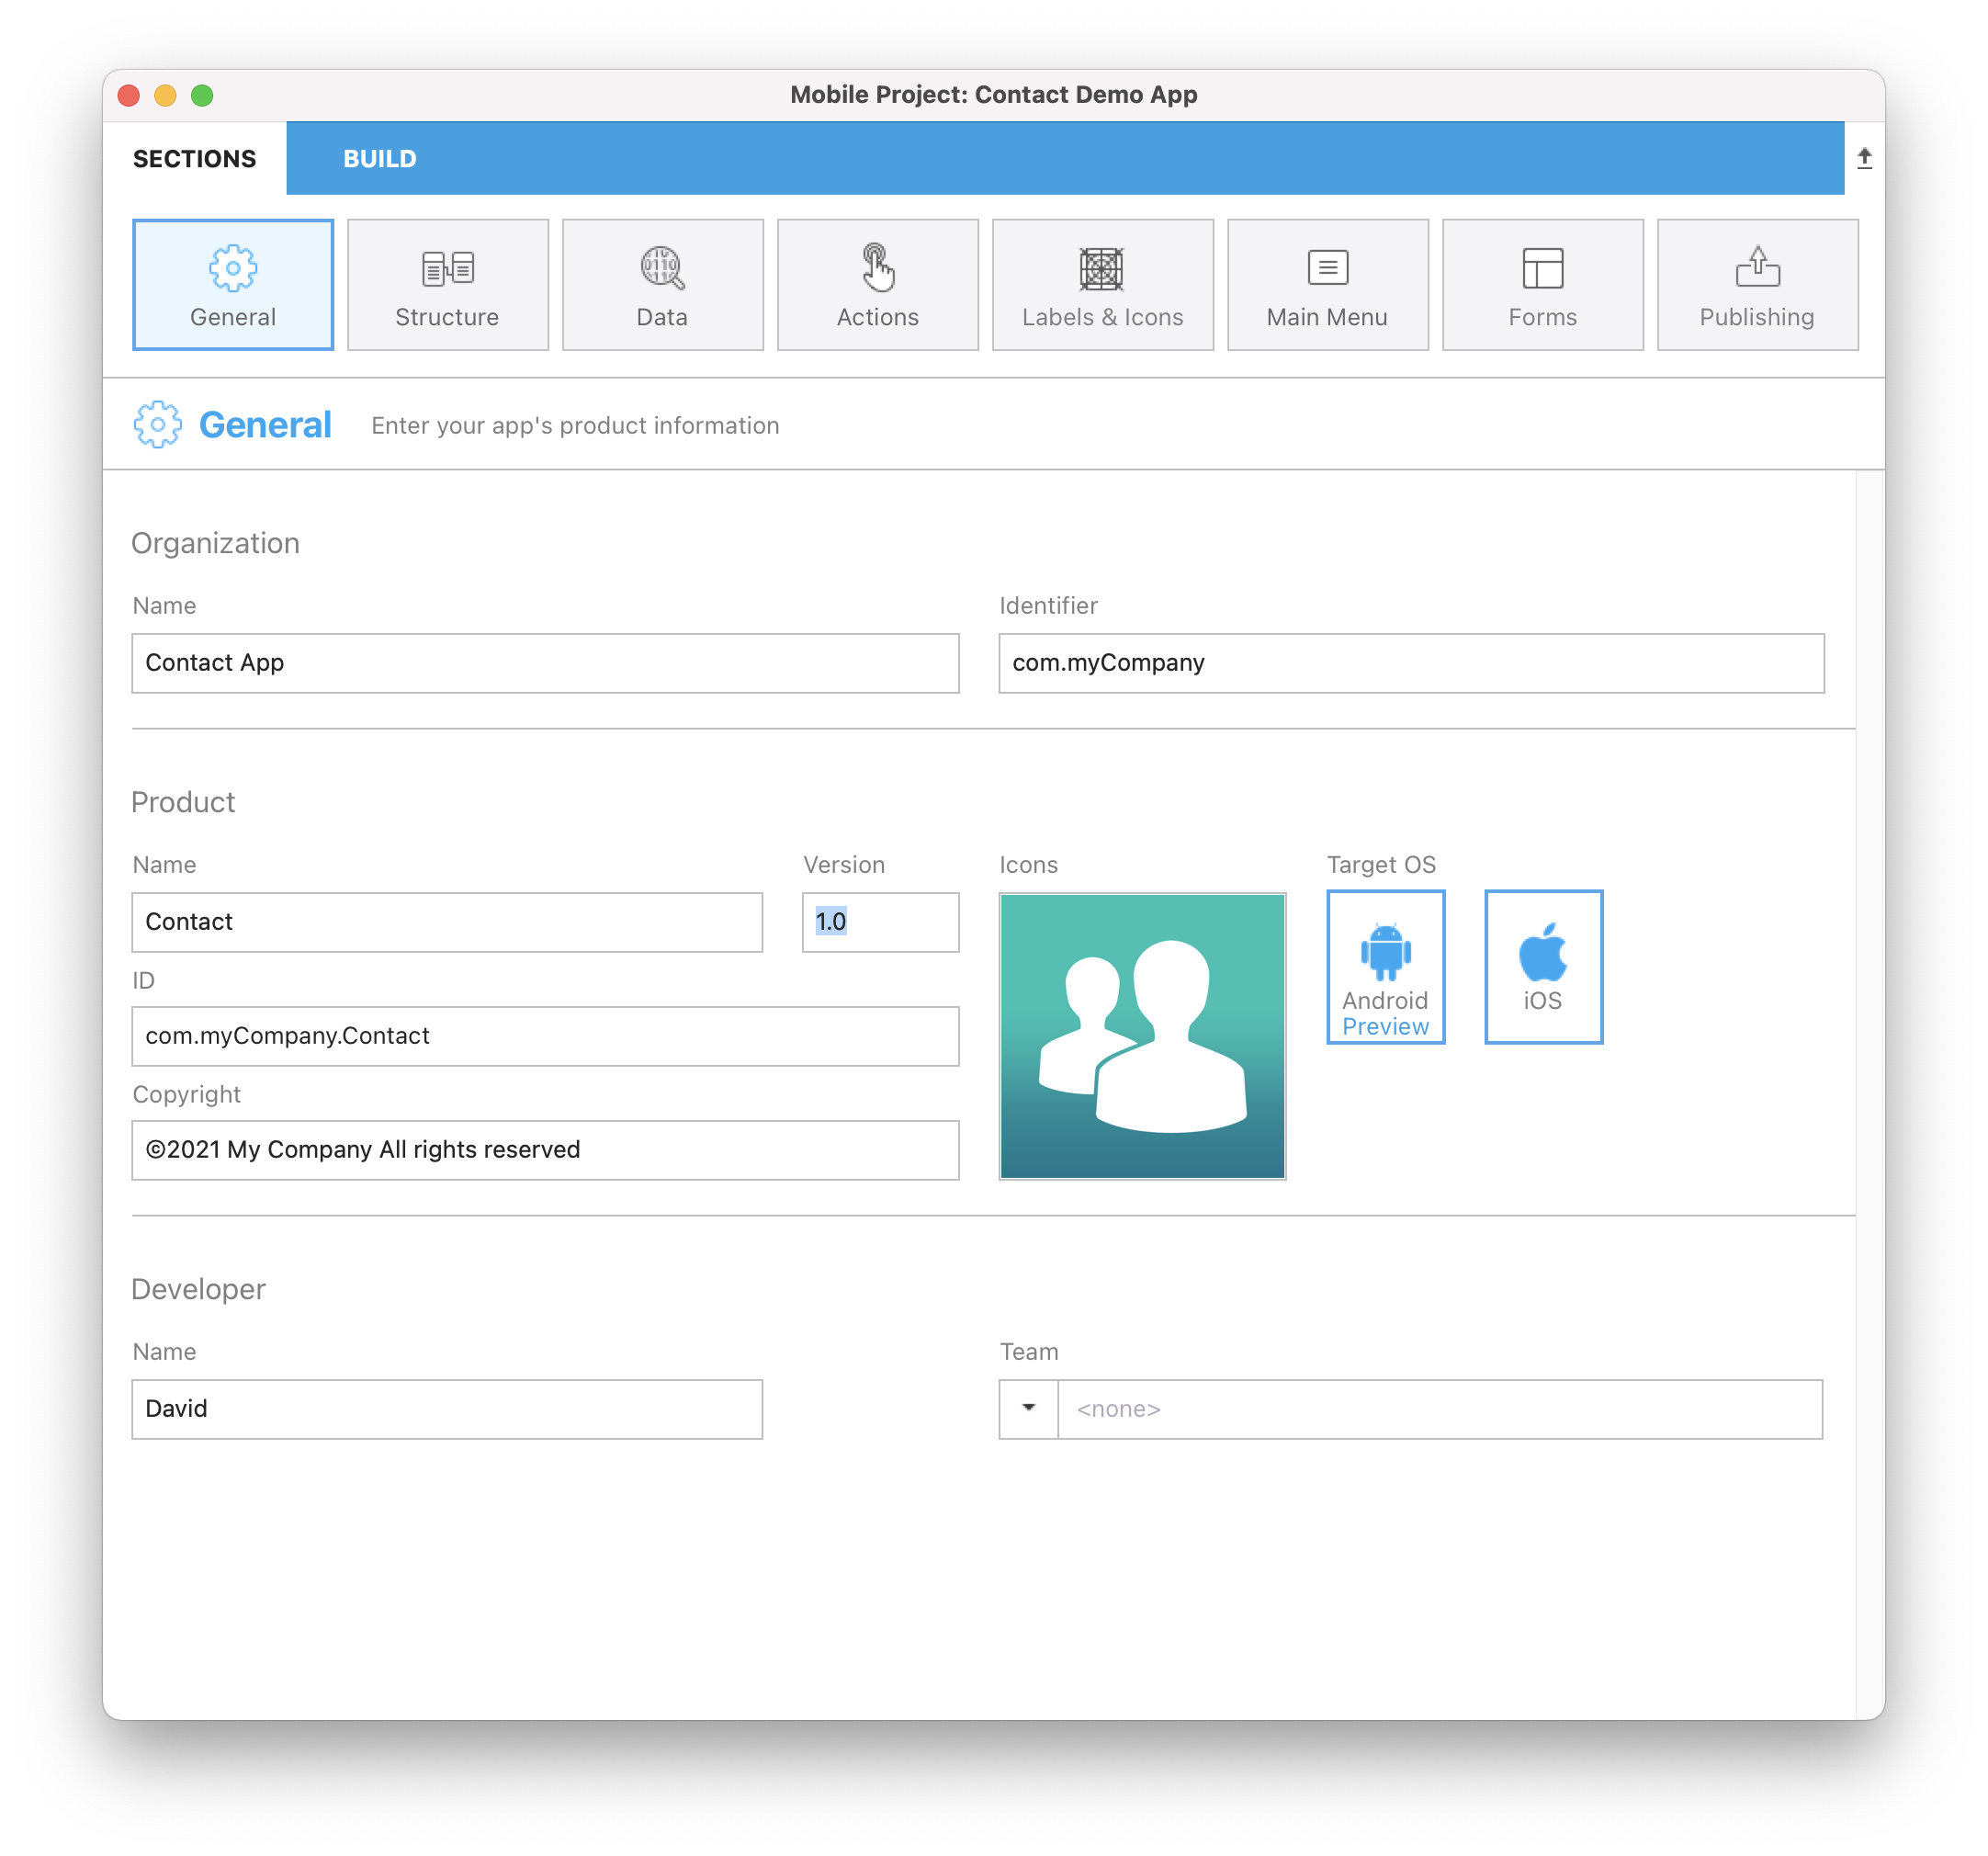
Here, you'll configure your app's primary information:
- Organization: Enter the name of your company and the application's identifier (ex.“My Company” and com.MyCompany).
- Product: Enter your app's name. ここでは "Contact" と名付けましょう。
- ID: (Bundle ID) is automatically generated as a composition of your organization identifier and product name.
- Version: Leave the version as 1.0 and define your app's copyright.
- Icons: Drag and drop an icon for your app into the icon area.
- Developer: This is automatically filled from the user name on your computer. 部署名は,Appleデベロッパーアカウントの「部署」に表示されているものをコピー&ペーストします。 実機ではなく,シミュレーター向けにビルドするだけであれば,空欄のままでも構いません。
⒌ ストラクチャー
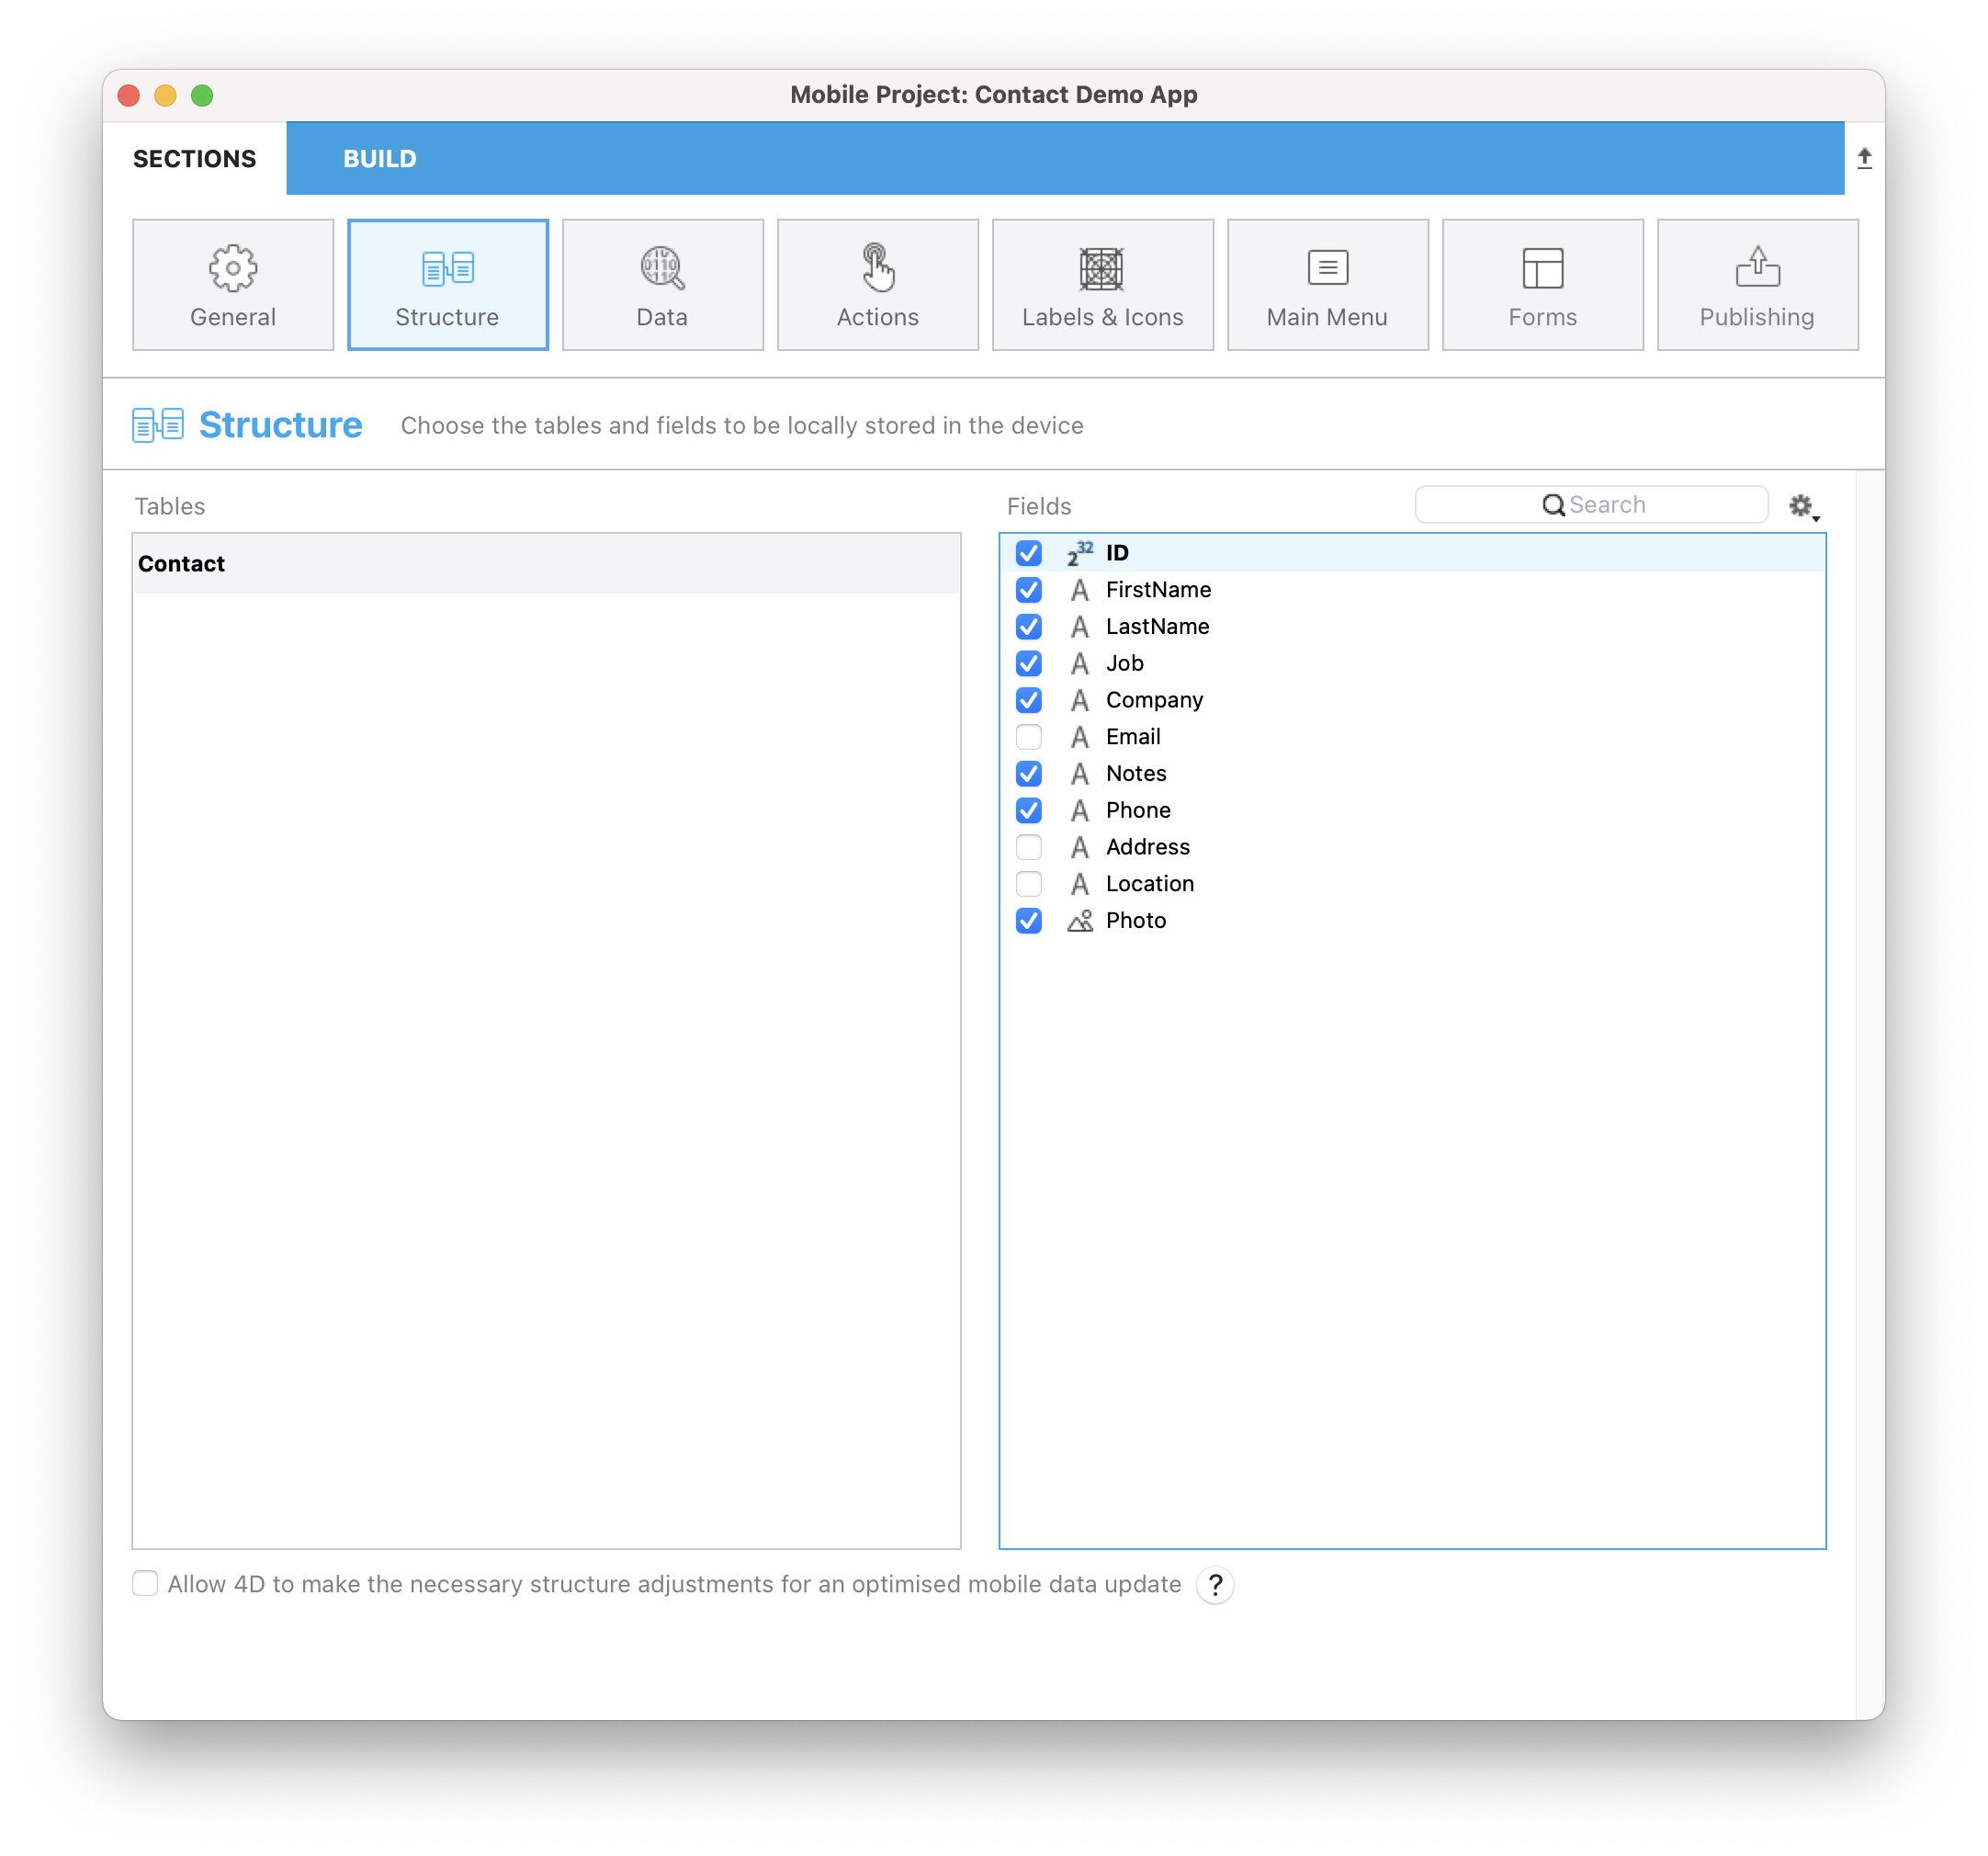
This is where you'll define a subset of your data (the database tables and fields) to expose to mobile devices.
For our example, select ID, First Name, Last Name, Job, Company, Phone, Notes and Photo.
注記
We highly recommend publishing your primary key in order to identify each record of your database
⒍ ラベル&アイコン
Now it's time to define some labels and icons for the selected tables and fields.
Table Properties:
- Contactテーブルに短いラベルと長いラベルを設定します。
- アイコン(はてなマーク)をクリックします。 表示されるアイコン群の中からContacts(顧客情報)を連想させるような画像を探してアイコンに設定します。 あるいは,空欄のままにすることもできます。 その場合,4D for iOSが自動的にアイコンを生成します。 便利ですね!
Field Properties:
- 選択したフィールドに短いラベルと長いラベルを設定します。
- アイコン(はてまマーク)をクリックし,各フィールドのアイコンを設定します。 フィールドの場合,いくつかの方法があります。
- 各フィールドにそれぞれ画像を選択して設定する
- 少なくとも1個のフィールドに画像が設定され,他は空欄のままだった場合,未設定のフィールドには4D for iOSが自動的にアイコンを生成します。
- すべて空欄のままにした場合,フィールドのアイコンは表示されません。
![]()
⒎ メインメニュー
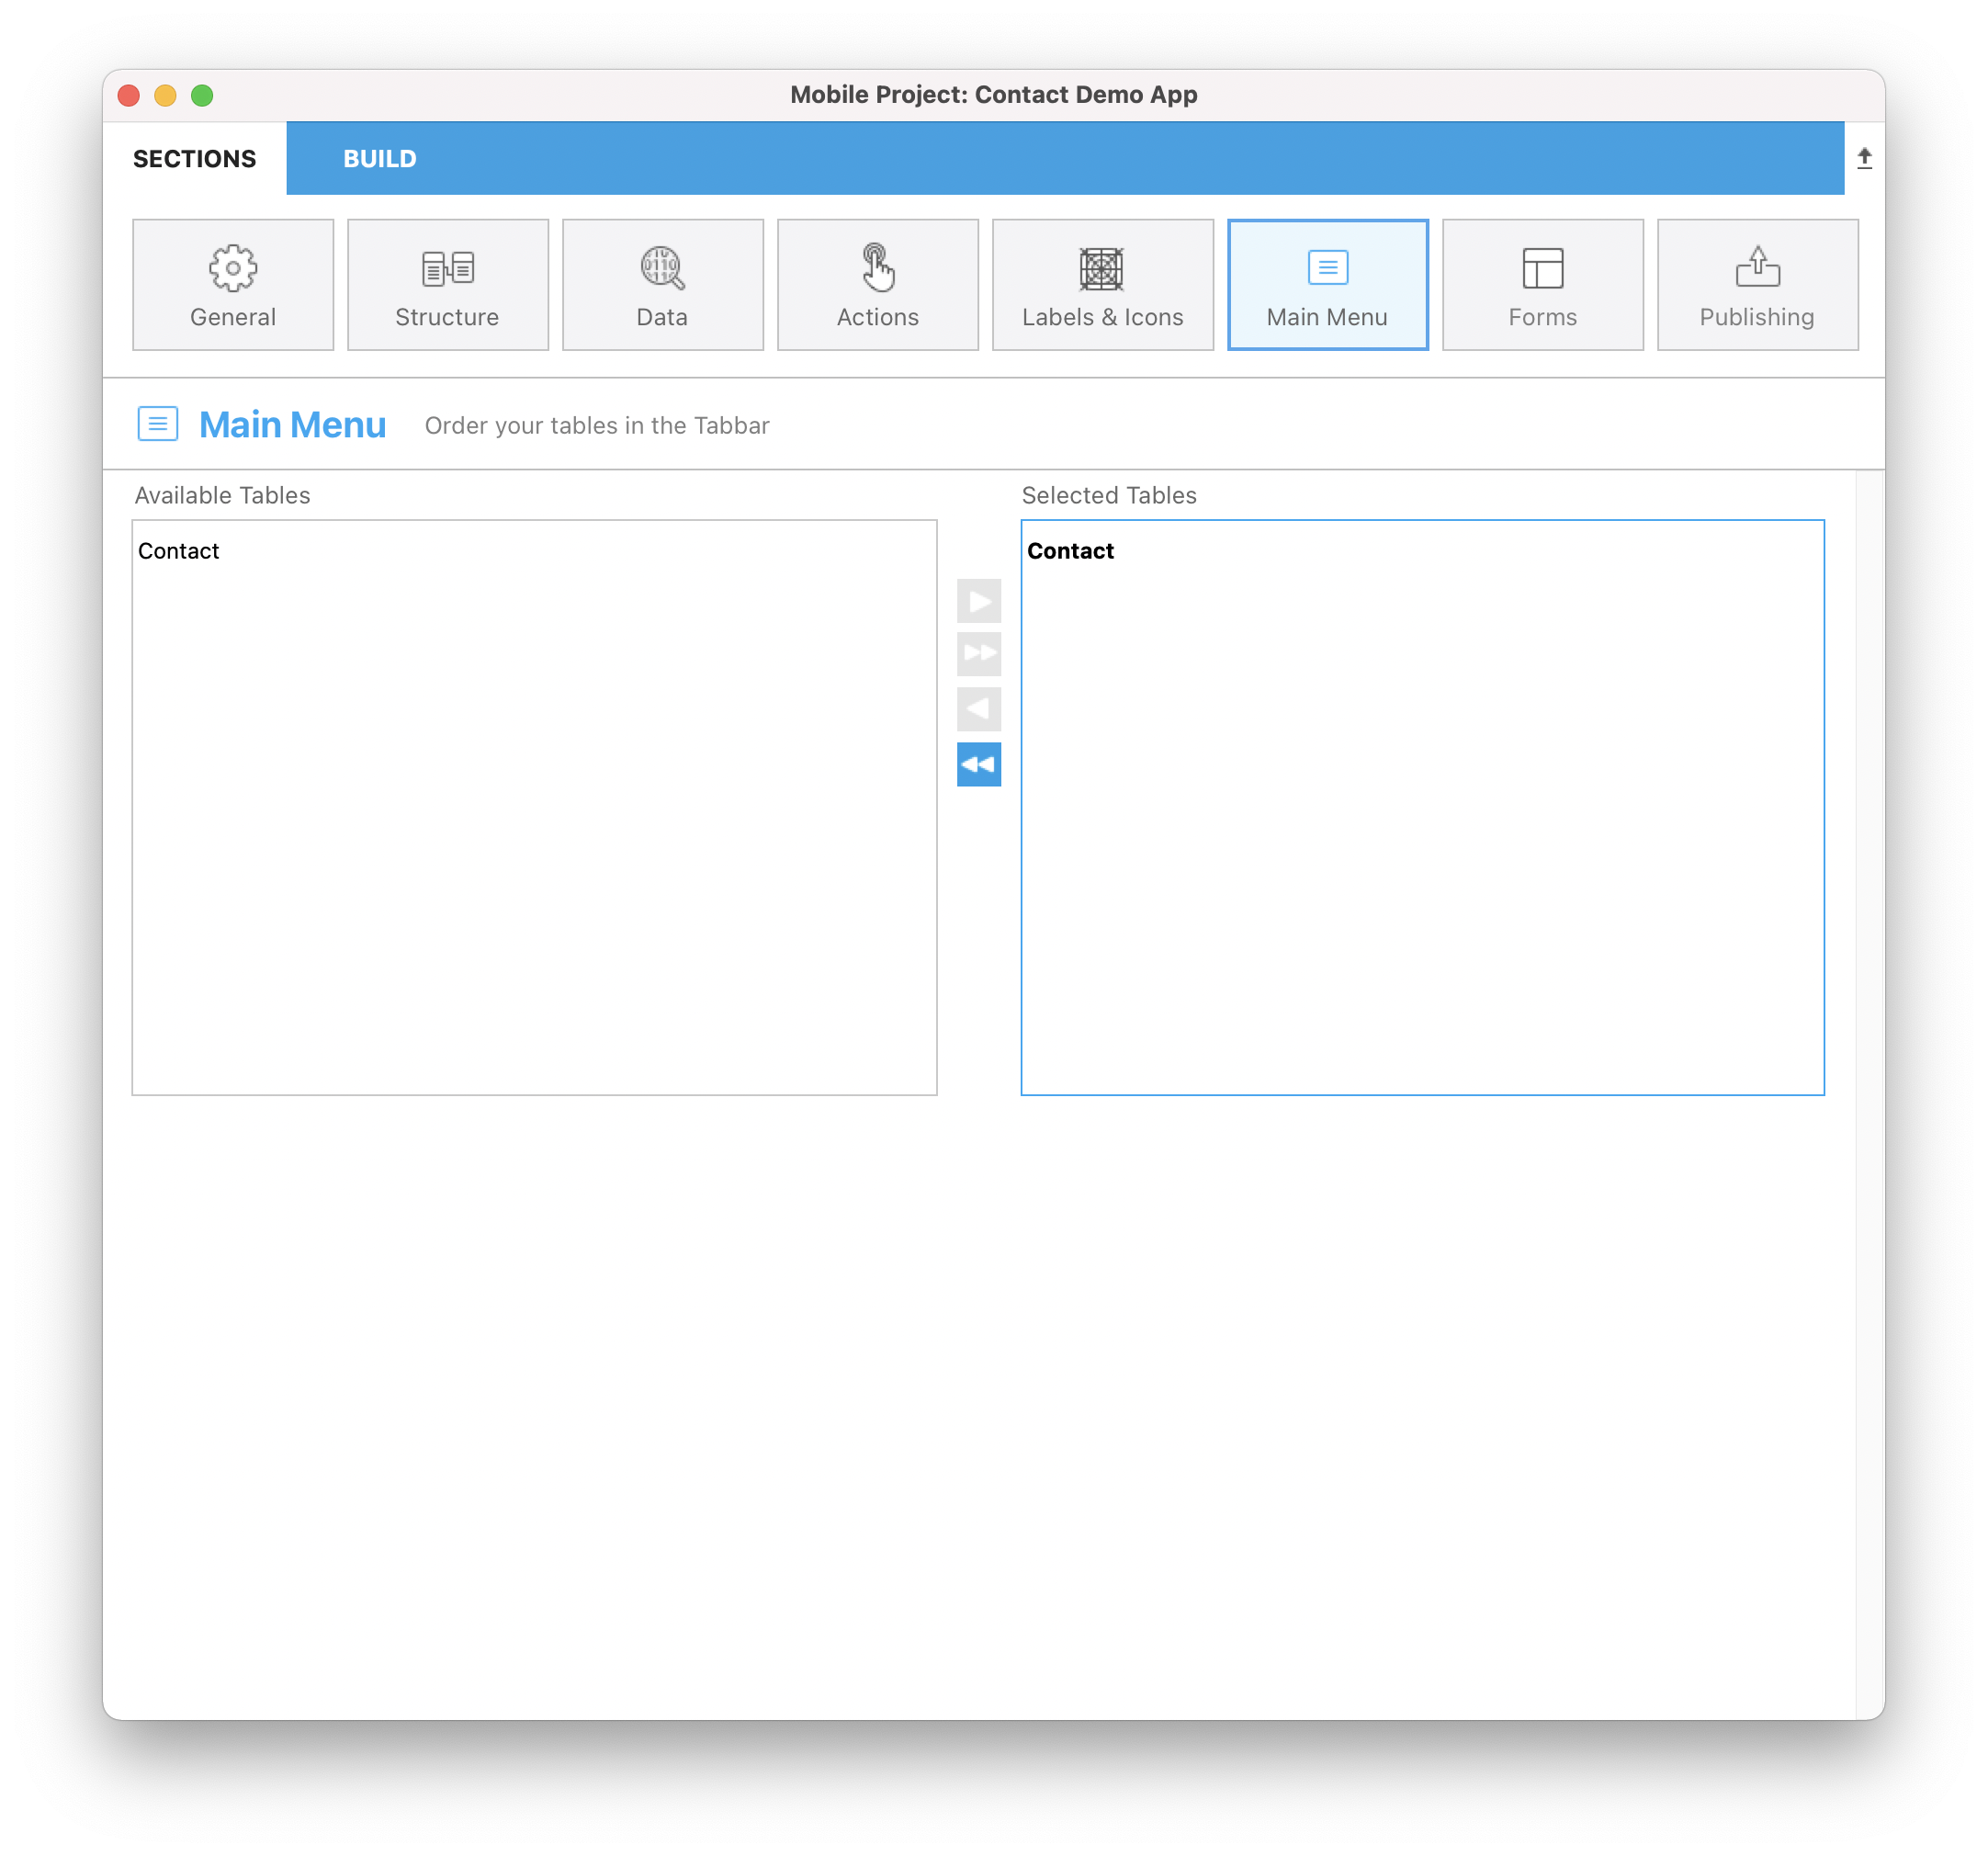
Next up is defining the order of the tables in the app's main menu.
- Available Tables: Displays the table(s) to be used.
- Selected Tables: Displays your app's menu items. ここでは1個しかテーブルがありませんが,順序はドラッグ&ドロップで変更できるようになっています。
⒏ フォーム
We're almost done, but first we need to decide on the app's layout. There are both List and Details forms to choose from.
- レコードをリスト形式で表示するために,listビューのテンプレートを選択します。 For our Contact app, let’s use the Profile template.
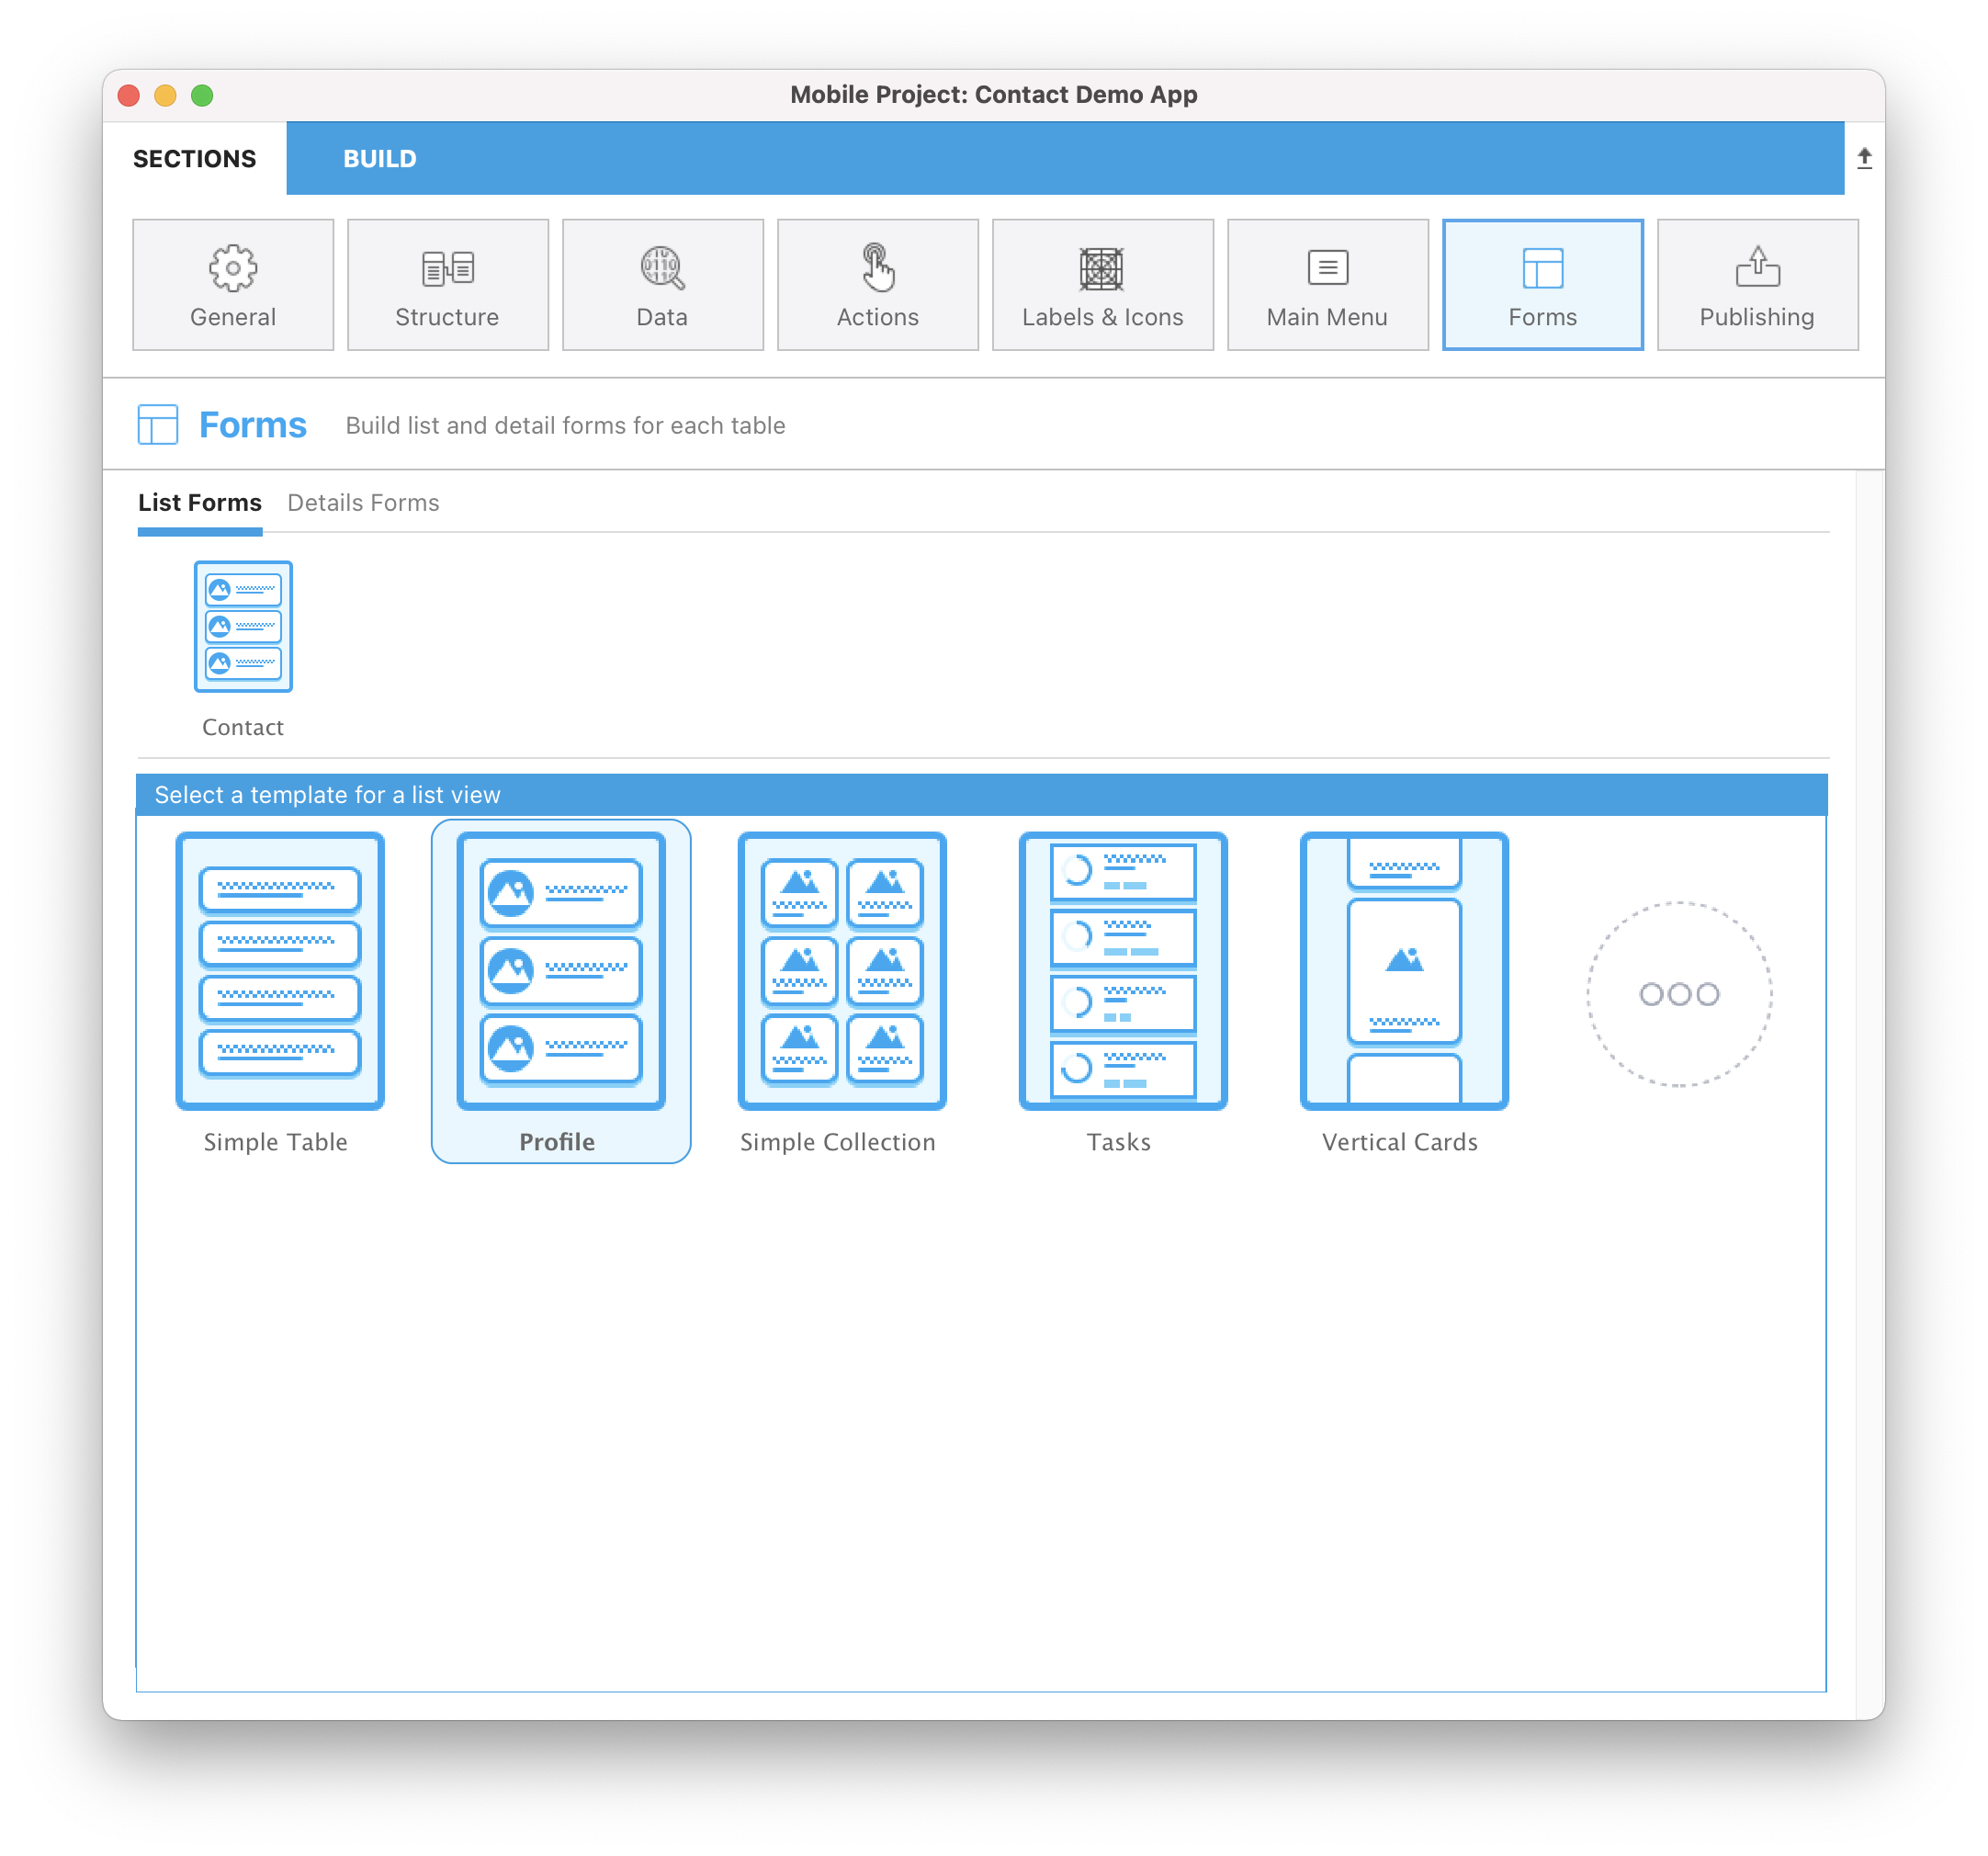
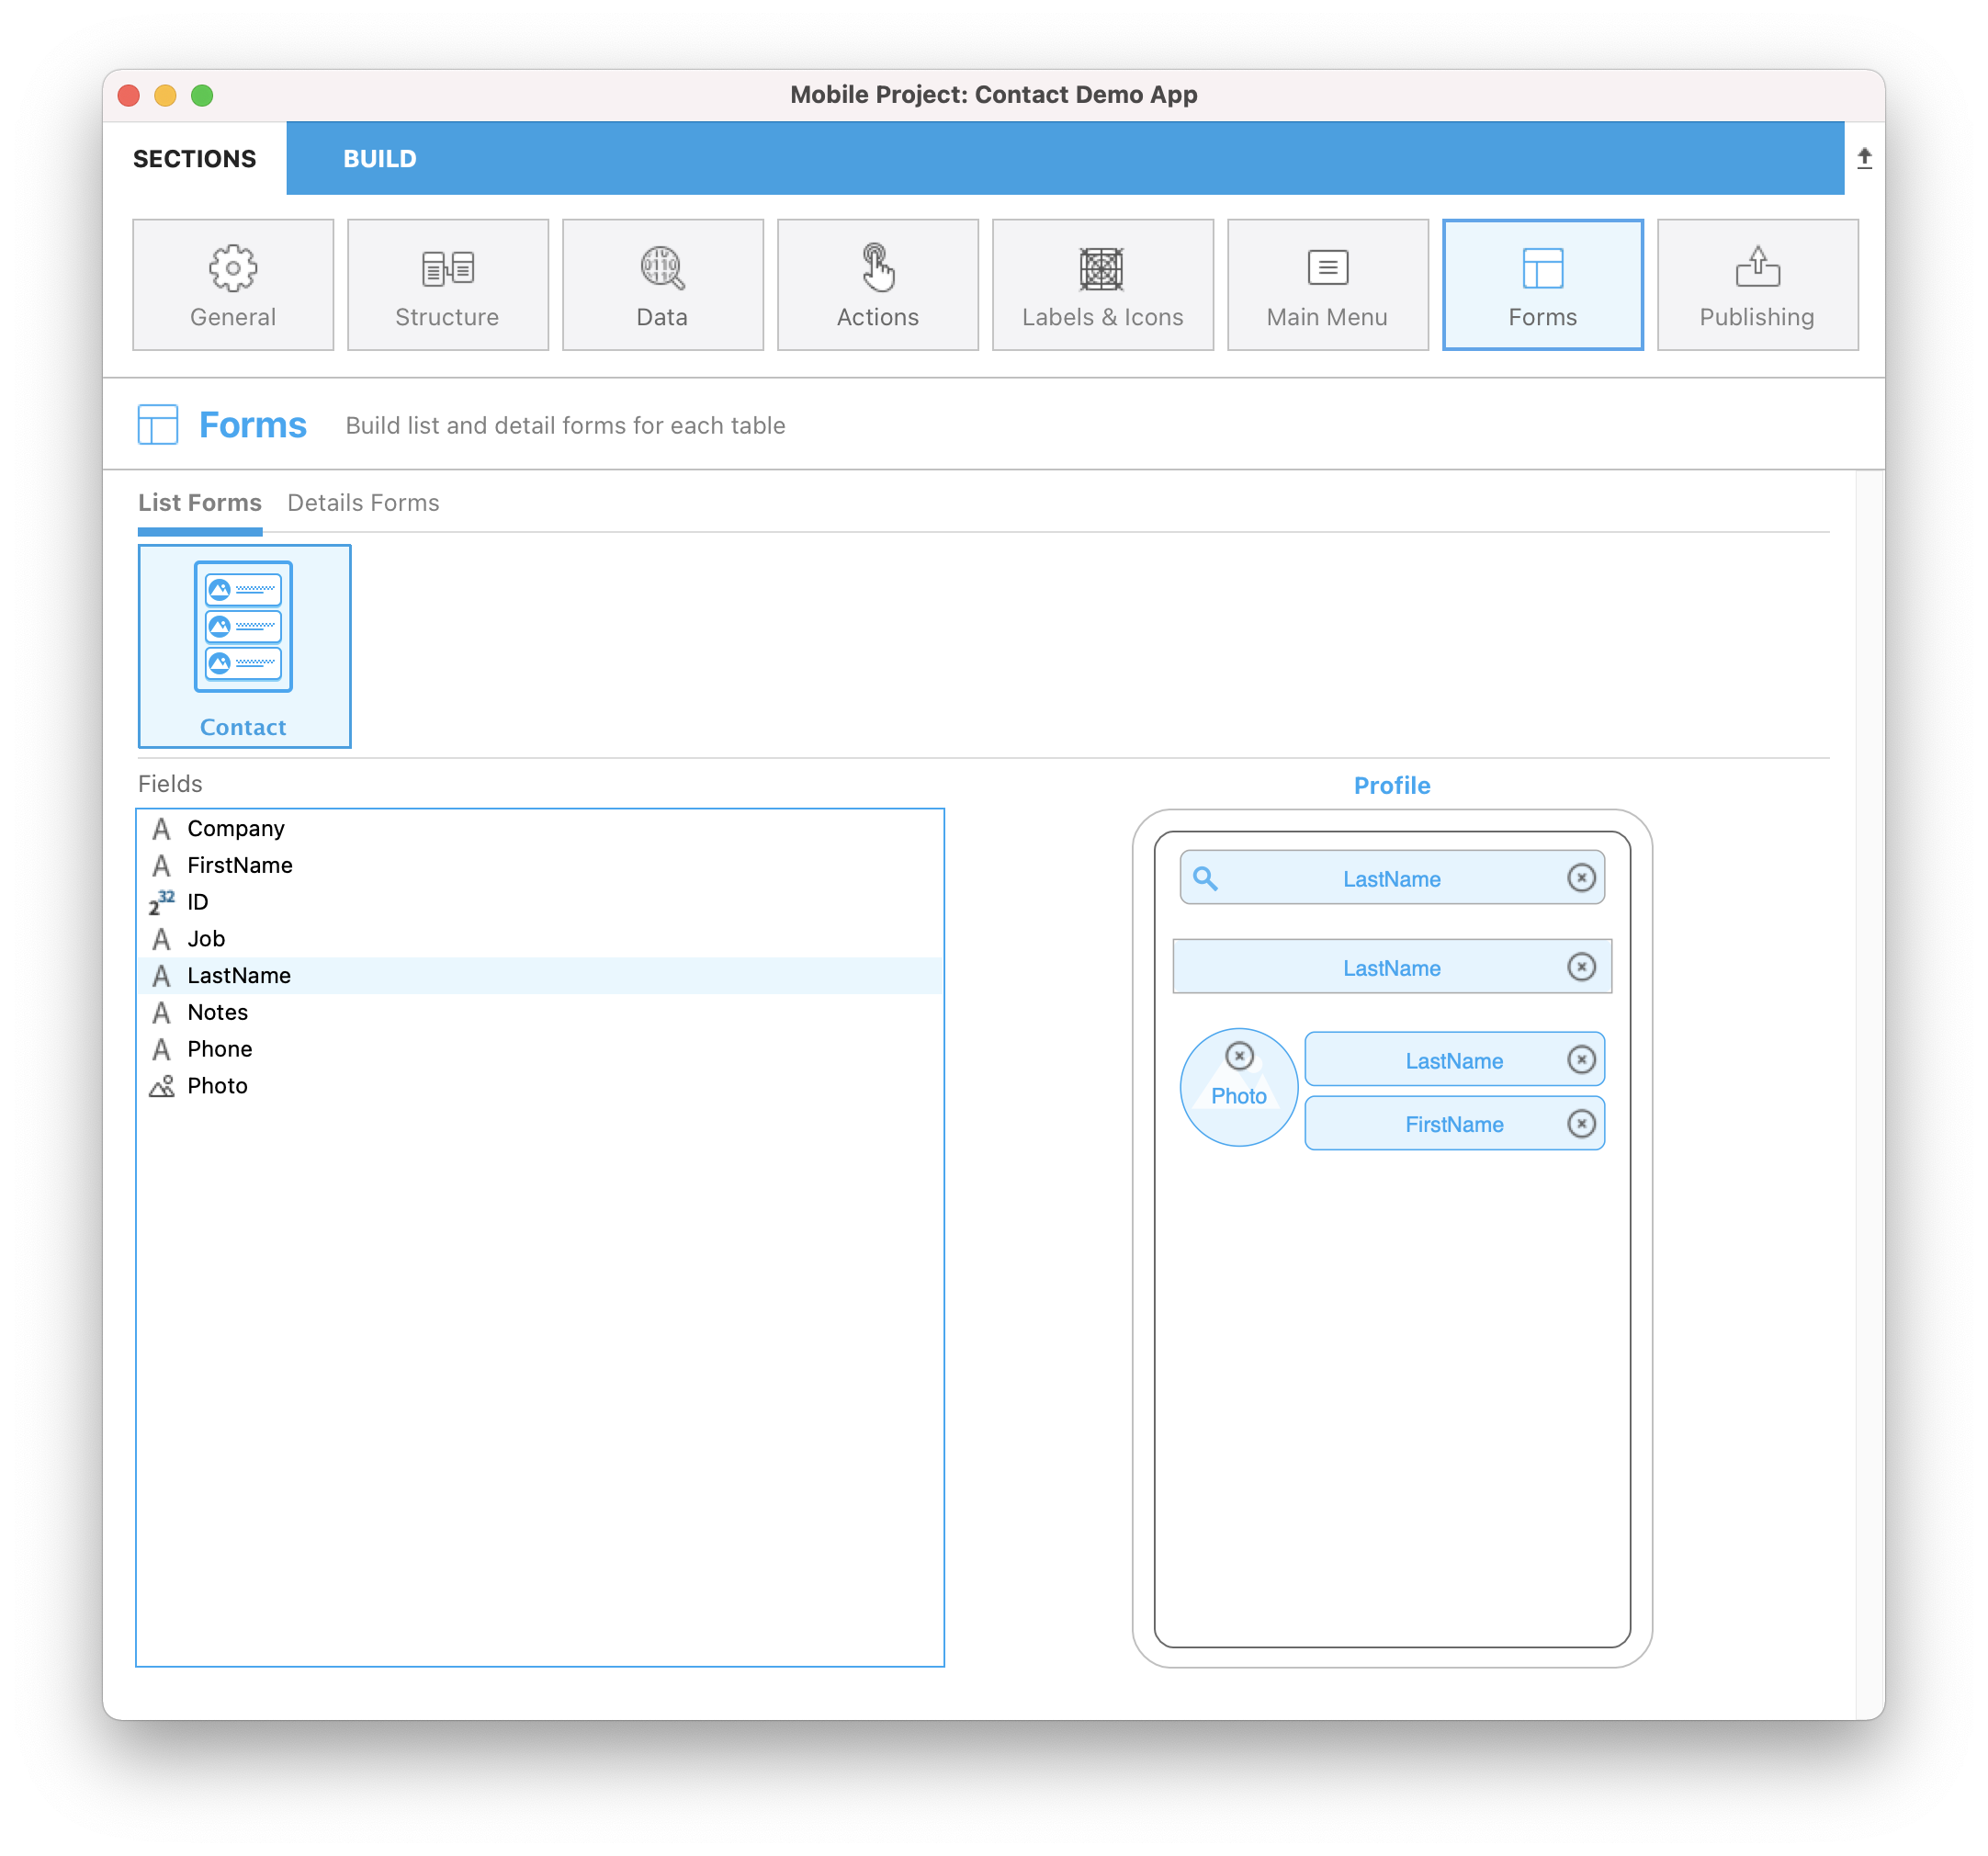
At this point, the bottom of the configuration window has changed from template selection to content definition.
- Drag and drop the fields you want displayed onto the template, i.e., Last Name into the search and Title fields. 「検索に使用するフィールド」および「セクションとして使用するフィールド」の使用は任意です。
And finally, we'll define the detail form.
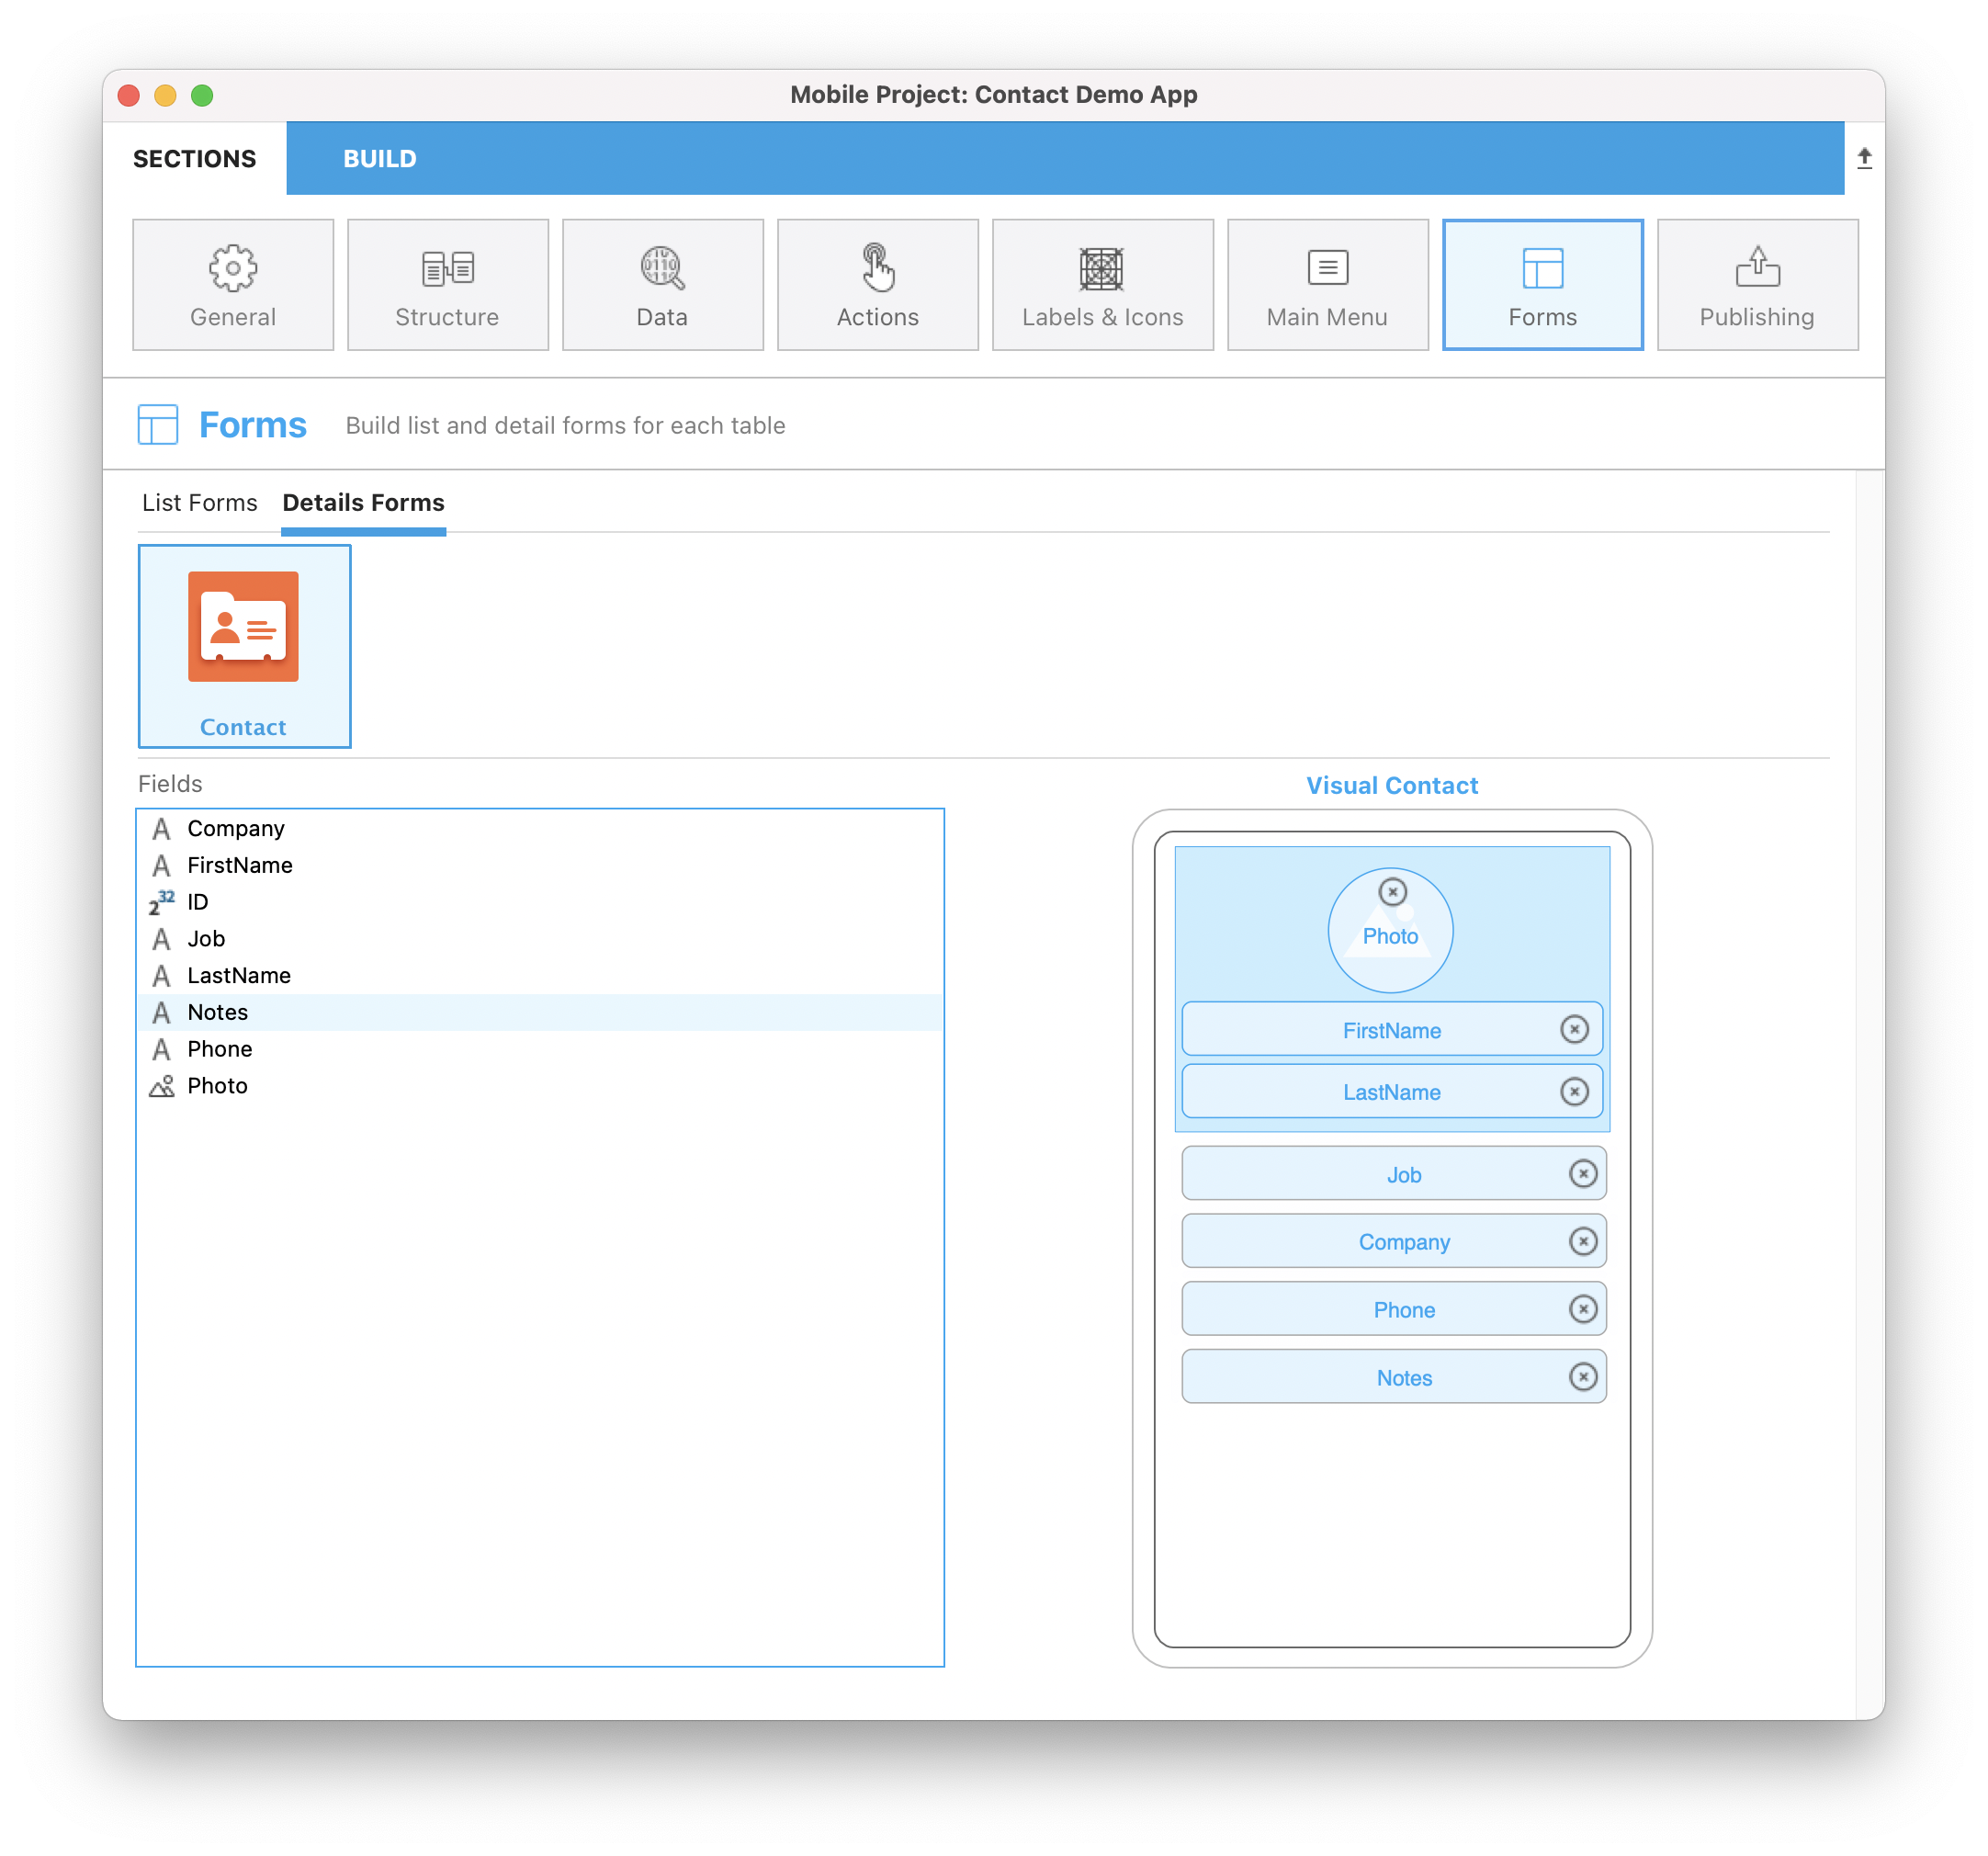
- Select a template that is best suited for your app. For our Contact app, let’s use the Visual Contacttemplate.
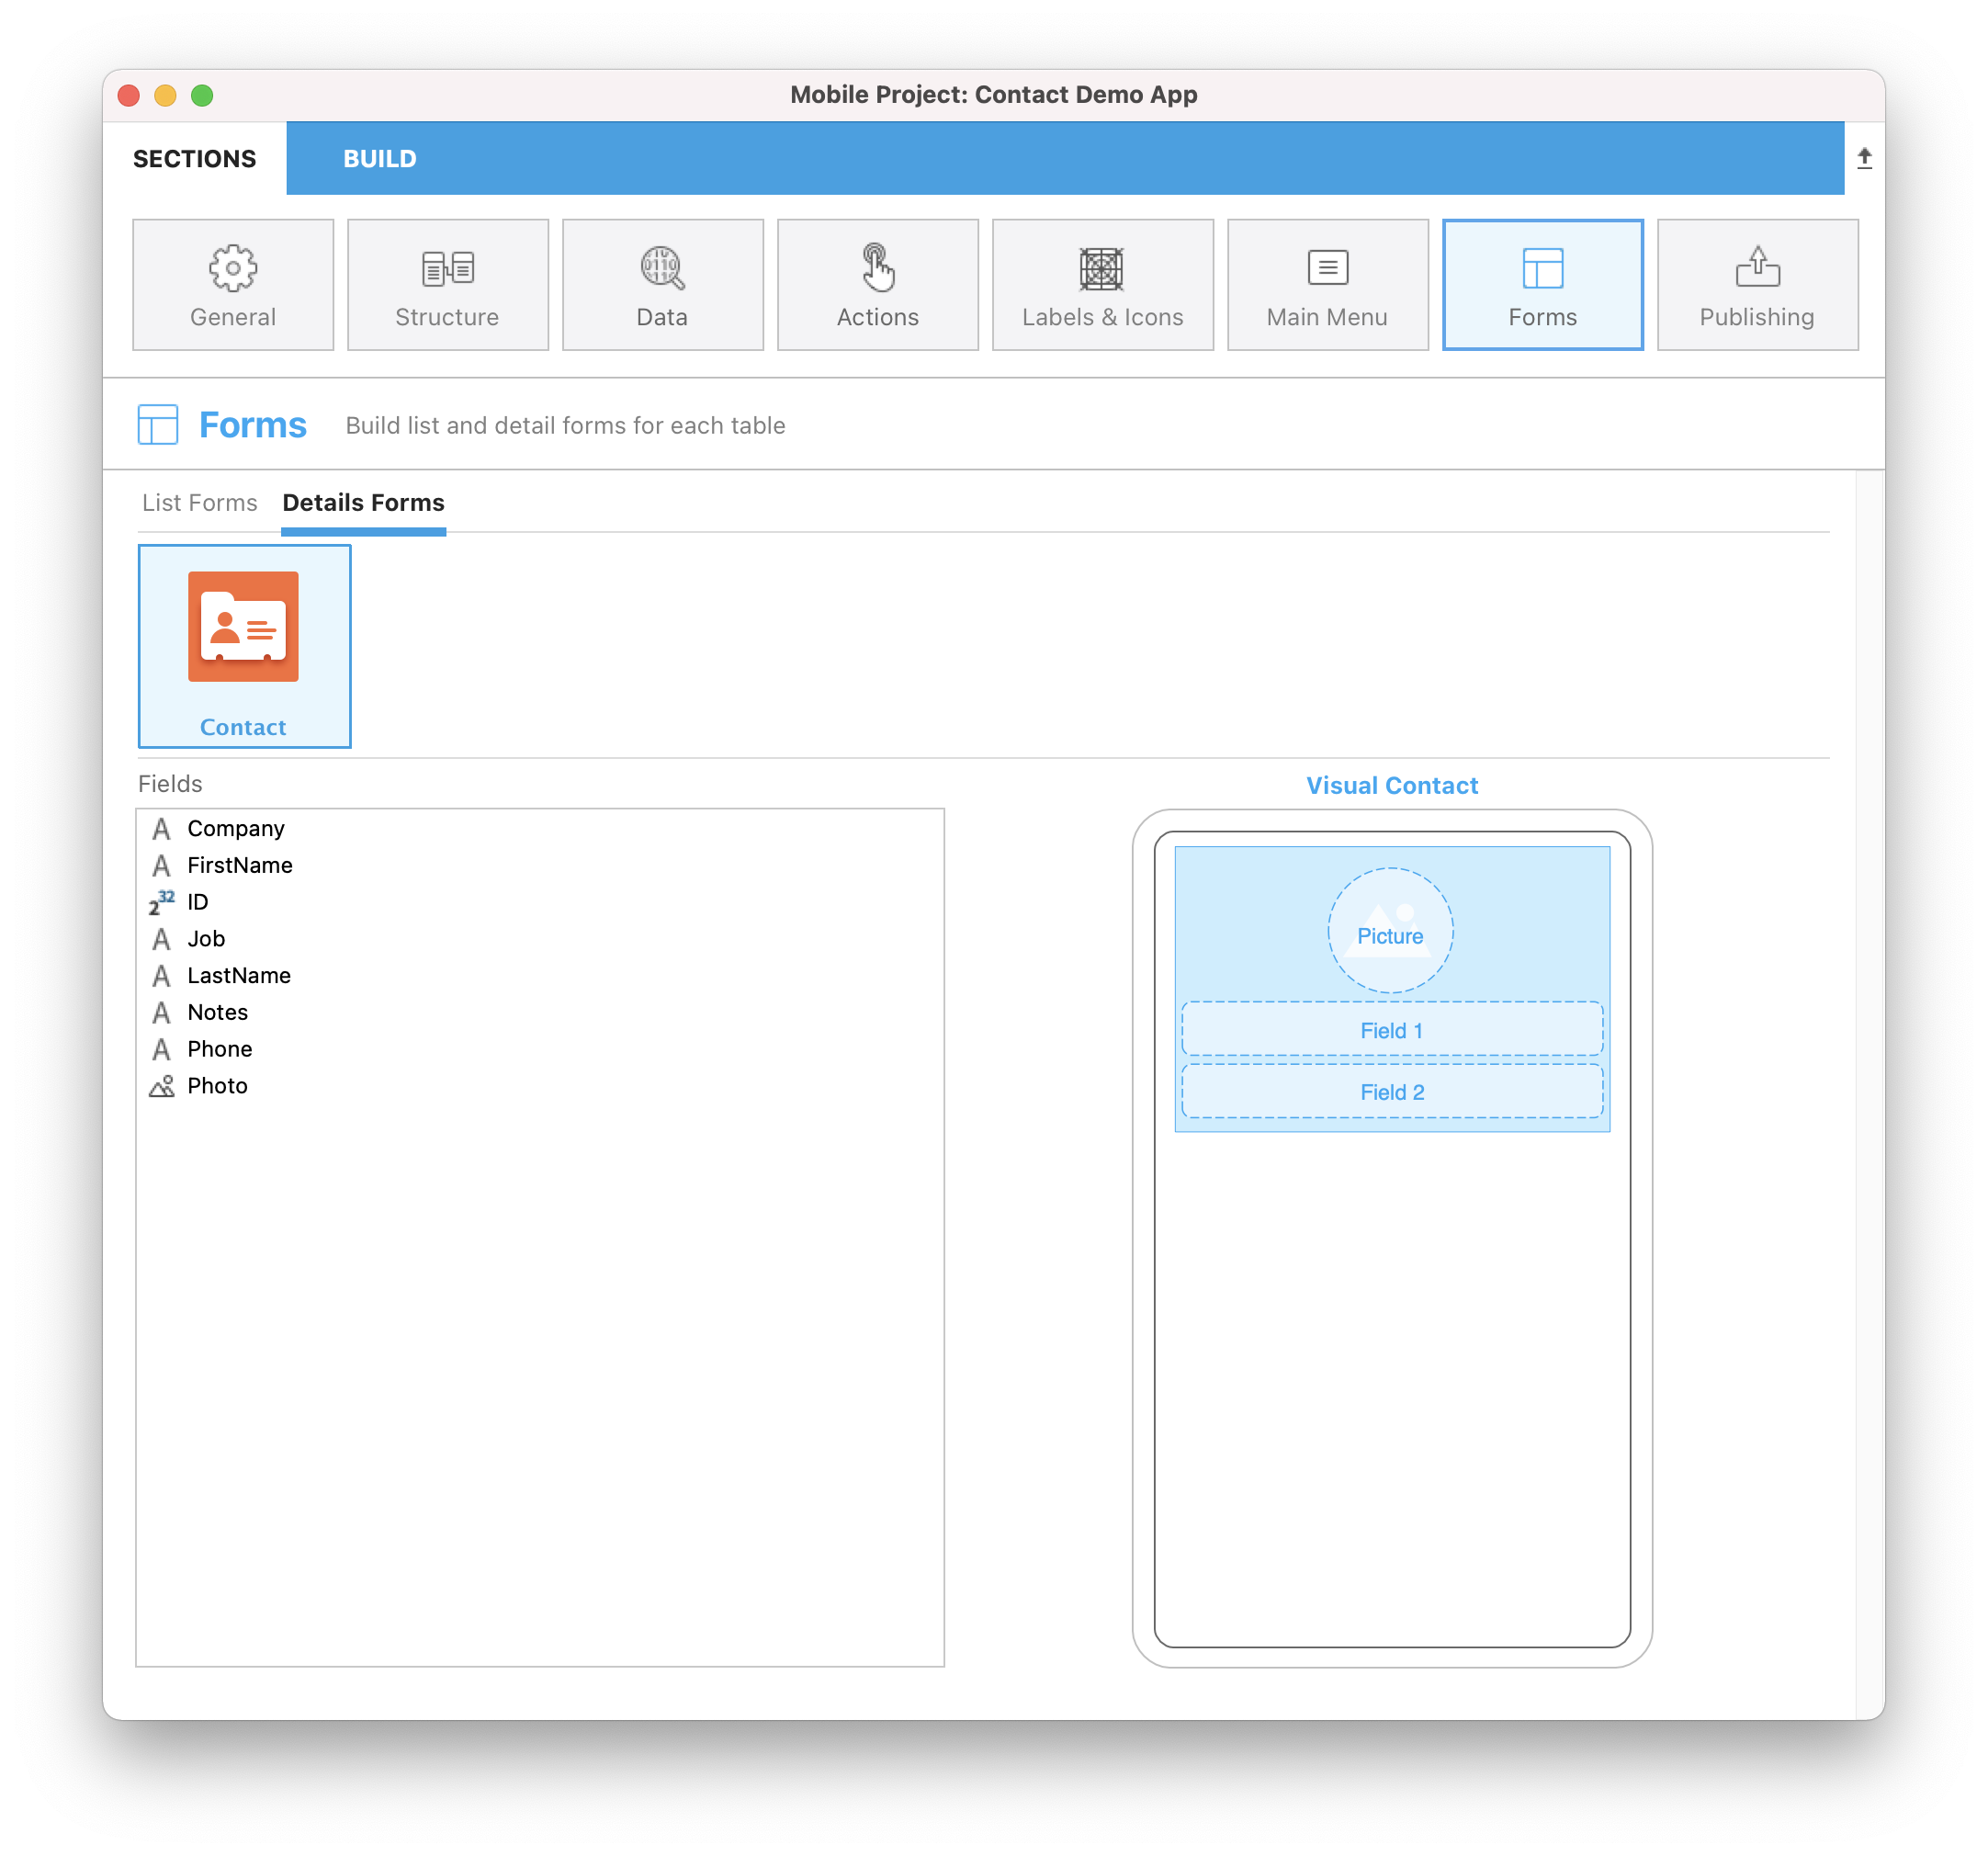
- Drag and drop the content onto the appropriate places on the detail form template, i.e., First Name, Last Name, and Photo.
⒐ ビルド
Now the fun part! It's time to build your app and test it on the Simulator to see the final result!
- Click the Build tab.
- 機種名のアイコンをクリックして,シミュレーターで起動するiOSデバイスのモデルを選びます。
- Click Build and Run.
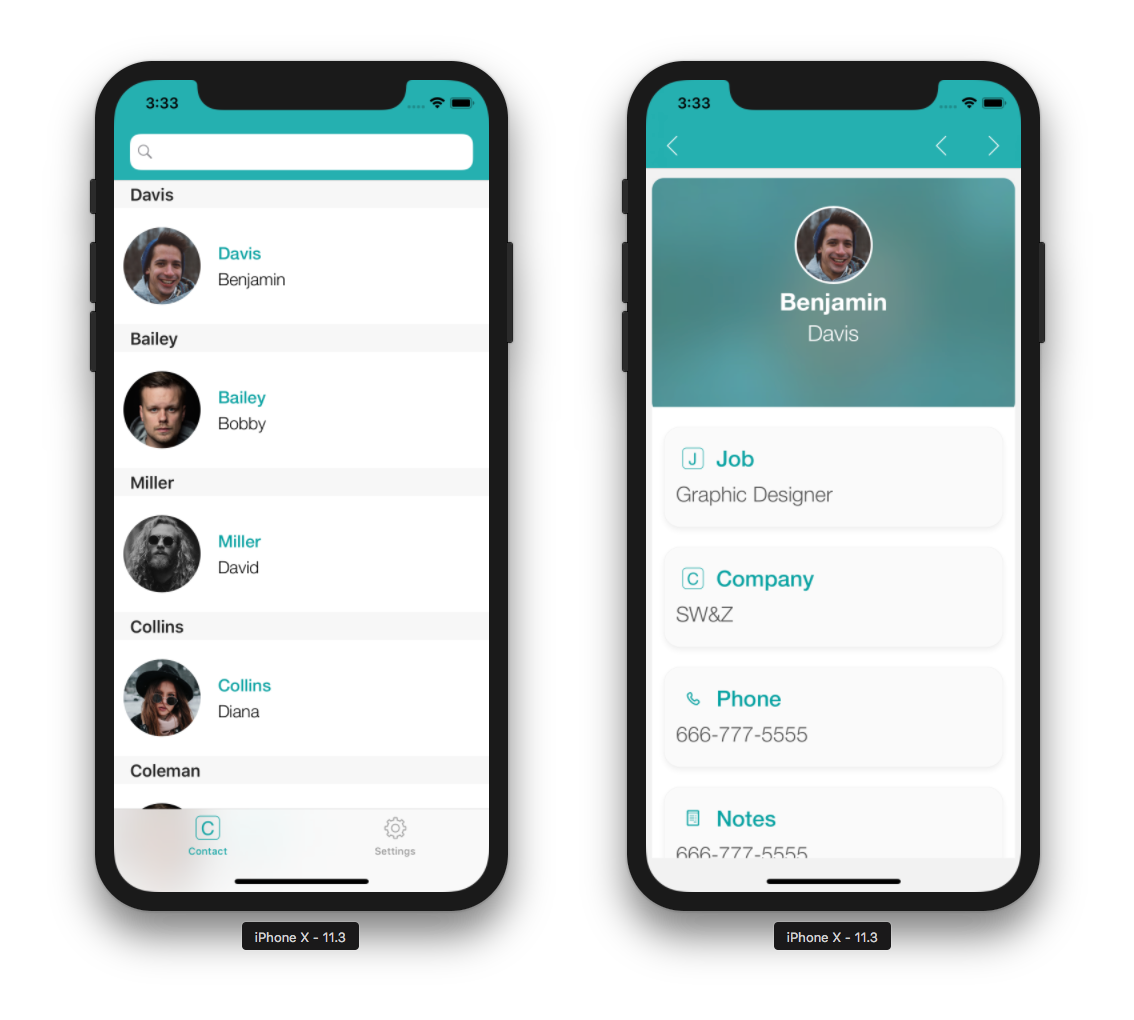
- そのまま待っていると… やりました! iOSアプリの完成です!
STEP 11. これからどうする?
We've covered basic app creation in this tutorial, and you should now be able to create simple apps on your own. しかし,知るべきことは,これだけではありません! In the next tutorial, you’ll learn how to build an even more complex app. Click on Final Project below to download the final Contact app.