1対Nリレーション
このレッスンでは,4D for iOSアプリで1対Nリレーションを使用する方法を学びます。
注記
In this tutorial, we will use the relation names between your tables. ストラクチャの設定を容易にするため,リレーションには意味のある名前を設定することが勧められています。
素材プロジェクトをダウンロードしてください。
In this tutorial, we are going to build a colorful Task app using 4D for iOS.
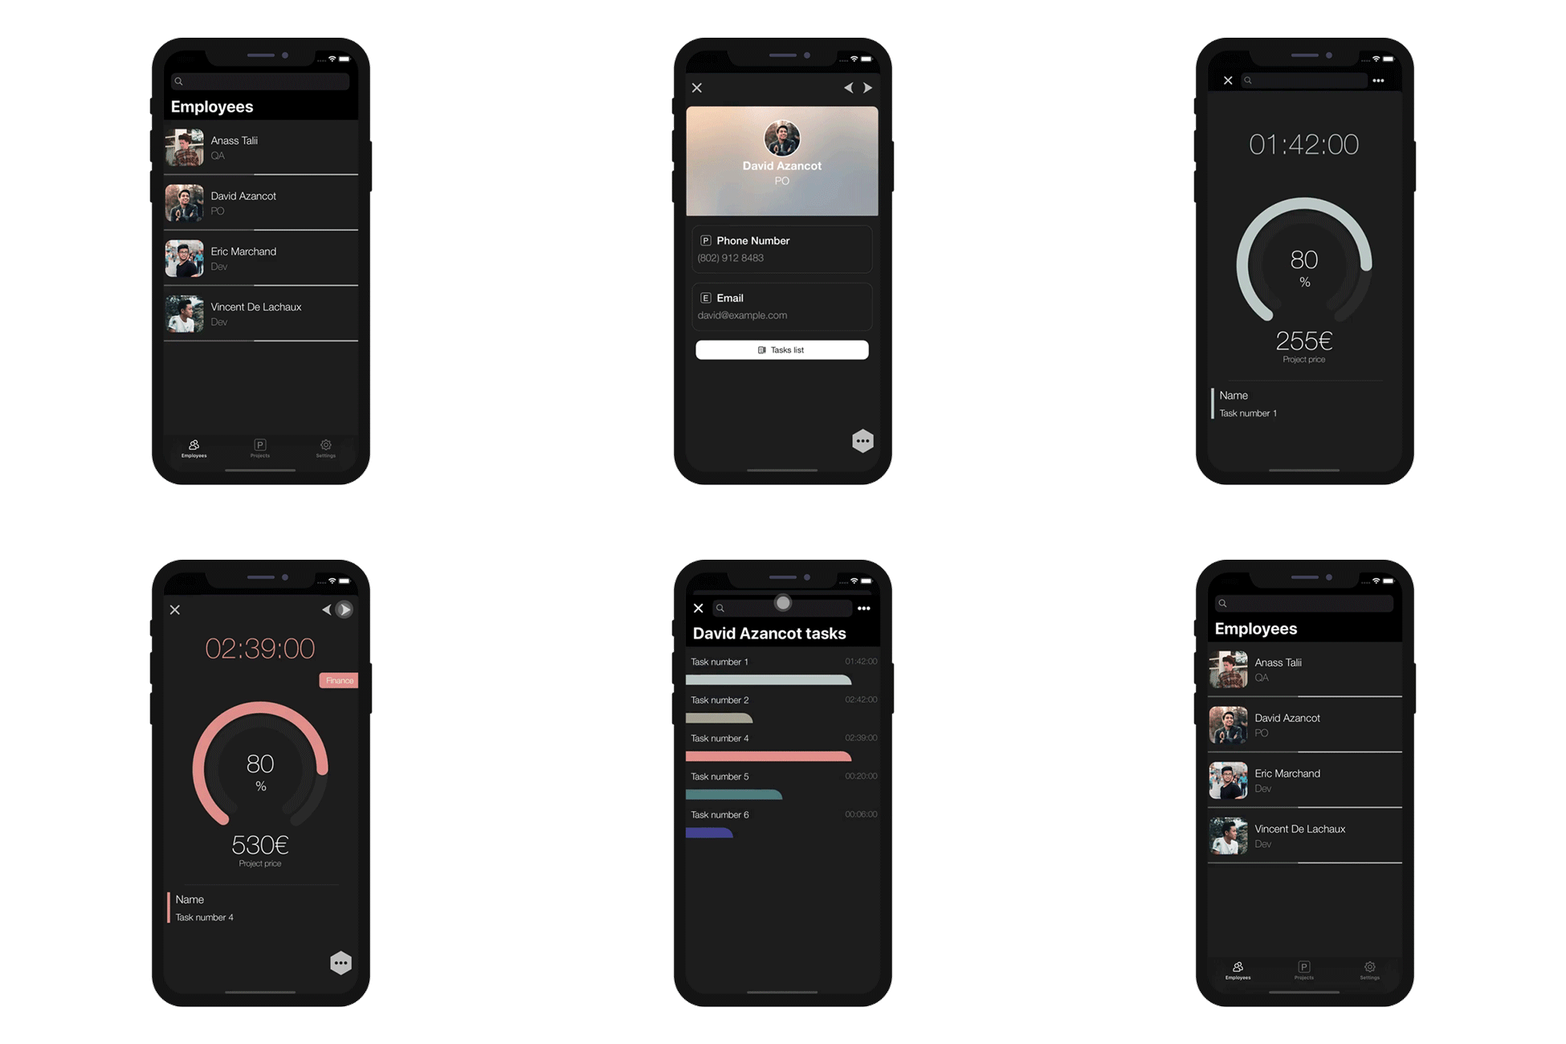
But first, let's have a look at the structure of our database:
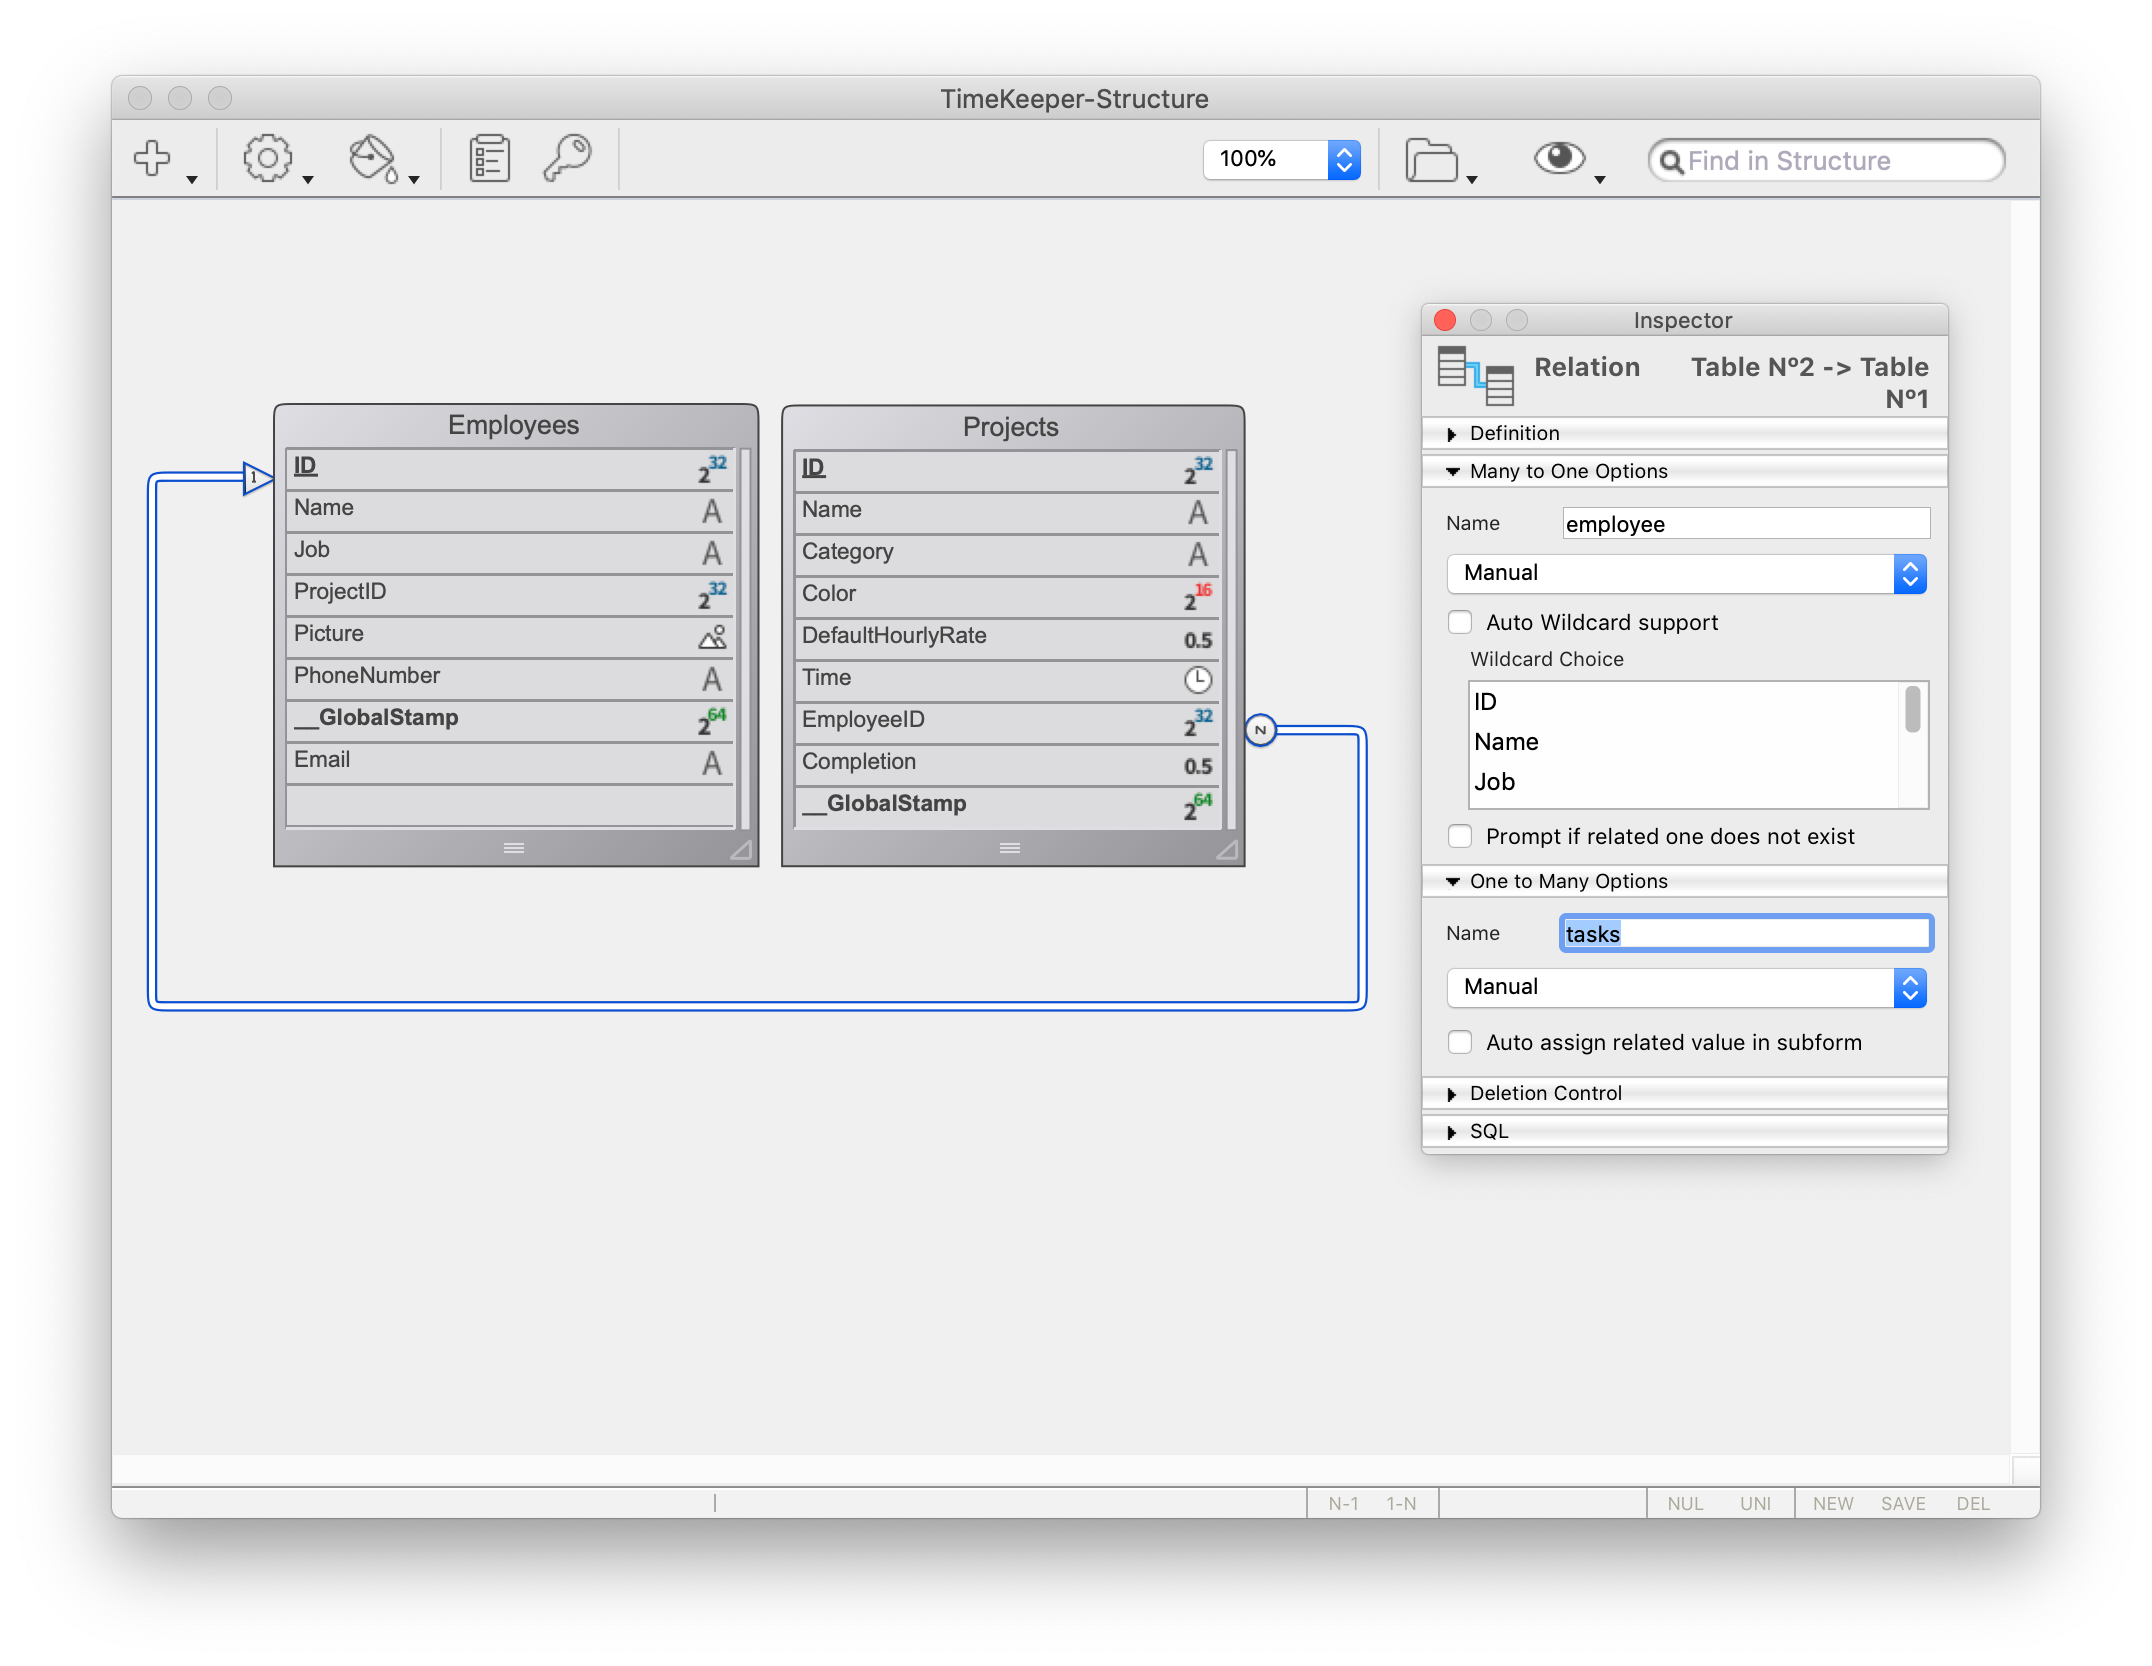
As you can see, there is a One to Many link named tasks that we will use in our iOS app to display the employees'(One) tasks(to Many).
Now, go straight to Open menu > Mobile project... to select Time Keeper and go to the Structure section.
「ストラクチャ」セクション
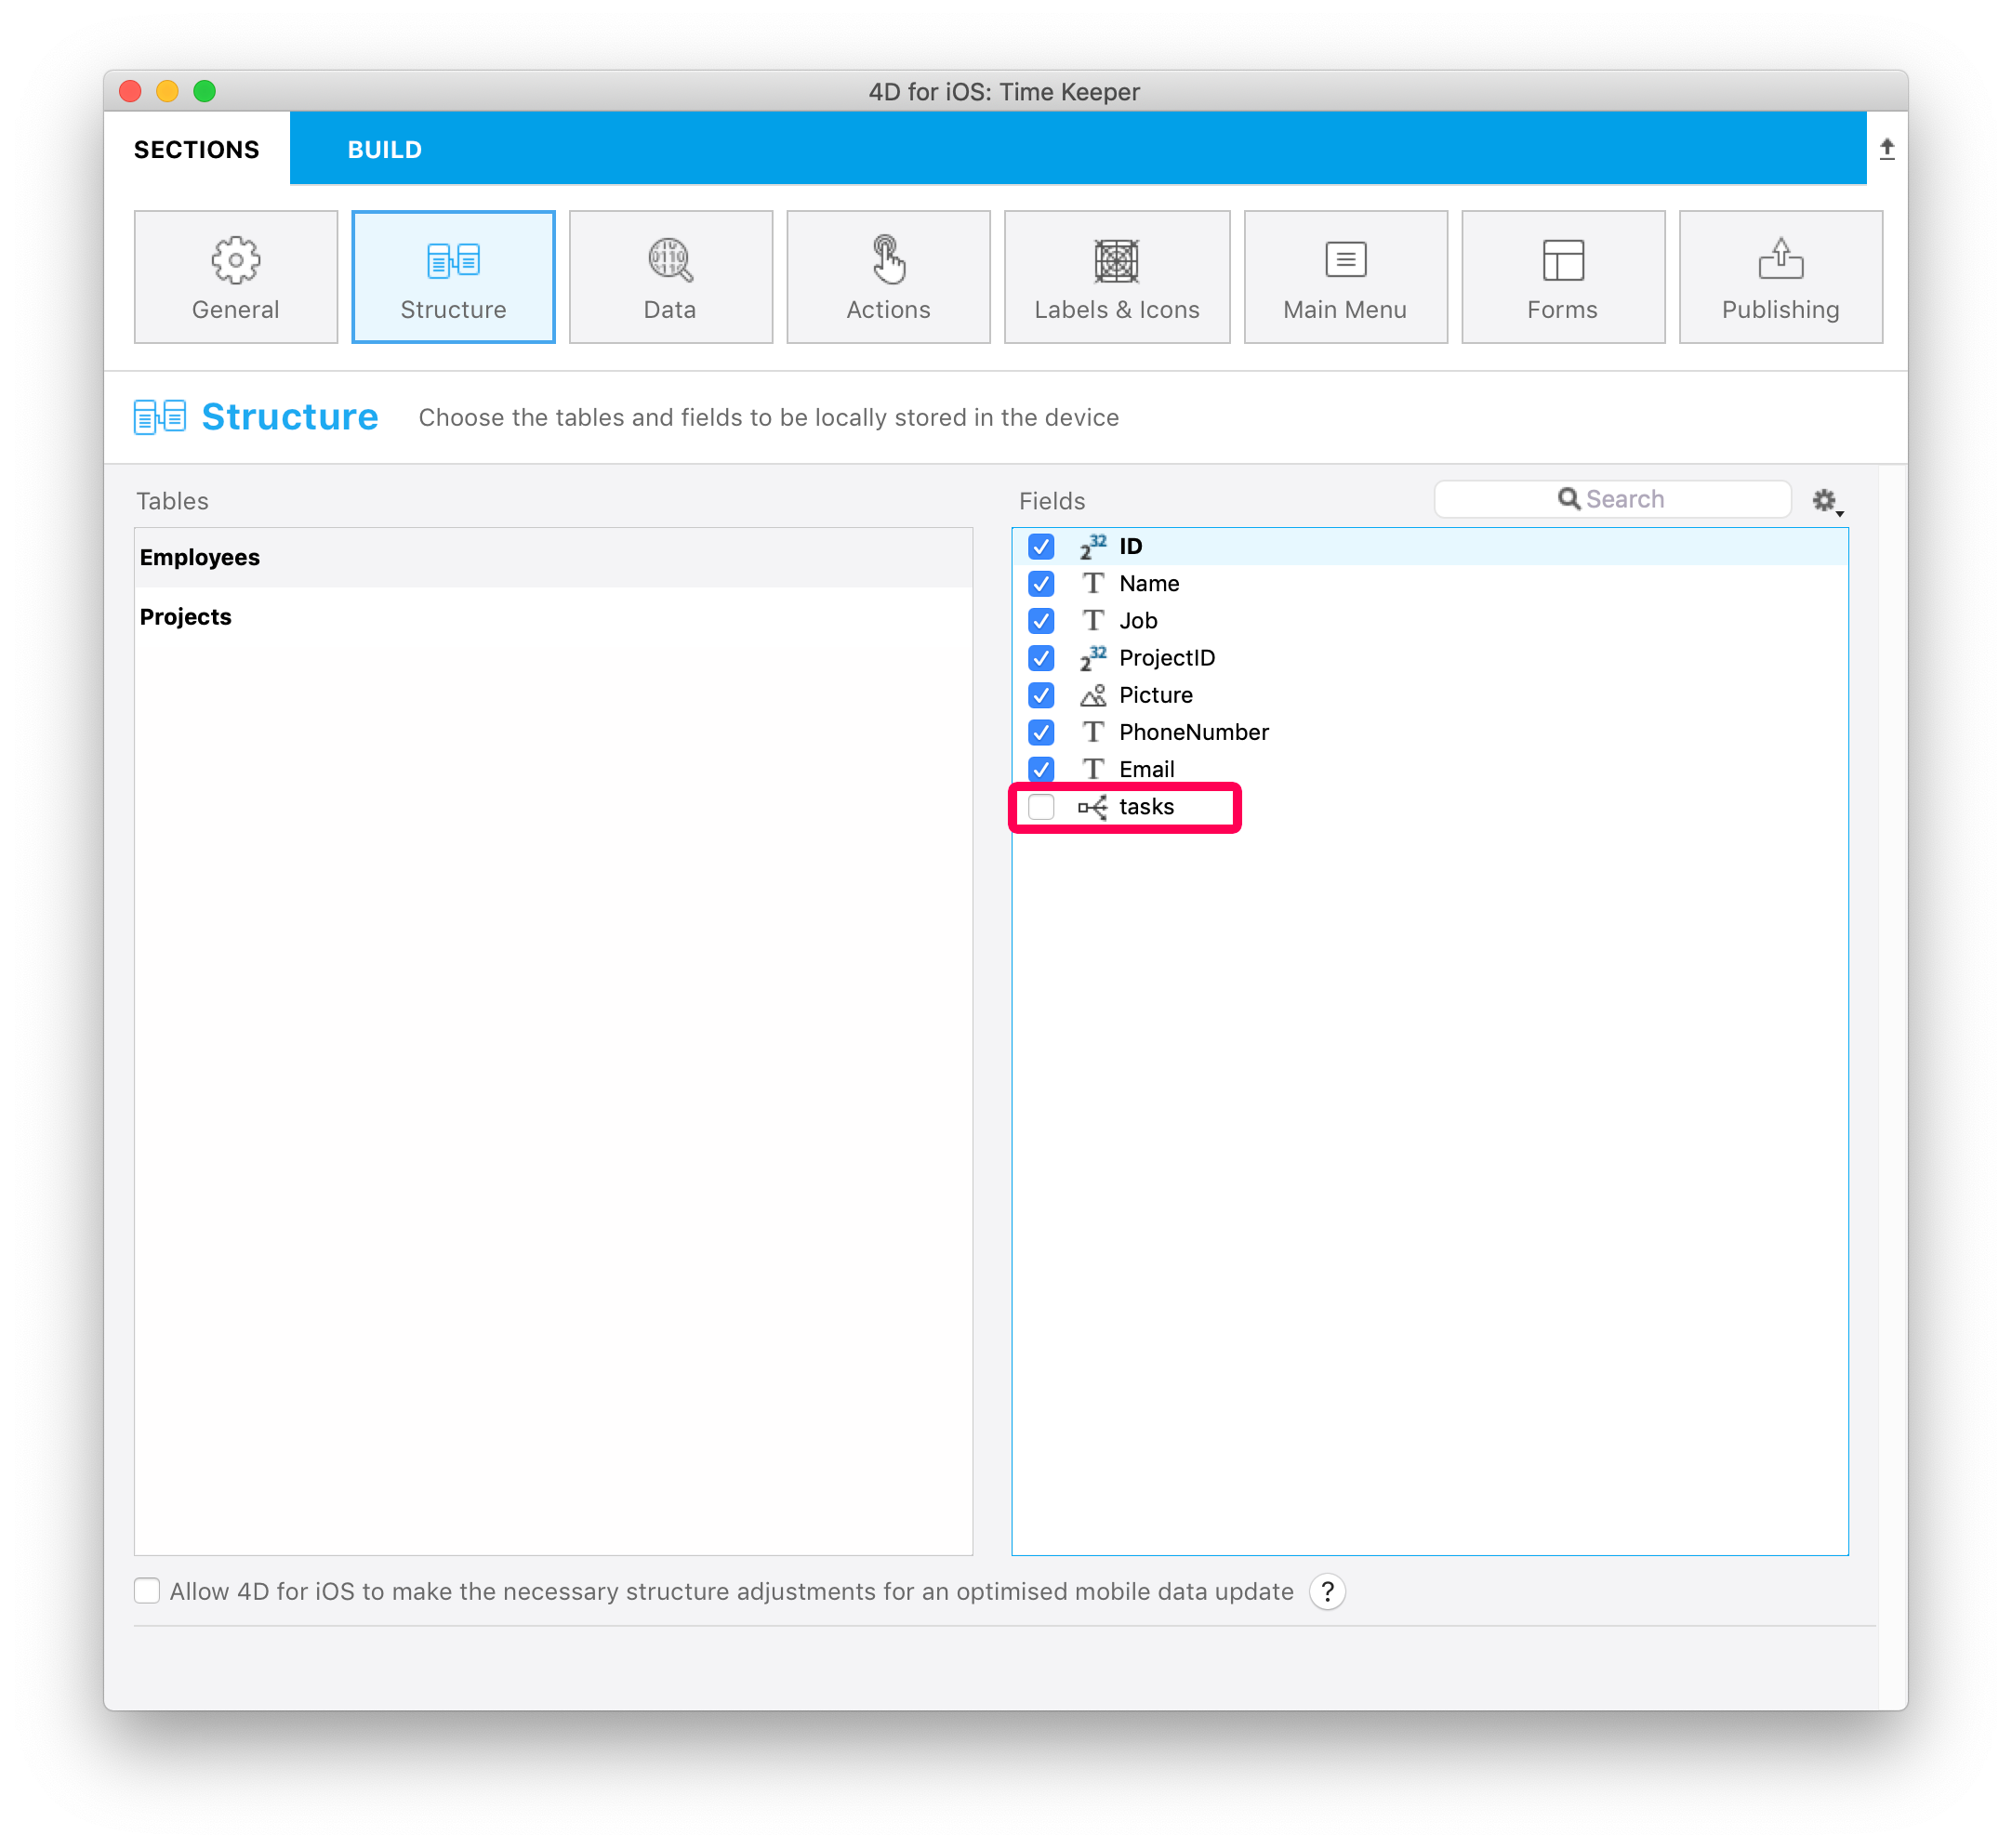
You can see the tasks relation we have seen earlier... Publish it !
This will now operate as any other field for the rest of the app creation process.
ヒント
- On mouse over, a tip displays the table name originating the relation.
Labels & Icons section
The One to Many relation is now available in the Labels and Icons section.
It is important to know that including a One to Many relation will create a button into the genrated iOS app.
So, in the Labels & Icons section you will define:
- ボタンタイトル
- ボタンアイコン
- 遷移した先の画面に表示されるタイトル(たとえば,どの画面から移動してきたのかを示すために使用します)。
![]()
フォームセクション
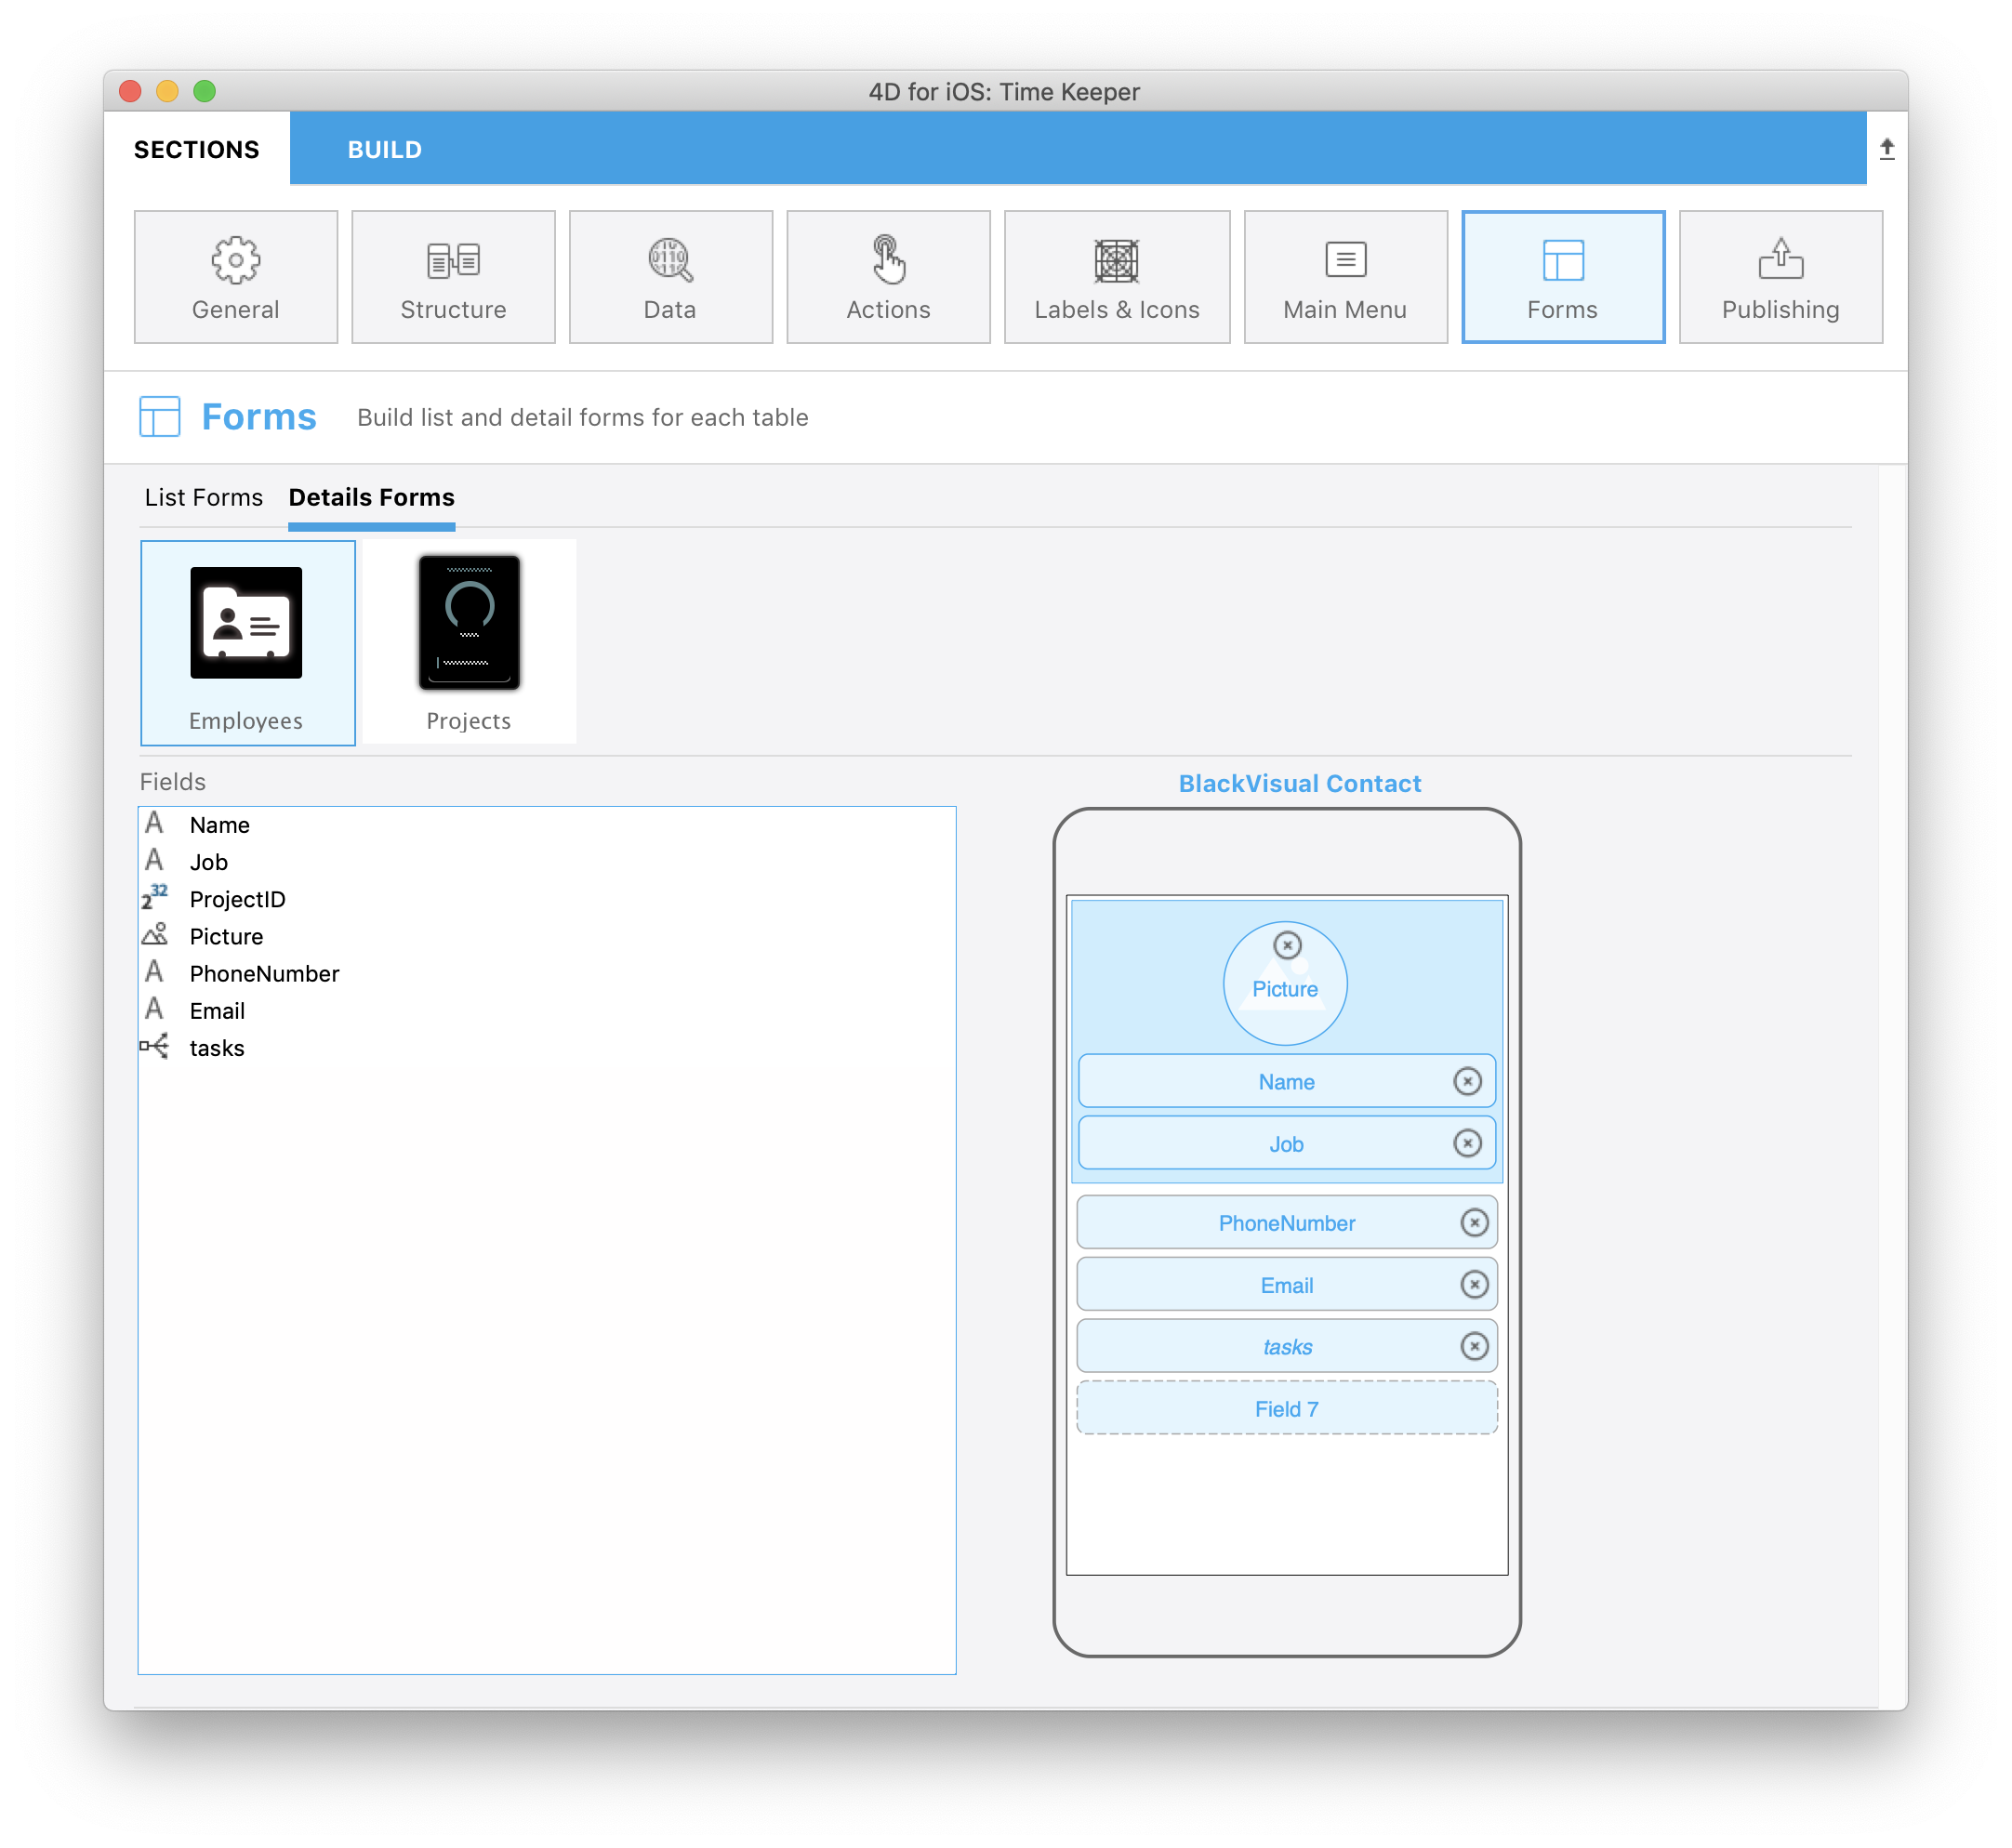
- Go to the Forms section and drop the tasks relation on the Employee Task Detail form.
ビルドして実行
- Employeeのリスト画面で適当な従業員をクリックします。
- This will open the employee's detail form, where you should see a new Relation button !
- Relationボタンをクリックすると,選択されている従業員のタスクが表示されます。
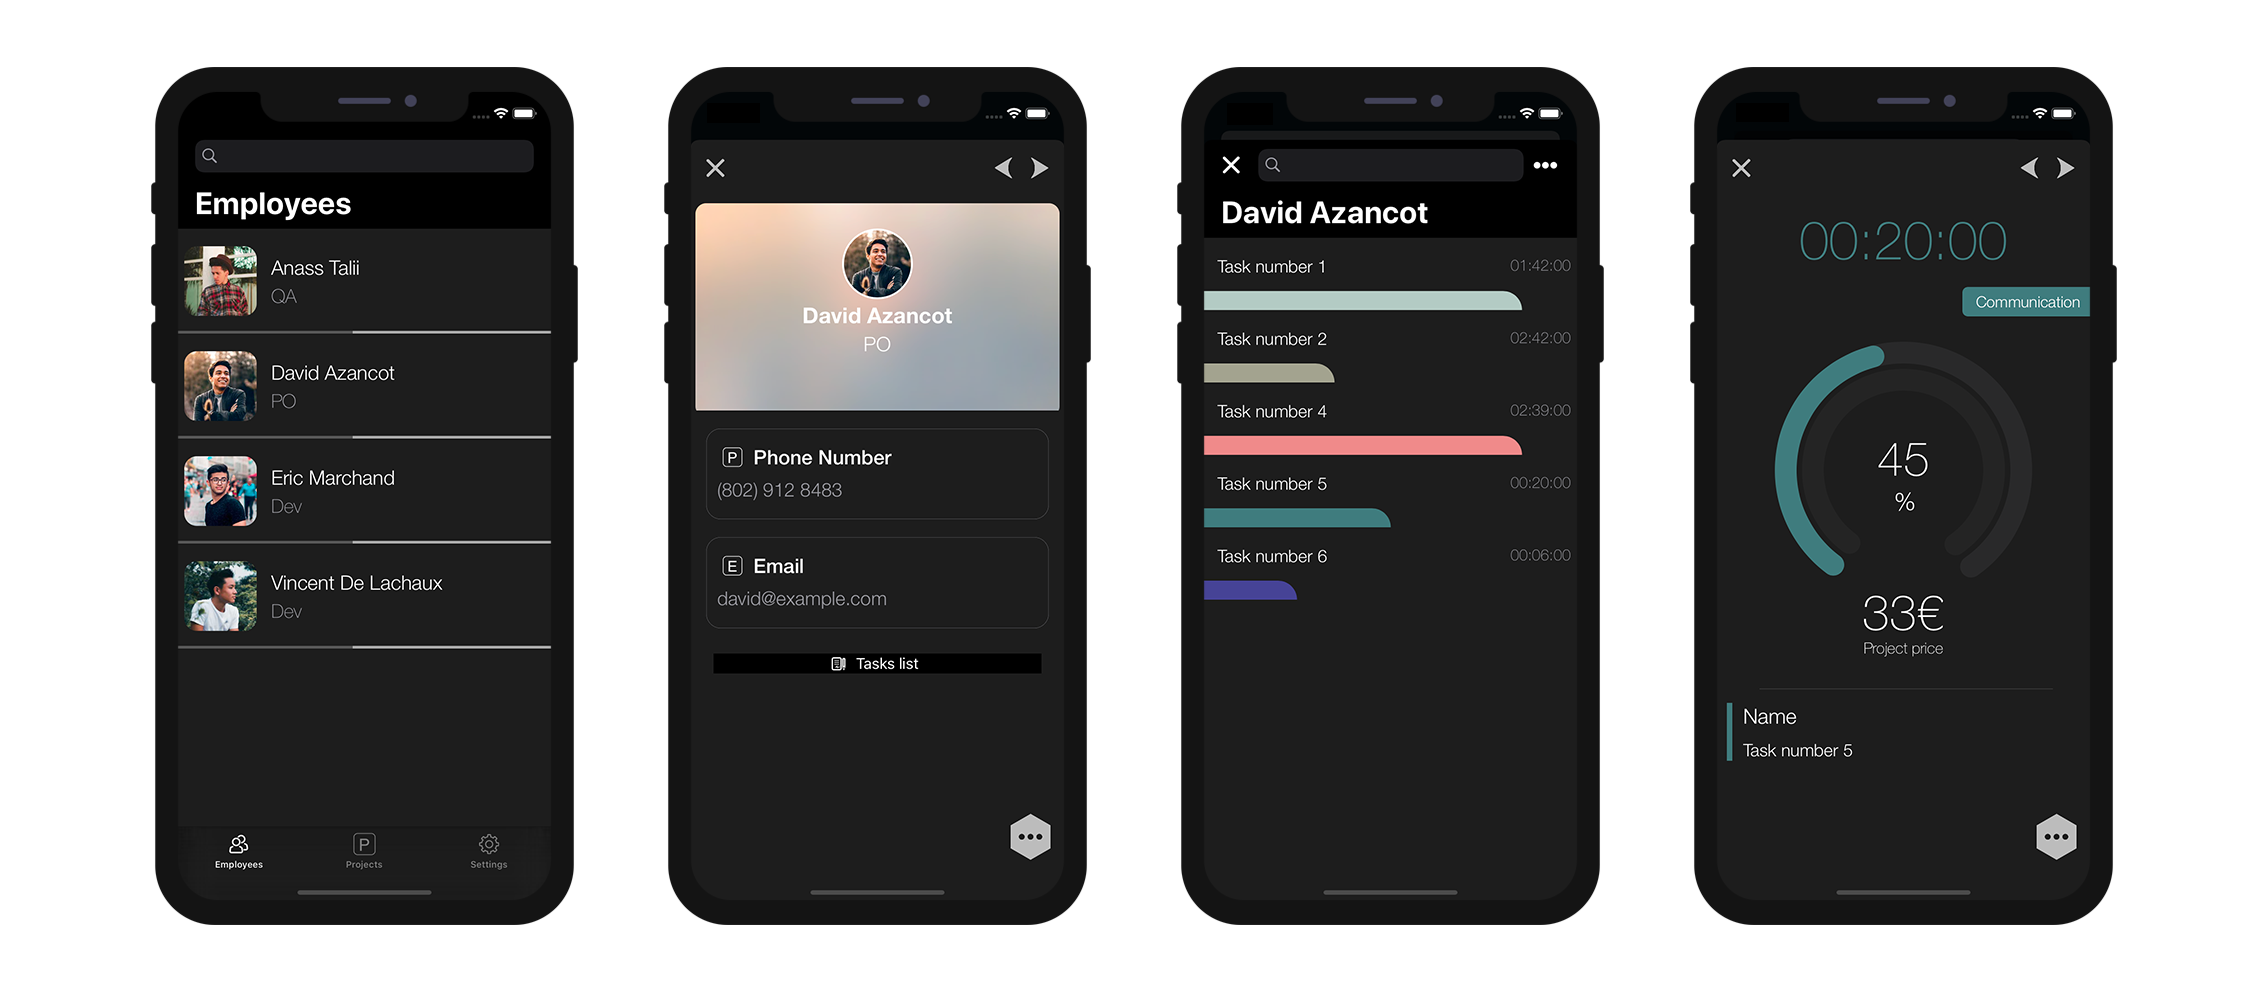
And voila, this is how One to Many relations work in 4D for iOS !